
How to Batch Edit Images for an Ecommerce Catalog
Learn how to batch edit images for ecommerce at catalog scale. Connect sources, build repeatable pipelines, order steps to cut cost, and export
You've got product photos spread across a camera folder, Google Drive, and an old export directory. Some files have SKU names, others have names like IMG_4821.jpg. Amazon wants a white background, Etsy needs square listing images, and Shopify needs a consistent grid. Editing one image is easy. Keeping an entire catalog consistent without repeating the same work is the hard part.
Start by building one canonical workflow. Import the original files, remove unwanted assets, crop and normalize the source, apply color corrections, then create marketplace-specific exports from the processed master. Don't resize, retouch, and export separately for every sales channel. That's how the same image gets edited three times and small inconsistencies spread across the catalog.
The Catalog-Scale Editing Problem
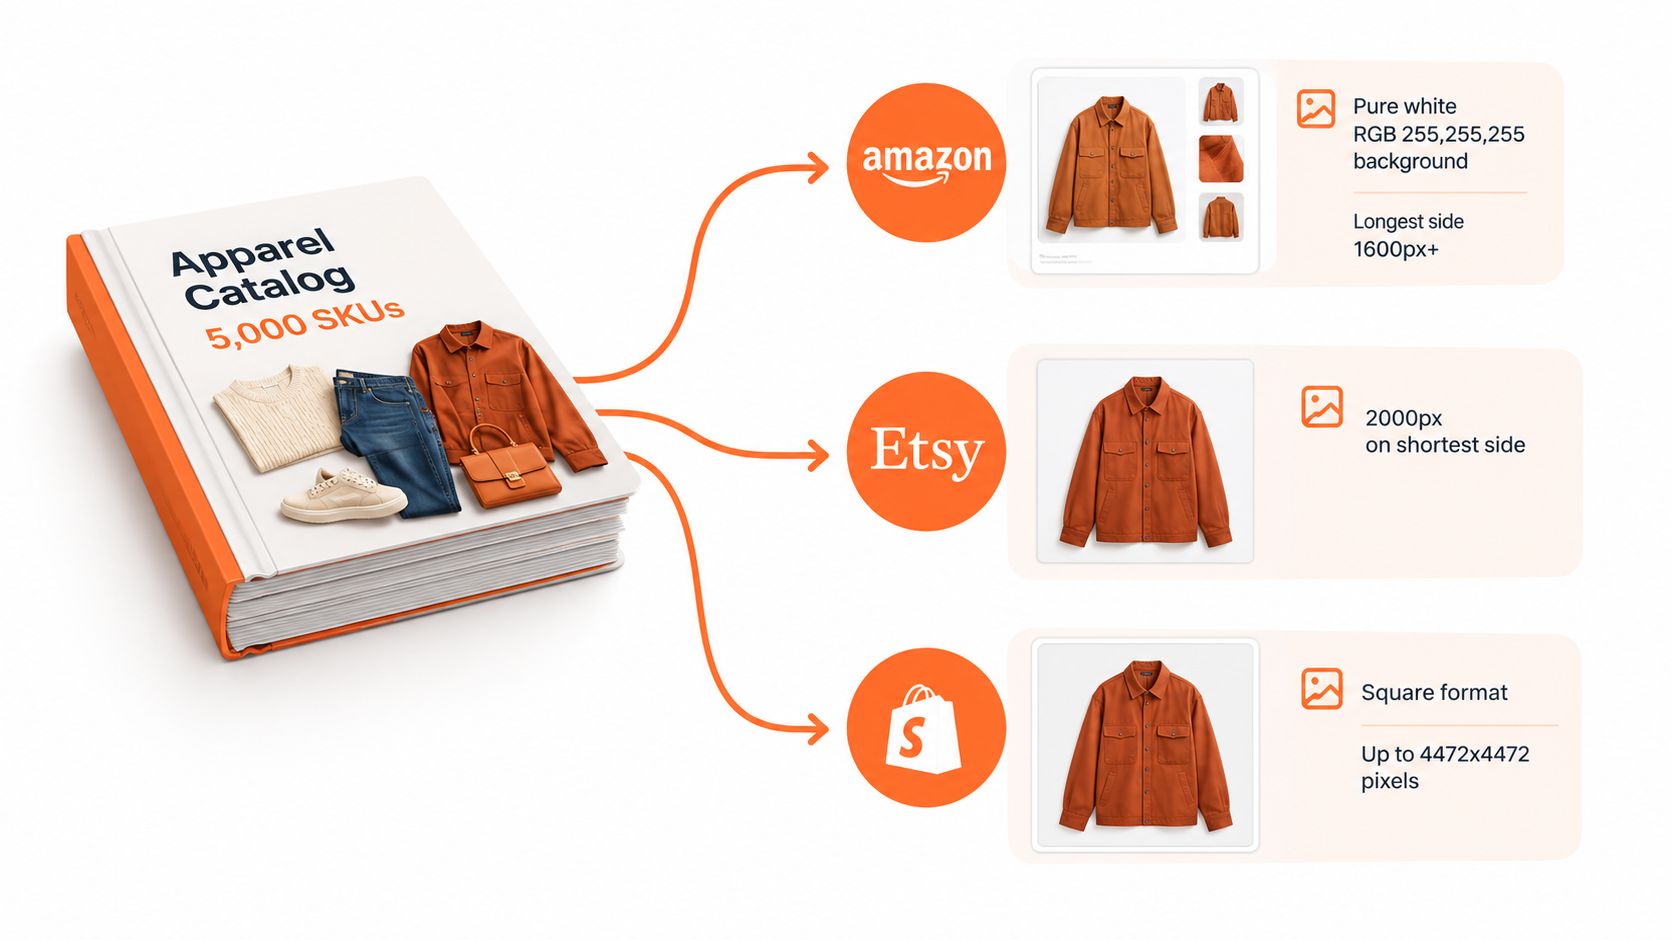
A large apparel catalog can contain thousands of SKUs, multiple views per product, lifestyle scenes, detail crops, and seasonal replacements. If those files move to Amazon, Etsy, and Shopify at the same time, each platform adds its own presentation requirements. Your process needs one source image and controlled derivatives, not a separate editing project for every marketplace.
Amazon's main product image requires a pure white background, RGB 255,255,255. Amazon guidance also requires at least 1,000 pixels on the longest side, while 1,600 pixels or more is commonly recommended for sharper zoom and display, as summarized in this Amazon product photography guide. Etsy recommends images with 2,000 pixels on the shortest side, and its own help content says the first listing image should be at least 635 pixels wide and tall to avoid appearing lower in search results, according to Etsy's image requirements. Shopify commonly uses 2,048 by 2,048 pixels for square product images, with a platform maximum of 4,472 by 4,472 pixels, according to this Shopify image-size reference.
Build one canonical source
Your master file should preserve the cleanest usable product detail. Keep the original aspect ratio or a controlled product-group ratio, apply your shared corrections once, and create channel exports only after the core image is approved. This structure follows the broader batch processing model for product images, where one repeatable transformation is reused across a collection.
The mistake to avoid is treating Amazon, Etsy, and Shopify as three separate editing jobs. Create one canonical file per SKU, then branch into marketplace presets. Your catalog becomes easier to audit, update, and replace when a product changes.
Operational rule: If you can't explain which file is the master and which files are derivatives, your batch workflow isn't ready.
Connect Your Sources Before You Touch a Single Photo
Don't start by dragging random images into an editor. Connect every source first, then inspect the catalog as one collection. This prevents duplicate imports and gives you a reliable starting point for every later run.
Use the storage and commerce sources where your files already live:
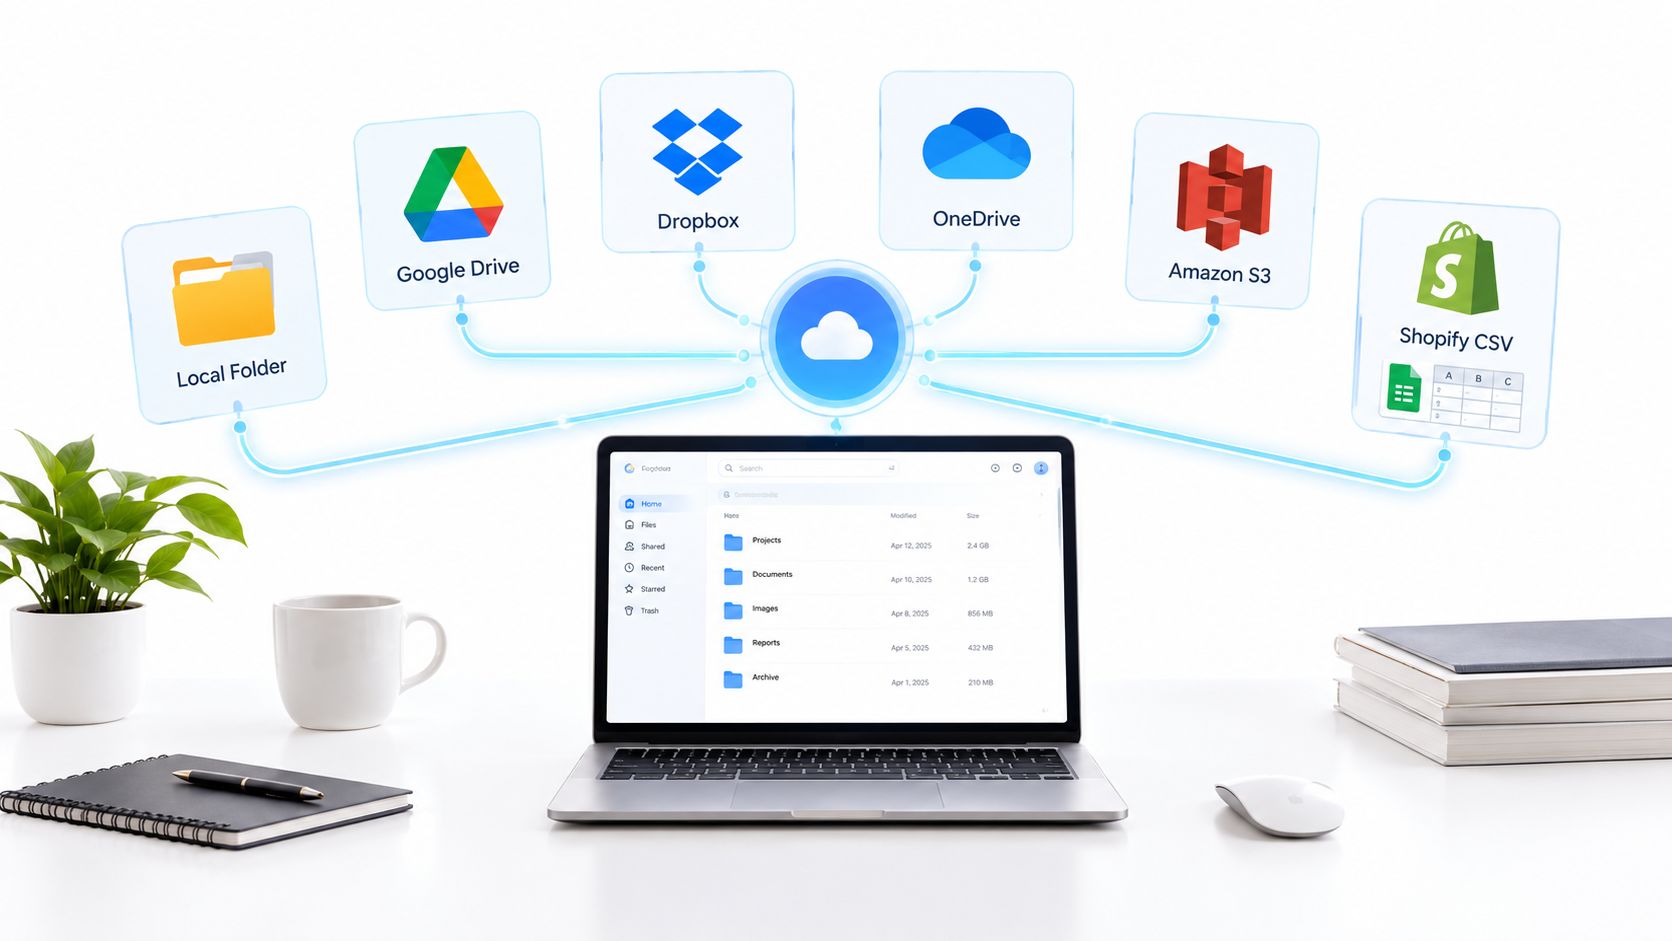
- Local folders: Import camera exports, retouched files, and existing marketplace folders.
- Google Drive, Dropbox, and OneDrive: Connect shared folders without creating another download-and-upload cycle.
- Amazon S3: Pull original assets from object storage and keep the source library separate from generated exports.
- Shopify product CSV: Use a direct CSV with image URLs when the store catalog is the most accurate source of product-image assignments.
For S3-based catalogs, a workflow such as AI image processing from Amazon S3 can help keep object storage connected to processing rather than turning every update into a manual transfer.
Inspect the source before importing
Use filenames that match the SKU or ASIN whenever possible. If the identifier is already in the filename, downstream renaming becomes a rule instead of a cleanup project. Keep the folder structure meaningful too. Separate hero shots, lifestyle images, and detail crops before the batch enters the queue.
Check the following before you run anything:
- Identifiers: Confirm that filenames or source records map to the correct SKU or ASIN.
- Resolution: Prefer originals with enough detail for the largest marketplace output. Resize-down is safer than trying to recover detail later.
- Folder roles: Separate hero images, lifestyle scenes, and detail views so each group receives the right crop and export preset.
- File types: Confirm that the connector accepts the formats in your library, including JPEG, PNG, TIFF, and WebP.
- Duplicates: Compare files across drives and folders before processing. A duplicate image with two SKU assignments can create bad listings and wasted processing.
Run an ingestion report before editing. Count imported files, flag duplicates, identify unsupported formats, and confirm that every image has a product association. Once a source is connected, keep it as the catalog source of truth. You shouldn't need to re-upload the same files for every later run.
Design a Repeatable Pipeline in Plain English
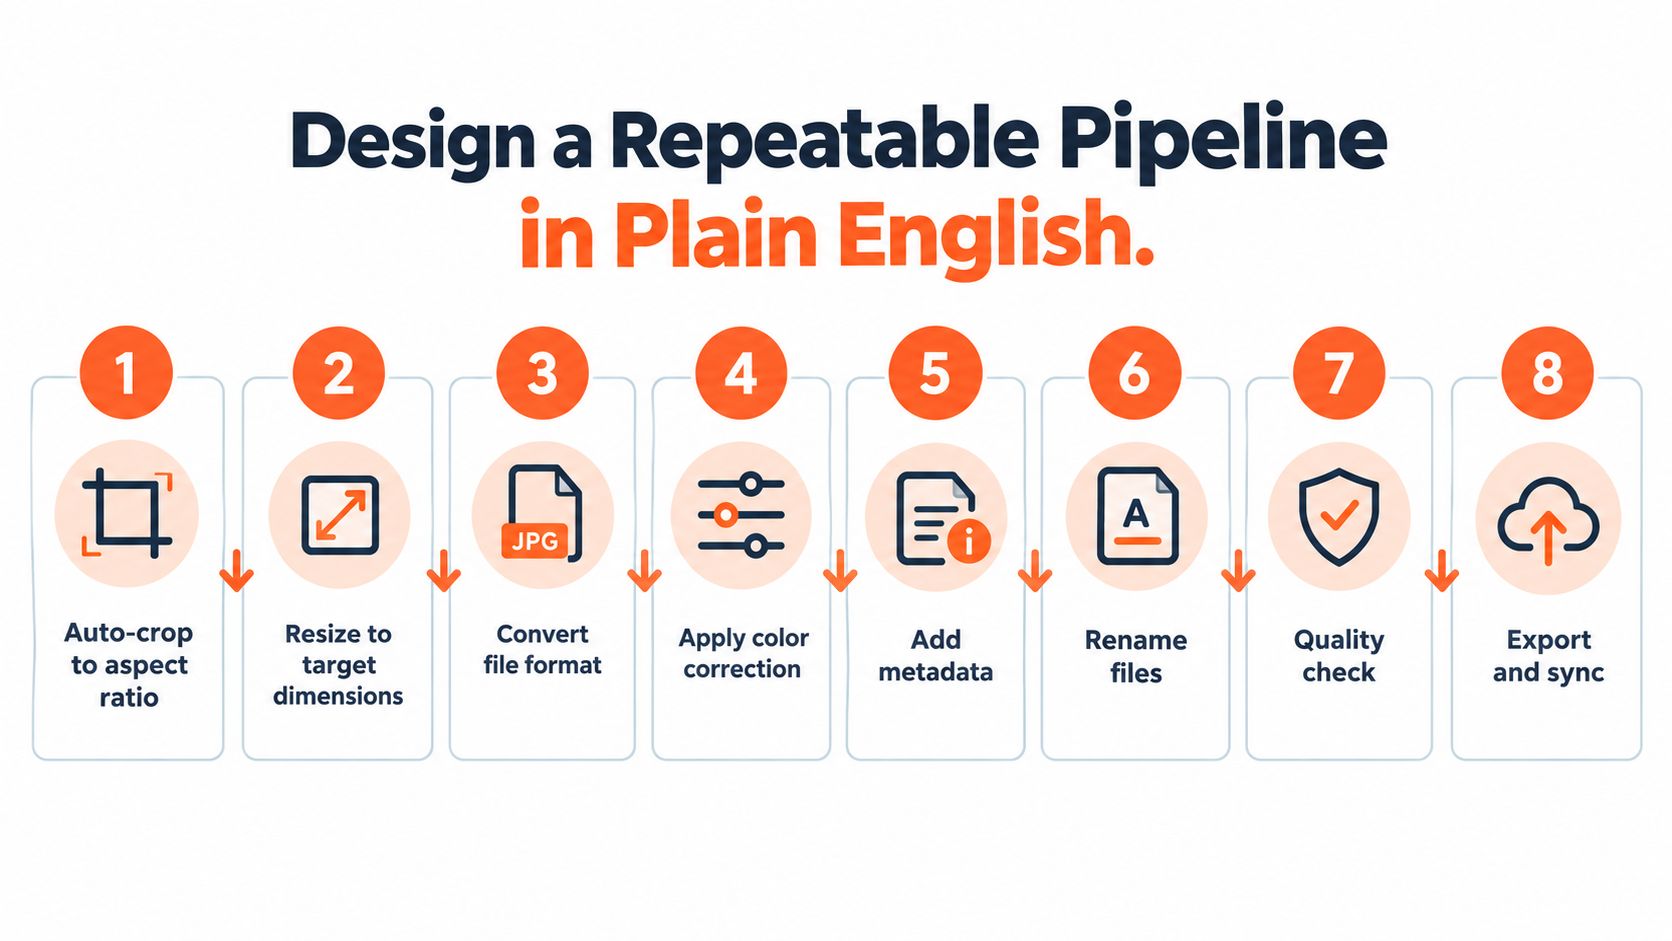
A good pipeline should be readable by someone who didn't build it. Write each operation as a short instruction, define where it applies, and save the sequence under a versioned name. If a seasonal catalog needs a new background or crop, you should change one step, not rebuild the entire workflow.
Use this order for standard product images:
- Auto-crop to the approved aspect ratio for the product group. Apparel, accessories, and furniture often need different framing. Set the rule by collection, not by individual file.
- Flatten and normalize the background to RGB 255,255,255 when the output is an Amazon main image or another white-background asset.
- Upsize files that are too small for the required output. Use Lanczos interpolation when enlargement is necessary, but don't enlarge every source automatically.
- Adjust exposure and white balance against a reference card or approved reference image. A batch should look like one collection, not a set of unrelated shoots.
- Apply the brand color profile, sRGB with the profile embedded. This reduces color surprises between editing software, browsers, and marketplaces.
- Sharpen for web output with a controlled setting, such as a 0.5 pixel radius when that matches your export workflow. Inspect edges and fine fabric detail before locking it in.
- Generate derivative sizes for each destination. Use the platform preset that matches the current marketplace requirement rather than exporting one oversized file for every channel.
- Export with the correct filename pattern. Include the SKU, image role, view order, and marketplace where your catalog system needs those fields.
The order matters. Cheap, reversible transformations should happen before expensive AI operations or heavy pixel processing. If a crop rule is wrong, you want to discover that before background replacement, relighting, or other costly work.
Save the workflow as something like Hero-White-Background-v3. Version names make review easier. They also let you apply the approved sequence to new SKUs without rebuilding the pipeline from scratch. A plain-English AI image workflow automation setup should make each step visible enough for an operator to inspect and change.
The pipeline should also support a failed-step rerun. If the background cleanup fails on a subset, rerun that operation on the processed subset instead of sending the complete original library through every earlier step.
Order Steps to Cut Cost Before You Hit Run
The cheapest batch is the one that never processes unnecessary pixels. Cull unsuitable files first, reduce working dimensions before heavy transformations, and leave expensive AI work until the remaining images have passed basic checks.
Use this sequence:
- Cull first. Remove duplicates, unusable angles, accidental shots, and products that aren't part of the current collection. Every discarded file saves later processing.
- Downscale to the working resolution. Don't send oversized originals into background removal, relighting, or sharpening when the final marketplace output is smaller.
- Normalize color and white balance. Apply the shared correction once after the basic image set is stable.
- Run heavy edits. Background removal, replacement, relighting, and detailed cleanup belong here.
- Export last. Create the master and marketplace derivatives only after the image passes review.
Doing this for a whole catalog?
MerchLoom runs background removal, upscaling and AI editing across every product photo you have — one prompt, whole batch. Try 2 batches free, no signup.
Try it freeThis order follows a simple principle: remove files and pixels before touching every remaining pixel. Background removal should not run on images you'll later reject. Upscaling should not happen before you know which images need enlargement. Sharpening should not be applied before cropping and resizing, because those operations change the edges and detail that sharpening affects.
A practical cost model
You don't need a complicated finance model to compare workflows. Record the number of files, the approximate data volume, the expensive operations applied, and the number of accepted outputs. The useful measure is the cost of a finished, compliant asset, not the nominal cost of one generation or one edit. This batch background-removal methodology also recommends tracking accepted assets, total attempts, reviewer time, retouching time, and cost per accepted image.
| Pipeline Order vs. Cost on 1,000 SKUs | Files After | MB Processed | Per-Image Compute | Cumulative Cost |
|---|---|---|---|---|
| Source inspection and culling | Reduced set | Original volume until rejected | Low | Lowest starting point |
| Working-resolution resize | Reduced set | Smaller working volume | Low to moderate | Lower than processing originals |
| Color and white-balance normalization | Reduced set | Working volume | Moderate | Accumulates on accepted files |
| Background and other heavy edits | Reduced set | Working volume | High | Main processing cost |
| Final export and derivatives | Accepted set | Marketplace output volume | Low to moderate | Final total |
Treat this table as a measurement template. Fill in your own file counts and processing volume after each stage. If a late failure forces a full rerun, move that operation later or add a review gate before it. That's how you reduce wasted compute and avoid paying to process images that never ship.
Apply Marketplace Export Rules in One Pass
Build one export checklist with conditional branches. Keep the crop, color, subject placement, and quality controls shared wherever possible. Then let each marketplace branch handle its own dimensions, format, and file-weight requirements.
Amazon's main image needs a pure white RGB 255,255,255 background and a product that fills most of the frame. Amazon's documented main-image range is 500 to 10,000 pixels on the longest side, while the practical target for crisp display is 1,600 pixels or more on that side, based on the Amazon listing image-size guidance. Use JPEG or PNG, embed sRGB, and keep text and graphics out of the main image.
Etsy recommends 2,000 pixels on the shortest side. Etsy's image guidance supports square presentation for shop and marketplace display, and the platform recommends JPG, GIF, or PNG, with a 72 PPI recommendation and a file size under 1 MB for faster uploading, according to this Etsy shop image announcement.
Shopify works well with square product crops at 2,048 by 2,048 pixels. Its documented maximum is 4,472 by 4,472 pixels, which equals 20 megapixels. Use JPEG or WebP where the store workflow supports it, embed sRGB, and keep the file below 20 MB.
| Marketplace Export Specs in One Table | Min/Max Long Side | Aspect Ratio | Format | Color Profile | File Size | Reject Triggers |
|---|---|---|---|---|---|---|
| Amazon | 500 to 10,000 pixels, with 1,600 or more commonly recommended | 1:1, 4:3, or 5:6 are commonly used | JPEG or PNG | sRGB | 1 MB to 10 MB | Non-white background, text or graphics, weak subject fill, wrong profile |
| Etsy | Use 2,000 pixels on the shortest side | Square framing is practical for listings | JPG, GIF, or PNG | sRGB | Under 1 MB recommended for faster uploading | Soft image, inconsistent crop, excessive file weight |
| Shopify | Up to 4,472 by 4,472 pixels | 1:1 for square crops | JPEG or WebP | sRGB | Under 20 MB | Inconsistent framing, unsupported output, oversized file |
Generate one master PNG after the shared corrections, then create the marketplace JPEGs from that master. Don't repeatedly recompress the original for each destination. Keep the subject centered according to the product-group rule, check that no text overlay has entered the main image, and verify that the embedded profile is sRGB before upload.
Review Mid-Batch and Refine Without Starting Over
Never wait until the final export to discover that every subject sits too low or every white background has a gray edge. Process an initial sample, inspect it, then continue only after the shared rules look right.
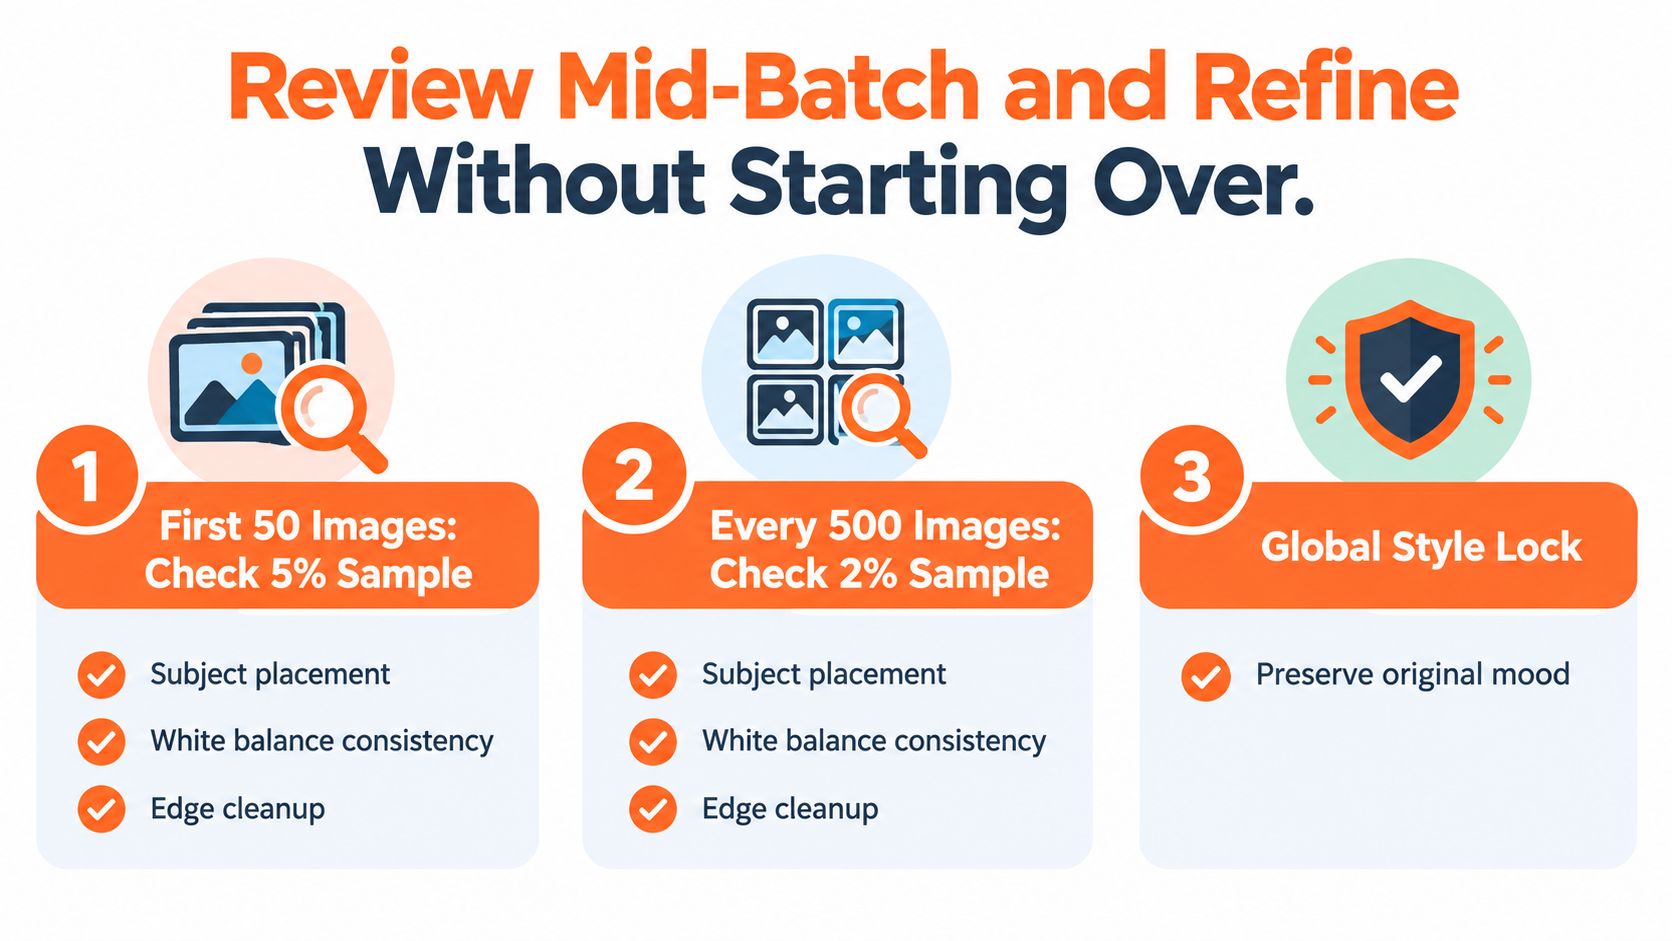
After the first 50 images, spot-check 5% of the batch. Then inspect 2% after every 500 images as the collection continues, following the sampling rule in the workflow. The sample should include different product groups, lighting conditions, orientations, and image roles. A sample made only from easy hero shots tells you very little.
Check five things:
- Subject placement: Is the product positioned consistently within the approved frame?
- White balance: Do similar products share the same neutral reference?
- Edge cleanup: Are collars, straps, hair, transparent parts, and fine fabric edges clean?
- Shadow direction: Do generated or retained shadows follow the same visual logic?
- Banding and artifacts: Do gradients, dark fabrics, and replacement backgrounds show visible defects?
Use a controlled rerun decision
Before restarting anything, ask:
- Does the issue appear across a meaningful part of the sample?
- Is it caused by a global parameter rather than one unusual source image?
- Can one pipeline step fix it without changing the approved steps around it?
If the answer is yes to all three, adjust the failing step and continue from the processed stage. Use the already-processed images as the new inputs when the system supports it. That avoids re-uploading and re-decoding the originals.
If the problem affects only isolated files, finish the batch and patch those outliers manually. Don't rebuild a complete catalog because one reflective product confused the background removal. A product image library management workflow should preserve the accepted outputs, rejected outputs, and revision history so the same problem doesn't return in the next run.
Review the pipeline, not just the pictures. A repeated defect usually belongs to one rule.
Run the Pipeline Across a Full Collection
Group products before queuing them. Apparel, accessories, home goods, and complex lifestyle imagery shouldn't share the same crop, background, or subject-placement rules. A logical collection lets you reuse the right template without forcing exceptions into every individual file.
Confirm that each collection follows the source naming and folder rules established during ingestion. Then queue each group as a separate batch run. Use clear statuses such as queued, processing, review, and exported so you know where a collection stopped and what still needs attention.
Heavy transformations can run during off-peak hours when your workflow allows scheduling. Parallel processing can help when the platform supports it, but don't trade review quality for queue speed. Record runtime, failed files, reviewer time, accepted assets, and processing cost for each collection. Those records show which product groups need a different crop or background rule.
| Sample Collection Run Plan | SKU Count | Pipeline Template | Export Targets | Review Status |
|---|---|---|---|---|
| Apparel heroes | Catalog group total | Hero-White-Background-v3 | Amazon, Etsy, Shopify | Sample approved before continuation |
| Apparel lifestyle | Catalog group total | Lifestyle-Neutral-v1 | Shopify, Etsy | Pending composition review |
| Accessories | Catalog group total | Small-Product-Centered-v2 | Amazon, Etsy, Shopify | Edge cleanup review |
| Home goods | Catalog group total | Square-Object-v1 | Shopify, Etsy | Awaiting crop validation |
Reuse the approved template across collections, but don't assume every collection needs identical settings. For catalog organization beyond image editing, a guide to key catalog software features is useful when you need product records, asset relationships, and workflow status to stay aligned.
MerchLoom can run the described work across a full collection through chained AI pipelines instead of one image at a time. You can try the first images with no account, then pay per image using credits that never expire. Human review still matters, especially for transparent products, difficult edges, unusual shadows, and marketplace rejection risks. The workflow can also connect to a broader bulk product photo editor process when the same transforms and exports need to repeat for new SKUs.
MerchLoom lets you connect existing product-image sources, describe the workflow in plain English, chain crop, cleanup, color, background, resizing, and export steps, and review results while the batch runs. Try your first images without an account, then visit MerchLoom to process a real collection with pay-per-image credits that never expire.
Stop editing product photos one at a time
Upload your catalog or connect your store. Describe the result once. MerchLoom does the rest.
Try it free — no signup