
How to Achieve White Background for Photography at Scale
Follow this step-by-step guide to white background for photography at scale. From lighting and staging to AI batch workflows and marketplace specs.
You've got 500 product shots due tomorrow. The products are ready, but every file still needs a clean white background, consistent framing, and marketplace-ready dimensions. Processing one image at a time will turn a photography task into a full-day editing job.
Start by fixing the production order. Prepare the background and lighting first, shoot every SKU from a repeatable position, check a small sample, then process the full batch. That order catches problems before they spread across hundreds of files and prevents expensive operations from running on images that still need basic cleanup.
Introduction and Workflow Overview
White background for photography became standard because marketplaces needed thumbnails with minimal visual clutter. The first documented online retail purchase in 1994 helped mark the beginning of e-commerce imagery as a commercial discipline, and by the 2020s, major marketplaces commonly required or strongly preferred pure white main images. Industry guidance also commonly places the product at about 85% of the frame, which keeps listings consistent across dense grids and mobile screens. (Marketplace history and white-background guidance)

The workflow is straightforward:
- Choose a backdrop that stays flat, clean, and repeatable.
- Lock the camera position, lens, lighting, and white balance.
- Stage products at the same scale and angle.
- Review test images for shadows, spill, sharpness, and background neutrality.
- Correct backgrounds, masks, sizing, and file outputs in batches.
- Review difficult edges manually before publishing.
That last step matters. AI background removal has become practical for catalogue work, but transparent packaging, reflective metal, pale fabric, hair-like fibers, and thin straps still need human review. The advantage comes from applying one approved workflow repeatedly, not from assuming every result is automatically correct. For a useful explanation of this production model, see this guide to batch processing for e-commerce images.
Choosing Backdrops and Equipment
A backdrop that looks fine for one product can become a liability across a catalogue. Paper may show dirt quickly, fabric can create folds and color variation, and glossy vinyl may reflect the light source into the product. Choose based on how often you'll shoot, how large your products are, and how easily you can reset the surface between SKUs.
Compare the surface before buying
Paper rolls give you a clean sweep and are simple to replace when the working area becomes marked. They store compactly, but you'll need a consistent support system and a process for trimming damaged sections.
Vinyl lasts longer and can be wiped clean. Its surface can also create unwanted reflections, especially with polished packaging, glass, or jewelry. Matte vinyl is easier to control than a glossy sheet.
Fabric is easy to fold and transport, but wrinkles create shadows that must be removed later. It makes sense for occasional shoots, not for a large catalogue where every product must share the same background texture.
Portable light tents and tabletop kits reduce setup time for small products. They're convenient, but their limited space can make larger apparel, footwear, or boxed goods difficult to frame consistently.
Keep the backdrop wider and taller than your largest product setup. A curved sweep prevents a visible horizon line, and clamps keep the material in the same position between shooting sessions. The studio backdrop guide covers the practical choices that affect repeatability.
Use a tripod and a lens that gives you enough working distance to avoid wide-angle distortion. A midrange zoom or a 50 mm prime is usually easier to control than a basic all-purpose kit lens when you need straight edges and consistent product proportions. The camera body matters less than locked positioning, controlled light, and a repeatable distance from the product.
Amazon's main image requires pure white, RGB 255,255,255, and the product should fill at least 85% of the frame. Amazon guidance cited in marketplace photography instructions lists at least 1,000 px on the longest side, with 2,000 px recommended for zoom. (Amazon-oriented white-background requirements)
| Marketplace | Requirement |
|---|---|
| Amazon | Pure white RGB 255,255,255, product fill of at least 85%, and a longest side of 1,600 px or more for the working marketplace standard |
| Etsy | 2,000 px on the shortest side, with square 1:1 or landscape 4:3 framing |
| Shopify | Square images commonly prepared at 2,048 × 2,048 px, with uploads supported up to 4,472 × 4,472 px |
For a rented studio or larger product line, an expert guide on photography studio rentals can help you evaluate ceiling height, available sweep space, lighting equipment, and whether the room will support a repeatable catalogue setup.
Lighting Setup and Camera Settings
The easiest way to create a white background is to separate the lighting jobs. Light the product for accurate color and detail. Light the background brightly enough to read as white. If one lamp has to do both jobs, you'll often get a product that's too bright, a background that looks gray, or shadows that are difficult to remove.

A repeatable small setup
For a small DIY rig, place a diffused softbox to one side and slightly above the product. Put a white reflector on the opposite side to lift the shadow area. Keep the product away from the background so the background light doesn't spill directly onto its edges.
Set the camera manually where possible. A practical starting point is ISO 100 to 200, f/8, and a daylight white balance of 5,500 K. Choose the shutter speed after checking the product exposure. The background can be pushed brighter, but the product must retain texture, labels, seams, and color. (Studio method and recommended settings)
A curved continuous sweep works well because it removes the corner where a wall meets a table. Aim the background light at the sweep rather than the product, and use diffusion to avoid a bright hotspot. If you see a gray band near the floor curve, move the light or correct it later with Levels or Curves.
Practical rule: Lock the light positions with tape on the floor. A few millimeters of movement repeated across a catalogue can change shadow direction and brightness.
A three-light setup gives you more control. Use a diffused key light for the product, a reflector or fill source opposite it, and a separate background light. Add a kicker or edge light when a pale product needs separation from the background. For a one-light setup, keep expectations realistic. It can work for simple matte products, but it usually requires more post-processing and gives you less control over edge contrast.
After the first test shot, inspect the histogram and zoom into the product edges. Look for colored spill, clipped product detail, visible shadows, and gray corners. Don't adjust the camera between products unless the product category changes. Create separate presets for small accessories, apparel, footwear, and larger boxes if their size or surface reflectivity changes.
This product photography lighting guide is useful when you need to document positions and settings for repeat shoots.
A visual reference can help you compare how the product, sweep, reflector, and lights should relate to each other.
Doing this for a whole catalog?
MerchLoom runs background removal, upscaling and AI editing across every product photo you have — one prompt, whole batch.
Try MerchLoomStaging and In-Shoot Techniques
Catalogue consistency starts with the first frame, not the editing software. Mark the tripod position, product position, and sweep location so every SKU enters the same setup. If you change camera height halfway through a collection, matching the images later becomes slower than the original shoot.
Place the camera at the product's natural viewing height unless the category calls for another angle. Keep the lens parallel to flat product faces to prevent unwanted convergence. For shoes, bags, cosmetics, and boxed goods, use a small stage or platform with alignment marks. Those marks let you rotate each product to the same front-facing position without relying on visual memory.
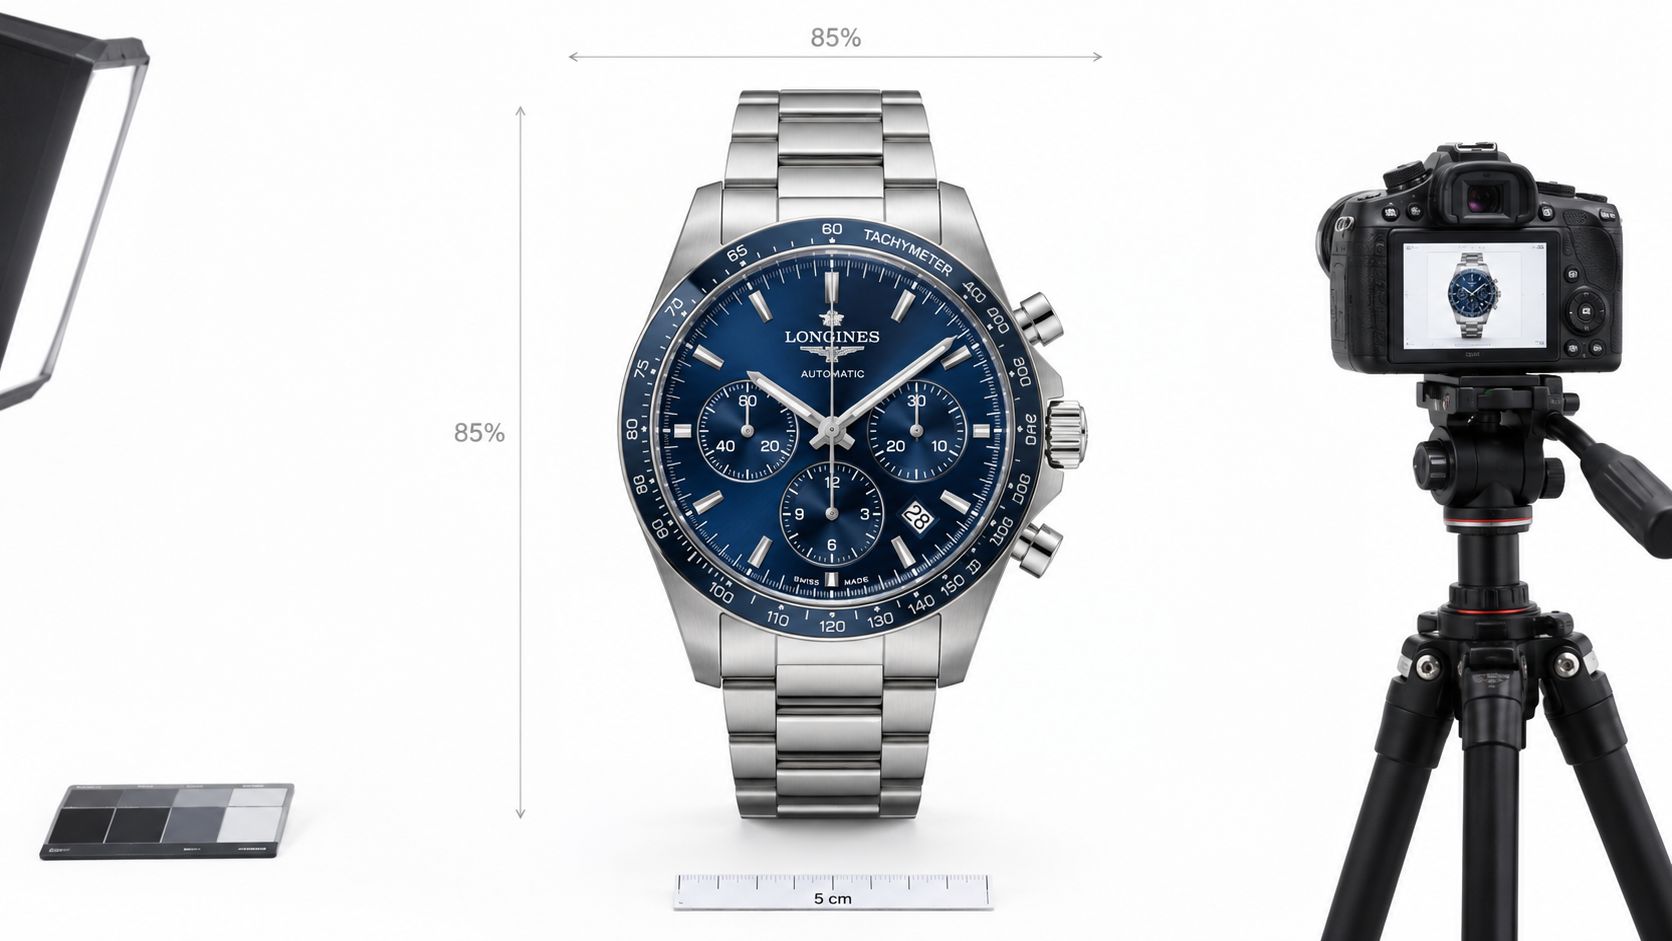
Build a staging reference
Photograph a reference product at the start of each session. Save it beside the raw files and compare later batches against it. Check:
- Frame fill: Keep the product near the same scale, with about 85% frame occupancy where marketplace rules call for it.
- Center position: Use grid lines or a taped stage mark to keep the visual center stable.
- Camera height: Don't raise or lower the tripod between similar SKUs.
- Product orientation: Align labels, openings, handles, and logos consistently.
- Shadow direction: Keep the key light and reflector fixed.
White products create a special problem. A white shirt, bottle, box, or cosmetic tube can merge into a pure white background even when the exposure is technically correct. Use a subtle near-white background during capture, add an edge or kicker light, or create a controlled tonal difference that preserves the outline. Practitioners commonly use edge lighting and a slightly darker background to retain surface detail. (White-on-white tonal separation)
A background can look white to a shopper without being the brightest possible value in every pixel. Separation is more useful than a flat silhouette.
Before shooting the full collection, zoom into a white SKU and a dark reflective SKU. Check the histogram, highlights, corners, and product edges. A grey card or custom white balance target can help confirm neutrality, but don't treat the camera preview as final proof of RGB 255,255,255. You'll verify exact values during post-processing.
If you use props for secondary images, keep them out of the main marketplace image and document their placement separately. A consistent prop system is easier to repeat when you follow a defined approach to photography with props, rather than improvising each listing.
Post-Processing and Batch AI Workflows
The processing order determines both quality and cost. Don't upscale a file before removing a background that will be discarded. Don't reframe images before you've decided whether the subject mask is clean. And don't run a full catalogue through an automated workflow before reviewing representative difficult products.
Start with the original camera files and group them by lighting setup, product category, and intended marketplace. Apply the same global correction to images captured under the same conditions. Correct white balance first, then use Levels or Curves to clean the background. A background that looks white on screen can still contain off-white pixels, gray corners, or a color cast.
The practical processing order
- Cull obvious failures. Remove blurry frames, closed eyes on models, damaged products, and shots with unusable glare before any AI processing.
- Correct the source image. Apply exposure, white balance, lens correction, and basic color adjustments to the product.
- Remove the background. Use masking, a clipping path, or batch AI matting depending on edge complexity.
- Replace the background. Use pure white for compliant main images, or a controlled near-white field when pale products need tonal separation.
- Clean the mask. Inspect transparent parts, thin edges, straps, hair-like fibers, glass, and reflective surfaces at high zoom.
- Reframe by channel. Set the product position and canvas shape for Amazon, Etsy, Shopify, or your own store template.
- Upscale only when necessary. Do this after the background is removed and the canvas is under control.
- Export and validate. Check dimensions, color, file naming, and the final white point before upload.
This order avoids wasting the expensive enlargement step on pixels that won't appear in the final image. It also makes the workflow easier to troubleshoot because each stage has one job.

Where automation helps
Batch AI is useful for repetitive operations such as background removal, white replacement, resizing, reframing, and file preparation. It doesn't remove the need for review. A clean cotton shirt may process well, while transparent perfume bottles or chrome accessories may require manual edge correction.
AI matting accuracy has improved year over year, and marketplace compliance changes are pushing sellers toward hybrid workflows that combine batch AI with manual retouching. (AI matting and hybrid editing workflows)
Create one approved recipe per product family. For example, your cosmetics workflow might remove the source background, place the product on pure white, preserve a small natural contact shadow, center the item, and export the marketplace size. Your apparel workflow might use a near-white capture background, stronger edge separation, and a more careful mask around loose fabric.
MerchLoom can run these chained AI operations across a collection instead of making you edit one image at a time. The first images can be tried with no account, and its model is pay-per-image with credits that never expire. It can reduce the source background, replace it, reframe outputs, and upscale when needed, but you should still review the results before publishing. More detail is available in this guide to AI batch image editing.
Use a sample-first review. Select a dark product, a white product, a reflective product, a transparent product, and a product with fine edges. Approve the workflow only after those images pass inspection. Then process the broader group and review the first results before allowing the batch to continue.
Conclusion and Best Practices
A reliable white background workflow is built around repeatability, not a single perfect frame. Use a backdrop that stays clean and fixed, mark your camera and product positions, lock the lighting, and photograph a reference SKU before moving through the catalogue.
Keep this checklist beside the shooting station:
- Prepare the product: Remove dust, fingerprints, lint, and packaging wrinkles before capture.
- Fix the setup: Keep the sweep, tripod, lights, and reflector in marked positions.
- Protect pale products: Use edge lighting or controlled near-white separation when white-on-white detail disappears.
- Check samples: Review difficult surfaces before shooting every matching SKU.
- Process in order: Cull first, correct color, remove the background, replace it, reframe, upscale if needed, then export.
- Validate outputs: Confirm RGB 255,255,255 where pure white is required, check dimensions, and inspect masks before uploading.
Amazon, Etsy, and Shopify don't share identical image rules, so one master file may need channel-specific versions. Preparing those variants from a clean cutout is faster than rebuilding each listing image from the original photograph. Image quality also needs to work alongside titles, structured product information, and other ecommerce product SEO strategies.
MerchLoom fits the batch stage when you have a complete collection to process. You can test the first images without creating an account, pay per image with credits that never expire, and keep a human review step for difficult products. That combination is more practical than forcing every SKU through the same automated treatment.
Use MerchLoom to chain background removal, white replacement, reframing, and optional upscaling across your product collection. Test a few representative images first, approve the workflow, then process the rest while reviewing the outputs before publishing.
Stop editing product photos one at a time
Upload your catalog or connect your store. Describe the result once. MerchLoom does the rest.
Try MerchLoom