
Studio Photo Backdrop: A Guide for E-commerce Sellers
Choose the right studio photo backdrop to streamline your e-commerce workflow. This guide covers materials, sizes, and lighting for perfect batch processing.
If your product photos feel inconsistent, the problem often starts before editing. One SKU was shot on a wrinkled fabric backdrop, another on glossy vinyl, another against a wall near a window. By the time you try to prepare Amazon white backgrounds, Shopify squares, and Etsy-ready crops, you're fixing three different problems instead of processing one clean batch.
That’s why a studio photo backdrop matters more than most sellers think. For catalogue work, the backdrop isn’t decoration. It’s a production control surface. The cleaner and more repeatable your capture setup, the less time you spend correcting edges, shadows, colour shifts, and framing drift later.
Why Your Backdrop Is Your Most Important Workflow Tool
Most backdrop advice stops at style. White for clean. Grey for neutral. Textured for mood. That’s useful for portraits, but it misses what matters for an online store owner trying to move hundreds of listings through one workflow.
For e-commerce, the backdrop is the first layer of standardisation. It determines how predictable your files are before they ever reach editing. Existing guidance often skips this link between physical capture and automation, even though California has 150,000+ e-commerce businesses, and 68% of sellers cite image processing time as a top bottleneck according to this business context on photography workflows. The same source notes a 42% surge in AI tool adoption in 2025-2026.
That shift matters because your backdrop now functions as an AI priming layer. If you shoot on a surface that gives clean subject separation, even tone, and consistent edges, every downstream task gets easier. Background removal is cleaner. Reframing is more reliable. Colour correction behaves more consistently across a collection. Marketplace-specific exports need less manual rescue work.
Practical rule: The best backdrop is the one that removes decisions later.
A growing store usually doesn’t fail because one hero image looks bad. It slows down because the full catalogue becomes messy. One batch has grey shadows on white. Another has floor creases. Another has reflective hotspots that break clean cut-outs around glass, jewellery, or packaged goods. Those little inconsistencies are what turn a fast listing workflow into endless exceptions.
There’s also a cost issue. If your source files are inconsistent, you either edit manually or pay for processing that has to work harder than it should. That’s why backdrop choice belongs in the same conversation as cropping templates, naming conventions, and listing specs. If you need a good baseline for that broader capture discipline, this guide on making product photos look professional is a useful companion.
A strong studio photo backdrop doesn’t just make the photo look cleaner. It makes the whole system more organised.
Choosing Your Backdrop Material for AI Processing
Material choice changes everything. Sellers often pick a backdrop based on price or storage convenience, then discover later that the wrong surface adds cleanup work to every image. For one-off shoots, you can tolerate that. For collections, you can’t.
The main question isn’t which material looks nicest in isolation. It’s which one produces the most reliable files across repeated sessions.
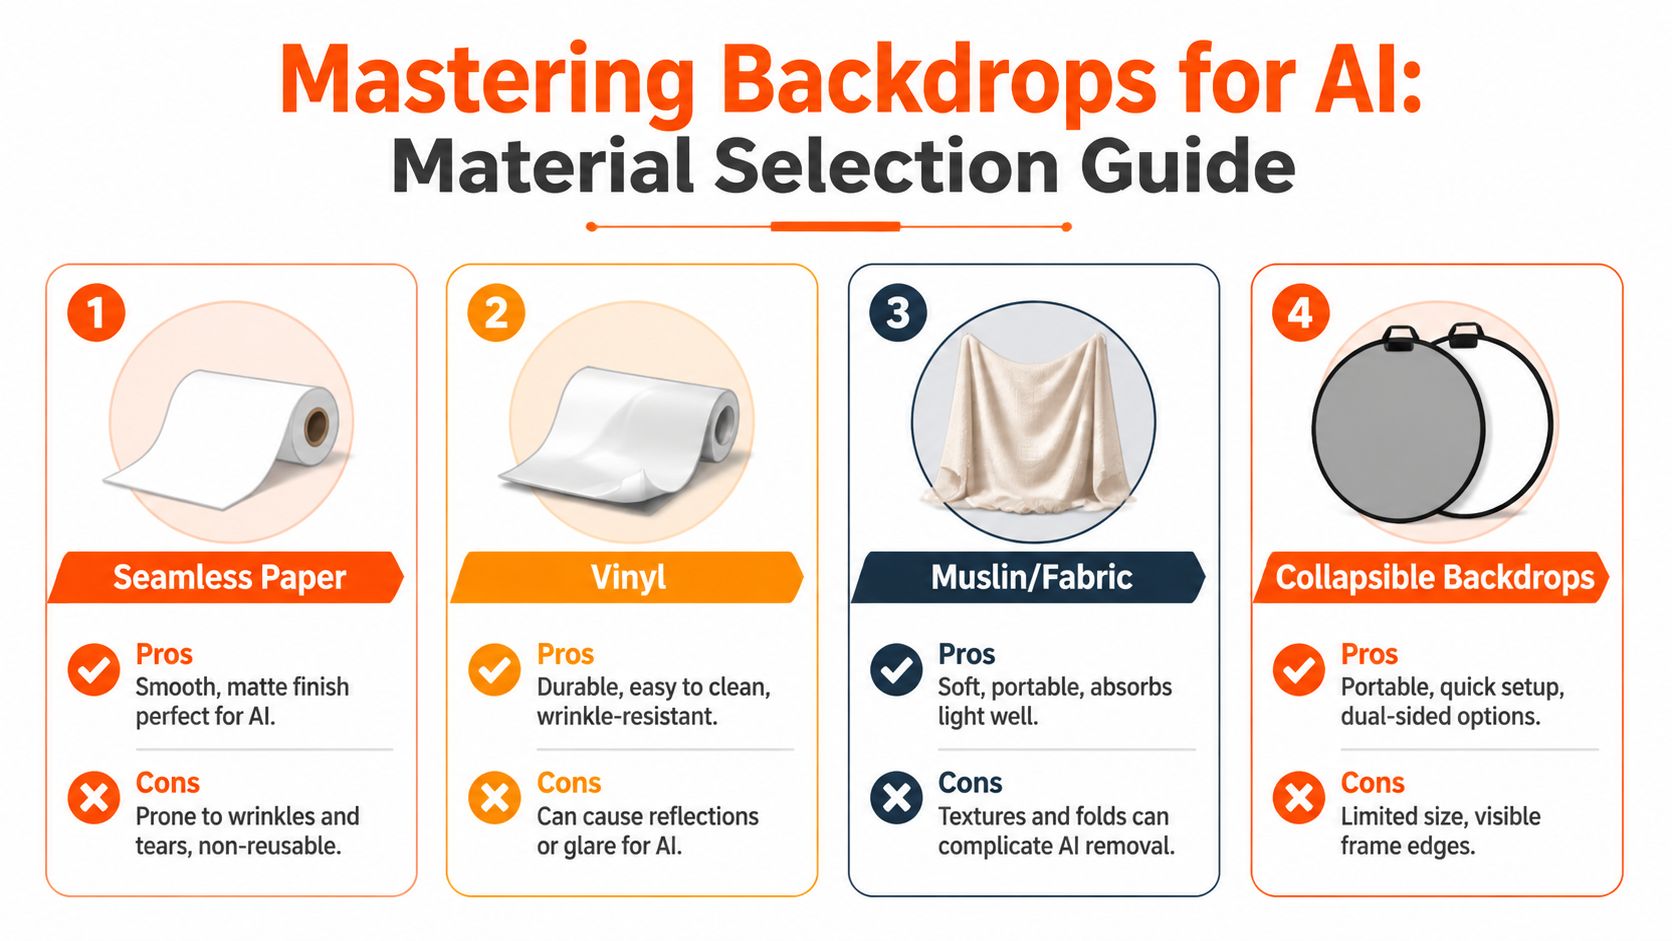
Why seamless paper usually wins
For most e-commerce catalogues, continuous paper is the safest default. It dominates this type of work because its non-reflective surface reduces light spill by 60% compared to fabric, and its density helps prevent moiré patterns that can inflate AI reframing compute by up to 35%, according to Sugar Studios’ guide to photography backdrops. The same source notes that disposable sections remove dust and scuff artefacts that cause 12-18% of keying failures in batch jobs.
Those are not small gains. They affect the basic reliability of your source images.
Paper also behaves predictably under lighting. It gives you a smooth sweep from vertical to floor, and when it gets dirty, you cut forward to a fresh section. That sounds wasteful until you compare it with the labour cost of retouching the same marks over and over. In product photography, fresh paper is often cheaper than repeated cleanup.
Where vinyl helps and where it hurts
Vinyl earns its place when durability matters more than perfect matte behaviour. If you shoot products that leave residue, arrive damp, or need frequent wipe-downs, vinyl is practical. It handles abuse better than paper and doesn’t tear as easily during busy production days.
The trade-off is glare. Vinyl tends to show reflections and hotspots more readily, especially with glossy packaging, bottles, metal products, and anything wrapped in plastic. That doesn’t make it unusable. It means your lighting has to be more disciplined, and your files may need more correction before background removal behaves cleanly.
If your catalogue includes a lot of reflective items, vinyl often shifts work from setup convenience to post-production cleanup.
Muslin and fabric for sellers who value flexibility
Muslin and other fabric backdrops are portable, easy to fold, and useful when space is limited. They absorb light nicely and can be a good fit for lifestyle-style product imagery where the background isn’t meant to disappear completely.
For clean isolation, though, fabric has a weakness. It creases, sags, and forms micro-shadows. Those irregularities create edge ambiguity around hems, straps, translucent objects, or textured packaging. That’s manageable when you’re carefully retouching a handful of hero images. It becomes expensive when a whole batch needs consistent cut-outs.
A lot of sellers underestimate how often “small wrinkles” become repeated editing tasks.
Fabric backdrops are convenient in storage and inconvenient in volume production.
Collapsible backdrops for small spaces
Collapsible backdrops solve a different problem. They’re fast, portable, and great when you need a quick setup for headshots, single accessories, or temporary studio corners. They also fold away cleanly, which matters in small offices and home studios.
Their limitation is scale and edge control. You get less floor sweep, less room for subject separation, and more risk of visible frame edges or uneven curvature. That’s fine for a simple single-item shot. It’s less fine when you need repeatable framing for apparel, bundled products, or seasonal catalogue work.
If you sell jewellery, beauty items, or small boxed goods and shoot in a constrained room, collapsible options can be useful. If you photograph dresses, mannequins, or grouped SKU sets, they become restrictive quickly.
Backdrop Material Comparison for E-commerce Batch Processing
| Material | AI-Friendliness | Durability & Reuse | Cost | Best For |
|---|---|---|---|---|
| Seamless paper | High. Smooth, matte, predictable edges | Lower reuse, but easy to refresh by cutting forward | Moderate ongoing spend | Apparel, home goods, accessories, most catalogue work |
| Vinyl | Medium. Clean surface but more reflection risk | High durability and easy cleaning | Higher upfront, reusable | Messy products, frequent shoots, wipe-clean environments |
| Muslin/fabric | Lower for clean cut-outs because folds create uneven tone | Reusable, portable | Varies | Lifestyle shoots, softer visual style, occasional use |
| Collapsible | Medium for small subjects, limited for larger setups | Reusable and portable | Moderate | Small products, quick shoots, tight spaces |
What I’d choose by product type
A practical buying decision often looks like this:
- For apparel and mannequin work: Choose continuous background paper first. It gives the cleanest sweep and the least edge confusion.
- For cosmetics, packaged goods, and kitchen items: Paper still works best unless the products regularly spill or stain the set.
- For food-adjacent or messy craft products: Vinyl can make sense if frequent cleaning matters more than perfect matte response.
- For occasional content in a small office: A collapsible backdrop is workable, but accept its limits and don’t force it into full catalogue duty.
If you’re choosing between white and light grey, don’t treat them as interchangeable. Grey often gives better tonal separation for pale products, while white is still the common requirement for many marketplaces. This breakdown of light grey backgrounds in product photography is worth reading before you lock in one colour for every SKU.
The short version is simple. If your priority is scalable editing, continuous paper is usually the most efficient studio photo backdrop. It’s not glamorous, but it produces the kind of files that stay manageable when your catalogue grows.
Selecting the Right Backdrop Size and Mount
Even the best material fails if the backdrop is too narrow, too short, or mounted on flimsy hardware. Sellers often notice this only after reviewing a batch and seeing inconsistent floor sweep, shifting frame lines, or shadows that weren’t there at the start of the shoot.
For repeatable product photography, size and support matter as much as surface.
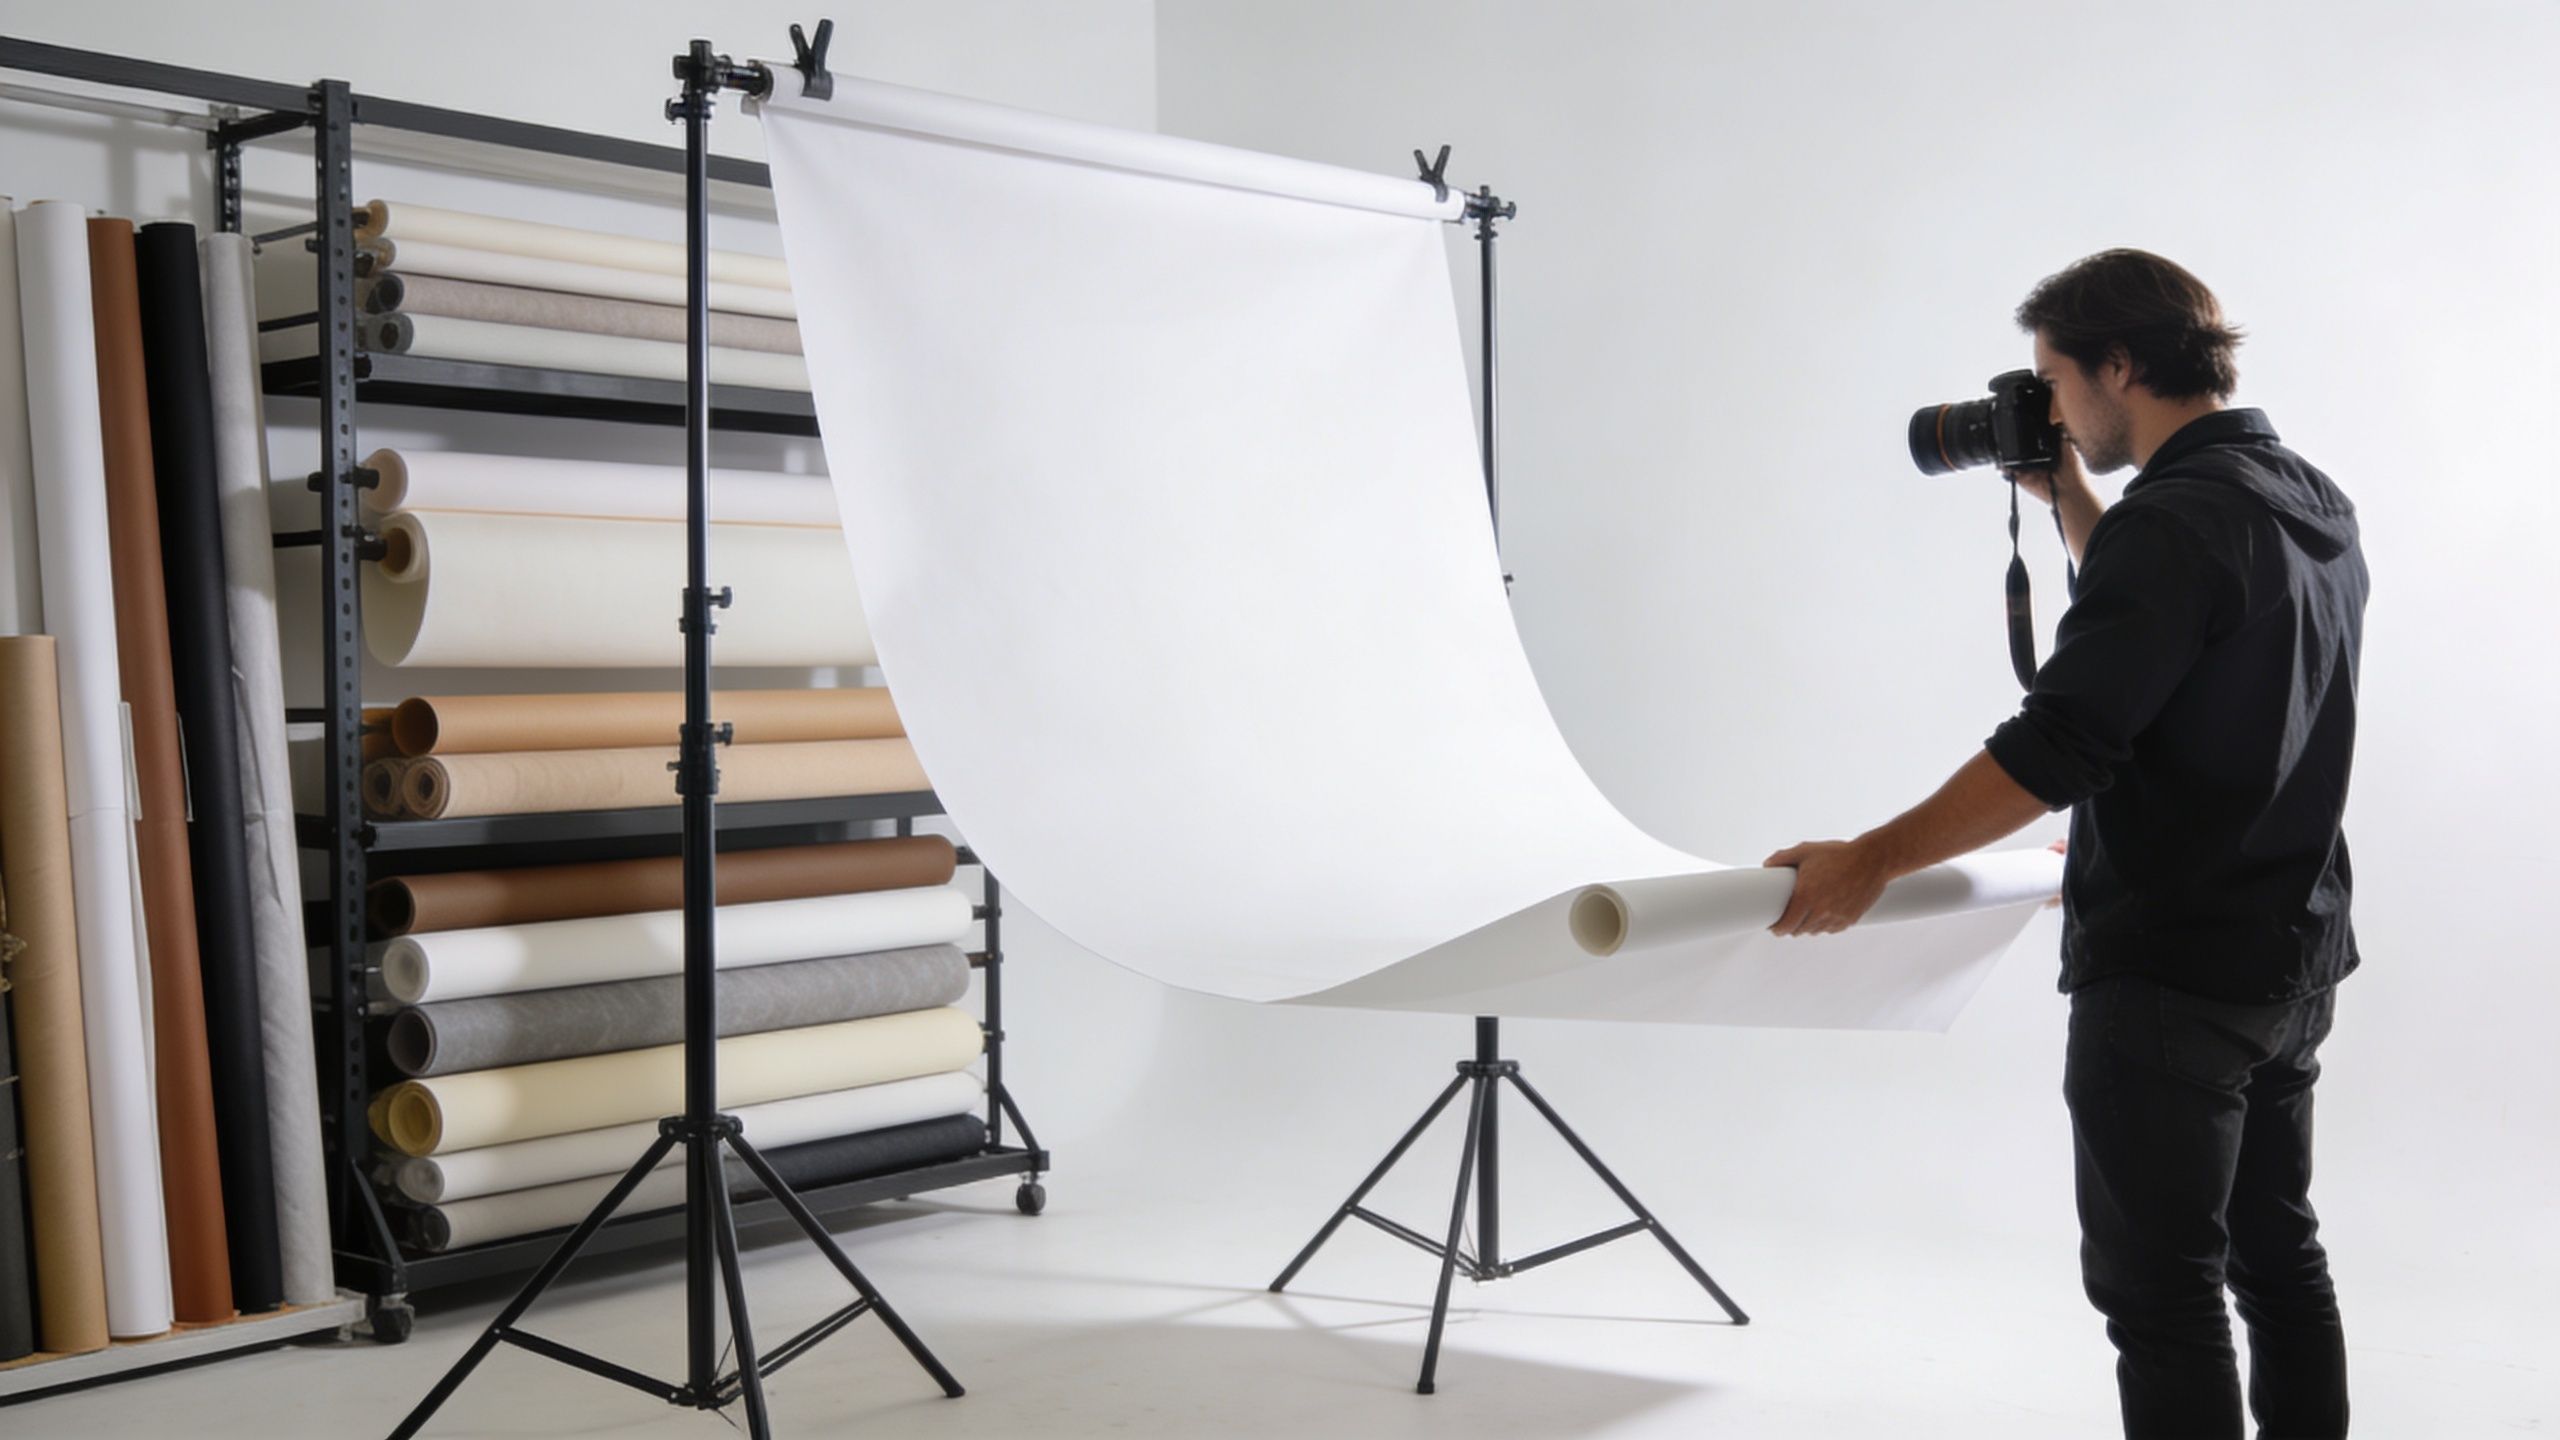
Start with the subject, not the room
If you shoot small products only, a compact setup can work. But most online stores expand. A studio that starts with candles or mugs often adds gift bundles, apparel, or model shots later. Buying too small usually means buying twice.
In California-based professional studios, standard support systems use 3-section crossbars and 12-foot stands, allowing continuous paper up to 10.5 feet wide and 12 feet high for full-body and group shots, according to Westcott’s backdrop guide. The same source notes that higher placement helps reduce shadow artefacts by 30-40% and can cut AI edge-detection errors by 25% in batch processing.
That setup isn’t just for portrait studios. It’s useful because it gives you room to keep framing consistent. You can shoot wider, crop later, and avoid backing yourself into a corner when marketplace formats change.
What width actually changes in practice
A narrow backdrop forces compromises. You crop tighter than you want. You lose room around bags, coats, or grouped products. You end up spending more time aligning products in-camera because there’s no margin for later reframing.
A wider system gives you flexibility:
- Two crossbars for narrower setups: Useful for headshots, accessories, tabletop products, and compact scenes.
- All three crossbars extended: Better for full-length apparel, mannequins, larger props, and room to create a proper floor sweep.
- Extra stand height: Helps when you need to light downward rather than straight across, which usually gives cleaner separation.
If you sell on multiple channels, that extra negative space matters. A file framed for a vertical listing can later become a square storefront image or a tighter marketplace crop without looking cramped. If Etsy is part of your channel mix, these practical notes on the size of Etsy listing photos help when planning how much room to leave around the subject.
Portable stand or permanent mount
There isn’t one right answer here. It depends on how often you shoot and whether your setup needs to move.
A portable stand system is the sensible default for growing sellers. It’s flexible, easier to reconfigure, and doesn’t commit your whole space to one layout. But it only works well if the stand is sturdy enough to stay put throughout a batch.
A permanent wall or ceiling mount is better when you shoot frequently in a dedicated room. It saves setup time and reduces alignment drift. The downside is reduced flexibility if your product mix changes.
Studio habit: If the stand shifts during the day, the batch is no longer one batch. It’s several slightly different sets.
Stability is a workflow decision
A support system that sags or wobbles creates tiny inconsistencies that compound later. The paper curve changes. The subject-to-background distance drifts. The lower sweep starts collecting uneven shadows. None of that looks catastrophic on one image, but across a collection it creates visible mismatch.
That’s why I’d rather see a seller buy one solid backdrop system and one reliable roll than spread budget across multiple cheap surfaces and weak stands. The mount is what turns a backdrop into a dependable production tool.
Lighting and Spacing for Flawless Background Removal
Most background removal problems are lighting problems wearing a different name. Sellers blame the software because edges look dirty or shadows remain, but the source issue usually started with uneven illumination or poor separation from the backdrop.
The fix doesn’t require a complicated lighting diagram. It requires discipline.
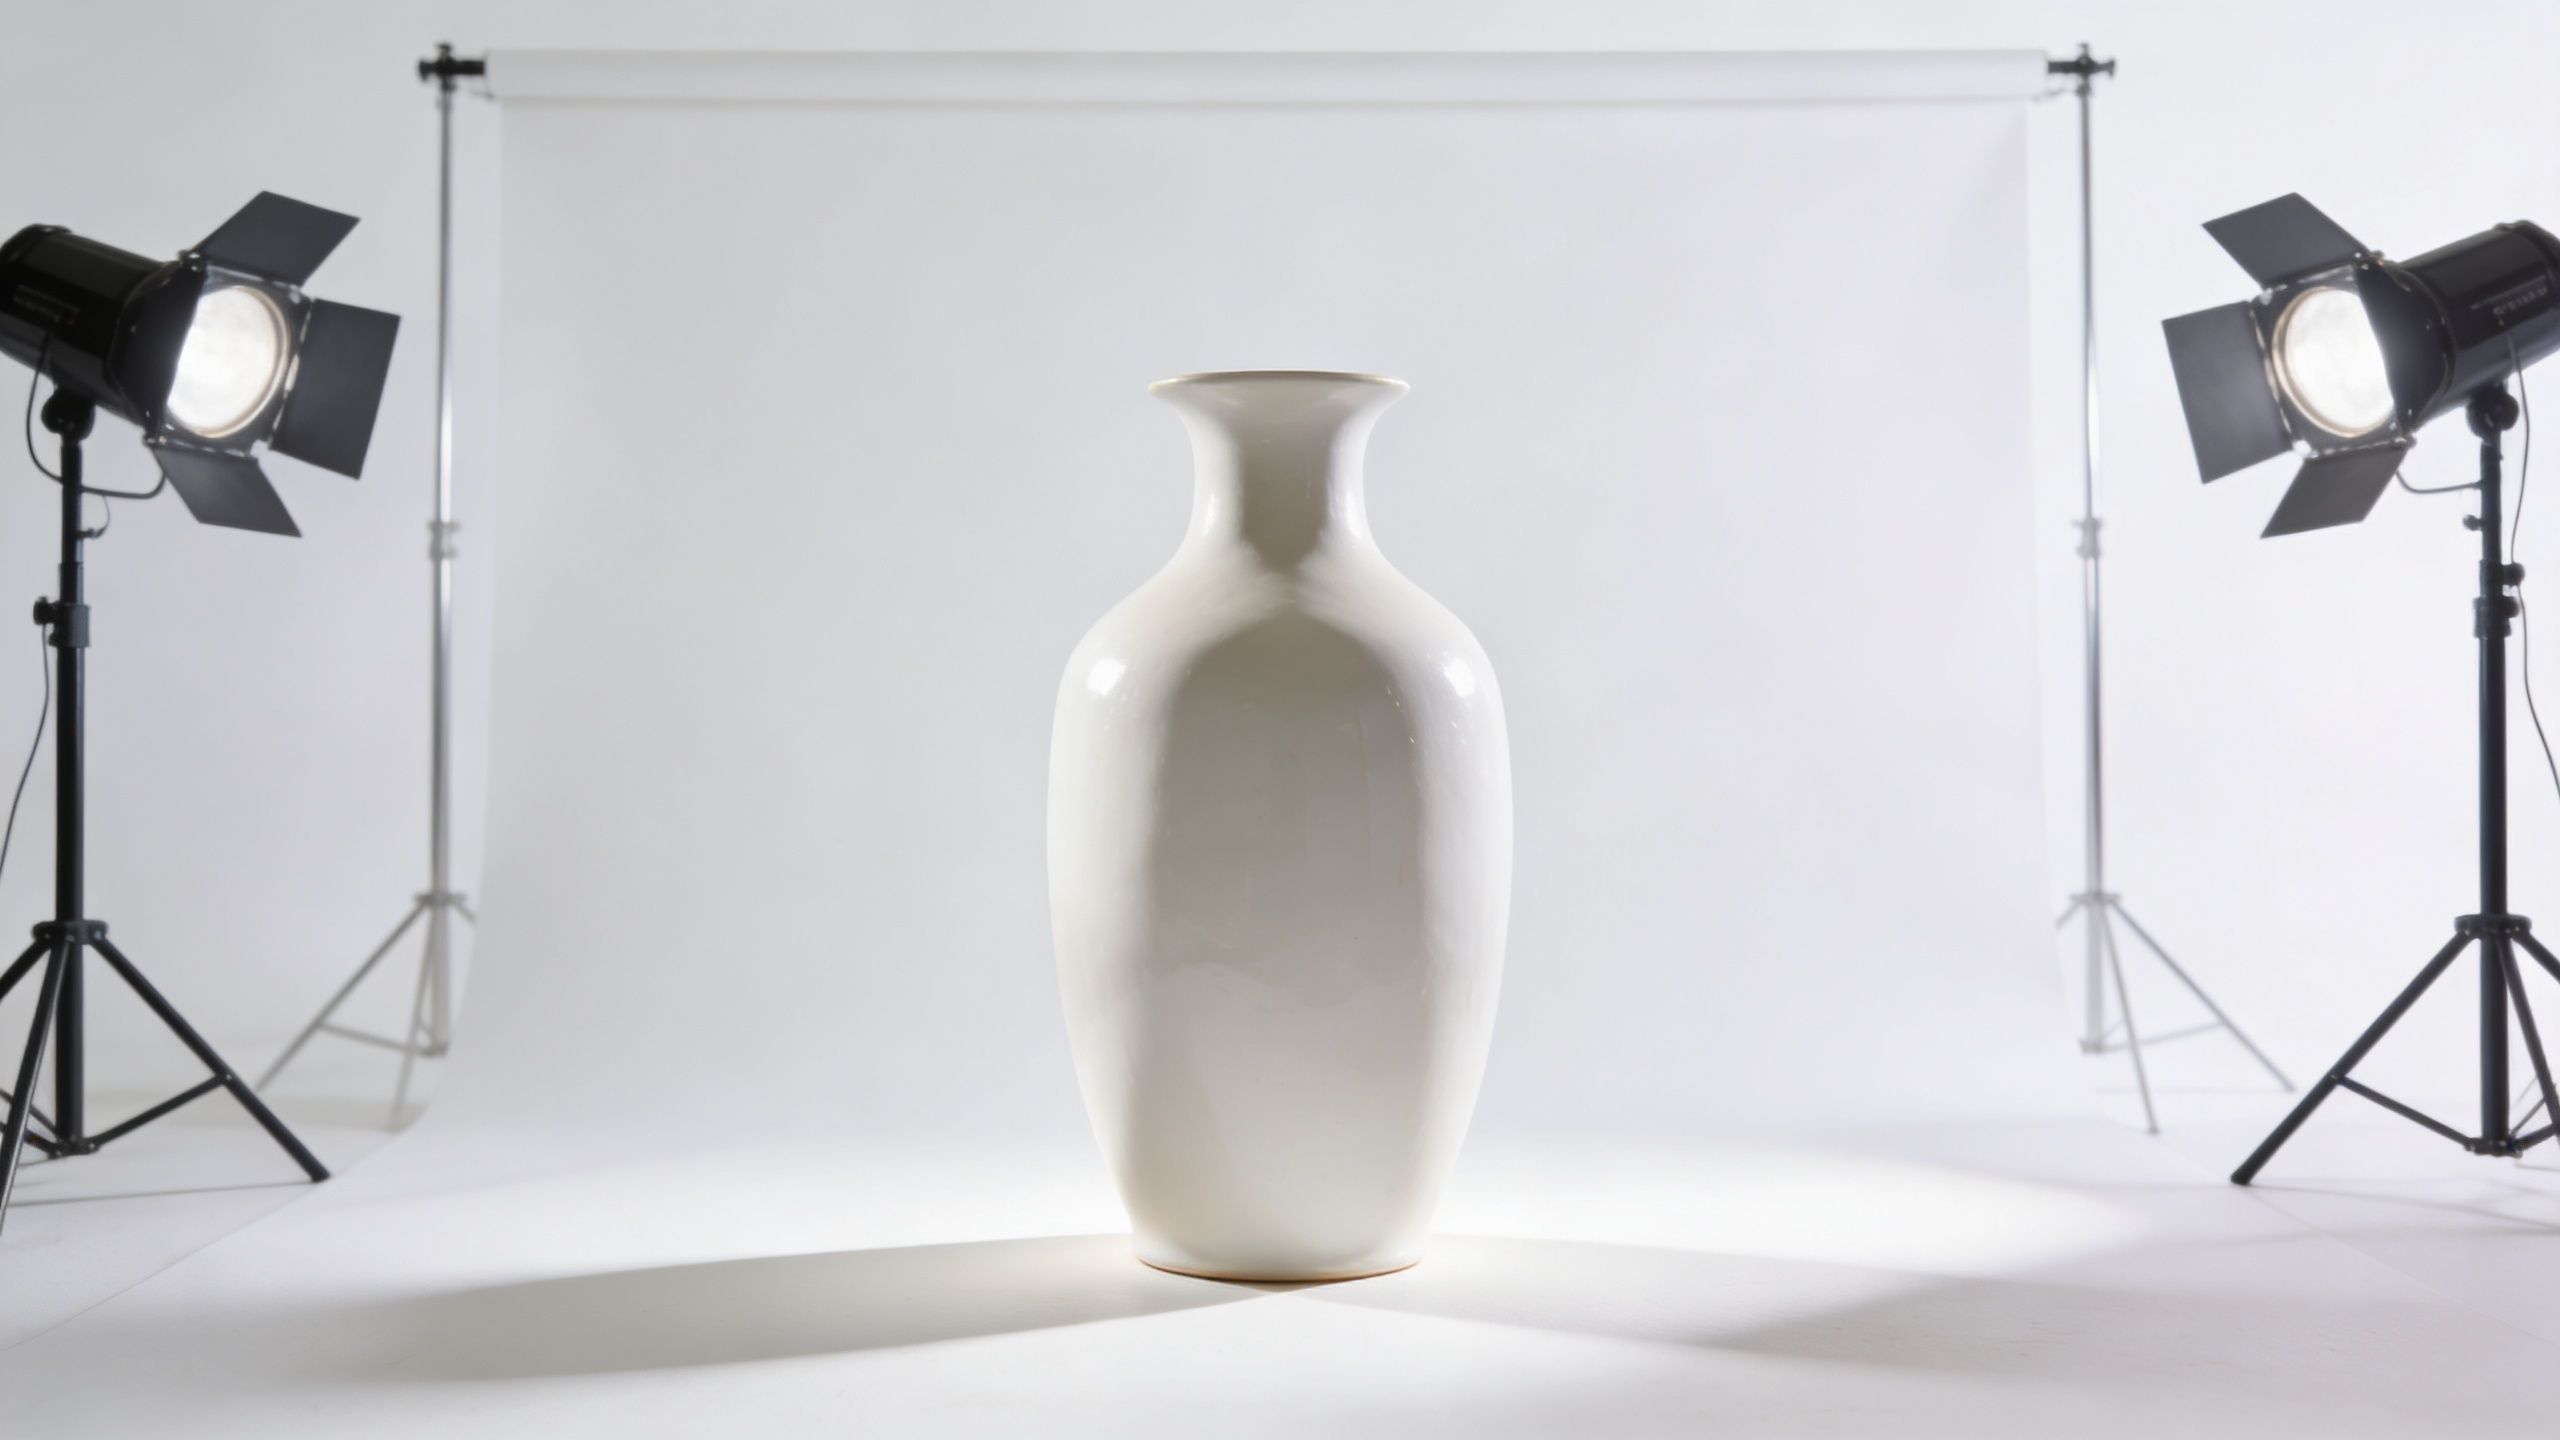
Separate the product from the background
The first rule is physical distance. Don’t press the product right against the studio photo backdrop unless you want a shadow welded to it. Pull the item forward enough that the background reads as background and the subject reads as a separate plane.
That spacing matters even more with apparel, translucent materials, and white products. When the subject sits too close, you get spill, muddy edges, and tonal overlap that makes cut-outs less clean than they should be.
A simple working routine helps:
- Keep subject placement marked: Tape marks on the floor or table stop drift between shots.
- Light the product and background as separate jobs: Don’t rely on one broad wash to solve both.
- Check edge-sensitive items first: Handles, straps, glass rims, lace, and fringe reveal bad separation fastest.
Aim for clean, boring consistency
Catalogue lighting should be uneventful. Dramatic light might suit a campaign image, but it creates extra work for listing photos. You want even background tone, controlled product detail, and shadows that look intentional rather than accidental.
If shadows are giving you trouble, this walkthrough on how to remove shadow from photo is useful, but it’s still better to reduce the problem during capture than to clean it later.
The best batch is a little boring at capture and very fast in post.
The most common mistake is over-lighting the background until it glows unevenly. That creates halos and hotspots around edges. The second most common mistake is under-lighting the backdrop and forcing the product shadow to carry all the tone. Neither gives a clean starting point.
Keep the setup repeatable
Once the light is working, lock it down. Mark stand positions. Note lens height. Keep the camera-to-subject distance stable for each product category. That repeatability matters more than finding a “perfect” setup every time.
Doing this for a whole catalog?
MerchLoom runs background removal, upscaling and AI editing across every product photo you have — one prompt, whole batch. Try 2 batches free, no signup.
Try it freeA short visual primer can help if you’re training staff or documenting a house setup:
If you shoot mixed categories, create separate lighting presets by product family rather than improvising each session. One setup for folded apparel. One for hanging garments. One for tabletop hard goods. That’s easier to maintain than trying to force one arrangement across everything.
Watch for spill and edge contamination
Coloured backdrops, bright props, and reflective surfaces all bounce information back into the product. Sometimes it’s subtle. A pale bottle picks up green from the background. A white trainer takes on blue from a side card. Metallic packaging catches a line of reflected paper seam.
Before running a large shoot, inspect a few test files at high zoom. If the product edge looks uncertain to your eye, it will likely become the kind of image that needs exceptions later.
Solving Common Backdrop Problems That Ruin Batches
A backdrop problem rarely stays physical. It turns into labour. One wrinkle can become a repeated shadow in every image from that angle. One hotspot can throw off consistency for an entire product line. Once that happens, your “batch” stops behaving like a batch.
Here are the problems that most often break otherwise usable product files.
Wrinkles and ripples
Fabric wrinkles are obvious, but paper ripples are easy to ignore until they catch side light. Then every small wave creates tonal variation behind the subject. That matters because clean removal depends on the background reading as one controlled surface, not a topographic map.
Fix the cause first. Pull the roll forward to a fresh section when needed. Keep tension even. Don’t let the lower sweep bunch at the floor. If you’re using fabric, clamp it properly and let it hang before the shoot rather than trying to “fix it in editing”.
A wrinkle behind one handbag might be minor. A wrinkle behind fifty handbags becomes a production tax.
Glare and hotspots
Glare usually comes from vinyl, glossy paper, reflective packaging, or lights aimed too directly at the backdrop. The problem isn’t just that the background looks shiny. A hotspot changes local brightness so sharply that files from the same batch stop matching each other.
When that happens, colour correction and white-background finishing become less predictable. You start nudging exposure or masking corrections image by image. That’s the exact kind of work a scalable workflow is supposed to eliminate.
Field note: If one corner of the backdrop is brighter than the rest, fix the light before you shoot the full set.
Dirt, scuffs, and floor marks
For high-volume sellers, time loss is a common occurrence. Shoes, stands, boxes, and product movement leave marks on the floor sweep. On white or pale grey paper, those marks are easy to create and annoying to ignore.
The physical fix is simple. Cut to a clean section sooner than feels emotionally comfortable. Protect the sweep where possible. Keep a no-shoes rule if the products allow it. Separate the walkway from the visible shooting area.
The workflow reason is even simpler. Background dirt is repetitive retouching. Repetitive retouching kills throughput.
Sagging mounts and drifting alignment
A weak stand system creates shape changes that are easy to miss in the studio and obvious on the monitor later. The paper starts flatter in the morning, then sags slightly by lunch. The side edge creeps into frame. The sweep angle changes just enough that shadows fall differently.
That inconsistency makes crops and tonal matching harder across a collection. You can still rescue the files, but you lose the smoothness that makes automated processing worthwhile.
A quick inspection routine before every batch
Use this checklist before you begin:
- Check the floor sweep: Look for footprints, drag marks, tears, and dents where the curve meets the floor.
- Check for glare: Take a test frame with the actual product, not just the empty set.
- Check stand stability: Nudge the support gently. If it shifts now, it’ll shift more after repeated handling.
- Check the corners of the frame: Edge intrusions and uneven backdrop lines often hide there.
These are small habits, but they decide whether your files move cleanly through editing or stall in exception handling.
How to Prepare Photos for Your AI Processing Pipeline
Good capture still needs an organised handoff. Without it, many sellers lose the benefit of a clean studio photo backdrop. The files are usable, but they aren’t prepared for fast processing across channels and image sets.
The handoff should be deliberate. Treat it like pre-flight, not like an afterthought.
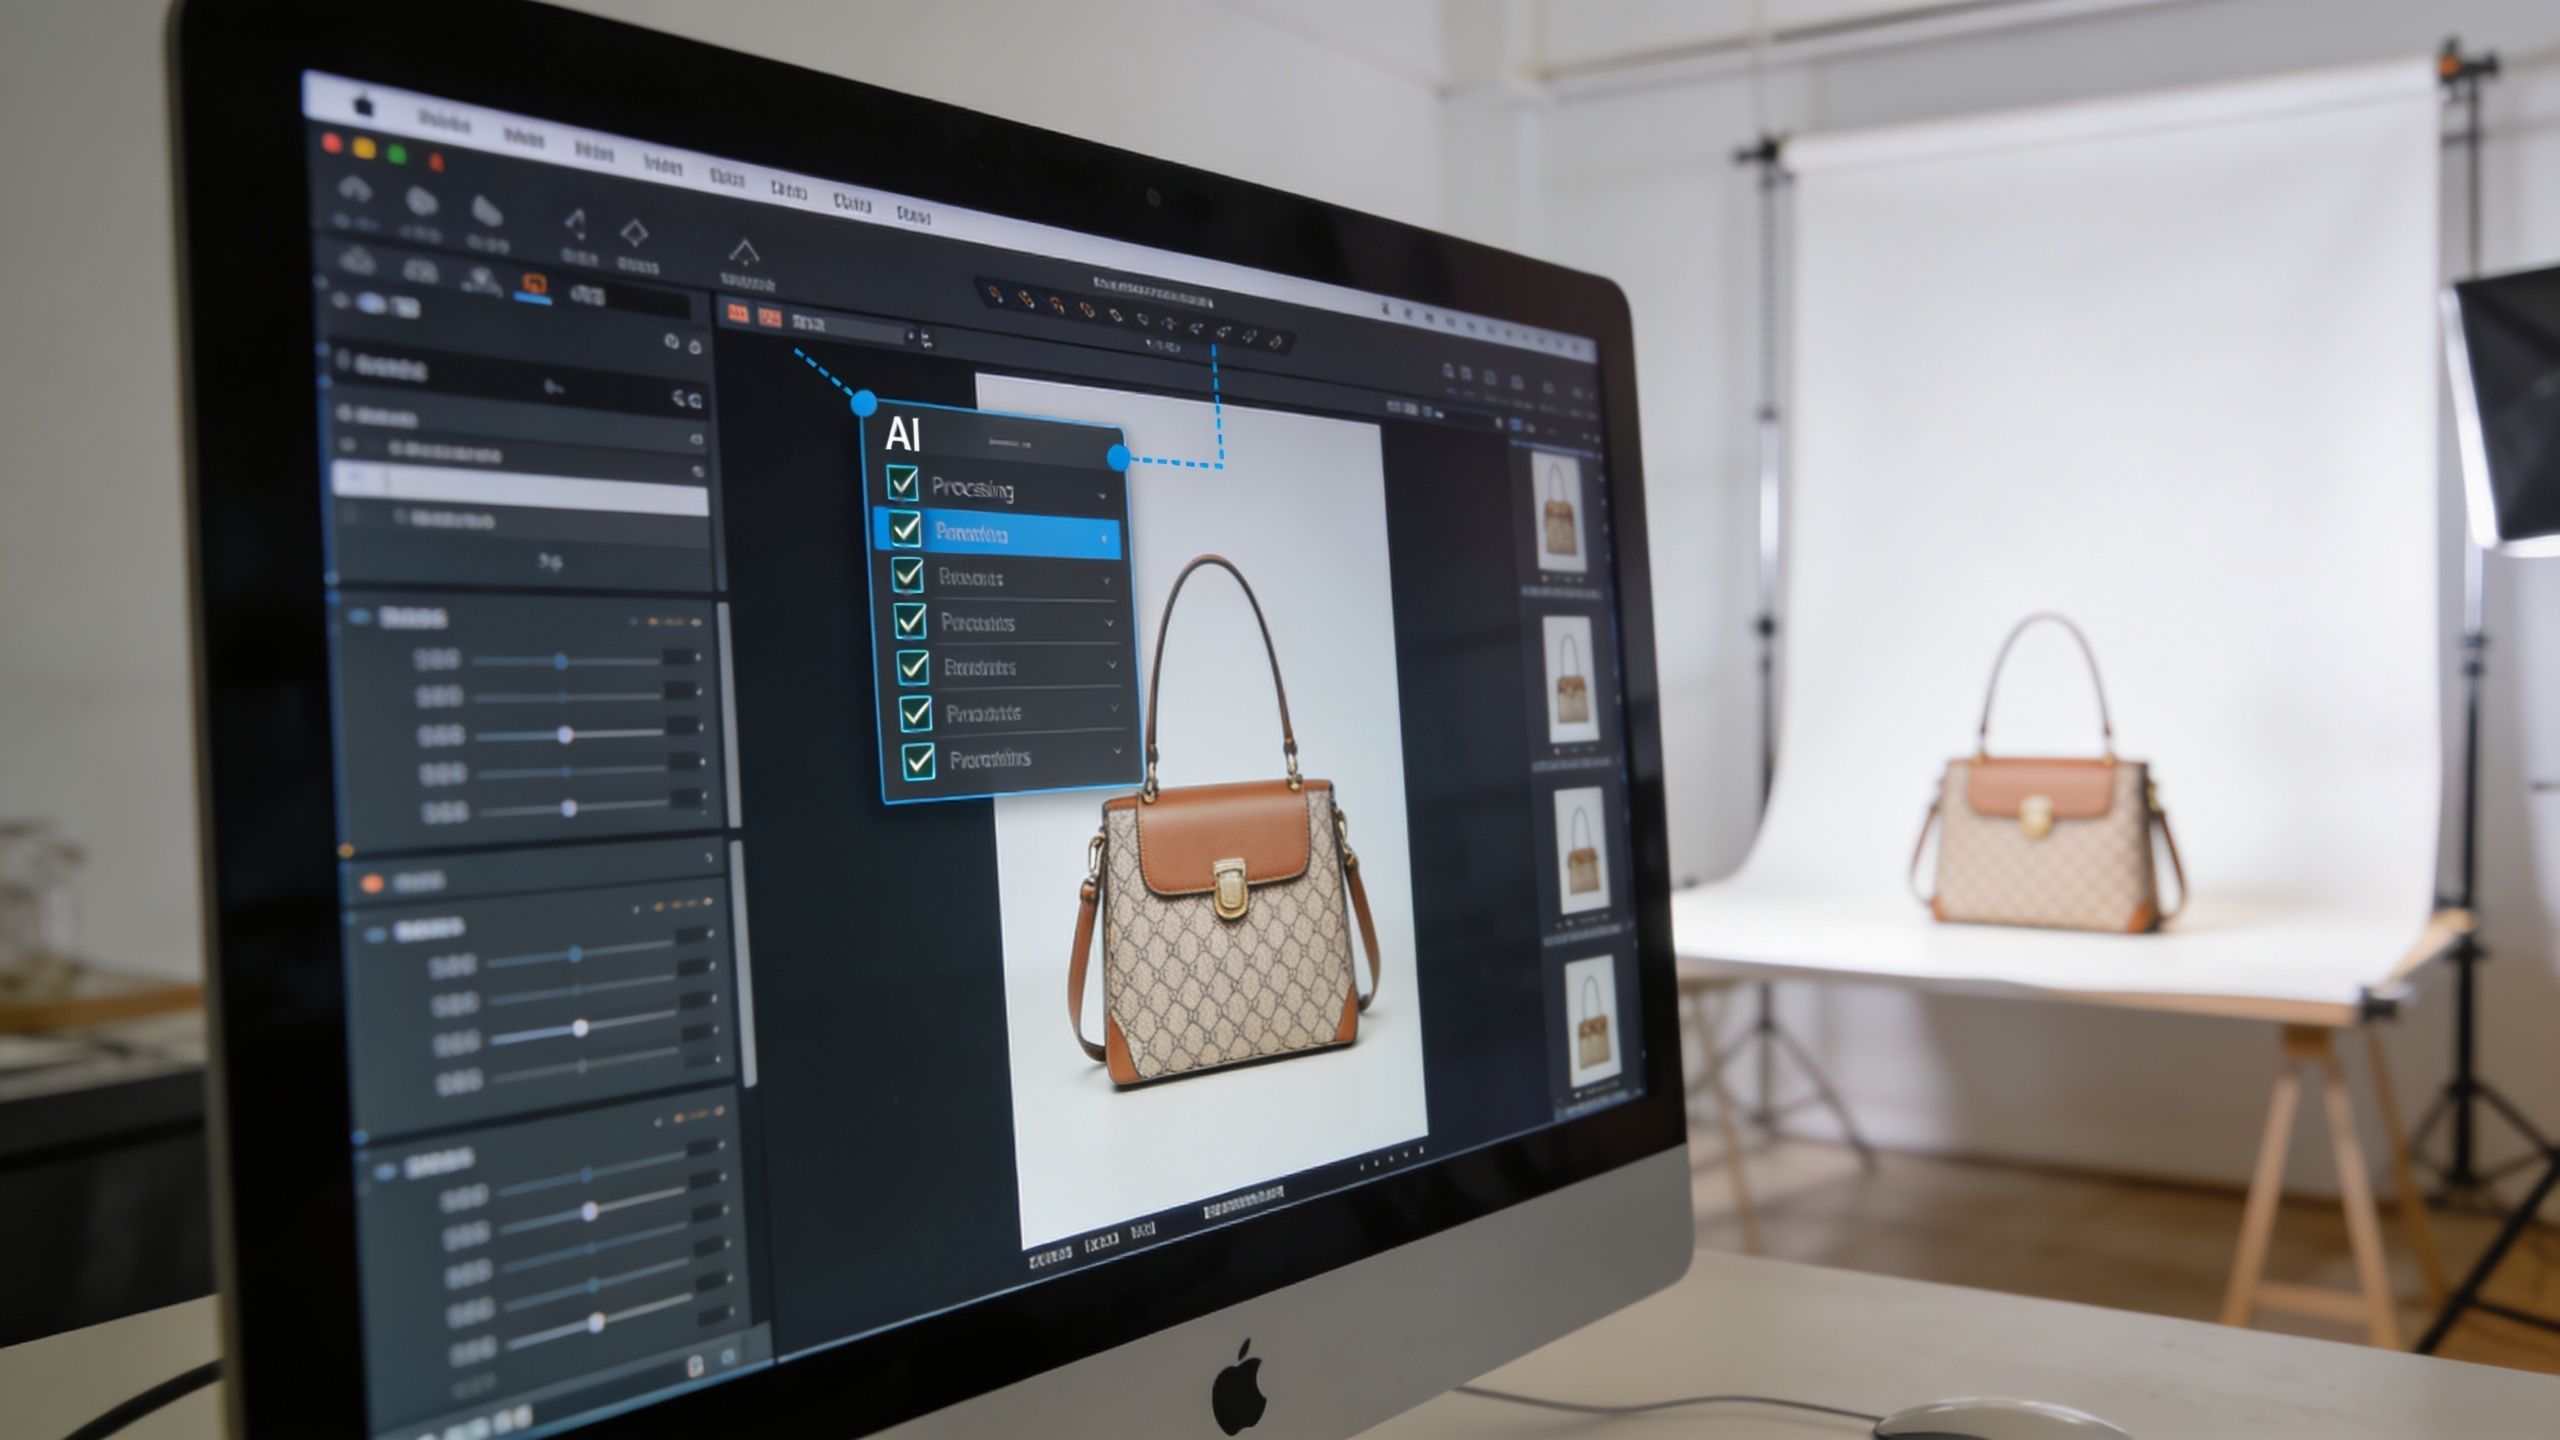
Build a batch around consistency cues
Start each product family or lighting setup with a reference frame. A colour checker or neutral reference in the first shot gives you a baseline for the rest of that series. You don’t need to include it in final exports. You need it so the batch has a shared anchor if white balance or tone needs adjustment.
Next, frame with room to crop. Sellers often shoot too tight because the image “looks finished” in camera. That creates trouble later when one file needs to become square for Shopify, another more vertical for a marketplace gallery, and another tighter for social ads. Negative space is cheap during capture and expensive once lost.
For apparel teams in particular, consistent garment presentation matters as much as backdrop control. If you handle clothing regularly, this practical guide to mastering clothing product images is worth reviewing alongside your backdrop and lighting SOPs.
Use a file system that survives growth
A small folder named “new product shots” works until you have six similar folders and no one remembers what was final. Use names that describe the product, angle, and sequence in a way another person could understand without asking you.
A practical pattern is:
- Product identifier
- View or angle
- Colourway or variant
- Sequence number
That structure helps whether you’re editing manually, sending files to a retoucher, or preparing them for a batch workflow. It also makes it easier to isolate problem groups if one lighting setup went off course.
Don’t flatten your options too early
Many sellers bake in heavy edits too soon. They crop tightly, export compressed files, then realise they need alternate placements for different channels. Keep your master set flexible for as long as possible.
That means:
- Retain original framing where possible: You can always crop later.
- Keep background and subject separation clean at source: That gives you more freedom for alternate outputs.
- Export with marketplace needs in mind: Think about white-background compliance, square storefront layouts, and high-resolution listing images before you create finals.
If you need a simple explainer on the mechanics of automated cut-outs, this piece on Canva remove background workflows is a helpful baseline. The main point is that all background tools work better when the source image is consistent.
Clean capture doesn’t remove the need for workflow discipline. It makes workflow discipline pay off.
A practical pre-processing checklist
Before sending a set into any batch system, confirm these basics:
Reference shot included
First image in each lighting group contains your colour or neutral reference.Framing leaves room for alternate crops
No product is pushed so tight that square, vertical, and marketplace-safe crops become awkward.Naming is systematic
The file name explains what the image is without opening it.Angles are grouped logically
Fronts with fronts, details with details, variants with variants.Problem files are removed early
Blur, glare, obvious wrinkles, and accidental duplicates should be culled before processing.
If you’re editing one image, these habits feel optional. If you’re processing collections, they’re the difference between a smooth pipeline and a messy folder full of near-matches and rescue jobs.
Frequently Asked Questions About Studio Backdrops
What’s the best studio photo backdrop for a growing online store
If the goal is clean catalogue images and predictable editing, continuous paper is usually the strongest starting point. It gives you a matte, consistent surface and makes it easier to keep sessions visually matched over time.
If your products regularly spill, stain, or scratch the set, vinyl can still be sensible. Just expect to spend more attention on glare control.
Can I use one backdrop for every product category
You can, but that doesn’t mean you should. One backdrop colour and material often works for most of a catalogue, especially if your listings need a consistent store look. But very pale products, reflective items, and textured goods sometimes benefit from a different tone or lighting setup even when the overall workflow stays standardised.
The mistake is forcing every product into one visual recipe when a small adjustment would produce cleaner source files.
Are collapsible backdrops professional enough
They can be, within limits. For small products, quick content days, and tight workspaces, they’re useful. For apparel, grouped items, and any setup that needs a proper floor sweep, they tend to become restrictive.
A collapsible backdrop is best treated as a mobile tool, not a full replacement for a robust studio system.
How often should I replace or refresh a backdrop
Replace paper when marks, dents, or uneven wear become visible in the frame. Refresh sooner than you think you need to if you’re shooting a large batch. Reuse is only economical when the backdrop still saves time overall.
For fabric and vinyl, maintenance matters. Store them carefully, keep them clean, and inspect them before every session instead of assuming they’re fine because they survived the last one.
Do California sellers need to think about compliance
Yes. In California, studio backdrops used for product photography should comply with Prop 65 for low-VOC materials and AB 1200 for fire-retardant requirements. This is often overlooked by the state’s 25,000+ product photographers, and 72% of Etsy and Depop sellers risk fines by using non-certified materials, according to this California-focused compliance reference.
If you’re buying vinyl, muslin, or modular panels for a dedicated studio, ask for compliance documentation before treating them as a long-term fixture.
What if I want something more branded than plain paper
That depends on the job. For marketplace listings, plain controlled backgrounds usually make life easier. For events, launches, social content, or brand activations, custom setups can make sense. If you’re exploring more decorative or branded installations, these custom photo booth design options show the kind of thematic backdrop direction that works well outside pure catalogue photography.
Just keep your listing workflow separate from your campaign workflow. Brand theatre is useful. Batch consistency is different.
Is a cheap stand good enough if I’m just starting
Only if you’re shooting very lightly and understand the trade-off. The stand isn’t where I’d cut corners for long. Weak support systems create drift, sag, and inconsistent framing, which then creates extra editing work.
If budget is tight, I’d start with one dependable stand and one reliable backdrop material instead of several low-cost pieces that all need workarounds.
If your catalogue keeps growing, the capture stage needs to work like the start of a system, not a one-off shoot. MerchLoom helps turn that consistency into usable outputs by processing full image collections through chained AI steps such as background removal, reframing for marketplaces, colour correction, and upscaling. It’s built for sellers and teams who need batch-ready results without rebuilding the workflow for every new product drop.
Stop editing product photos one at a time
Upload your catalog or connect your store. Describe the result once. MerchLoom does the rest.
Try it free — no signup