
Canva Remove Background: A Seller's Guide for Batches
Learn to use Canva remove background for your product photos. A guide for e-commerce sellers on when it works, when it fails for batches, and what to do next.
A new batch of product photos lands in your inbox. Maybe it’s a seasonal drop for Shopify, a thrift haul for Etsy, or another run of apparel SKUs that all need clean listing images before the end of the day. The exciting part lasts about five minutes. Then the editing starts.
That’s where canva remove background usually enters the conversation. It’s fast, familiar, and good enough to rescue a single product shot without opening heavier software. For one mug, one candle, one tote bag, it feels like magic. For a catalogue, it can turn into repetitive labour very quickly.
The question isn’t whether Canva can remove a background. It can. The better question is whether it still makes sense once your store grows past a handful of images and you need consistent outputs for multiple marketplaces. That’s where sellers get stuck, because a tool that feels efficient on image six can become the bottleneck on image sixty.
The Reality of Product Photos for Online Sellers
A batch of product photos can look manageable at 9 a.m. By lunch, you are still fixing edges on image 27, renaming files by hand, and trying to make one supplier photo match the rest of your catalog. That is the core job for online sellers. Image editing is part quality control, part marketplace compliance, and part time management.
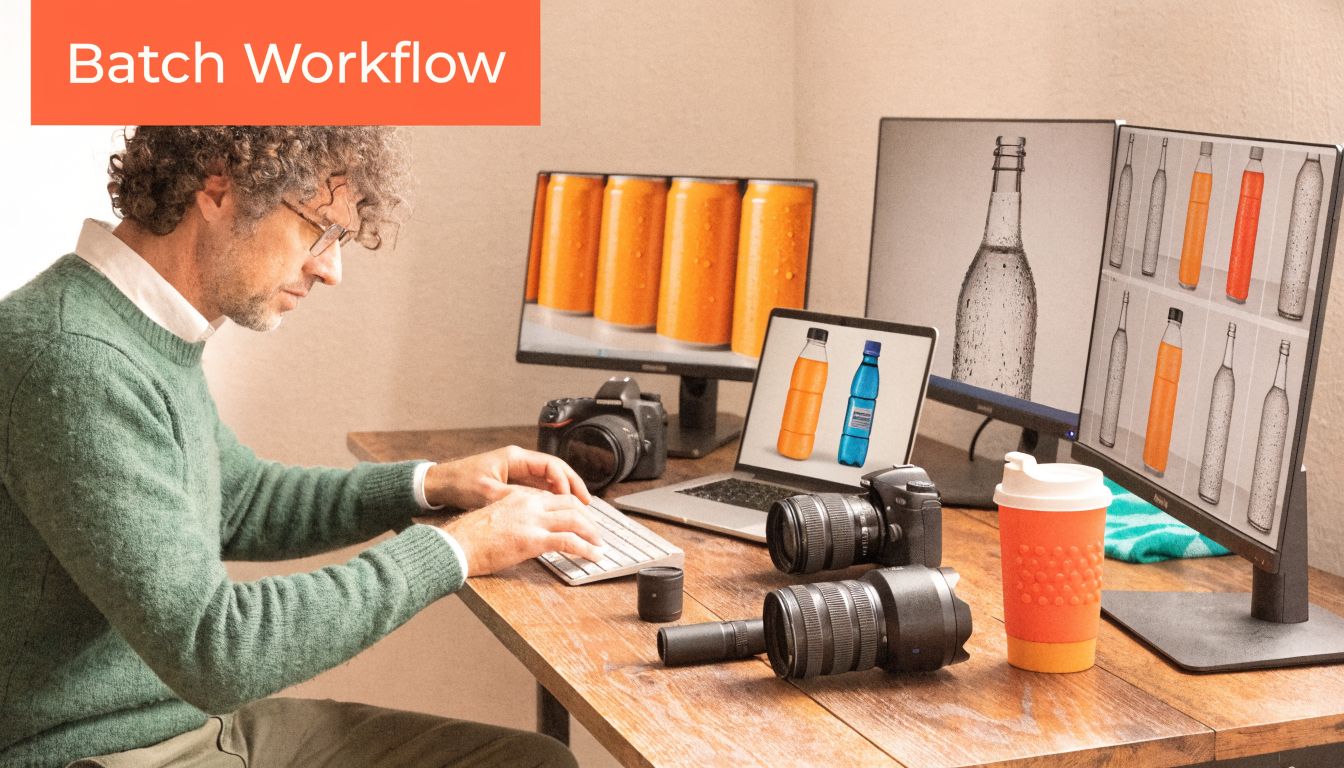
Clean images help listings look credible. Consistent images help the whole store sell. Those are different problems, and sellers usually feel the second one first.
The friction shows up fast in real catalogs. One collection was shot near a window and looks warm. Another came from a supplier on a gray background with uneven shadows. A third needs to meet Amazon’s white-background expectations, while your Shopify collection pages need square crops and Etsy still rewards images that feel polished without looking mass-produced. Canva can help with part of that cleanup, but it does not remove the operational mess that created it.
Where Canva fits
Canva is useful for straightforward product photos with clear separation between the item and the background. A mug, notebook, bottle, or folded shirt on a simple surface is usually fine. For those jobs, it saves opening heavier software and gets a usable result quickly.
It also works better when the photography is disciplined from the start. Good light, clean contrast, and predictable framing reduce cleanup time in any editor. If your team still needs to tighten the basics, this guide on how to take professional product photos is worth reviewing.
Clean source photos save more editing time than any retouching trick.
Where sellers start losing time
The cost is not the click. It is the repetition.
Canva’s one-at-a-time workflow is fine for a few hero images, a rushed restock, or a quick test listing. It gets expensive once you are processing dozens of SKUs and each file needs the same sequence. Upload, remove background, inspect edges, restore missing details, export, rename, resize, repeat. None of those steps is hard. Together, they turn into hours.
That is usually the breaking point for growing stores. Sellers assume Canva is the cheaper option because the tool is already in the stack. In practice, manual cleanup can cost more in staff time than a dedicated batch workflow costs in subscription fees. I have seen this happen with apparel, jewelry, and home goods. The images are simple enough for Canva one by one, but the catalog volume makes that approach drag.
Manual editing also introduces drift. The first set gets careful alignment and edge checks. Later files get rushed. A bracelet sits slightly off-center. A glass jar keeps a faint halo. One export is transparent PNG, another is a compressed JPG because someone clicked too quickly. Customers may not name the problem, but they notice when a storefront looks uneven.
If your source photography still needs work before you touch background removal, this walkthrough on how to make product photos look professional covers the prep that prevents cleanup headaches later.
Mastering the One-Click Canva Background Remover
A seller gets 12 new SKUs from a supplier, needs clean main images by the end of the day, and does not have time to open Photoshop for every file. That is the job Canva handles well. It gives you a fast first cut on simple product shots, especially when you need a usable image now and perfection can wait.

You need Canva Pro to use BG Remover. On desktop, upload the image, place it on the canvas, click Edit image, then choose BG Remover. On mobile, the tool is available too, but small screens make it harder to inspect corners, interior cutouts, and thin edges. For product listings, desktop is the safer setup.
The best results come from clean source photos. A mug, candle, notebook, or box with a clear outline against a plain background usually cuts out well in one click. Canva is less dependable with products that have fine texture, shine, transparency, or soft edges.
The basic workflow stays simple:
- Upload a JPG or PNG product photo.
- Add it to your canvas.
- Open Edit image and select BG Remover.
- Let Canva generate the cut-out.
- Export as PNG if you need a transparent background.
That speed is the reason sellers keep using it. For a handful of images, it is often faster to click through Canva than to set up a heavier editing workflow.
Where Canva works, and where it starts costing time
Canva’s background remover is usually accurate enough for straightforward products, but it is still an automatic mask, not a careful retoucher. In real catalog work, that matters. A flat-lay T-shirt with visible fibers, a glossy supplement bottle, or a jar with a transparent edge can look fine at first glance and still fail once you zoom in.
I treat Canva’s result as a draft whenever the product has any of these traits:
- fuzzy or frayed edges
- reflective packaging
- transparent plastic or glass
- thin parts such as straps, chains, or handles
- shadows that blend into the backdrop
Those are the files that subtly consume time. One image is quick. Twenty similar images turn into manual cleanup, one by one, and that is where Canva’s economics start to shift for a growing store.
If you need tighter control than Canva gives you, this guide on how to remove background in Illustrator shows where manual path-based cleanup still wins. If the job goes beyond background removal and into cleanup of props, dust, or stray packaging marks, these advanced AI tools for removing objects from photos are also worth comparing.
Practical rule: If the image has texture, transparency, or fine detail, do not approve the one-click result without zooming in.
A quick visual walkthrough helps if you are training a VA or handing the process to someone on your team:
Desktop versus mobile for sellers
Mobile is fine for a rushed social post or a last-minute listing fix. It is weak for quality control. Tiny edge defects around earrings, seams, bottle caps, and handle cutouts are easy to miss on a phone, and those mistakes become obvious on a marketplace zoom view.
Desktop also keeps the workflow more disciplined. You can compare versions side by side, check consistency across similar SKUs, and export files with cleaner naming. That does not solve Canva’s one-at-a-time limitation, but it does reduce avoidable errors while the volume is still manageable.
Refining Edges for Marketplace-Ready Quality
The one-click result is rarely the result you should publish immediately. Sellers usually discover that the hard part isn’t removing the background. It’s cleaning the edges well enough that the product still looks real once it sits on white.
For Canadian sellers, Canva shows a 20% to 30% failure rate on high-detail images such as vintage apparel, with users reporting edge artifacts in 25% of cases. The cleanup stage often needs 10% to 15% manual intervention with tools like Magic Eraser, according to these Canva AI background remover reviews.
How to refine without making the cut-out look worse
The first mistake sellers make is using a brush that’s too large. When you erase aggressively around a sweater cuff or necklace chain, you flatten the natural edge and the product starts looking clipped rather than photographed.
A better approach:
- For fuzzy fabrics: Use a smaller brush and work slowly around the outer halo instead of trying to carve a perfectly hard edge.
- Inside cut-outs: Zoom into spaces like handbag handles, sandal straps, and jewellery links. Those missed interior gaps make listings look rushed.
- Hair and fibres on mannequins: Restore first, then erase less. If you keep erasing, you’ll usually lose too much shape.
- Reflective packaging: Check corners and transparent windows carefully. These are common failure areas.
Product types that usually need extra attention
Apparel is the obvious trouble spot, but it’s not the only one. Canva can also struggle with:
- Vintage pieces that have frayed edges, lace, sequins, or uneven textures
- Jewellery where thin chains or prongs blend into the original backdrop
- Glass and acrylic products that rely on subtle transparency
- Soft goods like plush toys, sherpa, felt, and knitwear
If the product edge is part of what makes the item feel premium, don’t trust a one-click export without zooming in.
A lot of cleanup problems overlap with object removal rather than simple background work. If you also need to remove stands, dust, props, or hanger traces, these advanced AI tools for removing objects from photos are useful to compare before you commit to a long retouching session.
A workable cleanup routine
When I review product cut-outs, I use a simple order that prevents wasted effort:
Doing this for a whole catalog?
MerchLoom runs background removal, upscaling and AI editing across every product photo you have — one prompt, whole batch.
Try MerchLoom- Check the full silhouette first. Look for obvious missing corners or clipped product parts.
- Zoom into failure zones. Handles, hems, chains, tassels, and transparent surfaces come next.
- Place the cut-out on white. Flaws often appear more clearly once the transparent PNG sits on a clean background.
- Export and re-open if needed. Some issues only become visible outside Canva in the final file preview.
If your image still has heavy ground shadows or murky edge shadows, it helps to handle that separately before final export. This guide on removing shadow from a photo covers the kind of cleanup that makes a cut-out look cleaner without over-erasing the product itself.
Exporting for Amazon Shopify and Etsy Listings
A transparent PNG isn’t the finish line. It’s just the raw cut-out. Sellers still need to turn that cut-out into listing-ready assets for each platform they use.
That’s where Canva starts feeling more like a design tool than a catalogue workflow tool. It can absolutely export transparent PNGs, but it doesn’t solve the broader e-commerce problem of making one source image fit several marketplaces cleanly. As noted in this video on marketplace-specific workflow gaps, sellers often need outputs for Amazon, Etsy, and Instagram at the same time, and that multi-output process isn’t built into Canva’s single-image flow.
What I’d do for each marketplace
For Amazon, the product usually needs to sit on a pure white background and fill the frame strongly without feeling cropped. In Canva, that means placing your transparent cut-out onto a new white canvas, resizing carefully, and checking that the subject feels central and substantial.
For Shopify, square images usually make collection pages look more consistent. Even if your product photos begin in mixed orientations, you’ll want a stable square presentation for browsing pages so the grid doesn’t look chaotic.
For Etsy, larger polished images often work better, especially when the product has handmade detail or texture buyers want to inspect. The platform rewards clarity and character, but the images still need to feel tidy.
The friction point nobody talks about
The export pain isn’t a single image. It’s repetition across a catalogue. A seller with one batch of apparel might need:
- a white-background version for one marketplace
- a square crop for the storefront
- another version framed differently for social commerce
- a larger polished export for detail-driven listings
Doing that one by one in Canva is possible. It just isn’t efficient.
A clean cut-out can still fail as a listing image if the framing is wrong for the platform.
A practical Canva workflow for compliance
If you’re staying inside Canva, keep the process disciplined:
- Remove the background and export transparency only after checking the edges.
- Create separate templates for each marketplace size you need.
- Drop the cut-out into each template rather than rebuilding from scratch every time.
- Keep the product centred in a repeatable way across the range.
- Save exports with platform-specific names so your uploads stay organised.
The weakness here is obvious. You’re still manually recreating the same production logic image after image. That’s manageable for a launch with a few products. It gets draining once your catalogue expands.
The Breaking Point When Canva Stops Making Sense
Canva is good at helping a seller finish a task. It’s less good at running a production workflow. That distinction matters once image editing becomes a recurring operational job instead of a quick design chore.
The biggest break point is volume. Canva’s BG Remover is limited to 500 images per 24 hours and lacks native batch processing, which creates a serious workflow gap for sellers handling large catalogues, as discussed in this analysis of Canva’s volume limits.
The real cost isn’t the subscription
Most sellers underestimate the cost of manual editing because they only think about software price. The bigger cost is time spent on repetitive image handling when you should be listing products, sourcing stock, fixing returns, or launching campaigns.
A one-at-a-time workflow usually includes all of this:
- upload the image
- apply background removal
- inspect the result
- fix edge issues
- export the file
- rename it properly
- place it into another canvas if you need alternate formats
- export those versions too
None of those actions are difficult. The problem is that they stack.
When the workflow starts breaking
Canva still makes sense when:
- You’re editing a small set: A handful of hero images, ad creatives, or urgent listing fixes.
- Your products are simple: Bottles, mugs, boxes, and other clean-edged subjects usually behave well.
- You don’t need multiple outputs: One transparent PNG or one polished social image is manageable.
It starts to fall apart when:
- Your listings arrive in batches: Seasonal drops, thrift sourcing days, or supplier refreshes create volume fast.
- Your products are messy to isolate: Apparel, jewellery, textured goods, and transparent surfaces trigger rework.
- You sell across channels: The same SKU needs different framing and formatting depending on platform.
If your photo editing process feels like admin work, you’ve already crossed the line where convenience stopped being efficient.
Workflow comparison
| Metric | Canva Pro (Manual Workflow) | MerchLoom (Batch Workflow) |
|---|---|---|
| Background removal style | One image at a time | Entire collections processed in batches |
| Daily volume handling | Limited by Canva’s one-by-one workflow and 500 images per 24 hours | Built for high-volume catalogue processing |
| Multi-step editing | Manual repetition across separate actions | Chained AI pipeline across multiple steps |
| Marketplace outputs | Manual resizing and reframing per image | Smart reframing for marketplace-ready exports |
| Reprocessing edits | Rework usually means repeating parts of the workflow | Pipeline-based iteration without restarting from scratch |
| Cost pattern | Subscription plus labour time | Pay-per-image workflow aimed at processing volume |
The key issue isn’t whether Canva works. It does. The issue is whether your business benefits from spending skilled time on repetitive production.
That’s also why sellers often start looking into more task-specific alternatives and older fallback methods when Canva gets slow or fiddly. Even a simple reference like creating a transparent background in Paint can remind you how much manual image prep drains time once you scale past hobby-level volume.
A better way to think about the switch
Don’t switch tools because Canva is bad. Switch because your workflow changed. The needs of a small shop with a few new listings each week are different from the needs of a growing store handling regular product batches.
Once consistency, speed, and multi-platform output matter more than one-click convenience, the economics change. At that point, the manual path often costs more in labour than a dedicated batch solution costs in money.
Scaling Your Workflow with True Batch Processing
A growing catalog exposes Canva’s real limit fast. Ten new SKUs feels manageable. Fifty starts eating an afternoon. A few hundred turns background removal into production work, and one-by-one editing stops being a design task and starts becoming an operations problem.
That is the point where cost shifts from software to labor. If someone on your team has to upload, remove the background, check edges, resize, export, rename, and repeat for every image, Canva can end up being the expensive option even if the monthly subscription looks cheap.
What a scalable workflow looks like
Stores that handle volume well usually standardize the process before they change tools. The workflow is simple, but it has to be repeatable:
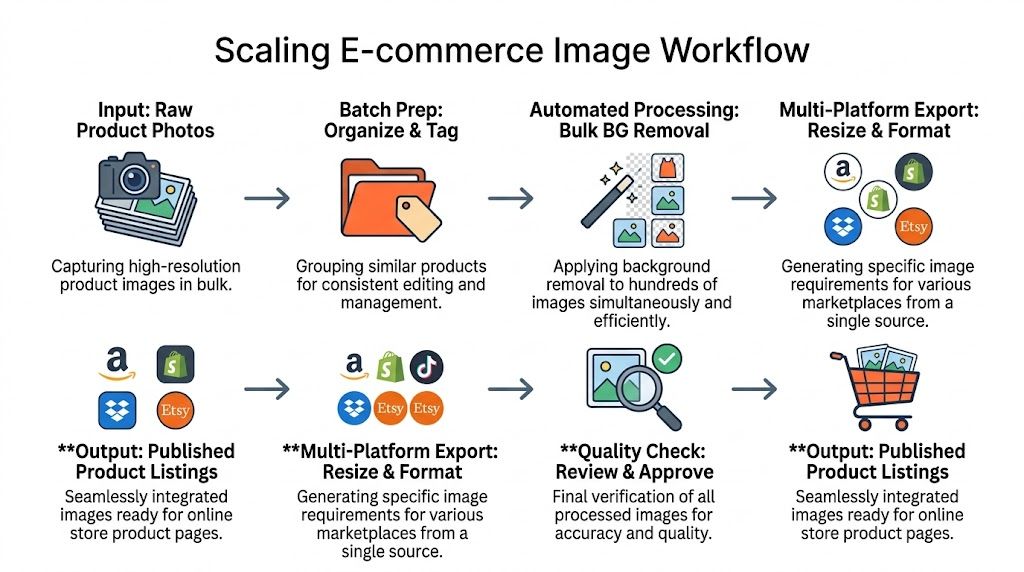
- Sort images before editing: Group by product type, shoot style, or destination channel.
- Process in batches: Apply the same background removal and framing rules across a set, not one file at a time.
- Generate channel-specific outputs: Keep a master version, then create Amazon, Shopify, and Etsy variants from it.
- Check exceptions, not every file: Review the images that fail or look off instead of manually babysitting the whole batch.
Why chained processing matters
Batch work is not just background removal. Sellers usually need a sequence. Cut out the subject. Clean the canvas. Center it consistently. Resize for each marketplace. Export in the right format. Save with usable file names. Canva can handle parts of that, but it still asks you to supervise too many clicks once volume rises.
I have seen this happen in growing stores again and again. Canva remains fine for testing a new product line, refreshing a few hero images, or fixing a small batch from a supplier. It becomes a bottleneck when image prep is tied to every launch, restock, and seasonal update.
If your supplier photos are also soft or undersized, this HD photo converter guide helps clarify where resolution cleanup fits in the pipeline and where it just adds another manual step.
The practical goal is consistency at speed. Once your team needs full collections processed the same way every time, a true batch system usually makes more financial sense than asking staff to keep pushing files through Canva one at a time.
If you’re at the point where Canva still works but your catalogue volume doesn’t, take a look at MerchLoom. It’s built for sellers who need to process full collections, chain steps like background removal and marketplace reframing, and keep moving without getting buried in one-image-at-a-time editing.
Stop editing product photos one at a time
Upload your catalog or connect your store. Describe the result once. MerchLoom does the rest.
Try MerchLoom