
How to remove background in Illustrator for your E-commerce Catalog in 2026
Learn how to remove background in Illustrator with our simple guide. Perfect for e-commerce product photos. Get clean, professional images fast.
When you need to remove a background in Adobe Illustrator, you’re usually looking at one of a few common methods: Image Trace, the Pen Tool with Clipping Masks, or maybe an Opacity Mask. Each of these can get you a clean, transparent background, which is essential for professional-looking product listings.
But let’s be real. We’re not talking about meticulously editing one perfect hero shot. We’re talking about the hundreds—or even thousands—of product photos from your last shoot. This is the reality for anyone selling on platforms like Amazon, Shopify, or Etsy. Your world isn't about artistic perfection on a single image; it's about getting your entire product line live and selling, fast.
The real grind starts when you’ve got a massive folder of images that all need to be prepped to meet different marketplace specs. You might need a pure white background for Amazon, a perfectly square image for Shopify, and maybe a 2000px wide version for Etsy. The biggest challenge? Keeping everything consistent across an entire catalogue while moving quickly enough to keep up with new inventory.
The Illustrator Bottleneck for E-commerce Sellers
Adobe Illustrator is an absolute powerhouse for vector work like logos and illustrations. Many of us learned it years ago and feel right at home in it. But when you try to use it for batch photo editing—especially background removal for an entire e-commerce catalogue—it quickly becomes a major bottleneck.
A process that feels manageable for one photo becomes a monumental task when you multiply it by 500. The very nature of its best tools—manually drawing paths, fussing with trace settings, and cleaning up stray pixels—is precise but incredibly time-consuming. This is where the workflow breaks down for scaling brands. The tool you know and trust for design work starts costing you far more in time and money than it's worth for production photography.
And the numbers don't lie. A 2026 survey focusing on e-commerce sellers found that 68% of Shopify store owners using manual methods spend an average of 45 minutes per image using the Image Trace method alone.
For a fashion retailer with 500 new products, that adds up to over 375 hours of tedious manual work. At a typical freelance rate, that could cost upwards of $18,750 per collection. It's a huge drag on efficiency, yet many sellers stick to it simply because they’re just so used to Adobe's software. You can dive deeper into these findings and see how manual editing time accumulates in this Mockey.ai analysis.
This manual process—placing an image, tracing it, expanding the shape, and then deleting the background remnants—fails for roughly 40% of complex products. For sellers handling thousands of listings, this isn't just inefficient; it's unsustainable.
Time and Cost of Illustrator Methods vs Automation
Here’s a realistic breakdown of processing 500 product images for your catalogue using different workflows, highlighting the true cost of manual editing.
| Method | Time per Image | Total Time (500 Images) | Estimated Cost (at $25/hr) |
|---|---|---|---|
| Illustrator (Image Trace) | 10-20 minutes | 83-166 hours | $2,075 – $4,150 |
| Illustrator (Pen Tool/Paths) | 15-45 minutes | 125-375 hours | $3,125 – $9,375 |
| Automated AI Tool | ~15 seconds | ~2 hours | ~$10-$50 (subscription fee) |
As you can see, what feels like a "free" method using software you already own quickly becomes your most expensive option when you factor in labour. The time saved with automation can be reinvested directly into marketing, customer service, and growing your business.
Why Batch Workflows Matter More Than Single-Image Perfection
For an online seller, the end goal isn’t one stunning photo; it’s a cohesive, professional-looking storefront. Consistency is what builds trust and makes a brand look polished and reliable. When every product has the exact same background colour and framing, customers notice. You can find more detail on creating professional listings in our guide to getting clean images with a white background.
Trying to achieve this with manual methods in Illustrator is a constant battle. Each image is its own little project, inviting tiny variations in lighting, cropping, and alignment that really add up across a large catalogue.
This is where you need a shift in mindset—from thinking about individual image edits to focusing on catalogue-scale processing. Modern tools built for e-commerce, like MerchLoom, are designed for this very problem. It processes entire image collections through chained AI pipelines, turning what used to be a multi-day ordeal into a task that takes just a few minutes.
Using Image Trace for Simple Product Batches
Ever found yourself with a mountain of new product photos, all needing their backgrounds stripped out before you can get them on your store? When you're in a pinch, it's tempting to reach for Illustrator’s Image Trace tool. For a handful of simple, hard-edged items—think books, electronics, or basic housewares—it can feel like the fastest way to get the job done.
Think of it as a blunt instrument. It's quick, but it's not exactly a scalpel.
The process itself is pretty simple. You just drop a product photo onto your artboard and fire up the Image Trace panel (you can find it under Window > Image Trace). The 'High Fidelity Photo' preset is usually the best place to start, as it does its best to hold onto the original colours and details. This first pass converts your pixel-based photo into a bunch of vector shapes.
Refining the Initial Trace
Now for the part that makes this method viable for batch work: the 'Ignore White' checkbox. It's tucked away in the advanced settings of the Image Trace panel. Ticking this tells Illustrator to automatically try and discard all the white areas. If you've shot your products against a clean, white background, this one click can save you a ton of cleanup.
A quick heads-up from experience: for this technique to work smoothly, your photos need to be high-contrast with a super clean, evenly lit background. Any shadows, off-white spots, or stray clutter will just get turned into more vector junk you have to delete manually.
Once the trace is done, you have to commit the changes by Expanding the object (Object > Expand). This turns your trace into a group of editable vector paths. From there, you'll probably need to right-click and Ungroup the shapes a few times to get at the leftover background bits. Then, using the Direct Selection Tool (A), you can click and delete those stray fragments one by one.
This is where the time sink begins, and it really puts the manual effort into perspective compared to modern, automated alternatives.
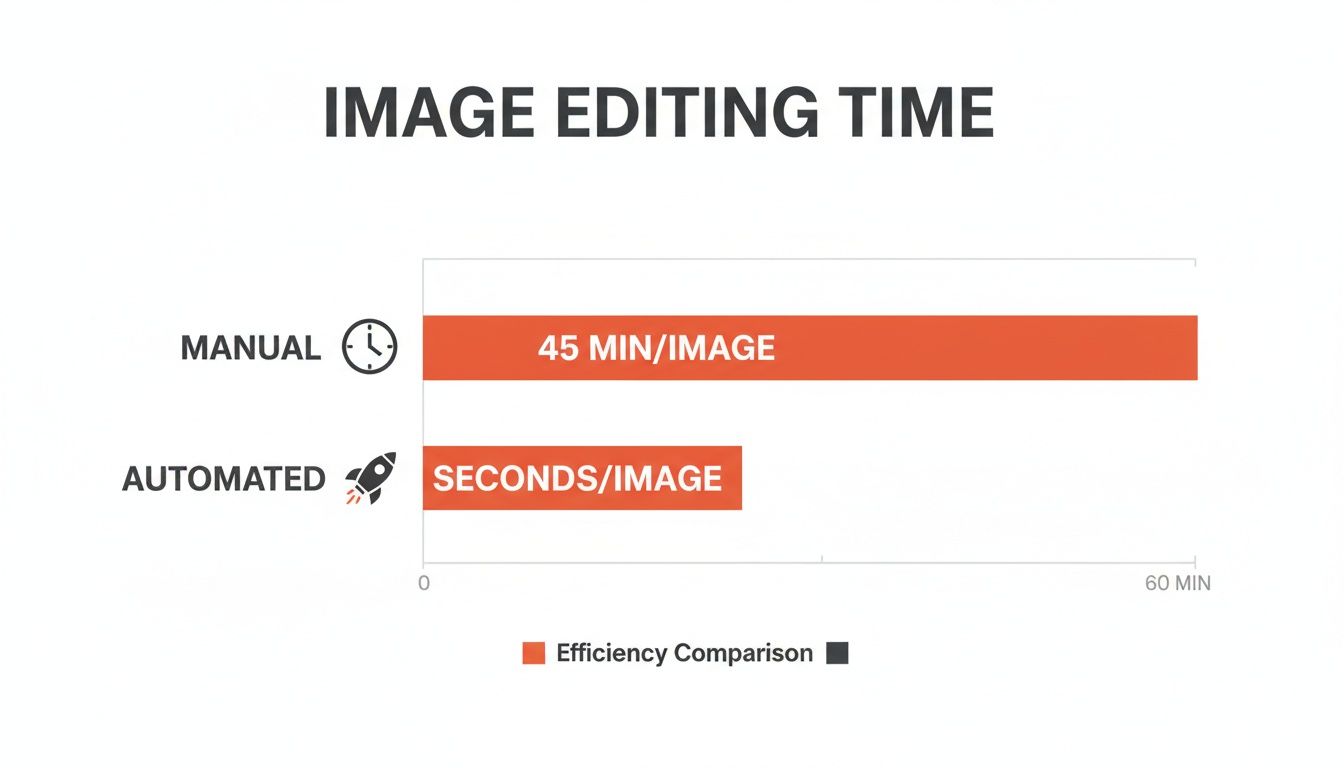
As you can see, the minutes you spend on one image quickly spiral into hours—or even days—when you're working through a whole catalogue. An automated solution can clear that same workload in a tiny fraction of the time.
The Limitations for E-commerce Catalogues
While Image Trace might seem like a handy shortcut, its flaws become glaringly obvious when you're managing a real e-commerce catalogue.
- Loss of Detail: Image Trace simplifies your photo. For anything with subtle textures, gradients, or fine details, this can leave your product looking flat or "cartoonish"—not exactly a great look when you're trying to build customer confidence.
- Inconsistent Results: The tool's success is completely dependent on each photo's lighting and quality. Run a batch of 50 photos through, and you'll likely get 50 slightly different results. This forces you to tweak the settings for each one, which totally defeats the purpose of a fast batch process.
- Massive File Sizes: A high-fidelity trace can create an astonishingly complex vector file with thousands of individual paths. These files get huge, fast, and can make Illustrator grind to a halt. We actually explore how file properties impact performance in our guide to understanding resolution in AI-powered workflows.
So, what's the verdict? For a seller with just a few simple, high-contrast items, Image Trace can be a decent starting point. But the moment your product count grows or you introduce anything with texture (like apparel or jewellery), the time you spend on cleanup just doesn't add up. This is usually the point where sellers realise they need a more scalable tool—something like the AI pipelines in MerchLoom, which are built from the ground up to handle entire product collections with the consistency and efficiency that e-commerce demands.
Creating Precise Clipping Masks with the Pen Tool
So, Image Trace turned your beautiful product photo into a bit of a cartoonish mess? I’ve been there. When you’re dealing with high-value items where every detail counts—think the clasp on a necklace, the crown of a watch, or the intricate legs of a chair—you need a more hands-on approach. This is where the Pen Tool and a Clipping Mask become your best friends in Adobe Illustrator.
This isn’t about just deleting pixels; it’s a much smarter technique. You're essentially drawing a perfect vector outline around your product that acts like a custom cookie-cutter. The magic is that it's a non-destructive process. It only hides the background, which means if you ever need to adjust the cutout, you can just tweak your path instead of starting all over again.
A Workflow for High-Value Products
I know, the Pen Tool has a scary reputation. But for this kind of e-commerce work, you really only need to master a couple of key moves. You’re not trying to become a digital Picasso; you’re just tracing an outline efficiently.
First, grab the Pen Tool (P). Here's a little trick that saves a lot of headaches: set your Fill colour to 'None' and your Stroke to a bright, obnoxious colour like neon green or magenta. This way, you can clearly see the path you're drawing without it covering up the very edges you're trying to trace.
Start clicking around your product to place anchor points. Straight edges are easy—just click from point to point. For curves, you’ll click and drag. This pulls out “handles” that let you bend and shape the line. A core principle here is to use as few points as possible; this is the secret to getting those smooth, professional-looking curves.
After tracing thousands of products, my best advice is to think in arcs. Don't try to trace a curve with a bunch of tiny little clicks. Instead, look for the start and end of a curve, click at each point, and then drag the handles to match the object’s contour. You’ll get a much cleaner result in half the time.
Once you’ve made it all the way around the object and clicked back on your very first anchor point to close the path, the hard part is over.
Now, just switch to the Selection Tool (V), click on your new path, then hold the Shift key and click on the product image itself. With both selected, hit Command+7 on a Mac or Ctrl+7 on Windows. Just like that, the background is gone, leaving a perfectly isolated product.
Building a Template System for Consistency
This is where the manual work really starts to pay off, especially when you're working on a large catalogue. Let’s say you have a whole new line of skincare bottles or a collection of earrings you shot from the exact same angle. You don't have to painstakingly redraw that path every single time.
Once you’ve created that first perfect path, it becomes your master template. For the next product in the series, you simply drop the new image into your Illustrator file and place it behind your existing path. If your photography was consistent, it should line up almost perfectly.
Using a template system like this gives you two huge advantages for a growing shop:
- Flawless Consistency: Every product in that line will have the exact same shape and crop. This kind of uniformity across hundreds of listings is what makes an online store feel polished and trustworthy.
- Massive Time Savings: That first path might take you a few minutes, but applying it to the next 50 images could take seconds. You're doing the meticulous work once to guarantee speed and quality down the line.
Of course, even with templates, this is still a manual process. It gives you incredible control, but the time investment is significant. For sellers managing thousands of different items or trying to cut out tricky subjects like models with wispy hair, the hours start to add up fast.
This is usually the point where businesses start looking for a better way. When the manual precision of the Pen Tool can no longer keep up with the volume of your business, automated tools like MerchLoom become the logical next step. They take this same principle of precise background removal and apply it at scale, using AI to generate those clean cutouts in moments, not hours.
Handling Soft Edges with Opacity Masks
Doing this for a whole catalog?
MerchLoom runs background removal, upscaling and AI editing across every product photo you have — one prompt, whole batch. Try 2 batches free, no signup.
Try it freeNow for the really tough stuff. What about products with soft, fuzzy edges like a scarf, semi-transparent items like glassware, or even a natural drop shadow you want to keep? A standard clipping mask, even a perfectly drawn one, just chops off the edges, leaving a hard, digital-looking cutout. It looks unnatural and can make expensive products feel cheap.
This is exactly where you need a more sophisticated technique: the Opacity Mask. Think of it less like a cookie-cutter and more like a gentle fade. Instead of simply cutting the background out, you’re making it gradually disappear. This method is the secret to preserving those delicate details that make a product look authentic and high-quality on your storefront.
The Logic Behind Opacity Masks
The whole idea behind an opacity mask hinges on a straightforward principle: black conceals, and white reveals. You create a new shape over your image and fill it with a black-and-white gradient. Any part of your image covered by pure white will be 100% visible, while anything covered by pure black will be 100% transparent. Everything in between—all the shades of grey in the gradient—becomes semi-transparent.
This is what lets you create that soft, feathered edge. By carefully placing a gradient along the edge of your product, you can make the background fade out smoothly instead of being abruptly cut off.
A Repeatable Process for Soft-Edged Products
Getting this right takes a bit more setup, but once you get the hang of it, this becomes a reliable tool for your most challenging images.
First, you'll need that precise path you already created around your product with the Pen Tool. Duplicate it and place it directly on top of the original. Next, you need a second shape to define the fade area. This is often just a slightly larger, blurrier version of your product path, or even a simple rectangle that covers your entire image.
Now, select this new masking shape and fill it with a linear or radial gradient. The key is to position the gradient so the white part is over your product (keeping it visible) and the black part is over the background you want to remove.
Finally, select both your image and the gradient-filled shape. Head over to the Transparency panel (Window > Transparency) and click the Make Mask button. Just like that, Illustrator uses your gradient to control the image’s visibility. The product stays solid where it was covered by white, the background vanishes where it was covered by black, and the area along the gradient becomes beautifully soft and semi-transparent.
From my experience, the Gradient Tool (G) is your best friend here. After making the mask, you can select it and drag directly on the image to adjust the angle, length, and position of the fade in real-time until it looks perfect.
The Trade-Off for E-commerce Sellers
This technique is incredibly powerful for achieving a high-end, professional look. It's the best manual method in Illustrator for handling tricky subjects like model hair, fuzzy blankets, or preserving a natural shadow.
The catch? The manual effort involved is significant. This process requires a solid understanding of gradients and paths, making it one of the most time-consuming techniques out there. This is a common challenge, and for those using other programs, learning how to remove a background in GIMP reveals similar trade-offs between precision and speed.
For a busy seller with a large catalogue, it all comes down to scalability. Is it really worth spending 20-30 minutes per image to get that perfect fade on a hundred different products? While it offers unmatched control for a hero shot on your homepage, it's rarely a practical solution for an entire product line.
This is the exact problem that advanced AI tools are built to solve. A platform like MerchLoom, for example, uses AI models trained on millions of images, including those with hair, fur, and transparent elements. It can generate a soft-edged mask automatically in seconds, delivering the quality of a manual opacity mask with the speed you need for a catalogue-scale workflow.
Knowing When to Automate Your Workflow
Alright, we’ve covered the nitty-gritty of removing backgrounds in Illustrator. Mastering the Pen Tool or an Opacity Mask can give you beautiful, clean results. But now it’s time for an honest conversation every growing e-commerce seller eventually has with themselves: when does all this hands-on work stop making sense for your business?
When you're first starting out, spending 15-20 minutes on an image feels like a win. You’re building a valuable skill and saving cash. But what happens when your next photoshoot yields 50, 100, or even 200 new products?
Suddenly, the math gets ugly. That 20 minutes per image for a batch of 200 photos balloons into over 60 hours of tedious clicking. That’s more than a full work week spent just tracing around products.
More Than Just Lost Time
The real cost here isn't just the hours you're putting in; it's the opportunities you're missing out on. Every hour you spend meticulously tracing paths is an hour you aren't spending on marketing, talking to customers, sourcing new inventory, or planning your next big launch. This opportunity cost is one of the biggest, yet quietest, growth killers for online stores.
And the problems don't stop there. As your catalogue grows, manual editing creates other headaches I’ve seen countless times:
Creeping Inconsistency: Let's be real—no matter how careful you are, the cutout you do on image #100 won't look exactly like the one you did on image #1. Tiny differences in path placement, feathering, and shadow handling start to add up, making your storefront look disjointed and a bit amateurish.
Creative Burnout: Tracing hundreds of nearly identical items is mind-numbing work. It’s the kind of low-value task that drains your creative energy, leaving you uninspired to tackle the parts of the business you actually love.
Hitting the Scalability Wall: There is a very real, physical limit to how many images one person can edit. As your business expands and you need to get products online faster, that manual workflow becomes a bottleneck that directly chokes your revenue.
This is the tipping point. It’s that moment you realise the tool that once helped you is now holding your business back.
From a Design Tool to a Production System
This is where a shift in thinking is required—moving from a single tool to a complete system. This is what AI-driven platforms like MerchLoom are all about. It’s not about ditching Illustrator, but about using the right tool for the right job. Illustrator is for creative, one-off design work; AI platforms are for high-volume production.
An automated system applies the exact same logic and standards to your entire image library, all at once. Think of it as having an entire team of editors who follow your instructions perfectly for every single photo, ensuring flawless consistency from your first product to your thousandth.
These systems are built from the ground up to solve the specific challenges e-commerce sellers face. Need a pure white background (#FFFFFF) for your Amazon listings? The system applies it to every image automatically. Selling on a platform that requires square images? The AI can intelligently reframe every photo to a 1:1 aspect ratio without awkwardly chopping off part of your product.
This kind of efficiency and consistency is just not possible to achieve manually in Illustrator. Chained AI pipelines, like those in MerchLoom, can remove the background, upscale the image for better clarity, and then crop it for multiple marketplace standards—all in a single, automated sequence. If you're looking to improve image quality across your catalogue, you might find our guide on using an HD photo converter helpful.
Ultimately, automation isn't just about going faster. It’s about building a reliable, scalable workflow that frees you up to do what you do best: grow your brand.
Common Questions from E-Commerce Sellers
When you're staring down a folder of hundreds of product photos, figuring out the best way to handle background removal in Adobe Illustrator can be a real headache. Let's tackle some of the most common questions we get from sellers stuck in the editing grind.
How Do I Get a Pure White Background for Amazon in Illustrator?
This is a big one. Yes, you can get that perfect white background in Illustrator, but it's a manual job for every single image. After you isolate your product with a clipping mask or Image Trace, the background isn't white—it’s transparent. To hit Amazon's standard, you have to add a new layer behind your product and fill a rectangle with pure white (#FFFFFF).
It's one of those small, repetitive tasks that eats up your day when you have a large catalogue. This is a classic example of where a dedicated batch-processing tool really pays off. An automated system can apply a perfectly consistent white background to hundreds of images in one go, no extra clicks needed.
What's the Best Illustrator Method for Hair or Fur?
Let's be honest: Illustrator really struggles with hair and fur. It’s a core limitation of using a vector program for what is fundamentally a photo-editing task. The Pen Tool gives you that hard, unnatural "cut-out helmet" look, while Image Trace will just obliterate all those fine, wispy details.
You can get a bit closer with an Opacity Mask, but it's an incredibly finicky and slow process to make it look right. Now imagine doing that for a whole clothing line shot on models. For products with soft or complex edges, an AI tool specifically trained on these textures is often the only way to scale your production while keeping a professional look.
When you're dealing with tricky textures like fabrics or semi-transparent items, the manual work in Illustrator can quickly become overwhelming. You might find it helpful to explore other approaches, like learning how to remove colour from an image with specialized tools that preserve detail without the hassle.
How Can I Keep Drop Shadows After Removing a Background?
Keeping a product’s natural drop shadow in Illustrator is a seriously advanced and time-consuming technique. It usually involves painstakingly crafting an Opacity Mask or layering multiple paths to fade the shadow out realistically. Trying to apply this consistently across a product line is next to impossible because the lighting and shadows will vary in every single photo.
Most sellers find it's far more efficient to just remove the background and shadow entirely. From there, a tool like MerchLoom can intelligently separate the product and then generate a brand-new, perfectly consistent drop shadow for every item. This gives your entire store a clean, uniform appearance that's much harder to achieve by hand.
What Is the Best Way to Export Images for Shopify?
For a platform like Shopify, you'll want high-quality, square-format images, typically around 2000x2000 pixels. The Illustrator workflow involves creating a separate artboard for each product you've finished editing. You’d set each artboard to the right dimensions, place your isolated product, and then use the 'Export for Screens' function (Ctrl+Alt+E) to save all your artboards as JPEGs or PNGs.
This process really highlights how much manual setup is involved for every single image. In contrast, an integrated e-commerce platform can handle all of this automatically. You just upload your photos, and an AI pipeline takes care of smart reframing, resizing to a square format, and converting to the right file type—all in a single job for your whole collection.
When you're ready to stop editing images one by one and start processing your entire catalogue at once, MerchLoom is the answer. It’s an AI platform built for sellers like you. Simply upload your product photos, describe your needs in plain English, and watch as it automatically builds and runs the perfect editing pipeline—from background removal to smart cropping and resizing for every marketplace. Try MerchLoom for free and see how much time you can save.
Stop editing product photos one at a time
Upload your catalog or connect your store. Describe the result once. MerchLoom does the rest.
Try it free — no signup