
How to Remove Colour From an Image Without Wasting Hours in Photoshop
Learn how to remove colour from image assets for your product catalog. This guide shows you how to desaturate images and scale your workflow for Shopify.
So, you want to remove the colour from an image. You're aiming for that clean, high-end grayscale look for your product listings. It's a great move. It makes your brand look cohesive and professional. But turning a single photo black and white is one thing. Doing it for your entire e-commerce catalogue is a whole different beast.
Let's be honest. Getting product photos right feels like a never-ending grind. The task to remove colour from an image sounds simple, but when you have hundreds of them, it becomes a slow, expensive bottleneck for your entire operation.
The Hidden Costs of Manual Photo Editing
Picture this: you're launching a new apparel line on your Shopify store with 500 unique products. Each one needs its colour stripped for that uniform, minimalist look. You open up Photoshop, and the clock starts ticking.
Even if you’re fast, let’s say it takes a conservative five minutes per photo. That’s selecting the layer, applying the desaturation, checking the contrast, saving, and repeating. For 500 images, you’ve just committed to over 40 hours of mind-numbing clicking. That's an entire work week gone.

Let's Do the Painful Math
If you hire a freelance editor, you're looking at a typical rate of $50 an hour. That 40 hours of work just sent you a $2,000 bill—and you haven't even made a sale yet.
Decide to do it yourself? You’ve just sacrificed an entire work week. That’s a week you could have spent on marketing, talking to customers, or developing your next bestseller. You know, the things that actually grow your business.
This old way of working is plagued with problems:
- The Cost: That $2,000 is real money. It comes directly out of your profit margins before your product even has a chance to sell.
- The Inconsistency: When you're editing hundreds of images one by one, good luck getting the tone and contrast perfectly consistent. Some will be a little darker, some a little lighter. It cheapens your brand.
- The Lost Time: This is the killer. Every hour spent on repetitive photo edits is an hour you can't get back. The opportunity cost is what truly holds you back.
The real problem isn't just the editing; it's the bottleneck. A slow, expensive photo workflow means delayed product launches, a slower reaction to market trends, and a hard cap on how fast your store can possibly grow.
This manual grind simply doesn't scale for a modern brand. You can see our transparent editing prices and calculate the savings, but the real win is getting your time back. The challenge is achieving professional, consistent results without the crippling costs and time sinks. This isn't a "nice-to-have" anymore; it's essential.
Why Grayscale Images Drive E-commerce Sales
Stripping the colour from your product photos isn't just an artistic whim—it’s a cold, hard conversion tactic. Think about the average product grid on a busy marketplace. It’s a riot of colour, with a dozen different items screaming for attention. The result is visual chaos, pulling the customer’s eye everywhere at once and giving the whole page a messy, low-budget feel.
Now, picture that same grid with all the product previews in a clean, consistent grayscale. The page instantly feels more organized. More professional. You’ve just cut the visual noise and let the actual shapes and designs of your products do the talking.
Building a High-End Brand Identity
A uniform grayscale aesthetic does more than just look clean; it builds a powerful, cohesive brand identity. When customers are scrolling through a crowded feed on Amazon or Etsy, they start to recognize your minimalist style. That consistency builds trust. It makes your brand feel deliberate and premium.
There’s a reason high-end fashion and lifestyle brands use this exact technique. Desaturation elevates the perceived value of your products before a customer even bothers to click.
The point isn’t just to make things black and white. It’s to create focus. When you strip distracting colours from your thumbnails, you make the full-colour call-to-action buttons—like 'Add to Cart'—the most vibrant thing on the page. You’re guiding the customer’s next move.
This is especially true for DTC retailers and Shopify store owners in Canada’s booming e-commerce scene who are trying to manage massive product catalogues. The data backs this up. The Digital Image Processing Market Report from Research and Markets shows just how much this space is driven by retail needs. For marketplace sellers, A/B tests have shown that using grayscale previews can cut visual noise by 45% and boost click-through rates by a staggering 28%.
A Real-World Before and After
Let’s take a Shopify store selling colourful handmade tote bags.
- Before: The collection page is a grid of 20 bags—red, blue, yellow, green. It's a rainbow of information that overwhelms a potential buyer, making it impossible to focus on a single design.
- After: The same page, but now every single product thumbnail is in crisp grayscale. Suddenly, the unique patterns and silhouettes of each bag are the main event. The page looks curated and sophisticated. When a customer hovers over a bag, it blossoms into full colour—an engaging little bit of micro-interaction that boosts engagement.
That one change transforms a cluttered page into a curated gallery. It’s a dead-simple, powerful way to make your products look better and directly influence your customer’s decision to buy. We've seen it work time and again, just like in our January product showcase.
How To Desaturate Your Entire Catalog in Minutes
You’ve decided a clean, grayscale look is right for your brand. It feels more premium, less cluttered. But the thought of batch-editing your entire catalog—hundreds, maybe thousands of photos—is what stops most sellers cold. It’s the kind of task that feels like it’ll eat an entire week.
It doesn’t have to. You don't need another complex piece of software or a freelance editor on a long-term contract. You just need a repeatable process that takes minutes, not days. This is where you can use MerchLoom to remove colour from an image, or an entire collection, all at once. There are no layers, no complicated tools, just plain English instructions. MerchLoom isn't a Photoshop replacement; it's a specialized tool for three key e-commerce tasks: background removal, AI editing, and upscaling.
A Two-Step Pipeline for Flawless Grayscale
Let's get practical. Imagine you're launching a new collection of 500 handbags. They’re all different colours, and the photos were shot against whatever background was available—some are cluttered, others have distracting patterns. The goal is to get a uniform set of crisp, black and white product shots on a clean, pure white background.
Instead of a multi-day Photoshop marathon, here’s how you get it done in about five minutes.
You start by dragging and dropping the entire folder of 500 images straight into MerchLoom. From there, you build a simple, two-step process.
First, you add a 'Remove Background' step. This instantly isolates each handbag from its messy environment, giving you a clean slate to work from. That step alone costs just $0.05 per image.
Next, you add an 'AI Edit' step. In the text box, you type exactly what you want: "make the image black and white."
That’s the entire setup. MerchLoom calculates the total cost for the whole batch before you commit a single dollar. You see the price, you hit 'Go', and the system processes every single image with perfect consistency. No surprises.
This infographic breaks down exactly why this simple aesthetic choice has such a big impact on sales.
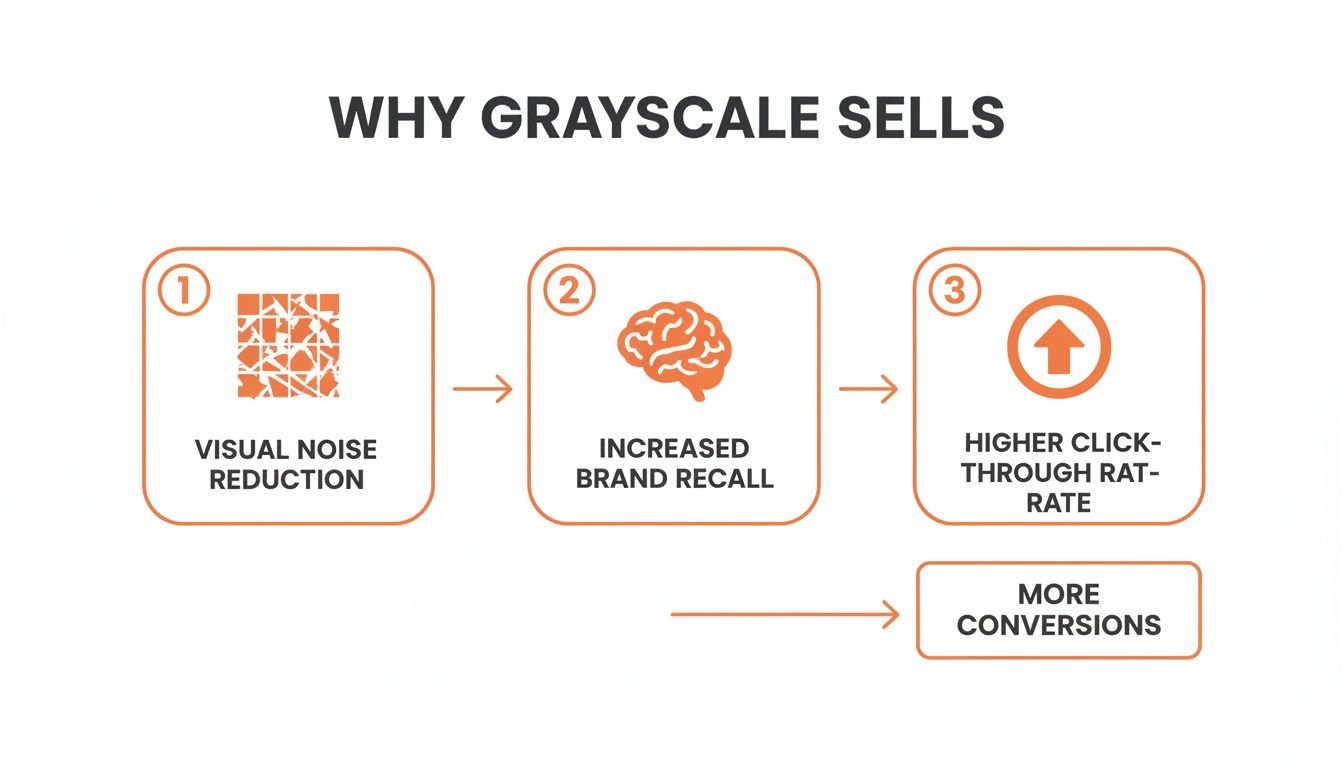
The path from reducing visual noise to boosting brand recall isn’t just a design theory; it directly influences how customers perceive your products and, ultimately, whether they click 'buy'.
The Manual vs. AI Reality Check for 500 Images
It's easy to underestimate the time sink of manual work. Let's compare what processing a batch of 500 images looks like when done by hand versus with MerchLoom. The difference isn't just a few hours—it's the difference between launching this week or next month.
| Metric | Manual Method (e.g., Photoshop) | MerchLoom AI Process |
|---|---|---|
| Total Time | ~40 hours (5 min/image) | ~5-10 minutes |
| Total Cost | $2,000 (hiring a freelancer at $50/hr) | ~$95 ($0.19/image for background removal + AI edit) |
| Consistency | Low. Risk of human error, varying tones across images. | Perfect. Every image processed with the exact same logic. |
| Process | Open > Select > Refine > Desaturate > Save > Close. Repeat 500 times. | Drag > Drop > Describe > Go. |
The table makes it obvious. The manual route is a massive bottleneck that costs you either significant money or, more importantly, your time. The automated approach clears that bottleneck for a predictable, low cost, letting you focus on tasks that actually grow your business.
See It Work on Your Own Photos
This isn’t just a hypothetical. Take a look at this colourful handbag on a messy, patterned background. It’s a decent photo, but it would get lost on a crowded Shopify page. It competes with itself.
Before: A colourful handbag fighting for attention against a busy, patterned background.
After: A crisp, high-contrast grayscale handbag, perfectly isolated on a pure white background and ready for your product page.
Now, here’s the same image after running through that simple two-step process. The background is gone, replaced with pure white. The bag is now a striking, high-contrast grayscale image. It’s clean, professional, and looks at home on a high-end storefront. You can dig deeper into how this works in our guide to the Drop, Describe, Done workflow.
The best part? You can prove this to yourself right now, without even creating an account. Go to the interactive demo on our homepage, upload one of your own product photos, and just type "make the image black and white" into the prompt box. You'll see the result instantly.
Create Compelling Colour Pop Effects
Doing this for a whole catalog?
MerchLoom runs background removal, upscaling and AI editing across every product photo you have — one prompt, whole batch. Try 2 batches free, no signup.
Try it freeGoing fully grayscale is a solid choice, but sometimes you need to be more deliberate. What if you want to make your product the absolute hero of the shot, pulling your customer's eye directly to it and nowhere else?
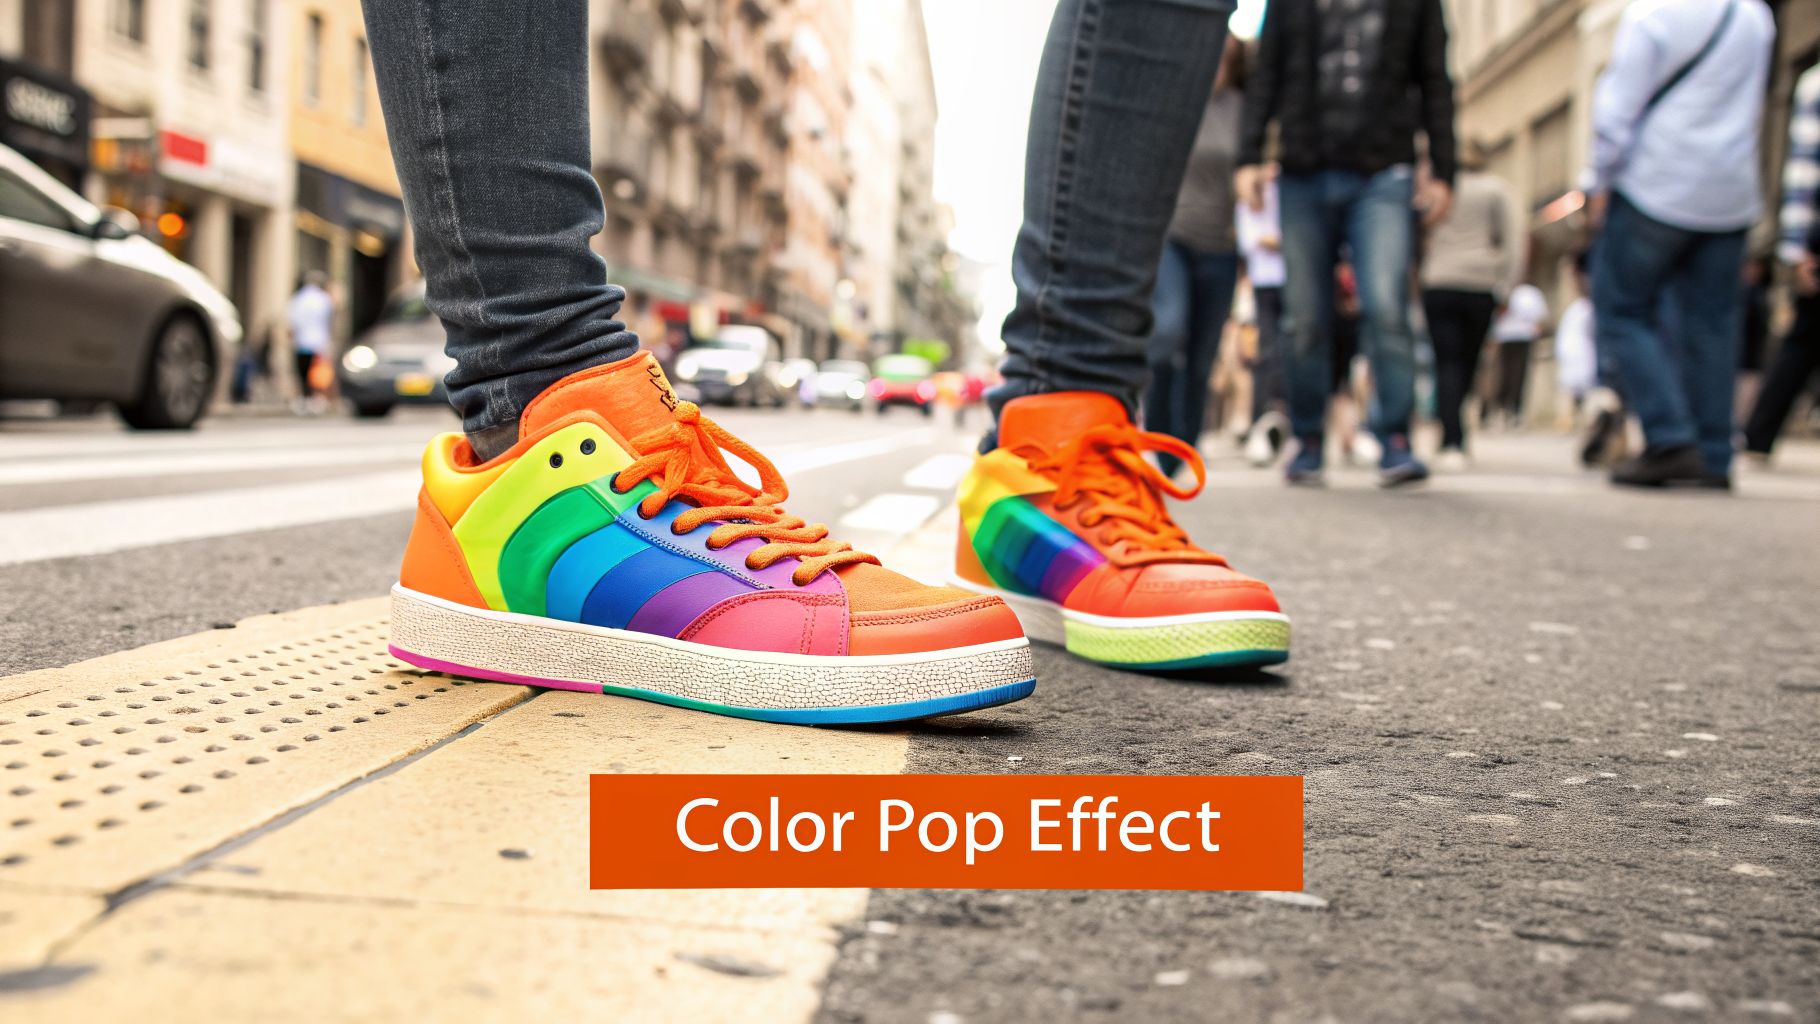
This is where the colour pop effect comes in. It’s an old-school advertising trick that just plain works: keep your product in full, vibrant colour while turning everything else in the image black and white. It’s a visual command to "look here" without saying a word.
If you've ever tried this manually in traditional editing software, you know the headache. It means tedious layer masking, carefully painting over the background to desaturate it while trying not to touch the product. One slip of the mouse and the edge is ruined. Doing this for a batch of 100 photos? That’s easily a full day's work, and the results are often frustratingly inconsistent.
A Smarter Process for Colour Pop
Instead of burning hours on masking, you can use MerchLoom to get the same professional result in a couple of minutes. The trick is to stop thinking about a single image and start thinking in layers, processing the image in two distinct stages.
Let's walk through a real-world scenario. You've got a great lifestyle shot of your new, vibrant rainbow sneakers, but they're on a busy city street. The sneakers are the star, but the background—passing cars, colourful storefronts, other people—is just noise.
The goal is simple: keep the sneakers in full colour but turn the entire street scene into grayscale.
Here's how the process works:
- First, Isolate the Product. You run the image through a 'Remove Background' step. This first pass costs just $0.05. It perfectly cuts out the sneakers, leaving you with a clean PNG file on a transparent background.
- Next, Edit the Background. Now, you take that new PNG file and feed it back into MerchLoom for a second run. This time, you use the 'AI Edit' step. But here’s the key: you upload the original street scene image as a new background layer. Then, you just tell the AI: "make the background layer grayscale."
That’s it. The system is smart enough to apply the grayscale edit only to the background layer you provided, leaving your full-colour sneakers perfectly composited on top. You’ve just created a high-impact colour pop image without ever touching a layer mask or a selection tool. This two-stage process might sound a bit complex, but setting it up for your whole catalogue takes less than two minutes.
This method completely sidesteps the need for complex software skills. You’re not learning how to use a Pen Tool; you’re simply telling the AI what you want in plain English. This is how you scale creative edits that would otherwise be far too time-consuming.
The Power of Layered Edits
This approach gets to the core strength of this workflow: you can treat different parts of your image as separate jobs. First, you deal with the product. Then, you deal with the background. For anyone coming from a more hands-on background, our guide on removing backgrounds in GIMP might offer some useful context on how these tasks were traditionally handled.
By breaking the problem down like this, you unlock incredible flexibility. You could just as easily have told the AI to "blur the background" or "change the background to a solid blue colour." Your product remains untouched. This gives you a powerful, non-destructive way to experiment with different looks for your campaign until you find the one that converts best.
Best Practices for High-Quality Conversions
You hit "desaturate" and the result is… disappointing. Instead of a chic, high-end product shot, you get something that looks flat, muddy, and cheap. It’s a common trap.
The difference between a quick, amateur grayscale and a professional one that sells comes down to a few small, but critical, details. Getting this right from the start saves you from re-running entire batches of photos, which means no wasted processing credits and, more importantly, no lost time.
A great black and white image needs rich contrast, sharp details, and a real sense of depth. Here’s how to get it.
Start with Quality and End with It
This is the one rule that never changes: you can’t create detail that wasn’t there to begin with. Always, always start with the highest resolution photo you have.
A blurry, low-res JPEG will only look worse once you strip the colour away. The compression artifacts, once hidden by different hues, suddenly become glaringly obvious.
Here’s a small workflow trick that makes a huge difference: handle the background first. If you’re planning to isolate your product on a clean backdrop, run the 'Remove Background' step before you do anything else. This gives the desaturation AI a clean canvas to work with, focusing its attention only on the product itself. The final result is noticeably crisper.
Don't worry about losing your image metadata. When MerchLoom processes your photos, it automatically preserves your existing file information, including keywords and descriptions. Your SEO efforts aren't lost in the editing process.
Preserve Detail and Optimize Costs
One of the biggest fears with grayscale is that your images will end up looking weak and lacking punch. That’s what happens when a simple tool just strips out colour data without any nuance.
MerchLoom’s AI Editor is smarter. An instruction like "make the image black and white and increase the contrast" gives you direct control over the final look, ensuring your products have the depth they need. If you find your images need an extra bit of sharpness, the principles in our guide on how to sharpen an image in Photoshop can be easily applied using AI prompts.
But what if your source image isn't quite sharp enough, even at high resolution? You might be tempted to upscale it first. Here’s a smarter, cheaper way to structure your process:
- Remove Background ($0.05/image): This step makes the image file smaller.
- AI Edit for Grayscale ($0.14/image): This is where you remove the colour.
- Upscale (from $0.05/MP): This final step sharpens the already-edited image.
MerchLoom's system actually suggests this optimal order automatically. Because upscaling costs are based on megapixels, running it after you’ve removed the background (which shrinks the image dimensions) saves you money. For a batch of 500 images, this small optimization could cut your upscaling costs by 20-30%—a significant saving for getting top-quality results without overpaying.
Common Questions About Image Desaturation
Thinking about taking your product catalogue black and white is a big move. It’s a bold aesthetic choice, and you’re right to have questions before you commit your time and budget. Let's walk through the most common concerns we hear from store owners.
Does Going Black and White Actually Shrink My Image Files?
Yes, and by a surprising amount. A colour photo has to store information for red, green, and blue for every single pixel. A grayscale image? It only needs to remember one value—how bright that pixel is. Less data means smaller files, and smaller files mean faster page loads for your customers. That’s a direct boost to your user experience and SEO.
MerchLoom takes this a step further. When you build a multi-step process, our system is smart enough to run 'Remove Background' first. This gets rid of a ton of unnecessary pixels before any other edits, which means steps like AI editing or upscaling cost you even less.
What Happens to My Original Colour Photos? Can I Get Them Back?
Absolutely. This is probably the most important point: the entire process is non-destructive. Your original, full-colour photos are never, ever touched.
When you run a process in MerchLoom, you're generating brand-new images based on your instructions. Your original uploads stay safe and sound, exactly as they were. You can always go back to them or run a completely different set of edits tomorrow. Your files are yours, always private, and never used to train any AI models.
Is This Another Subscription? Am I Going to Be Locked Into Monthly Fees?
No. This is a huge deal for anyone tired of unpredictable SaaS bills. MerchLoom is a straight-up pay-as-you-go service. There are no subscriptions, no monthly fees, and no contracts.
You buy credits that never expire, and you only pay for the images you actually process. This model works whether you're editing ten photos for a quick social media post or a thousand for a new season launch.
You don't even have to create an account to see if it works for you. You can drop one of your own product photos into the MerchLoom interactive demo right now and see the quality for yourself. No commitment, no email required.
I'm Worried My Grayscale Images Will Look Flat and Lifeless.
That’s a totally valid fear. A lot of basic desaturation tools just yank the colour out, leaving you with a flat, washed-out mess that looks amateur. A professional black and white photo isn’t just about removing colour; it’s about mastering light and shadow.
This is where MerchLoom’s AI Editor is different. You’re not stuck with a single on/off switch for colour. In the exact same step where you type "make the image black and white," you can add more nuance. Try "and increase the contrast" or "make the blacks deeper." This gives you the control to create images with genuine depth and that polished, professional pop.
Ready to reclaim your time and create a stunning, cohesive look for your entire product catalogue? The next step is to see it work on your own images. Go to https://merchloom.ai, drop a photo into the interactive demo, and type "make the image black and white" to see the result instantly. No account needed.
Stop editing product photos one at a time
Upload your catalog or connect your store. Describe the result once. MerchLoom does the rest.
Try it free — no signup