You know that sinking feeling. You’ve just uploaded new product photos to your Shopify store, and they look… soft. Blurry. It’s more than just an aesthetic problem; it’s a direct hit to your sales. A shopper can’t see the quality stitching on a leather wallet or the intricate facets of a diamond ring if the image is out of focus. That kills trust and makes it a whole lot harder to justify your price.
But the real pain isn’t just lost sales—it’s the time suck. Manually sharpening an entire product catalog is a nightmare. For a batch of 500 photos, that’s easily 15+ hours spent in Photoshop, clicking through filters and adjusting sliders for each one. That’s two full workdays you could have spent on marketing, customer service, or sourcing new products.
This guide will walk you through the professional Photoshop techniques to get crisp, clear images. But more importantly, it will show you when to stop doing it manually and how to get those hours back.
Choosing Your Sharpening Tool: Unsharp Mask vs. Smart Sharpen
You’ve opened your product photo in Photoshop, you navigate to the Filter menu, and there they are, sitting side-by-side: Unsharp Mask and Smart Sharpen. They both promise a crispier image, but they are not the same.
One is a blunt instrument, and the other is a scalpel. Knowing which one to grab can be the difference between a clean, professional shot and one that just looks… wrong.
Unsharp Mask: The Old Reliable
Think of Unsharp Mask as the trusty hammer in your toolbox. It’s been around forever, it’s simple, and it gets the job done fast. It works off three sliders: Amount (the intensity), Radius (the thickness of the sharpened edges), and Threshold (a control to stop it from sharpening subtle noise).
It’s the tool I’ll reach for when I need to quickly punch up the texture on something like a thick fabric or a rough surface. You can dial in an Amount of 150% with a Radius of 1.2 pixels and instantly make the weave of a canvas bag pop.
But its simplicity is also its weakness. Unsharp Mask sharpens everything it sees, which means it can easily amplify noise in your shadows or create harsh, ugly halos along high-contrast edges. It’s a brute-force approach.
When to Upgrade to Smart Sharpen
This is where Smart Sharpen earns its keep. It’s the more intelligent, refined tool that gives you the control you actually need for high-quality e-commerce work.
At first glance, it looks familiar—it has the same Amount and Radius sliders. But the magic is in the details. You get a dedicated Reduce Noise slider built right in, plus advanced controls for how sharpening affects Shadows and Highlights.
For anyone selling products online, these extra controls are non-negotiable. The ability to dial back sharpening in the shadows and highlights separately is a game-changer. It means you can sharpen the crucial mid-tone details of your product without turning your shadows into a grainy mess or blowing out your highlights.
A Practical Comparison
Let’s say you’re editing a photo of a stainless steel watch. It has intricate details on the dial but also large areas of smooth, polished metal.
If you use Unsharp Mask, you might get the dial looking crisp, but you’ll almost certainly introduce a gritty, unnatural texture to the polished case. You end up creating a new problem while solving another.
With Smart Sharpen, you can target the sharpening. Crank it up for the mid-tones to make the watch face sharp, then use the Shadow/Highlight tabs to protect the smooth gradients on the steel case. The result is a clean, professional image where the details are sharp, and the smooth surfaces stay smooth. No compromises.
To help you choose, here’s a quick head-to-head look at the two filters.
Photoshop Sharpening Filter Comparison
Deciding between Unsharp Mask and Smart Sharpen really comes down to how much control you need. For quick jobs on simple textures, Unsharp Mask is fine. For almost everything else, especially for product photos where quality is paramount, Smart Sharpen is the superior choice.
| Feature | Unsharp Mask | Smart Sharpen |
|---|---|---|
| Best For | Quick, general sharpening; images without much noise. | Precise control; images with fine details and smooth areas. |
| Key Controls | Amount, Radius, Threshold. | Amount, Radius, Reduce Noise, Shadow/Highlight adjustments. |
| Noise Control | None (can amplify noise). | Built-in Reduce Noise slider. |
| Complexity | Simple and fast to use. | More complex but offers superior results and artifact control. |
Honestly, for most e-commerce work, taking the extra minute to use Smart Sharpen is almost always worth it. That superior control helps you produce the kind of clean, high-quality product photos that build trust and show your items in their best possible light.
Achieve Subtle Control with the High Pass Filter
So you’ve used Smart Sharpen or Unsharp Mask, and the result is… crunchy. You’ve got that tell-tale grain in the background and weird, glowing halos around your product. It looks sharpened, and not in a good way.
This is where professional retouchers pull out a different tool. The High Pass filter isn’t found under the Sharpen menu, but it’s often the best way to get crisp, clean edges without wrecking your image. It’s the secret to getting that perfect edge on product photos without the ugly side effects.
The whole workflow is surprisingly simple and, crucially, non-destructive. You just duplicate your layer, run the High Pass filter, and switch the blend mode. That’s it.
The magic is in how it works. Instead of just cranking up the contrast on everything, the High Pass filter specifically isolates edges—those lines where light and dark pixels meet. It turns the rest of the layer a neutral grey, leaving only the outlines of your product visible.
The High Pass Sharpening Workflow
Here’s how you put it into practice. No complex steps, just a clean, repeatable process.
First, you need to duplicate your layer. Never work directly on your original image. The fastest way is the keyboard shortcut: Ctrl+J on Windows or Cmd+J on a Mac. This gives you a safe copy to work on.
With your new layer selected, head up to the menu and find Filter > Other > High Pass. A small dialogue box will pop up with a single slider for “Radius.”
For most product and e-commerce shots, a tiny radius is all you need. Start somewhere between 1.0 and 3.0 pixels. You’re looking for just the faint ghost of your product’s edges to appear against the grey. If the image starts to become recognizable, you’ve gone too far.
Now for the final step. In your Layers panel, change the blend mode of this High Pass layer from ‘Normal’ to ‘Overlay’. You’ll see the image instantly sharpen. If the effect feels too strong, try ‘Soft Light’ for a more subtle touch.
This technique intelligently tightens up just the details, leaving smooth surfaces and clean backgrounds completely alone. It’s the perfect solution for avoiding that gritty, sandy texture in your backdrops. The result is a high-end sharpening effect that looks completely natural.
Using Photoshop’s High Pass filter with an Overlay blend mode and a 1-3 pixel radius focuses sharpening on edges, which can cut distracting ‘sizzle’ artifacts by up to 60% compared to a basic sharpening filter.
Because this whole effect lives on its own layer, you have total control. Is the sharpening a bit too intense? Just lower the layer’s opacity to dial it back. Need to sharpen only the logo on a t-shirt but not the fabric? Add a layer mask and paint the effect in exactly where you want it.
This level of control, combined with the quality of the result, makes High Pass an essential technique if you’re serious about making your product photos look professional.
Master Selective Sharpening with Layer Masks
Applying a sharpening filter across your entire image is one of the fastest ways to make a product photo look cheap. It’s a dead giveaway of an amateur edit. When you sharpen everything—the product, the background, the shadows—you end up with a crunchy, noisy mess that actually pulls the eye away from what you’re trying to sell.
The pros don’t do this. They don’t sharpen the canvas; they paint with sharpness.
This is called selective sharpening, and it’s what gives professional product shots that crisp, focused look. The secret weapon here is the Layer Mask, arguably one of Photoshop’s most powerful and fundamental features for controlling exactly where your edits appear.
Painting with Precision
Instead of applying a filter directly and destructively, you’ll work on a separate, duplicate layer. This is non-negotiable for any serious workflow as it protects your original image and isolates the sharpening effect so you can control it.
Let’s say you’re editing a shot of a t-shirt. The goal is to make the brand’s logo pop and maybe bring out the weave of the fabric. You couldn’t care less about sharpening the seamless paper background.
Here’s how you’d tackle it:
- First, get your sharpening in place on a new layer. This could be using Smart Sharpen or the High Pass method.
- Next, add a black layer mask to that sharpened layer. The sharpening will instantly vanish, as the black mask hides the entire layer.
- Now, grab a soft, white brush.
- Start painting over just the parts you want to sharpen—the logo, the texture, a specific seam. As you paint with white, you are selectively revealing the sharpening effect on the layer below.
This gives you absolute precision. You can trace the facets of a gemstone, highlight the grain of a leather bag, or define the metallic clasp on a piece of jewellery, all while leaving smooth surfaces and backgrounds untouched. It’s how you guide the viewer’s eye and make your product the undeniable hero.
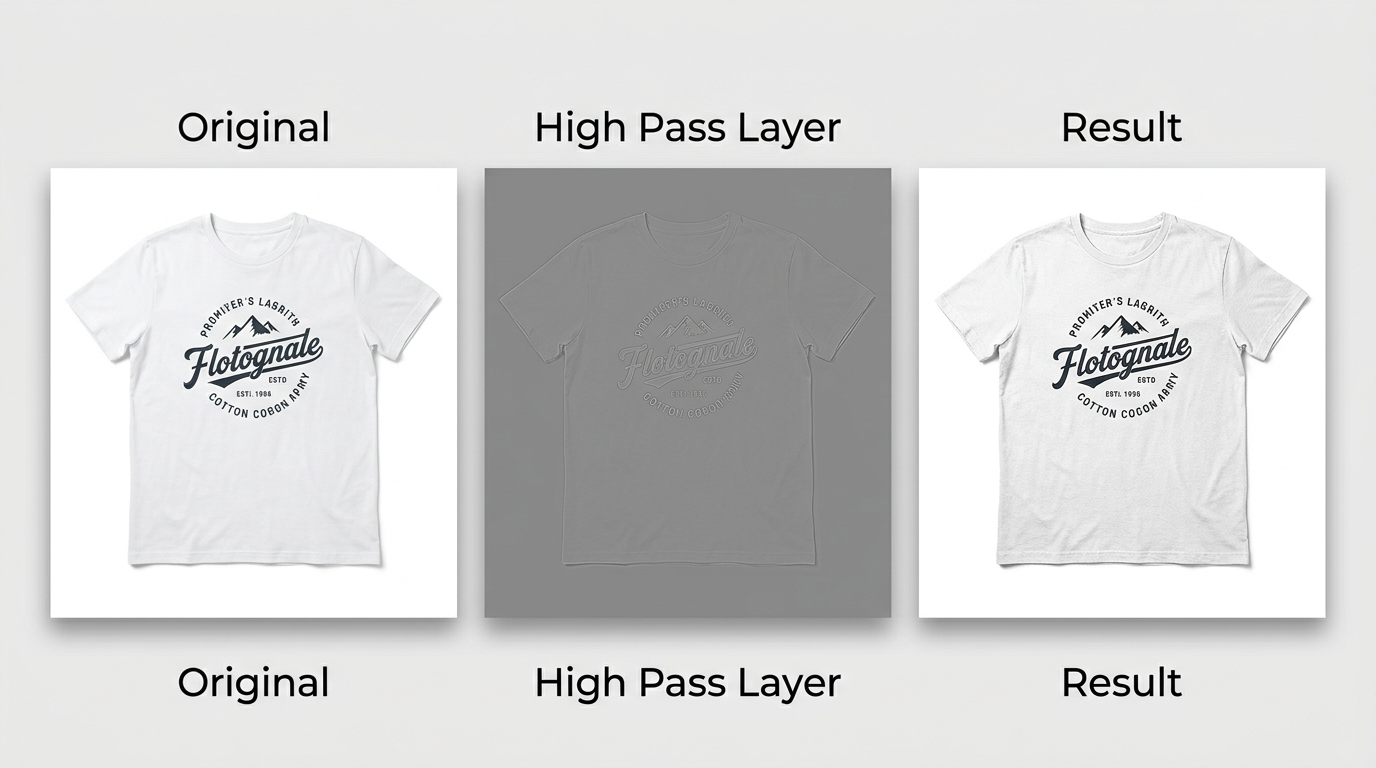
The infographic below shows a similar non-destructive process using the High Pass filter, which also isolates the effect on its own layer before you blend it in.
Whether you use a layer mask or a blending mode, the core principle is the same: isolate your edits. It’s a fundamental skill for clean, professional results. While this technique helps you control focus within an image, sometimes the whole background is the issue. For those cases, you might want to learn more about removing backgrounds in our GIMP guide, which covers a different set of tools for image cleanup.
A layer mask isn’t just a technical tool; it’s a creative one. You’re consciously directing the viewer’s focus, adding depth and making your product look more valuable. It’s a small step that makes a massive difference in how your items are perceived.
It’s a classic, frustrating problem every e-commerce pro knows well. You spend ages in Photoshop getting an image just right. It’s perfectly crisp on your monitor. Then you upload it to your product page, and it just… deflates. It goes soft, a little blurry, and all that fine detail you laboured over is gone.
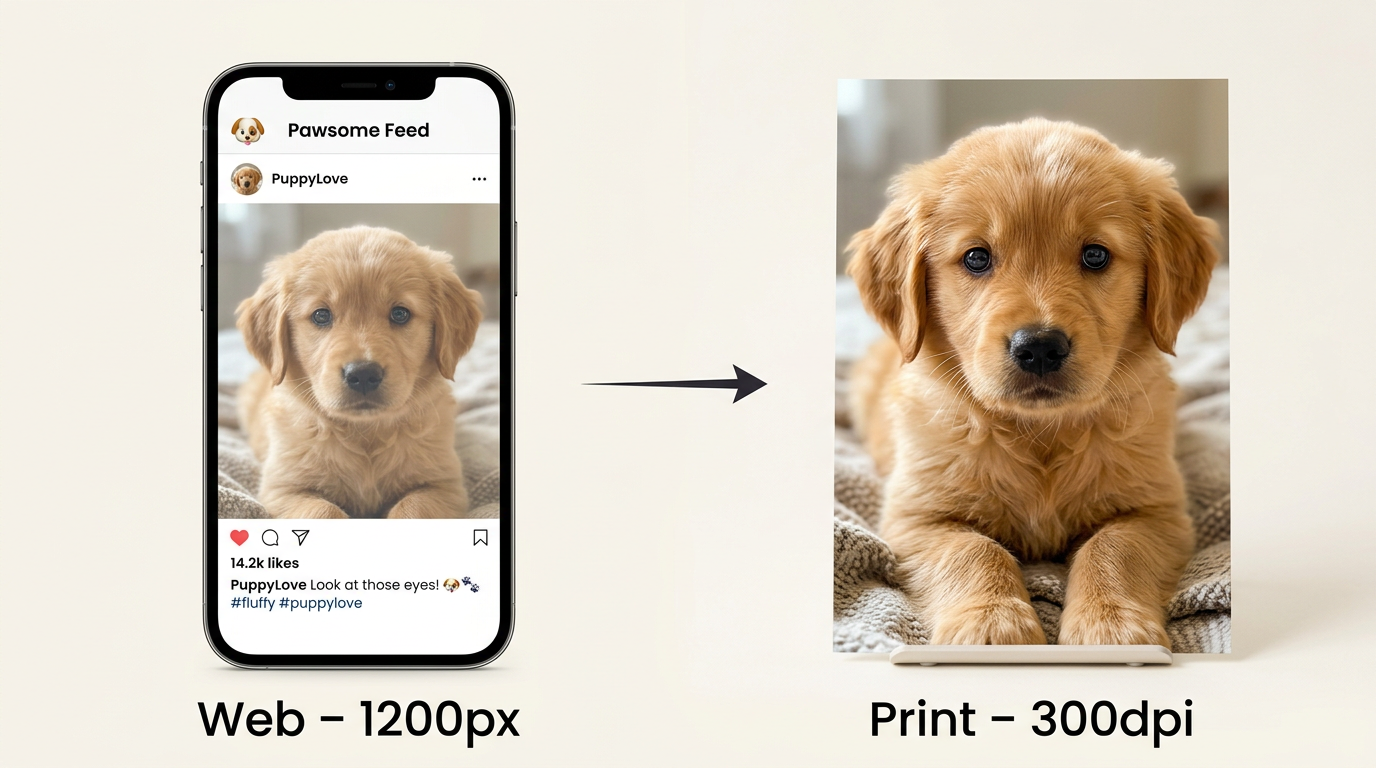
This isn’t a bug. It’s a mismatch of intent. An image destined for a high-resolution print catalogue needs a totally different sharpening approach than one sized for a 1200px web display. If you use the same settings for both, you’re asking for trouble. Sharpen for print, and your web image will look harsh and over-processed, with crunchy digital artifacts. Sharpen for the web, and your printed image will look disappointingly mushy.
The solution is what’s known as output sharpening. Think of it as a final, specific sharpening pass you apply after resizing your image for its final destination—whether that’s your website, Instagram, or a box going to the printer.
The Recipe for Web Sharpening
When you’re sharpening for an online store, subtlety is everything. Your goal isn’t to add aggressive, new detail. It’s simply to counteract the slight softening that inevitably happens during resizing and compression.
Here’s my go-to recipe for any image headed for the web.
First things first: resize the image. Always get it down to its final web dimensions (say, 1200px wide for a product shot) before you even think about sharpening.
Next, apply an Unsharp Mask by going to Filter > Sharpen > Unsharp Mask.
Now for the settings. You want to be gentle here. I usually start with these baseline values and tweak as needed:
- Amount: 75%
- Radius: 0.3 pixels
- Threshold: 2 levels
These low values are designed to just firm up the edges without creating those ugly halos or digital noise. Make sure you’re viewing your image at 100% to properly judge the effect. It should look crisp, but not artificially so.
Sharpening for High-Resolution Prints
Print is a completely different animal. Printed materials have a much higher resolution (typically 300 DPI) than screens (which are usually around 72-96 PPI). Because of this, they can handle—and frankly, they require—a much stronger sharpening effect to appear sharp on paper.
For a full-resolution file you’re sending to print, you can be more aggressive. A good starting point for your Unsharp Mask settings might be an Amount of 150% with a Radius of 1.5 pixels. The exact numbers will always depend on the printer, the paper stock, and the image itself, but they will be significantly higher than what you’d ever use for the web.
Getting a handle on output sharpening is one of those small steps that makes a huge difference. It’s how you ensure your products look consistently professional and crisp everywhere, from a tiny phone screen to a full-page magazine ad. It’s the fix for that maddening moment when your sharp images go soft right after you hit “upload.”
When Manual Sharpening Is Not Enough
You nailed it. You spent the last 20 minutes in Photoshop getting that one product photo perfect. The edges are crisp, the texture pops, the details are razor-sharp. It looks incredible.
Now look at the folder with the rest of the shoot. There are 300 more photos waiting for the exact same treatment.
This is the exact moment the manual, artistic process shatters. It just doesn’t scale when you’re trying to run a business. Do the math: at 20 minutes per image, you’re looking at 100 hours of editing. Even if you get twice as fast, that’s still a full work week you don’t have. This is where you have to stop thinking like a photo editor and start thinking like a business owner.
From Hours in Photoshop to Minutes With AI
Picture this: you’re an Etsy seller who just photographed your entire new line of handmade ceramics with your iPhone. The shots are decent, but they’re a little soft. You know they need that extra crispness to stand out and look professional.
The old way involves opening each image, one by one, and running through a multi-step sharpening workflow in Photoshop. The new way is to process the entire catalogue at once.
This is where AI tools come in—not to replace your skill, but to buy back your time on bulk, repetitive tasks. For example, using a tool like MerchLoom, you could upload all 300 of those photos and apply a consistent, high-quality sharpening and enhancement effect to the whole batch in one go. Our AI upscaling service, which also sharpens and enhances detail, starts from just $0.05 per megapixel. That batch of 300 smartphone photos could be processed and ready for your storefront in minutes, not days.
There’s no subscription to cancel and your credits never expire, so you only pay for exactly what you use. You don’t even need to create an account to see if it works for you. You can try the interactive demo on merchloom.ai and upload a few of your own images to see the before-and-after with your own eyes.
A Pro Tip to Save on Bulk Processing Costs
When you’re processing hundreds of images, every cent adds up. Here’s a simple workflow trick that can seriously cut your costs: remove the background before you upscale or sharpen.
Why does this work? Because many processing services, including ours, are priced per megapixel. When you strip away a busy, unnecessary background, the file’s total pixel count often drops significantly.
Let’s walk through a real-world scenario:
- You start with a standard 12-megapixel photo from your camera. Upscaling it as-is might cost around $0.60.
- But what if you run it through our background removal service first? That costs just $0.05 per image. This step crops the image tightly around your product, which dramatically reduces the pixel count.
- Now, when you send that smaller, background-free image to be upscaled, the cost could plummet to as low as $0.08.
By adding one quick $0.05 step to your workflow, you just saved over 87% on the final processing for that single image. Multiply that by a few hundred photos, and you’re talking about real money back in your pocket. That’s the kind of strategic thinking that lets you scale an e-commerce business without breaking the bank.
For more practical tips on optimizing your product photography, feel free to explore other guides on our blog.
Frequently Asked Questions About Image Sharpening
Even after you get the hang of sharpening, a few common questions always pop up. Getting these wrong can mean the difference between a crisp product shot and a digital mess, so let’s clear them up before you find out the hard way.
If you’ve sharpened your image directly and saved over the original file, that detail is baked in. Trying to “unsharpen” it is like trying to un-bake a cake—it just creates a new kind of mess.
This is precisely why you always work non-destructively. It’s not just a fancy term; it’s the safety net that saves you from re-doing an entire edit. Always apply sharpening on a separate layer or, even better, convert your image to a Smart Object first.
Think of it as a professional habit. If you go too far, you just lower the sharpening layer’s opacity, tweak the filter’s settings, or simply delete the layer. No harm done. Your original photo remains untouched and ready for another try.
Here’s a practical breakdown based on my experience:
For Web Images: For a standard product photo on Shopify, probably sitting around 1000 to 2000 pixels wide, you’ll want a very small radius. I usually start somewhere between 0.3 and 1.5 pixels. Anything more tends to look overcooked.
For Print Images: High-resolution files give you more breathing room. For photos destined for a catalog or print ad, you can push the radius higher, sometimes up to 3.0 pixels, without it looking strange.
The ultimate test? View the image at 100% zoom. That’s the only way to see what’s really happening. If you spot glowing halos or harsh, aliased lines around the edges of your product, your radius is definitely too high. Back it off.
First, get your image to the right size. Instagram’s feed is optimized for a width of 1080 pixels. Do this step before you even think about sharpening.
Once it’s resized, it’s time for a final, subtle sharpening pass. Don’t go crazy. A great starting point in Unsharp Mask is Amount: 80%, Radius: 0.3px, and Threshold: 3. This little touch is just enough to counteract the softness from both resizing and whatever Instagram’s servers are about to do to it, making sure your product looks sharp and intentional in the feed.
Instead of spending another day clicking through filters, you can have your entire product catalogue sharpened and enhanced in minutes. MerchLoom processes your images starting from just $0.05 per megapixel, with no subscriptions and credits that never expire.