
Effortlessly Remove Shadow from Photo for E-commerce
Quickly remove shadow from photo batches for your e-commerce catalogue. Explore manual, mobile, and AI automation methods for Shopify & Amazon.
You finish a product shoot, open the folder, and spot the same problem across half the set. A dark edge under every jar. A soft grey cast behind folded tees. A hard shadow under small accessories that makes the white background look dirty.
That is when “remove shadow from photo” stops being a cosmetic task and becomes operations. If you sell on Amazon, Shopify, Etsy, or all three, the issue is not one image. It is the whole catalogue, the next launch, and every reshoot after that.
Most advice online still treats shadow removal like a one-off retouch. That is useful for a hero image. It is not useful when you have hundreds of SKUs, multiple aspect ratios, and a deadline.
Why Annoying Shadows Are More Than Just an Eyesore
A stray shadow does more than make a product shot look messy. It breaks consistency across the grid, makes colour look uneven, and creates friction when you need clean marketplace-ready exports.

A typical problem looks like this. You shoot a batch of products under one lighting setup. Midway through, the light shifts, a reflector moves, or a prop sits too close to the item. Now the first third of the shoot has a soft shadow, the next third has a hard one, and the final third is clean. On a product page, those differences make the catalogue feel patched together.
Shadows create catalogue-level inconsistency
Many sellers lose time at this stage. They do not just need cleaner photos. They need repeatable consistency.
If one candle sits on pure white, another on light grey, and a third has a cast shadow on the right side, the customer reads that as lower production quality. Marketplace reviewers can read it that way too. If your target is a clean white-background listing, shadows are often the reason the image still looks off even after background cleanup.
For sellers working through volume, this is not a niche problem. Data from the California E-Commerce Report 2025 shows that 68% of the state's 45,000+ online retailers manage catalogues exceeding 500 images monthly, with 42% citing image editing bottlenecks as a top barrier to listing speed (California E-Commerce Report 2025 reference).
That is why clean capture and cleanup have to be planned together. If your current setup keeps producing muddy edges, fixing the shooting surface matters as much as editing later. A practical starting point is tightening your white photoshoot background workflow.
Why single-photo advice falls short
Most tutorials show a single image, one brush, one mask, one perfect correction. Real catalogues are not like that.
You might need to correct:
- Flatlay shadows from overhead softboxes
- Cast shadows from upright products on sweep paper
- Shelf or riser shadows under home goods
- Fabric falloff on apparel, where removing too much shadow erases shape
A useful rule is simple. If the shadow helps define form, reduce it. If it makes the background look dirty or inconsistent, remove it.
The business cost is not just visual. Every manual correction delays upload, slows approvals, and increases the chance that two people edit the same product family differently.
Manual Shadow Removal The Craftsman’s Approach
Manual editing still has a place. For a homepage hero, a lookbook banner, or a premium product image that needs exact control, hand retouching is often the cleanest route.

Photoshop is often the tool teams reach for first, and for good reason. It lets you target only the shadowed area instead of lifting the whole frame.
Manual methods that hold up
The first method is selective lightening with adjustment layers and masks. Add a Curves or Levels adjustment layer, brighten the shadow area, then paint into the mask so only the affected region changes. This is safer than pushing global exposure because the highlights and white background stay under control.
The second is reverse dodge-and-burn style retouching. Instead of blasting the shadow away, you gradually lift density while preserving edge detail and realistic falloff. On simple products with smooth surfaces, this can look far better than aggressive AI cleanup.
A practical sequence looks like this:
- Duplicate the base layer so you can compare before and after.
- Add a Curves layer and raise the dark region gently.
- Invert the mask and paint the correction only where needed.
- Lower opacity if the image starts to look flat.
- Check the product edge at high zoom for halos or washed texture.
Where Lightroom helps and where it does not
Lightroom can handle broad shadow lifting with the Shadows slider, local brushes, and masking tools. It is faster than Photoshop when the correction is mild and the product does not sit against a strict white background requirement.
But Lightroom has limits. If the shadow edge crosses textured material, if the background needs to hit a cleaner white, or if part of the product is dark by design, broad tonal sliders start to break down.
A separate issue is replication. You can sync settings across a set, but synced adjustments only work when the lighting problem is nearly identical from frame to frame. That is rarely true in a mixed catalogue.
A lot of sellers who start in desktop apps also end up juggling background cleanup in other software later. If that is your current setup, this guide on removing backgrounds in GIMP is useful for understanding where manual masks save you and where they slow you down.
Here is a video demonstration for the visual learners on your team:
Best use case for manual work
Manual editing is strongest when you need:
- Pixel-level control around jewellery, glass, or reflective edges
- Natural shape retention on apparel folds and soft goods
- A hero image finish that will be reused in ads, landing pages, or print
It is weakest when you need speed across a catalogue.
For one image, manual retouching feels precise. For two hundred images, it becomes production debt.
That is the trade-off. The craft is valuable. The throughput is not.
Quick Mobile Fixes for Small-Scale Sellers
Phone editing is good at one thing. It gets a listing live fast.
If you sell a few items a week on Etsy, Depop, or Poshmark, mobile apps can be enough to remove shadow from photo files that only need light cleanup. Snapseed, Lightroom Mobile, and similar apps all let you brighten selective areas, use healing tools, and make fast tonal adjustments without moving to a desktop.
How the mobile options compare
| App | Best for | Main weakness |
|---|---|---|
| Snapseed | Fast selective edits with simple controls | Easy to over-brighten and flatten the product |
| Lightroom Mobile | Better tonal control and masking | Less precise on difficult edges |
| Facetune and similar apps | Quick cosmetic cleanup | Can create obvious fake texture or smeared surfaces |
The advantage is convenience. You can shoot, tweak, crop, and upload from the same device.
The drawback is consistency. Mobile edits depend heavily on finger precision, small screens, and ad hoc judgement. That is manageable for five listings. It gets messy when the same collection needs matching treatment across dozens of images.
When mobile editing is good enough
Use mobile fixes if:
- You have a tiny batch and need same-day posting
- The shadow is soft and simple, not cutting across product detail
- The listing is casual resale, not a polished branded catalogue
Skip mobile-first editing if the product line needs identical framing, matching background tone, and exports for more than one platform. That is when the process starts to unravel.
For iPhone sellers, blur and shadow edits often get mixed together because both are attempts to separate the product from a messy scene. If that sounds familiar, this article on how to blur background on iPhone helps clarify which edits should happen at capture and which should happen in post.
Limitations
Mobile apps are convenience tools, not production systems. They can rescue a few images. They do not give you a dependable catalogue workflow.
Automating Shadow Removal for Your Entire Catalogue
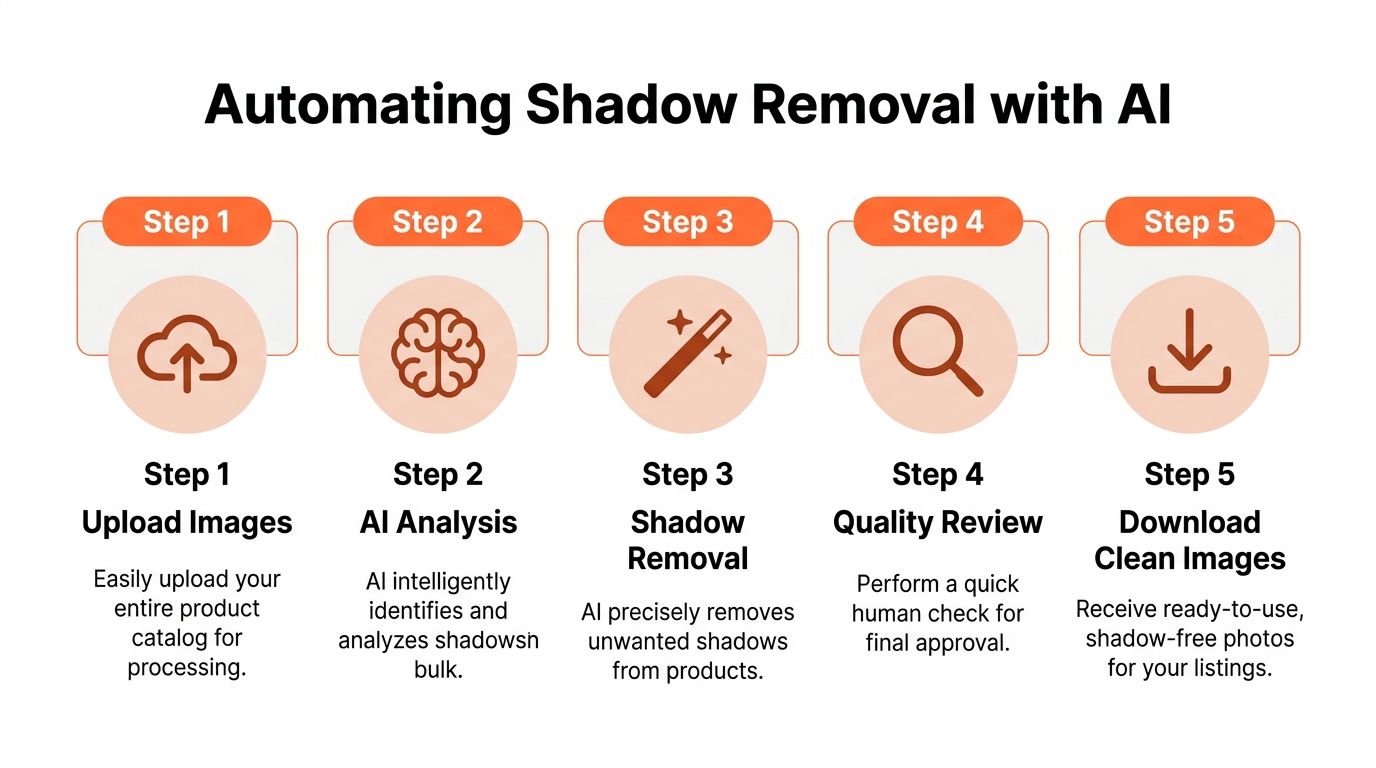
A 500-image shoot breaks the old editing logic fast. If every SKU needs separate shadow cleanup, your margin disappears into retouching hours, review delays, and inconsistent outputs across Amazon, Shopify, and your own store.
Automation solves a production problem first. Good batch shadow removal identifies lighting changes, corrects them in a repeatable way, and leaves the product itself stable across the whole set.
What the underlying systems are doing
The core idea is straightforward. The software has to separate shadow from subject, then rebuild the affected area without flattening texture, warping edges, or shifting actual product colour.
Earlier academic work helped define that problem. In 2016, researchers at UCSB removed shadows from document images by estimating local background and text colours, then generating a per-pixel gain shadow map. They tested the method on 81 shadow-affected images covering 11 documents, with 5 to 9 shadow variations per document (UCSB shadow removal paper). The subject matter was documents, not catalog photography, but the lesson still applies. Controlled backgrounds respond well when a system can model illumination separately from the object.
Doing this for a whole catalog?
MerchLoom runs background removal, upscaling and AI editing across every product photo you have — one prompt, whole batch. Try 2 batches free, no signup.
Try it freeNewer deep-learning approaches go further by accounting for scene structure, not just brightness differences. For e-commerce teams, that matters because a usable batch system has to treat a white ceramic mug, a black leather bag, and a reflective bottle as different cleanup cases, even if they came from the same shoot.
Why batch systems change the economics
The cost win comes from standardization. Once shadow cleanup runs as one step inside a fixed pipeline, the team stops making one-off judgement calls on every file.
A differential correction-based shadow removal method reported sub-second processing per image, 93.5% overall accuracy on product benchmarks, and performance that exceeded older methods by 12% on the evaluated set (DC-SR method details). For catalogue operations, the useful takeaway is practical. This class of method is fast enough to process hundreds or thousands of images without turning cleanup into the bottleneck.
That speed only pays off if the order of operations is consistent:
- Run shadow cleanup early so the model works on the original edges and tones
- Remove or replace backgrounds after cleanup when the product boundary is easier to detect
- Apply reframing next for square, vertical, and marketplace-specific crops
- Upscale at the end after defects are fixed and crops are locked
That sequence separates a one-click tool from a production workflow.
I have seen teams reverse those steps and pay for it twice. They upscale first, then discover the shadow halo got enlarged too. They crop early, then force the cleanup model to work with less context around the product. On a 20-image batch, that is annoying. On a 2,000-image seasonal catalogue, it creates expensive rework.
Once shadows and edges are clean, larger exports become safer. That is the right point to use HD photo conversion for marketplace-ready images.
What works best in real catalogues
Automation performs best when the input is predictable:
- Clean studio backgrounds
- Simple cast shadows under or behind the product
- Large batches with repeating camera angles
- Catalogues that need the same export rules across every SKU
It struggles more with hard mixed lighting, reflective materials, textured textiles, and lifestyle images where part of the shadow helps the object feel grounded.
That trade-off matters. Removing every shadow is not the goal. Removing distracting shadows while keeping believable depth usually produces the better sales image.
A workable review process
Batch automation still needs review, but the review should stay light. The team is checking for exceptions, not rebuilding the whole shoot by hand.
Pull a sample from each batch and check:
| Check | Why it matters |
|---|---|
| Product edge integrity | Prevents clipping, halos, and missing corners |
| Background cleanliness | Confirms the shadow was removed instead of merely brightened |
| Texture retention | Protects detail on leather, fabric, wood grain, and matte finishes |
| Platform crop fit | Prevents rework before Amazon, Etsy, or Shopify upload |
For large catalogues, that final QA pass is where consistency gets protected. One approved pipeline, one sampling method, and one set of output rules will save more time than any individual retoucher working faster.
Building a Bulletproof Product Image Workflow
A 500-image shoot rarely fails because the editor picked the wrong tool. It fails because the team lets every batch follow a different path. One lighting setup drifts during capture, one retoucher handles shadows more aggressively than another, and one marketplace export gets built by hand at the end. That is how costs climb and catalogue consistency slips.

Tighten the shoot before you touch the files
Shadow removal gets cheaper when the shoot is disciplined. For catalogue work, the goal is not a perfect image straight out of camera. The goal is predictable input that can survive batch processing without creating hundreds of edge cases.
A simple studio setup usually holds up well:
- Keep the product-to-background distance stable so cast shadows stay similar across the batch.
- Mark the shooting position for products and lights so replacement shots match the first setup.
- Use the same sweep or surface across a category unless the product type needs a different treatment.
- Check tethered samples early and fix lighting before the team finishes the full run.
Controlled input gives AI cleaner boundaries, fewer strange gradients, and less cleanup later. As noted earlier, better scene consistency usually matters more than chasing a smarter removal model after the files are already messy.
Build one repeatable post-production path
The workflow that scales is plain, documented, and easy to audit.
For a large catalogue, a dependable sequence looks like this:
- Group the shoot by product type or lighting setup.
- Run batch shadow removal with the same settings for that group.
- Standardize the background for the channels that need it.
- Create channel-specific crops and safe margins.
- Export marketplace versions from the same approved master.
- Review only the exceptions and the QA sample, then publish.
That order matters. If the team crops first, then removes shadows, edge artefacts become harder to spot. If the team swaps backgrounds before fixing shadows, contamination around the product base often shows up later on white exports.
Marketplace requirements also pull the workflow in different directions. Amazon usually rewards a cleaner, flatter hero image. Shopify needs consistency across collection pages. Etsy listings often benefit from keeping more personality in secondary images. One master file can support all three, but only if the workflow is built around derivatives instead of one final export.
If your catalogue depends on marketplace-safe hero shots, pair shadow cleanup with a broader images with white background workflow.
Why systems beat reactive editing
Reactive editing looks cheaper on a small batch. On a full catalogue, it creates expensive rework.
The pattern is familiar. One editor lightens the shadow. Another deletes it. A third retouches the edge damage and saves over the original. A month later, the catalogue has three different looks for the same product line, and nobody can trace which version should be the standard.
A system fixes that by setting one order of operations, one approval method, and one export rule set per channel. It also makes outsourcing easier because vendors are following a process, not inventing one.
If your team cannot explain the order of operations in one sentence, the workflow is probably too fragile.
The strongest workflow is the one that keeps 20 new SKUs looking like they belong beside the previous 2,000. That is what saves time, reduces re-edits, and keeps Amazon and Shopify listings visually consistent at scale.
Troubleshooting Common Shadow Removal Problems
Removing a shadow is easy. Removing it without breaking the image is the hard part.
That is where sellers get frustrated with both manual tools and AI. The correction works on one product, then destroys texture on the next. A clean ceramic mug looks fine, but a knitted jumper suddenly looks smeared.
Problem one the image looks flat
This usually happens when you remove all local contrast from the dark area. The shadow disappears, but so does shape.
Fix it by backing off the correction. In Photoshop, lower the adjustment layer opacity or rebuild the mask with a softer brush. In AI tools, pick a less aggressive preset if one is available. For product pages, some natural grounding under the item is often better than a fully shadowless floating object.
Problem two the AI leaves halos or edge artefacts
This is often a masking failure. The tool correctly identifies the shadow in broad terms but misreads the product boundary.
Try these fixes:
- Use a cleaner original crop with less clutter near the edge.
- Separate background removal from shadow removal if one tool is trying to do too much at once.
- Switch to manual finishing on reflective, transparent, or fine-edged items.
Recent benchmark work also shows why some models fail on difficult boundaries. In the NTIRE 2025 Image Shadow Removal Challenge, top methods used multi-stage pipelines with alignment, shadow removal, and feature enhancement, while challenge reports still noted failure on ill-defined edges and severely underexposed segments (NTIRE 2025 shadow removal challenge report).
Problem three fabric texture gets wiped out
This is the complaint apparel sellers raise most often, and it is real. A 2025 Bay Area Product Photography Survey found that 55% of apparel and vintage resellers experienced “AI editing failures” on textured goods, where shadow removal introduced unnatural artefacts (Bay Area Product Photography Survey reference via Adobe article).
That result matches what operators see in practice. AI handles smooth surfaces more reliably than wool, denim, embroidery, lace, or patterned vintage fabrics.
A good response is not “never use AI.” It is use quality control where texture matters.
A simple troubleshooting grid
| Symptom | Likely cause | Best response |
|---|---|---|
| Flat-looking product | Over-lifted shadows | Reduce strength and preserve some natural falloff |
| Halo around edge | Poor shadow mask or boundary read | Reprocess with cleaner separation or finish manually |
| Texture loss on fabric | Aggressive AI smoothing | Use lighter correction or hand-retouch the problem area |
| Dirty background remains | Shadow was brightened, not removed | Combine relighting with background cleanup |
| Product edge clipped | Over-detection | Restore original edge and limit automation to the background zone |
The quality check should focus on edges, texture, and realism. If those three survive, the shadow correction is usually good enough for catalogue use.
The final filter is common sense. If the correction makes the product look less believable, it is not an improvement.
If you process product photos in batches, MerchLoom is built for that reality. You can upload whole collections, describe the result you want in plain English, and run chained image workflows without juggling separate tools for every step. That is useful when shadow removal is only one part of the job and you also need background cleanup, marketplace reframing, colour correction, and upscaling across a full catalogue.
Stop editing product photos one at a time
Upload your catalog or connect your store. Describe the result once. MerchLoom does the rest.
Try it free — no signup