
Mastering the White Photoshoot Background in 2026
Struggling with your product photos? Learn how to create a perfect white photoshoot background with DIY setups, camera settings, and AI batch editing.
That perfect white photoshoot background. It seems so simple, but getting it right across your entire product catalogue is one of the biggest—and most frustrating—hurdles for any online store. It’s the silent difference between a brand that looks professional and one that feels amateur, and it has a direct impact on customer trust and sales.
Why "Good Enough" Backgrounds Are Costing You Sales
If your product photos feel inconsistent or just a little "off," the background is almost always the problem. A slightly grey, uneven, or poorly lit backdrop doesn't just look unprofessional; it actively drains your time and money. This isn’t about artistic taste—it’s about the very real costs that pile up when you try to fix photos one by one.
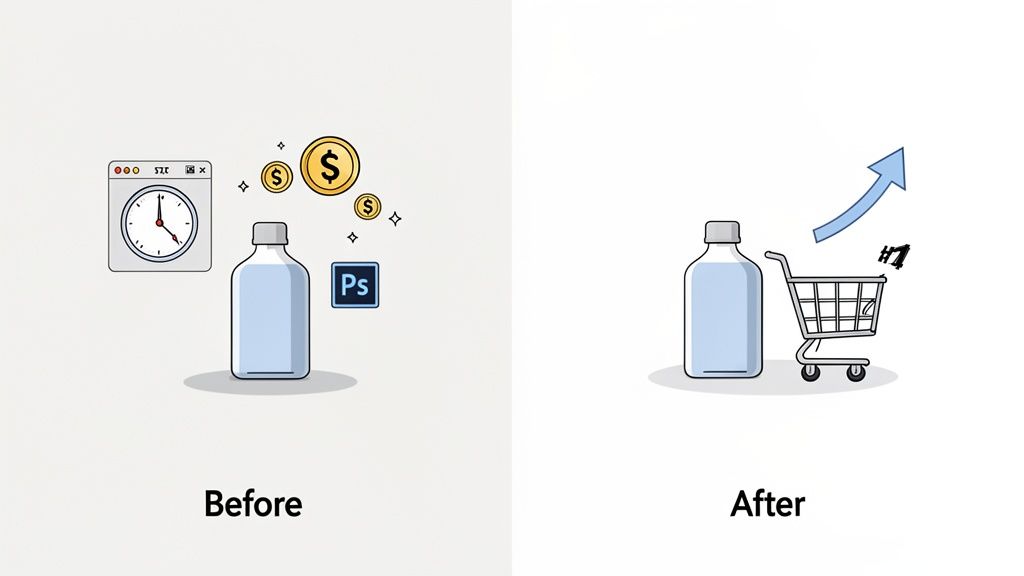
You know the grind. Hours spent in Photoshop, painstakingly tracing each product with the pen tool. The frustration of trying to match that perfect #FFFFFF white across dozens of photos shot on different days is a pain every Shopify store owner knows too well.
The Real Cost of "Good Enough" Photos
Let's break down the actual financial hit. Hiring a photographer to get those clean shots in-studio often runs $50 to $100 per hour, and that’s before you even pay for the studio rental. For a new collection with 200 items, a multi-day shoot can easily cost thousands. The e-commerce photography industry is booming, and those traditional costs can be a killer for growing brands. You can get a better sense of this by looking at recent industry reports. Learn more about the photography market's expansion on ibisworld.com.
If you decide to handle the editing yourself or hire a freelancer, the costs just shift from your business bank account to your personal time—or both.
- Your Time: Spend just 10 minutes editing each photo? A batch of 200 images will eat over 33 hours of your life. That’s time you could have spent on marketing, product development, or customer service.
- Your Money: A freelance editor might charge $2-$5 per image for manual background removal. For a 500-image catalogue, you're looking at $1,000 to $2,500 for just one part of the editing process.
This manual approach is not only expensive but also creates subtle inconsistencies that customers notice, even if they can’t quite put their finger on why.
A Before-and-After Scenario
Picture a small online jewelry store. Their first product photos, shot on a white poster board in the living room, have soft shadows and a slightly greyish tint. The lighting changes from one photo to the next. The jewelry is beautiful, but the overall impression is more "hobby" than "trusted brand."
Before: Inconsistent, greyish backgrounds with noticeable shadows. This forces customers to second-guess the store's professionalism and the actual quality of the products.
Now, imagine that same store runs its entire 300-image catalogue through an automated AI pipeline. Each background is digitally removed and replaced with a pure, uniform white for just $0.05 per image. The total cost? Only $15.
After: Every single product is perfectly isolated on a crisp, clean white background. The entire collection looks cohesive, high-end, and trustworthy. The next month, the conversion rate on their product pages jumps by 12%.
This isn't just a cosmetic fix; it's a direct investment in how customers perceive your business. When a shopper sees clean, consistent imagery, they feel more confident hitting that "Add to Cart" button. The product itself hasn't changed, but the professional presentation removed a major point of friction. To see how other brands are nailing this, you can explore our latest product showcase for more examples.
The struggle to get a perfect white photoshoot background is universal. But the solution no longer has to be a slow, manual, and expensive grind. Once you understand the true costs of imperfect images, it becomes much easier to justify a smarter workflow that saves you thousands of dollars and countless hours.
Getting a Clean Shot In-Studio or at Home
Here’s the honest truth: the single best way to save time and money on editing is to get a clean shot straight out of the camera. Forget fixing it in post.
Whether you’re in a professional studio or a corner of your apartment, the goal is identical. Capture your product with even, consistent lighting on a plain background. Nail this part, and everything that follows—especially background removal—gets faster, cheaper, and far more accurate.
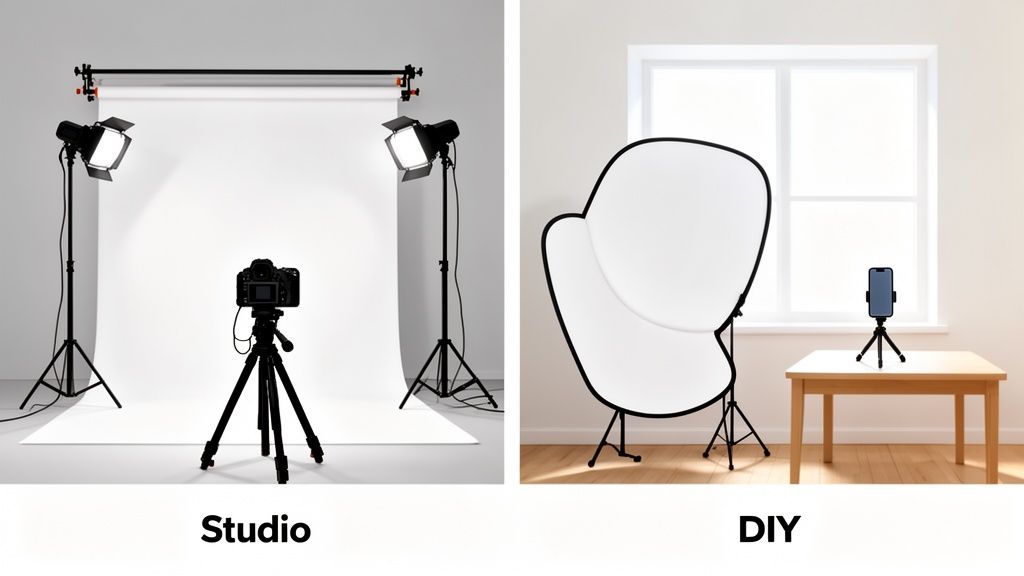
Let's walk through two paths to get there. One is the pro-grade setup for when every shot has to be perfect. The other is a scrappy, budget-friendly approach that gets you 90% of the way there for a fraction of the cost.
The Professional Studio Setup
If you’re shooting hundreds of products and consistency is non-negotiable, investing in a dedicated setup pays for itself. You don't need a massive space, but you absolutely need a few key pieces of gear to build a reliable white photoshoot background.
The foundation is seamless paper. A roll of Savage Universal #01 Super White is the industry standard for good reason. It’s non-reflective and gives you a smooth, crease-free surface that sweeps from the wall to the floor, killing any hard corners in your shot.
You'll need a way to hold it, too. A pair of sturdy C-stands and a crossbar will keep the paper roll secure. This lets you pull down fresh, clean paper whenever the old section gets dirty or torn, so every product starts on a flawless backdrop.
But lighting is where the real magic happens. A classic three-point lighting setup is perfect here:
- Key Light: Your main, brightest light. Position it at a 45-degree angle to the product to create dimension and shape.
- Fill Light: A softer light, placed on the opposite side. Its only job is to fill in and soften the shadows created by the key light.
- Background Lights: This is the step most people skip, and it’s a huge mistake. Aim two additional lights, one on each side, directly at the white seamless paper behind your product. This is what turns a light grey background into a pure white one.
This separation—lighting the product and the background independently—is the secret to creating that clean, professional "floating" look right in the camera.
The Scrappy DIY Method at Home
No budget or space for a full studio? No problem. You can get surprisingly close with a few smart purchases from your local art supply or hardware store. The whole game here is using natural light effectively.
Find the biggest window in your home that gets bright, but indirect, sunlight. Direct sun is your enemy—it creates harsh, dark shadows that are a nightmare to edit out later. An overcast day is your best friend.
Instead of seamless paper, your new go-to is a large sheet of white foam core. It's cheap, lightweight, and has a matte finish that won't create distracting reflections. Prop one piece up vertically and lay another flat on your table to create your own mini seamless sweep.
The most important tool in any DIY setup is a reflector. A simple piece of white foam core or a collapsible photo reflector costs less than $20 and does the work of a second light. Position it opposite your window to bounce soft light back onto your product, filling in those shadows for a much cleaner look.
Your makeshift setup will look something like this:
- Place your product on the flat foam core, close to the window.
- Use the window as your "key light," letting that soft, natural light hit one side of the product.
- Hold your reflector on the opposite side to bounce light back, softening any harsh shadows.
This simple, low-cost setup gives you a bright, evenly lit product on a clean background. It won’t be a perfect #FFFFFF white in-camera—your camera will probably see it as light grey—but it will be consistent. And for an AI tool, a consistent light grey background is incredibly easy to remove.
Getting a clean source image is half the battle won, making the entire post-processing workflow smooth and predictable.
Your Camera Settings, Demystified
Getting your camera settings right feels like a dark art. Twist one dial, and your perfect white background turns a sickly yellow. Nudge another, and the back half of your product blurs into oblivion. You end up with a hundred photos that look "good enough" on the tiny camera screen, only to discover in post-production that they're a nightmare to fix.
This isn't just about technical perfection. It's about time. Every minute you spend wrestling with colour correction or trying to sharpen a soft image is a minute you're not spending on shipping, marketing, or literally anything else. So let's cut through the jargon and dial in the settings that get you crisp, colour-accurate shots straight out of the camera, whether you're using a DSLR or your phone's pro mode.
The Only Three Settings That Matter
Forget the manual. For a clean white background shoot, you only need to master three controls. They work together to manage the light hitting your sensor.
- ISO: This is your camera’s sensitivity to light. In a controlled studio setup, you want this as low as it will go—usually ISO 100 or 200. Anything higher introduces digital noise, that grainy texture that makes images look cheap. Keep it low for the cleanest possible shot.
- Shutter Speed: This is simply how long the shutter stays open. Since your product isn't moving and your camera is on a tripod, you have a lot of flexibility. A good starting point is 1/125s. It's fast enough to avoid any blur if you accidentally bump the tripod.
- Aperture (f-stop): This is the opening in your lens, and it's the one most e-commerce sellers get wrong. It controls not just brightness, but how much of your product is actually in focus.
Your camera’s light meter will tell you if the combination of these three is "correct," but knowing what each one does is what gives you control.
Why F/8 Is Your Secret Weapon for E-commerce
Here's the counterintuitive part about aperture: a low f-stop number (like f/2.8) means a wide-open lens. This lets in a ton of light, but it also creates a very shallow "depth of field." It's that look you see in portraits where the person's eyes are sharp and the background is a creamy blur.
That’s a disaster for product photos. You need the entire product to be sharp, from the front label to the back seam.
To get that, you need a higher f-stop number, like f/8 or f/11. This narrows the lens opening, creating a deep depth of field that keeps every last detail in focus.
A lot of beginners crank the aperture open (low f-stop) to make the image brighter, and then wonder why half their product is out of focus. Don't do that. Start at f/8, and then adjust your lighting or your shutter speed to get the right exposure.
How to Get Perfect Colour in Every Shot
Ever take a picture of your white background, only to find it looks blueish or yellowish on your computer? That’s your camera's Auto White Balance failing you. It’s trying to guess the colour of your studio lights, and it's almost always wrong.
The result is a colour cast that makes your products look off and your background look anything but pure white. Trying to fix this across an entire batch of photos is one of the most soul-crushing editing jobs there is.
The fix takes 30 seconds. It's called custom white balance, and you use a simple grey card.
Just place a neutral grey card exactly where your product will sit, under the same lighting. Dive into your camera's menu, find the "Custom White Balance" option, and follow the prompts to take a picture of the card. Your camera now has a perfect reference for what true neutral grey looks like under your specific lights.
Do this once at the start of your shoot. You can now say goodbye to those weird colour tints forever. Every photo will have pure whites and true-to-life product colours, slashing your editing time and showing customers exactly what they’re getting.
How to Batch Edit Your Entire Catalog Instantly
Editing one or two photos is easy. You pop open Photoshop, trace the product, clean up the edges, and you’re done in ten minutes. But what happens when you’re staring down a folder of 200 new product shots? That ten-minute task just exploded into a 33-hour problem. That’s an entire work week lost to the soul-crushing, repetitive click of a mouse.
Doing this for a whole catalog?
MerchLoom runs background removal, upscaling and AI editing across every product photo you have — one prompt, whole batch. Try 2 batches free, no signup.
Try it freeThat's the old way. It’s a workflow that pits your time against your money. You either sacrifice your own sanity to the "Magic Wand" tool, or you pay a freelancer $2-$5 per image and watch your budget vanish before a single product even goes live. For most Shopify stores, this manual grind is the single biggest thing keeping new inventory from getting listed.
From One-by-One to All-at-Once
The real killer isn't just the time suck; it's the inconsistency. No matter how precise you try to be, the padding will be slightly off, the centring won't be perfect, and you'll miss a stray shadow here and there. This old method of opening, editing, saving, and closing each file individually is slow, expensive, and completely broken for anyone managing more than a handful of products.
There's a modern workflow that completely sidesteps this mess. Imagine a pipeline where you upload your entire photoshoot at once and apply a series of edits to every single image automatically. It’s not just a single tool; it’s a process that gives you consistent, studio-quality results across your whole catalogue in minutes, not weeks.
Getting your camera settings right from the start makes this process even smoother. This diagram breaks down the fundamentals.
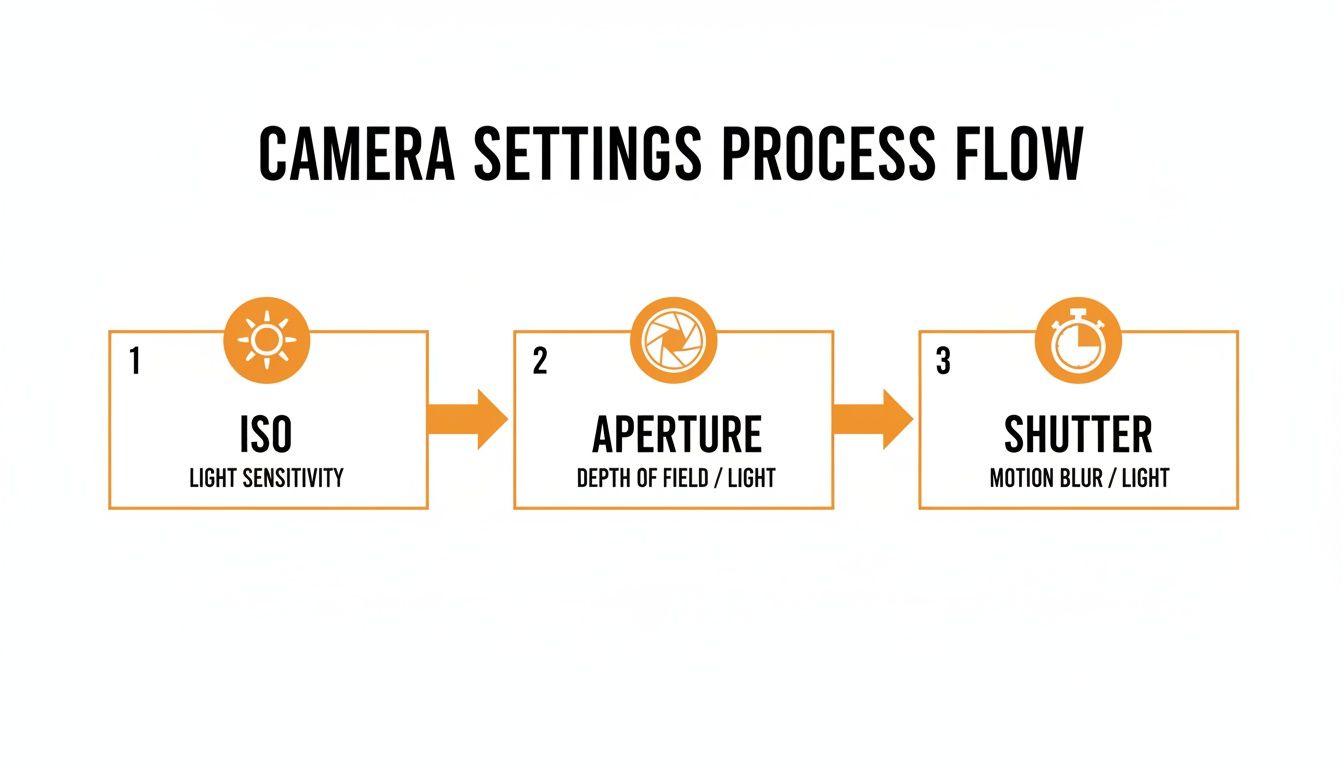
Nailing the balance between ISO, aperture, and shutter speed in-camera gives you a much better starting point, making any automated editing faster and more accurate.
A Real-World Batch Processing Scenario
Let's make this tangible. You've just photographed 200 pieces of silver jewellery for your Shopify store. The shots are decent, but the "white" background is really a dull grey, and the products are all different sizes and positions in the frame.
The old way is to open all 200 files one by one. The new way? You upload the entire folder to an AI tool like MerchLoom and build a simple, three-step pipeline that runs on every image:
- Remove Background: The first operation isolates every piece of jewellery from its greyish background, swapping it for a perfect, marketplace-ready
#FFFFFFwhite. This costs just $0.05 per image, coming to $10 for the whole batch. - Edit Image: Next, an editing step automatically centres and resizes each piece onto a standard 1080x1080 pixel canvas with 5% padding. Suddenly, every product shot on your store looks uniform and professional. This step runs $0.14 per image, for a total of $28.
- Upscale Image: For fine jewellery, detail is king. The final step upscales every image to a crisp 2000x2000 resolution, perfect for those zoom-in details that customers love. At $0.05 per megapixel, this comes to about $0.20 per image, or $40 for the lot.
The total cost to process your entire 200-image collection—with a perfect white photoshoot background, consistent framing, and high-res detail—is just $78. And the entire job takes about 15 minutes. Compare that to the $400-$1,000 and 33 hours of manual work.
Smart Workflows That Save You Money
This pipeline approach has some clever cost-saving tricks built in. A smart system will automatically reorder your steps to be as efficient as possible. For instance, removing the background first shrinks the image data significantly. That means the final upscaling step has less work to do and costs less—up to 87% less, in fact—because it’s only processing the pixels that matter.
While some free tools exist for basic background removal, they often stumble on complex products. If you’re set on a manual route and want to explore your options, you can learn how to remove backgrounds with GIMP.
But for those who value their time, let's look at the numbers.
Manual Editing vs MerchLoom AI Pipeline Cost Comparison (500 Images)
This table breaks down the time and cost for processing a typical product batch, showing the dramatic savings with an automated workflow.
| Task | Manual Editing (Freelancer) | MerchLoom AI Pipeline | Savings |
|---|---|---|---|
| Time Investment | ~83 hours | ~25 minutes | 99.5% of your time back |
| Cost | ~$1,000 (@ $2/image) | ~$120 | $880 (88% savings) |
The contrast is stark. You're not just saving money; you're reclaiming days of your life that can be spent on marketing, product development, or just about anything more valuable than clicking pixels.
With MerchLoom, there's no subscription, and your credits never expire, so you only pay for what you actually process. You can even see the exact cost breakdown for your job before you hit "go." It’s a pay-as-you-go model that puts you in control, ending the vicious cycle of manual labour and unpredictable freelance bills for good.
The next step is easy. Take five of your own product photos—yes, even the ones you thought were unusable—and run them through the background removal tool on the MerchLoom.ai homepage. You'll see for yourself how a 30-second automated process can beat a full day of manual editing.
Meeting Marketplace Specs Without Losing Your Mind
You’ve done the hard work. You shot the products, ran them through your editing workflow, and now you have a folder full of images with perfect, clean white backgrounds. You’re ready to upload.
And then Amazon rejects half of them for being too small. Etsy crops your hero shot weirdly, cutting off the side of your product. Your Shopify theme looks like a jumbled mess of different sizes.
This is the part that drives sellers crazy. A clean background is only half the battle. Every single marketplace, from Amazon to Instagram, has its own strict, non-negotiable rulebook for images. Getting it wrong means a frustrating cycle of uploading, getting rejected, resizing, and re-uploading—a colossal waste of time when you’re just trying to get a new product live.
This final, tedious step is what separates a smooth launch from a week of technical headaches.
The Specification Maze
Every platform has its own bible of requirements, but they all boil down to three things: resolution, aspect ratio, and file type. Trying to keep track of them all manually is a nightmare.
- Amazon: Your image's longest side must be at least 1000 pixels. They recommend 2560 pixels for that crisp zoom experience customers expect. Miss this, and your listing might get suppressed.
- Shopify: While it’s more flexible, most themes are designed for consistency. They look professional with a uniform aspect ratio, usually a perfect 1:1 square or a 4:3 rectangle. Mix and match, and your grid looks amateur.
- Instagram: A standard post is a 1:1 square (1080x1080 pixels), but a Story needs a vertical 9:16 ratio. Get it wrong, and the algorithm just chops off part of your image.
Fail to meet these specs, and the platform will automatically crop, stretch, or pad your images with ugly white bars, instantly destroying the professional look you worked so hard to create.
Automating the Final Polish
Manually resizing hundreds of images for these different platforms is just as soul-crushing as removing backgrounds by hand. Opening each file to crop it to a perfect square or pad it to 2000 pixels wide simply doesn't scale. This is where an automated editing step becomes a non-negotiable part of your workflow.
Let’s go back to that batch of 200 jewellery photos we processed earlier. After removing the backgrounds, the images are all slightly different shapes and sizes. Before they ever touch a marketplace, we need to standardize them.
An AI editing pipeline can handle this automatically. You can set a single rule to reframe every image onto a new canvas—say, a 2000x2000 pixel square with a 5% margin around the product. The AI is smart enough to centre each item, guaranteeing a consistent, clean look across the entire collection.
This isn't just about saving a few hours. It’s about brand consistency. When a customer is scrolling through your product grid on Shopify and every single image is perfectly aligned and framed, it projects a sense of order and professionalism. That’s what builds immediate trust.
A Real-World Scenario
Imagine a Shopify store selling handbags. The photos themselves are great, but they're a mix of vertical and horizontal shots. On the collection page, the product grid is a chaotic mess. Some bags look huge, while others look tiny and get lost.
Before: The product grid is a jumble of different aspect ratios. The store looks disorganized, making it hard for customers to compare products at a glance. It screams "side-hustle," not "serious brand."
The Fix: The owner uploads their entire 150-image catalogue to MerchLoom. They apply a single AI editing step: reframe every photo onto a 1:1 square canvas (1500x1500 pixels) with a pure white background. The total cost is just $0.14 per image, for a grand total of $21.
After: In minutes, the entire product grid is perfectly uniform. Every handbag is professionally centred in a clean square, creating a sleek, high-end browsing experience. The store looks instantly more credible, and sure enough, conversion rates on the collection pages start to climb.
Meeting platform requirements shouldn't be the final, frustrating hurdle. By building it into your batch workflow, you ensure every image is perfectly optimized for every platform, every single time. See for yourself—take a few of your own product photos and drop them into the interactive editor on the MerchLoom.ai homepage. Watch how it automatically reframes and pads your product for a marketplace-ready finish.
Common Questions About White Backgrounds
You've got the gear and the plan, but your white backgrounds are still coming out… well, not quite white. It happens. Getting that perfect, consistent e-commerce look involves a bit of art and science, and a few common hurdles trip up even seasoned sellers. Here are the practical questions that always come up after you've learned the basics.
Can I Really Get Pure White with Just My Phone?
The short answer is no. It’s next to impossible to capture a pure, perfect #FFFFFF white background straight out of any camera, your phone included. Your camera's sensor is built to see the world in tones, not absolutes. It will almost always interpret a bright white wall as light grey to avoid blowing out the highlights and losing all the detail.
You can get incredibly close, though. Good, bright, diffused window light is your best friend. Add a white foam board to bounce that light back and soften up the shadows. Then, dive into your phone's 'Pro' or 'Manual' mode to lock in your settings so every shot is consistent. This gives you a fantastic starting point.
But when you need true consistency across hundreds of products shot on different days, in different light? The most efficient path is to shoot on a clean light grey or white surface and let an AI background removal tool handle the rest. That’s how you guarantee a perfect, uniform white every single time, for about $0.05 per image.
What’s the Single Biggest Mistake People Make?
By far, the most common mistake is not lighting the background and the product separately. New sellers often point one light at their product and just hope it all works out. This creates two immediate problems: the background looks dull and grey, and the product throws ugly, distracting shadows onto it.
The professional approach uses at least two lights. One light—your main "key light"—is for the product itself. The second light is aimed only at the background. This separation is the secret sauce. It’s what creates that clean, crisp "floating" look and makes any post-processing, whether you’re doing it by hand or with AI, dramatically faster and more accurate.
Why Do My White Backgrounds Always Look Grey in Photos?
This is a classic camera problem, and it's not your fault. Your camera's built-in light meter is programmed with one simple goal: find a "middle grey" exposure. When it sees a scene that's mostly bright white, it panics, thinking the shot will be overexposed. So, it darkens the entire image to compensate.
The fix is surprisingly simple: use your camera's exposure compensation setting. Look for a button or dial marked with a +/- symbol. By cranking the exposure up to +1 or even +1.7, you're manually telling the camera, "Hey, this scene is supposed to be bright white, not grey." This one tiny adjustment can make a massive difference in your raw photos and save you a ton of editing time later. If you want to dive deeper into tricks like this, you can find more practical guides in our blog on various photography topics.
Ready to skip the manual fixes and just get consistent results, instantly? Grab five of your own product photos—yes, even the tough ones with weird shadows or fuzzy edges—and drop them into the free tool on the MerchLoom homepage. See for yourself how a 30-second automated pipeline delivers a perfect white background every time.
Stop editing product photos one at a time
Upload your catalog or connect your store. Describe the result once. MerchLoom does the rest.
Try it free — no signup