
How to Make Product Photos Look Professional at Scale
Learn how to make product photos look professional with our guide for e-commerce sellers. Master batch processing for consistent, high-quality images at scale.
If you're staring at a folder full of product photos and already dreading the edit queue, you're not alone. Most advice on how to make product photos look professional assumes you're styling one hero image at a time. That's not how most sellers work.
Real catalogue work is repetitive. You need item one and item five hundred to look like they belong in the same shop, on the same brand page, and across the same marketplaces. That means the professional look doesn't come from one perfect shot. It comes from a system that survives volume, seasonal drops, staff handoffs, and platform requirements.
For online sellers, image quality isn't a cosmetic detail. 67% of online buyers rank image quality as the top purchase factor, ahead of product info, descriptions, and reviews, and low-quality photos contribute to 22% of product returns due to appearance mismatches according to ElectroIQ's product photography statistics roundup. If your catalogue looks inconsistent, buyers notice fast.
Your Pre-Shoot Plan for Catalogue Consistency
A professional catalogue starts before the lights go on. If you shoot without a plan, you'll create work for yourself later. Crops won't match. Angles will drift. One sweater will sit high in frame, the next low and off-centre. On a single listing that's annoying. Across a collection, it looks amateur.

Build a shot list by product type
Don't create a fresh plan for every SKU. Group products into repeatable categories instead. Shirts need one shot list. Mugs need another. Jewellery needs its own.
A simple shot list for a run of shirts might include:
- Front straight-on: Main image for marketplace and collection pages.
- Back straight-on: Useful for fit, seams, and print placement.
- Side or slight angle: Adds shape without changing the visual language of the catalogue.
- Close detail: Fabric, stitching, buttons, or label.
- Scale or fit image: Only if your brand uses it consistently across the full category.
That kind of list keeps everyone aligned. If you bring in a freelancer or hand shooting to a staff member, they aren't guessing.
Write a one-page style guide
This doesn't need to be a big brand document. One page is enough if it's specific.
Include the rules that affect consistency most:
- Background choice: Use one standard. If you need clean marketplace-ready images, start with a neutral setup and review practical examples of a white photoshoot background for product listings.
- Camera height: Define whether the main angle is eye-level, slightly above, or overhead.
- Framing rule: Decide how much of the frame the product should occupy.
- Lighting direction: Keep your key lights in the same positions every time.
- Styling limits: Decide whether folds, props, tissue fill, mannequins, or model shots are allowed for that product class.
Practical rule: If a new assistant can't match your last shoot using only your style guide, the guide is still too vague.
For a collection of fifty shirts, this matters more than most sellers realise. Without a guide, the black shirts get brightened too far, the white shirts lose edge detail, and half the collars end up framed differently. You can fix some of that in editing, but you shouldn't have to fix all of it.
Decide what must be perfect and what must be repeatable
Experienced sellers save time through a selective approach. Not every image needs magazine styling. Your main listing images need clarity, consistency, and platform compliance. Secondary images can carry texture, scale, or lifestyle context.
Use this filter before every shoot day:
| Decision area | Keep strict | Allow variation |
|---|---|---|
| Main angle | Yes | No |
| Background | Yes | No |
| Crop position | Yes | No |
| Detail shots | No | Yes |
| Prop use | Usually | Sometimes |
| Creative composition | No | Yes, outside core listing set |
The fastest teams separate catalogue work from campaign work. Catalogue photos need to be organised, repeatable, and easy to batch process later. That's what gives your store a professional look at scale.
A Scalable DIY Photo Setup for Non-Photographers
You don't need a studio build-out to get reliable results. You need a setup that can stay put, produce even light, and remove guesswork. The easiest version is a dedicated photo station in a spare corner, stockroom, or office.
Use a fixed two-light layout
A simple setup works well because it's predictable. Place two identical lights with softboxes at roughly 45-degree angles to the product. That gives you even coverage and reduces the harsh side shadows that instantly make listings look homemade.
If one side still falls dark, add a reflector instead of moving everything around. The goal isn't dramatic lighting. It's stable, boring light that repeats well across a full batch.
For product work, boring is useful.
Build a background sweep once
A clean sweep background saves time all the way through capture and editing. Use white paper, white vinyl, or another smooth material that curves from wall to surface so you don't get a hard line behind the product.
That curve matters. It makes the product read cleanly in camera and makes later background removal easier because edges are easier to separate from the backdrop.
A practical setup usually includes:
- A table at fixed height: So camera position and styling stay consistent.
- A marked product spot: Tape marks help you place each item in nearly the same location.
- A fixed light position: Once it's working, don't keep redesigning it.
- A sweep you can replace quickly: Backgrounds get scuffed. Plan for that.
If your setup takes twenty minutes to rebuild every time, you won't stay consistent for long.
Optimise for repeatability, not gear envy
Plenty of sellers lose time chasing equipment upgrades when inconsistency is the problem. A basic station with stable lighting beats an expensive setup that's assembled differently every week.
What usually works:
- Soft, even light: Better than direct light with hard edges.
- Consistent floor markings: Useful when multiple people shoot.
- A dedicated shelf for tools: Tape, lint roller, clips, gloves, cloth, spare batteries.
- A small checklist taped nearby: Clean product, align label, straighten seams, check dust, shoot sequence.
What usually doesn't:
- Mixed light sources: They create colour shifts that are tedious to correct in batches.
- Phone flash or direct flash: It flattens texture and makes reflective products harder to control.
- Changing backgrounds by mood: It breaks catalogue cohesion fast.
- Rebuilding every session: Small differences become obvious in grid view.
Set the station up for six months, not one afternoon
The most useful photo setup is one you can walk back into next month and use without relearning it. Leave tripod marks on the floor. Keep a note of light positions. Save your camera height. Store your sweep material close by.
That way, if you need to photograph ten replacement SKUs or reshoot one damaged item later, the new images still match the original batch. That's one of the clearest signs of a professional catalogue. Buyers don't consciously notice it, but they do feel it.
The Capture Workflow for Efficient Batch Editing
A lot of editing pain starts during capture. If your files come in with shifting exposure, inconsistent white balance, random angle names, and soft focus, no amount of batch editing will make the process smooth.
Lock your camera settings
For catalogue work, manual settings are your friend because they remove variation. According to Dash's guide to ecommerce product photography, for maximum sharpness and editing flexibility you should shoot in RAW format on a tripod with an aperture between f/8-f/16, ISO 100-200, and a shutter speed around 1/125s. The same source notes that following this approach for 8-12 angles per product has reduced return rates by as much as 87% for some DTC brands.
Those settings aren't magic. They work because they favour consistency and detail. RAW files also give you more room to correct exposure and colour across a batch without breaking the image.
Tether if you can
Tethered shooting is one of those workflow upgrades that sounds optional until you've used it. Seeing images on a laptop while you shoot makes it much easier to catch dust, focus misses, crooked labels, or framing drift before the product goes back on the shelf.
If you're dealing with dozens or hundreds of SKUs, reshoots are expensive in time even if they aren't expensive in cash. Tethering helps you catch mistakes at the cheapest possible moment.
A good capture rhythm looks like this:
- Place the item on your marked spot
- Style it once
- Shoot the full angle sequence
- Check focus and framing on a larger screen
- Rename or sort immediately before moving on
Name files like someone else will use them later
Messy file names slow down every later step. If your folders are full of DSC_4821 and IMG_9044, you're forcing yourself to re-identify products later.
Use a naming pattern that survives handoffs:
- SKU-front-01
- SKU-back-01
- SKU-detail-collar-01
- SKU-angle45-01
That structure makes your folders easier to batch sort, bulk rename, and push through resizing or export workflows. It also helps when you need to create sharper listing images later with tools built for converting product photos to HD-ready outputs.
Shoot like your future self is tired. Good file names are one of the cheapest productivity wins in the whole process.
Keep your sequence fixed
The biggest capture mistake in catalogue work isn't bad photography. It's drift. One product gets six angles, the next gets four. One is centred tightly, the next has extra headroom. A shirt gets folded one way in the morning and another way in the afternoon.
A fixed capture order reduces that drift. Use the same angle order every time. Keep one sample image visible on set. If staff rotate in, make them match the reference, not their own taste.
Professional product photos don't just look clean. They look organised. The camera workflow is where that organisation starts.
Your Modern Post-Processing Pipeline
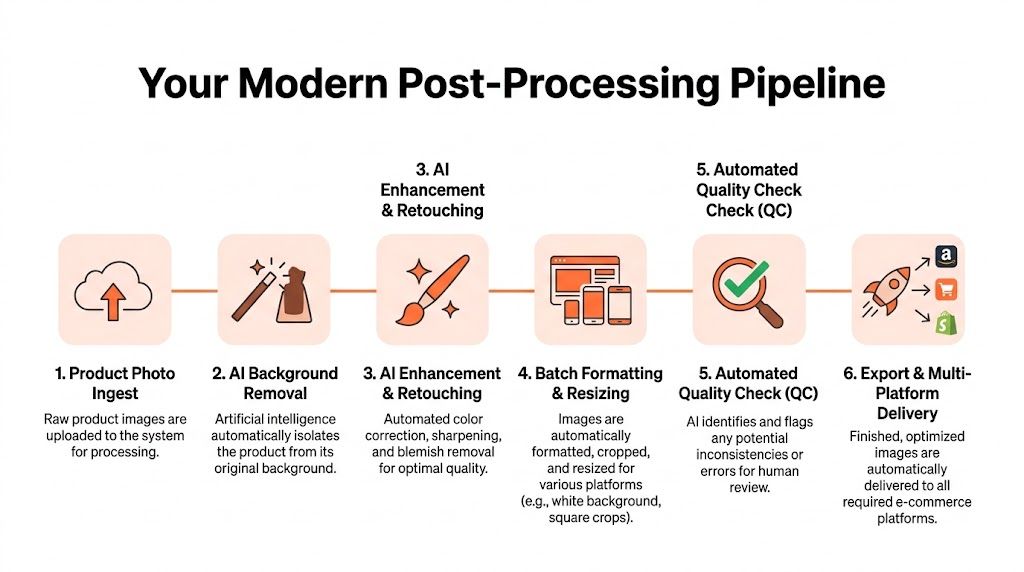
Post-processing is where catalogue work either stays profitable or turns into a slow, expensive mess. If each image needs individual attention after the shoot, the problem usually started earlier. The goal here is not perfect retouching on every file. The goal is a repeatable system that gives you clean, consistent outputs across a large batch.
Process in the right order
Editing order has a direct cost. If you upscale too early, retouch too much before cleanup, or create marketplace crops before the master file is stable, you waste both processing time and staff time.
A practical batch pipeline usually runs like this:
- Ingest the full shoot
- Remove or clean the background
- Correct colour and exposure across the set
- Retouch small distractions if needed
- Reframe for each marketplace
- Upscale or export to final resolution
That order keeps the master file lighter and reduces rework. FactMR's commercial photography market report notes that running background removal before AI upscaling can cut processing costs significantly for large catalogues, because you are cleaning the image before generating larger output files.
For ten products, that may feel minor. For a full catalogue refresh, it affects turnaround, software costs, and how much manual review your team can afford.
Standardise the edits that should never vary
Doing this for a whole catalog?
MerchLoom runs background removal, upscaling and AI editing across every product photo you have — one prompt, whole batch.
Try MerchLoomCatalogue inconsistency usually comes from small judgement calls repeated hundreds of times. One image gets a cooler white balance. Another gets more contrast. A third gets sharpened harder because it looked soft on one screen. None of those decisions look dramatic on their own. Together, they make the listing grid feel uneven and less trustworthy.
Batch correction fixes a lot of that, but only if the source images were shot with discipline. Good post-processing cannot rescue random capture habits at scale.
Use automation for steps that should follow the same rule every time:
- Background removal for marketplace-safe main images
- Colour and exposure correction across a product family
- Sharpening with restrained, fixed settings
- Cropping and reframing based on saved templates
- Export presets for file type, size, naming, and destination
Save manual retouching for exceptions. Reflective foil packs, transparent bottles, frizzy fabric edges, and glossy black products still need a human check. The cost-saving move is to isolate those files instead of treating the whole batch like an exception case.
If you need a cleanup method for problem areas, this guide to content-aware fill in Photoshop for product-image corrections is a useful reference.
This walkthrough shows the general production logic in motion:
Build one master, then version out
The expensive mistake is editing separately for each sales channel. That approach feels manageable with a few SKUs, then falls apart when you need Amazon, Shopify, Etsy, paid social, and email assets from the same source set.
A better system starts with one cleaned master image for each approved angle. From that master, generate the required variants: white-background marketplace images, square catalogue crops, tighter mobile-friendly versions, and larger files for zoom. That keeps colour, edge quality, and framing logic consistent across every destination.
Chained processing matters because it removes repeated setup work. Instead of opening the same file three times and making three slightly different judgement calls, you apply the rule once and let presets handle the predictable outputs.
A professional catalogue is a controlled production system. Every image follows the same rules, and exceptions get reviewed on purpose.
Put human review at the exception points
Automation works best when it handles the boring 80 percent and leaves the risky files for review. That is usually the cheapest split.
Check the batch at these points:
- After background cleanup, to catch bad edges and missing shadows
- After colour correction, to spot drift across a product family
- Before final export, to confirm that only approved files move forward
I also recommend testing the pipeline on one product family before pushing an entire seasonal range through it. If your crop rules, white balance target, or background settings are off, you want to find that out on 12 files, not 1,200.
That is how professional product photos stay consistent at scale. Build a post-processing line that handles the standard cases quickly, keep the rules fixed, and spend human time where it changes the outcome.
Mastering Marketplace Image Requirements Automatically
One of the least glamorous parts of selling online is preparing the same product photo in slightly different versions for each platform. This is also where a lot of sellers often lose time. They crop by eye, resize manually, and end up with listings that feel close enough but not quite right.
That approach works until you have a real catalogue.
Marketplace image specification cheat sheet 2026
The table below focuses on the requirements explicitly covered in the source material. If a platform rule isn't verified in the provided data, it's better to document your internal standard and test it than to rely on memory.
| Platform | Minimum Dimensions | Recommended Aspect Ratio | Background Requirement |
|---|---|---|---|
| Amazon.ca | 1600x1600px minimum | Square | White background for main listing image |
| Shopify | Not specified in the verified data | Square often works well for catalogue consistency | No single background rule in the verified data |
| Etsy | Not specified in the verified data | Varies by shop layout and image use | No single background rule in the verified data |
For Amazon.ca, the requirement is clear. Adobe's product photography guide notes that the platform requires a minimum of 1600x1600px, and achieving a consistent 85% frame-fill has been shown to yield 2.3x more customer engagement.
That one detail changes how you crop. A product floating too small in the frame wastes image real estate. A product cropped too tightly can look awkward or get rejected.
Smart reframing beats manual cropping
Manual resizing across a catalogue sounds manageable until the numbers pile up. Front angle, side angle, detail shot, alternate marketplace crop, social variation. It spreads quickly.
Smart reframing solves a real production problem because it can keep the product centred and proportionate while generating different outputs from the same cleaned image set. That matters most when one category includes products with very different shapes, such as bottles, folded apparel, and home goods.
Use automation for the parts humans do badly at scale:
- Keeping the product consistently centred
- Holding similar frame fill across unlike products
- Generating square outputs in bulk
- Creating alternate crops without clipping edges
If Amazon is a major channel for you, it's worth reviewing a platform-specific guide to Amazon product image size requirements and framing considerations.
The professional look on marketplaces often comes down to one quiet detail. Every product occupies the frame with similar confidence.
Build one master and export variants
The cleanest setup is to keep one high-quality master image per angle, then create marketplace-specific variants automatically. That protects you from rework later.
If you change channels, update templates, or need seasonal exports, you don't want to hunt through old folders for platform-specific one-offs. You want a structured asset library that can generate fresh outputs from the same approved source files.
That's how bigger catalogues stay manageable. The hard part isn't making one image look good. It's making every required version of that image easy to reproduce.
QC, Iteration, and Cost-Saving Best Practices
Most sellers treat quality control as the final glance before upload. That's too late. By then, the full batch is already processed, and any systematic mistake has multiplied across the collection.
Check the batch while it runs
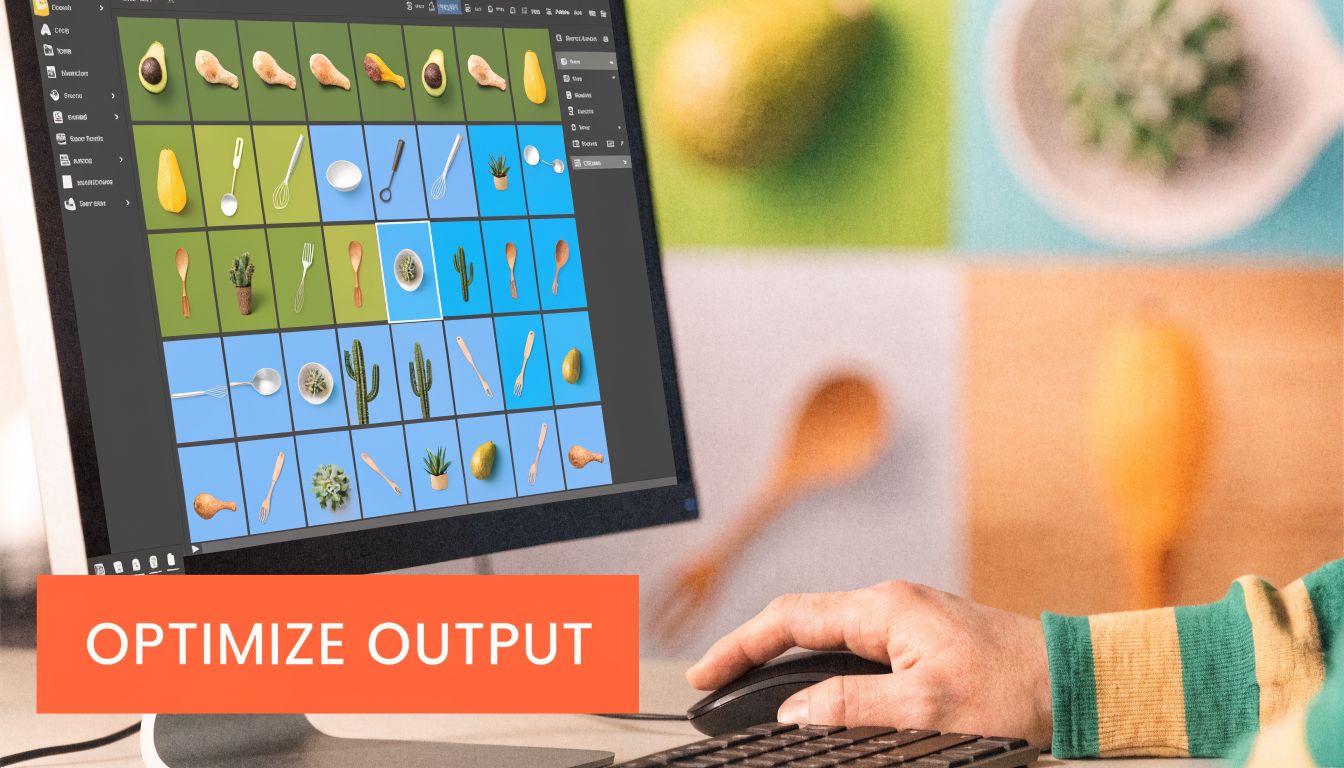
The smarter habit is mid-batch QC. Review early outputs while the rest of the collection is still processing. That lets you catch bad masks, colour drift, framing errors, or over-sharpening before they affect the full set.
Look for patterns, not isolated flaws:
- Edge handling: Fine details, transparent areas, soft fabrics
- Colour consistency: White products, black products, skin-adjacent tones in apparel
- Framing alignment: Especially across similar SKUs
- Naming and folder structure: So exports stay usable later
If a problem repeats, pause and adjust the workflow. Don't finish the entire run just because it's already moving.
Treat processed images like reusable assets
Many teams leave money on the table. Once you've cleaned and approved a batch, don't think of it as finished forever. Think of it as an image asset library you can iterate on.
If you later need a tighter square crop, a social-friendly vertical version, or a cleaner variant with a stray support object removed, the efficient path is to reprocess from the approved batch, not rebuild from scratch. That's especially useful when you're handling edits related to cleanup tasks such as removing distracting objects in Photoshop-style workflows.
Your first export isn't the end product. It's version one of a reusable catalogue asset.
Keep cost discipline in the workflow
Good image operations are partly creative and partly operational. The operational side is where margins are protected.
A few habits help:
- Run the cheapest impactful step first: Earlier in the article, the background-removal-first sequence covered why processing order affects cost.
- Avoid duplicate uploads: Reuse approved assets whenever possible.
- Separate exceptions from the main batch: Don't slow down hundreds of straightforward files because a handful need special treatment.
- Use spot checks instead of obsessive review: Review enough to catch systematic issues, not every pixel of every file.
Teams that work this way usually move faster because they're not pretending every product needs handcrafted attention. They reserve manual effort for the files that earn it.
Professional product photography at scale is mostly about restraint. Tight standards, smart sequencing, and iterative QC beat heroic editing sessions every time.
Frequently Asked Questions
Can I use a smartphone for product photos
Yes, you can, especially if your lighting, background, and framing are controlled. For many sellers, the bigger issue isn't the camera body. It's inconsistency. A modern phone can work for simpler products and smaller catalogues.
A dedicated camera still gives you more control, especially when you need stable manual settings, cleaner RAW files, and consistent depth across many SKUs. If you're processing large batches regularly, that control makes the downstream workflow easier.
Is AI reliable enough for product photo editing
Usually, yes, for the repetitive parts. Background removal, reframing, resizing, and broad consistency corrections are good candidates for automation. The files that still need closer review are the familiar troublemakers: reflective packaging, transparent products, very fine edges, and unusual shapes.
Value isn't blind trust. It's reducing manual work on the standard cases so you have time to review the exceptions.
How do I know if a batch workflow is worth it
Start with the bottleneck. According to Nightjar's guide on taking professional product photos, 42% of Canadian sellers on platforms like Shopify and Amazon.ca cite image processing time as the main bottleneck, and many manage over 100 SKUs. If that sounds like your week, manual editing is already costing you.
A simple ROI check works well:
- Count total images per product
- Estimate manual minutes per image
- Multiply by your typical shoot volume
- Compare that with a standardised batch process
If the same repetitive edits keep eating afternoons, the workflow needs to change.
Do I need every product photo to look perfect
No. You need them to look trustworthy, clean, and consistent. Buyers don't compare your images to a gallery exhibition. They compare them to the next seller's listing.
That shifts the target. Professional means organised, clear, and repeatable.
If you're handling large product batches and want a cleaner way to process them, MerchLoom is built for that catalogue reality. You can upload whole collections, chain steps like background removal, reframing, colour correction, and upscaling, and re-run approved images through new pipelines without starting over. For sellers juggling Shopify, Amazon, Etsy, and seasonal catalogue refreshes, that kind of workflow is often more useful than another manual editing sprint.
Stop editing product photos one at a time
Upload your catalog or connect your store. Describe the result once. MerchLoom does the rest.
Try MerchLoom