
Master How to Remove Objects in Photoshop for 2026
Learn how to remove objects in Photoshop efficiently. Master batch processing, Generative Fill, & advanced fixes for e-commerce product catalogs in 2026.
You’ve wrapped a shoot, cards are full, and the product photos look almost ready. Almost. There’s a hanger edge peeking into one frame, a reflection from a light stand in another, lint on a knit jumper, a packaging insert that shifted halfway through the set, and a mannequin support you swore was hidden.
Removing one object in Photoshop is easy. Removing the same class of problems across hundreds of listing images is where most sellers lose their evenings.
That’s the primary use case behind how to remove objects in photoshop for e-commerce. Not one hero image. A whole catalogue that has to look consistent on Amazon, Shopify, Etsy, and everywhere else your products appear. If you’re also dealing with white-background requirements, this guide to images with white background pairs well with the object-removal workflow below.
The Reality of Catalog Editing
A lot of Photoshop advice breaks down because it assumes you’re polishing a single image for a portfolio. Sellers don’t work like that.
You might have 300 SKU shots from one day, plus detail crops, flat lays, alternate angles, and square exports for Shopify. The issues are usually small, but they repeat. Dust on acrylic. A tag string tucked behind a collar in half the set. The same hotspot on a metal bottle because the light was fixed in one position all morning.
One image can absorb manual care. A catalogue punishes that approach.
The practical problem isn’t whether Photoshop can remove an object. It can. The problem is whether the method stays consistent when you’re tired, rushing a launch, and trying to preserve edges, shadows, and texture across a long batch. That’s where weak habits show up fast. Hard selections leave halos. Aggressive tools smear fabric weave. Quick fixes on one image turn into visible inconsistency when the product grid loads on a collection page.
The sellers who keep their sanity build a system. They sort by problem type, use the same edit logic on every set, and reserve heavy cleanup only for the frames that will carry the listing.
Your Core Toolkit for Scalable Object Removal
Photoshop gives you several ways to remove distractions. For catalogue work, the question isn’t which tool is best in theory. It’s which tool gives you the cleanest repeatable result with the least correction afterwards.
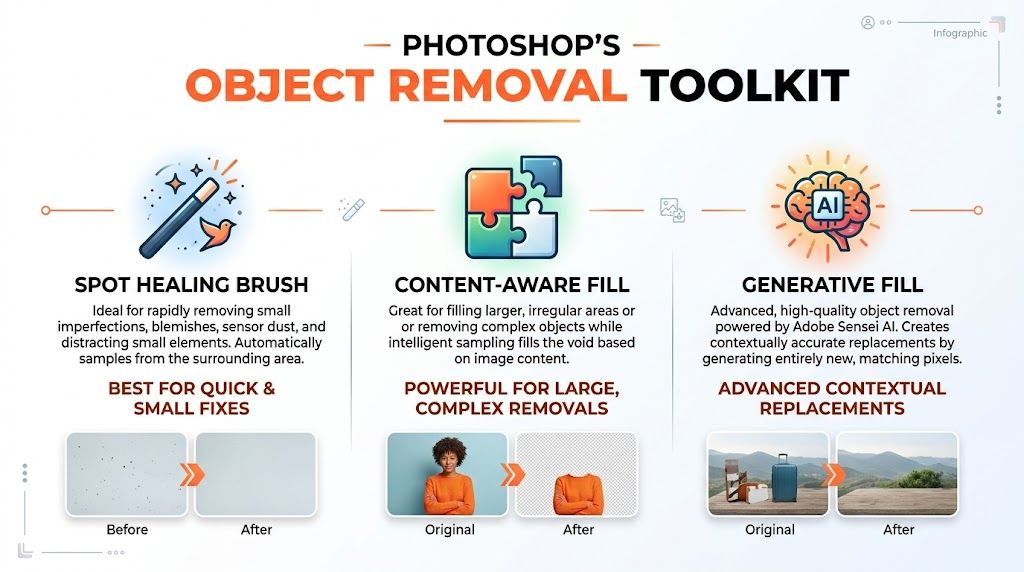
Content-Aware Fill for controlled removals
For product photography, Content-Aware Fill is still one of the most dependable tools when you need control without fully manual cloning. Clean images can boost conversion by up to 30%, and the same source notes 92% flawless removal on uniform backgrounds versus 78% on complex textures. It also recommends duplicating the background layer with Cmd+J and feathering the selection by 10 to 20 pixels for smooth blending in high-resolution product shots, as detailed by The Photo Method’s guide to object removal in Photoshop.
In practice, I reach for it when the object is awkward but the surrounding pixels are predictable. Think:
- Price tags on plain apparel shots
- Small props left on tabletop scenes
- Wrinkle clips on white-background product images
- Packaging corners intruding into flat lays
The working sequence is simple:
- Duplicate the layer first so you can compare before and after.
- Make a loose selection with the Lasso Tool.
- Feather the selection so the repair doesn’t leave a hard edge.
- Go to Edit > Fill > Content-Aware.
- Refine with a layer mask if the blend looks too clean or too muddy.
That feather matters more than most tutorials admit. Tight selections often create a pasted-on repair, especially against white sweeps or soft shadow falloff.
Practical rule: If the fill area touches a product edge, don’t trust a one-click result. Zoom in and check the contour before moving on.
For readers who want a deeper walkthrough of this specific method, this breakdown of content-aware fill in Photoshop covers the mechanics in more detail.
Clone Stamp for tiny repeatable defects
The Clone Stamp Tool isn’t glamorous, but it wins on repetitive, low-risk cleanup. For catalogue work, that usually means small defects on simple backgrounds or surfaces where you need to preserve texture exactly as shot.
It’s strong for:
| Tool | Best use in e-commerce | Main weakness |
|---|---|---|
| Clone Stamp | Dust, tiny scuffs, repeating specks, edge cleanup | Slow on large areas |
| Content-Aware Fill | Mid-sized removals on predictable backgrounds | Can invent mushy texture |
| Spot Healing or Remove Tool | Fast one-off blemishes | Less reliable near product edges |
| Generative Fill | Large or complex removals | Needs review and cleanup |
Clone Stamp is the tool I use when the mistake repeats across many frames and sits in roughly the same visual environment. Dust on a white acrylic base. Sensor specks in a clean backdrop. A tiny nick on a paper sweep. It’s also useful after AI tools have done the heavy lifting and left one ugly patch.
A few habits keep it efficient:
- Sample nearby, not far away. Long clone jumps create visible repetition.
- Work on a separate empty layer with current and below sampling.
- Use a soft brush for gradients and a firmer edge when repairing product contours.
- Resample often on fabric and paper so the texture doesn’t tile.
Spot Healing and Remove Tool for speed, not trust
Photoshop’s faster cleanup tools are handy, but they’re not where I put blind faith on revenue-driving images.
Use them for the obvious, low-stakes fixes:
- Lint on background paper
- Tiny blemishes on props
- Minor marks away from the product edge
- Single-frame cleanup for secondary listing images
What they don’t do well is understand product geometry. The moment a fix crosses stitching, jewellery edges, box corners, or glossy reflections, you need to slow down. Fast tools tend to soften shape transitions. That’s exactly the kind of thing shoppers may not consciously notice, but they do read it as “cheap image”.
A practical decision flow
When the batch is big, hesitation is expensive. I use a simple mental filter.
- Tiny defect, simple surface. Start with Spot Healing or Remove Tool.
- Small to medium object, predictable background. Use Content-Aware Fill.
- Large object, mixed texture, or background reconstruction needed. Use Generative Fill.
- Any visible artefact after AI or content-aware repair. Finish with Clone Stamp and masking.
That’s the difference between knowing Photoshop and using it professionally at scale. The best tool isn’t the newest one. It’s the one that lets you finish the set without creating a second round of cleanup.
Mastering Generative Fill for Complex Product Shots
Generative Fill earns its keep when the old methods become slow or brittle. If you need to remove a mannequin arm from a fashion shot, a reflected tripod from polished steel, or a stray prop from a styled tabletop scene, in such instances, Photoshop’s AI usually saves time.

The strongest results come from being boring and precise. Loose selections, vague prompts, and rushing the review stage are what make AI edits look fake.
How to set up the selection properly
Start by rasterising the layer if needed. Then use Object Selection or Quick Selection to isolate the unwanted element as cleanly as possible.
If the object touches the product, don’t hug the edge too tightly. Give Photoshop enough surrounding context to rebuild the area, but not so much that it starts rewriting adjacent parts of the item. That balance takes a few jobs to get a feel for.
For product work, I usually follow this pattern:
- Select the unwanted object precisely
- Add slight feathering if the edge transition is soft
- Click Generative Fill in the contextual taskbar
- Leave the prompt blank, or use something simple like “empty background”
- Review all generated variants at full zoom
- Keep the best version on its own generated layer
- Clean edge issues with a mask
According to the benchmark data cited in BWillCreative’s Photoshop Generative Fill tutorial on YouTube, Generative Fill achieves a 95% success rate in removing large objects from detailed e-commerce photos and outperforms Clone Stamp by 25% in the quality of its integration. The same source notes a 15% rate of hallucinations on low-light or highly textured shots, which matches what product photographers run into with reflective metals, knitwear, and busy backgrounds.
Keep prompts simple
Most e-commerce object removal jobs don’t need creative prompting.
Blank prompts often work best because Photoshop focuses on reconstruction instead of invention. If I use text, it’s short and literal:
- empty background
- plain tabletop
- continue wall
- remove reflection
Long prompts tend to push the tool into image generation mode. That’s not what you want for listings. You want repair, not interpretation.
The more specific the product geometry, the less freedom you should give the AI.
This is also where combined workflows matter. If you’re building image sets from multiple assets before cleanup, an AI image combiner workflow can simplify the prep stage before you even open Photoshop.
How to judge the three variants
Don’t choose the variant that looks best at screen-fit size. Zoom in.
Look at:
- Product edges where the removed object touched the item
- Pattern continuity on fabric, wood, or stone
- Reflection direction on glossy surfaces
- Shadow logic under the product
- Background consistency across the rest of the batch
If one variant gives you a better edge and another gives you a cleaner texture, keep the stronger one and repair the weak area manually with masking or cloning. You don’t have to accept the generated layer as-is.
A short demo helps if you want to see the mechanics in motion.
The cleanup pass that makes it look real
This is the step most tutorials skip. Generative Fill gets you close. The final polish makes it saleable.
Use a layer mask on the generated result and paint with a soft black brush to hide bad portions. Bring back original pixels where the AI softened a seam, bent a straight edge, or invented nonsense inside a texture. Then use Clone Stamp for the tiny transitions.
Three common examples:
- Apparel. Restore stitching, weave direction, and hem shape.
- Hard goods. Straighten corners and preserve clean highlight lines.
- Homeware. Rebuild contact shadows so the item doesn’t float.
When it works, Generative Fill is the fastest route through a difficult removal. When it doesn’t, the fix is rarely another prompt. The fix is controlled masking.
Why Non-Destructive Editing is Non-Negotiable
Catalogue images don’t stay finished for long.
A marketplace changes its crop. A brand manager wants a cleaner shadow. You notice a missed reflection after exporting the whole collection. A retailer asks for a white-background version after you already built a softer lifestyle edit. If you edited the base pixels directly, you’ve turned a small revision into a restart.
That’s why every serious object-removal workflow in Photoshop needs to be non-destructive.
Build edits so they can be reversed
At minimum, that means:
- Duplicate the base layer before major cleanup
- Use generated layers instead of flattening AI results
- Apply masks instead of erasing
- Keep retouch layers separate for cloning and healing
- Name layers by edit type when the file matters
This isn’t just neatness. It’s production insurance.
A mask lets you pull back a cleanup that went too far. A separate clone layer lets you compare texture repair without reopening the raw file. A generated layer keeps AI reconstruction isolated, so you can swap or remove it later without damaging the shot underneath.
Non-destructive files are easier to standardise
The hidden benefit is consistency across a team or across your own work a week later.
If every product PSD follows the same pattern, you can open any file and know where the edits live. Original at the bottom. Cleanup layers above. AI reconstruction isolated. Output crops saved separately. That structure matters when you’re revisiting a catalogue under deadline.
Working standard: If deleting one layer breaks the whole file, the edit was built too destructively.
Doing this for a whole catalog?
MerchLoom runs background removal, upscaling and AI editing across every product photo you have — one prompt, whole batch.
Try MerchLoomRevisions stop being painful
A destructive edit traps you in the first decision. A non-destructive edit lets you revise for platform requirements without rebuilding from zero.
That matters when the same image needs to serve:
- Marketplace white-background listings
- Shopify collection tiles
- Square social crops
- Closer detail crops for zoom views
The object removal itself might stay the same, but the crop changes what’s visible. A hidden flaw near the edge of a wider frame can become obvious in a square export. If your cleanup is layered properly, fixing that takes minutes. If it’s baked in, you’re back to manual surgery.
For high-volume sellers, this is less about Photoshop purity and more about avoiding duplicate labour. Non-destructive habits feel slower on image one. They’re much faster by image two hundred.
Advanced Fixes for Professional Polish
Removing the object isn’t the finish line. The finish line is when nobody can tell anything was there.
That takes a different skill set. You’re no longer deleting. You’re rebuilding visual logic, especially with shadows, reflections, and texture.

Recreate shadows instead of flattening the scene
A common amateur edit removes the prop and accidentally removes the shadow structure with it. The product ends up looking pasted onto the background.
To fix that, create a new layer and paint in a soft shadow manually at low opacity, or borrow nearby shadow information with a gentle clone. Keep it subtle. Product shadows should support shape, not call attention to themselves.
Use this when you remove:
- A stand or clip under apparel
- A stabilising prop beside cosmetics
- A support arm under small home goods
If the original image already has a messy cast shadow you need to clean separately, a focused guide on how to remove shadow from photo can help with that specific repair.
Repair reflections by following the surface
Glossy products punish lazy retouching. On metal, glass, polished plastic, and coated packaging, the reflection pattern is part of the object’s shape language.
Don’t clone randomly across a reflective surface. Sample along the same highlight path. Follow curvature. If the reflection fades from bright to dark, your repair needs to preserve that gradient.
A practical sequence:
- Remove the main distraction with Generative Fill or Content-Aware Fill
- Check highlight continuity across the repaired area
- Clone along the reflection direction
- Use a soft mask to blend any abrupt transitions
- Compare with neighbouring images from the same set so the finish stays believable
Preserve texture on fabric and edges
Textured products are where quick tools fall apart. Knitwear, denim, straw, fur trim, and woven home textiles all reveal bad object removal fast.
The trick is to separate the job into two parts:
- first, remove the unwanted object
- then, restore the product texture manually where the automated tool softened it
That might mean cloning a short run of weave, borrowing a clean seam section, or masking back original pixels around a product edge.
If the repair is technically invisible but the texture rhythm changes, shoppers still read it as wrong.
Use divide-and-conquer on awkward shapes
Long, thin, or irregular objects often fail because you try to remove them in one pass. Break them into smaller segments.
This works well for:
- Tag strings
- Thin support rods
- Crease clips
- Wires from lit products
- Stray edges from styling materials
Remove the easiest middle sections first. Then clean the difficult parts where they touch the product. Photoshop performs better when each fill has less ambiguity.
Match polish across the set
One flawless image doesn’t help if the rest of the collection looks rougher.
After the hero image is repaired, compare it with the alternates. Make sure the same surface still has the same level of texture, the same shadow density, and the same edge sharpness. Professional polish in e-commerce is less about making one image perfect and more about making the whole series feel like it came from one controlled process.
From Manual Edits to Automated Pipelines
Manual retouching breaks first on repetition.
If a dust speck appears in one frame, Photoshop handles it easily. If the same product line has hundreds of images and each file needs the same opening steps before the unique cleanup even begins, that’s where time disappears. Data from the California E-Commerce Association’s 2025 report says 68% of online retailers spend over 10 hours weekly on manual photo edits, and 25% of DTC brands face listing delays because standard tutorials ignore batch processing. The same report says sellers are looking for AI-pipeline alternatives that can cut editing time by up to 87%, as summarised in this discussion of batch-processing gaps for e-commerce image editing.
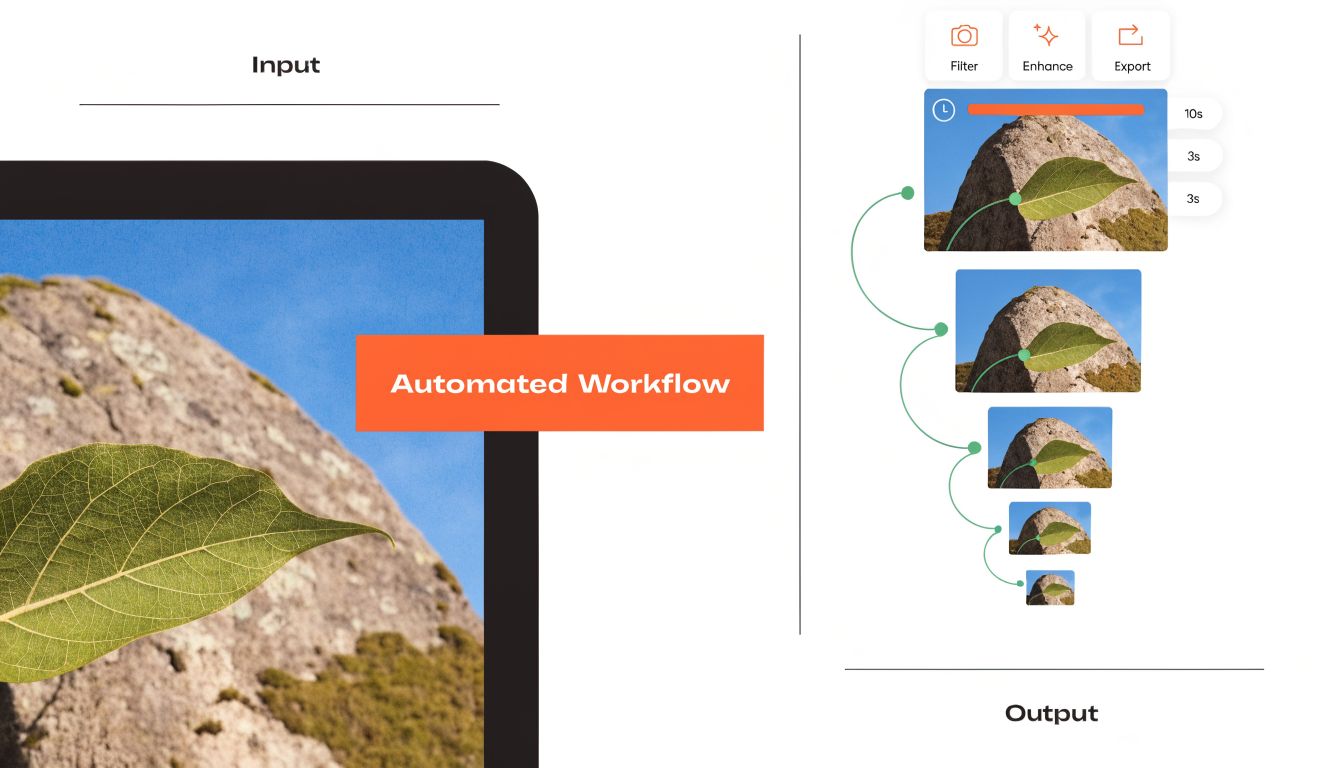
What Photoshop Actions do well
Photoshop Actions are good for rigid repetition.
If every image in a set needs the same sequence, Actions can save serious time. Typical examples:
- Duplicating the background layer
- Running a fixed crop
- Converting to a square canvas
- Applying a standard export setup
- Triggering the same cleanup step on a consistently placed flaw
For catalogue prep, that’s useful. It reduces the number of boring clicks before retouching begins.
A solid Action might handle:
- Open file
- Duplicate base layer
- Create cleanup layer
- Run a standard crop or canvas resize
- Save a working PSD
- Export a review JPEG
That sort of automation is worth doing because it removes friction from every single file.
Where Actions stop helping
Actions fail when the issue moves.
A tag isn’t always in exactly the same place. A reflection changes with product shape. A mannequin stand might be hidden in one angle and fully visible in another. The moment Photoshop needs judgment, recorded steps become fragile.
That’s why single-image tutorials hit a wall in real production. They show you how to remove one problem in one frame. They don’t address the larger job, which is moving an entire collection from raw shoot output to listing-ready assets without manually babysitting every image.
Think in pipelines, not isolated edits
The scalable way to work is to treat each image as part of a processing chain.
For a typical e-commerce batch, that chain might be:
| Stage | Purpose |
|---|---|
| Background cleanup | Remove obvious distractions and standardise the base |
| Object removal | Fix props, tags, supports, reflections, or packaging intrusions |
| Reframing | Prepare marketplace crops such as square or white-background layouts |
| Resolution prep | Upscale or export to the needed listing size |
| QC pass | Catch failures and outliers before upload |
That’s a different mindset from “open file, fix issue, save, repeat”. It’s much closer to production.
If you’re evaluating image sizing and output constraints as part of that flow, this guide to resolution in AI image workflows is a useful reference point.
The shift from tools to systems
This is the point where many sellers outgrow Photoshop as the whole workflow, even if they still use Photoshop for exceptions.
For large catalogues, a system like MerchLoom fits the way production works. Instead of recording a brittle sequence, you can process entire image collections through chained AI pipelines that handle tasks in order, such as background removal, reframing for marketplace requirements, colour correction, and upscaling. That matters when the set includes mixed products, inconsistent framing, and different output needs for Amazon, Shopify, Etsy, or social placements.
The big advantage isn’t that automation replaces judgement. It’s that automation removes the repetitive baseline so you can spend your human attention on the files that require it.
That’s the practical threshold. Once you’re editing by the hundreds, the skill isn’t just knowing how to remove objects in photoshop. It’s knowing which removals deserve Photoshop at all, and which should be absorbed into a pipeline.
Troubleshooting Common E-commerce Editing Issues
Most failed object removal jobs don’t fail completely. They fail in the last ten percent.
That’s the dangerous part, because the image looks finished until you zoom in and catch a broken pattern, a dirty white patch, or a warped edge. According to a 2025 to 2026 survey from the Los Angeles Product Photography Guild, 55% of e-commerce photographers still encounter AI hallucinations in 30% of edits, especially on textured fabrics, as noted in Adobe’s page on object removal tips and techniques.
When Generative Fill invents bad texture
This shows up constantly on knitwear, woven bags, vintage denim, and patterned garments.
Fix it by masking back the original texture around the damaged area, then cloning from a nearby section that matches direction and scale. Don’t ask the AI for more versions unless the entire generated area is unusable. Small texture failures are usually faster to repair manually.
When white backgrounds turn blotchy
Large removals on white sweeps often leave tone variation that looks fine alone but inconsistent in a product grid.
Use a soft mask first. If the patch still reads dirty, sample from a clean nearby area with Clone Stamp at low flow. Keep an eye on natural falloff near contact shadows so you don’t flatten the product onto pure white.
When edges lose their shape
Corners of boxes, hems, bottle outlines, and jewellery contours can soften after an automated fill.
The fix is usually simple. Mask back the original edge where possible, then repair only the interior fill. If the edge itself is damaged, clone along the contour in short passes instead of one long stroke.
A believable repair keeps the product’s geometry intact first. Surface perfection comes second.
When one image doesn’t match the rest of the set
Sometimes the retouch is good, but the image now looks cleaner, flatter, or more processed than its companion shots.
Pull up neighbouring frames and compare them side by side. Match shadow density, texture strength, and background cleanliness. Catalogue consistency sells better than one overworked file surrounded by weaker ones.
If you’re spending nights repeating the same cleanup across entire product sets, MerchLoom is worth a look. It’s built for batch image processing, so you can run chained AI workflows across hundreds of e-commerce photos instead of fixing every file one by one in Photoshop.
Stop editing product photos one at a time
Upload your catalog or connect your store. Describe the result once. MerchLoom does the rest.
Try MerchLoom