
What Is 4K Upscaling for E-Commerce Catalogs
Learn what is 4K upscaling and how to apply it across large e-commerce catalogs. Compare AI and interpolation methods, platform rules, and batch costs.
You've got a folder full of supplier photos, many too small for marketplace zoom, and a launch date approaching. The problem isn't improving one hero image. It's turning hundreds of inconsistent files into exports that meet Amazon, Etsy, Shopify, eBay, WooCommerce, Poshmark, and Depop requirements without paying to process pixels you'll later remove or crop.
Start by checking the source dimensions, then define the destination for each channel. 4K upscaling is a delivery decision, not an automatic repair step. It can make a file large enough for a display or listing requirement, but it can't recover detail the camera never captured.
The Reality of Upscaling Product Photos at Scale
4K upscaling enlarges a lower-resolution image or video to a 4K output size. In consumer video and common product-image workflows, 4K usually means 3840 × 2160 pixels, compared with Full HD at 1920 × 1080. The 4K frame contains four times as many pixels, so the system must synthesize three extra pixels for every source pixel to fill the larger canvas, as explained in this technical overview of TV upscaling.
That distinction matters when a supplier sends a small image of a handbag, shoe, lamp, or garment. Enlarging the file changes its dimensions. It doesn't automatically restore the weave of the fabric, the sharpness of a printed label, or the edge of a metal clasp. A larger file can still look soft when a buyer opens marketplace zoom.
The practical workflow starts with a source audit:
- Group by source size. Separate files that already meet a channel's target from undersized images. Don't upscale images that will be reduced later.
- Check the subject area. A large canvas with a tiny product still produces a weak listing. Measure the product's visible footprint, not only the file dimensions.
- Identify the destination. Amazon's main image rules, Etsy's recommended image size, and Shopify's square product-image workflow require different exports.
- Run a representative test batch. Include white products, dark products, fine textures, reflective surfaces, and small text before processing the whole collection.
- Review at actual listing size and zoom. A result that looks crisp in an editor at a reduced preview can reveal halos, invented texture, or lettering errors when enlarged.
Practical rule: Treat upscaling as display matching. It prepares an asset for a larger output frame, but it isn't a substitute for a sharp source photograph.
The reason this matters has changed with the way shoppers interact with listings. Buyers expect clean product visuals, zoom, consistent backgrounds, and imagery that behaves well across devices. That sits alongside broader work around intelligent shopping experiences with AI, where the image becomes part of a larger product-discovery experience rather than a file uploaded once and forgotten.
For a practical workflow focused on converting HD assets for catalog use, see this guide to converting HD product photos. The key decision remains the same across tools: upscale only when the destination needs more pixels and the source contains enough structure to support a credible result.
Interpolation Versus AI Super-Resolution
For a catalog team processing thousands of product photos, the choice between interpolation and AI super-resolution is a batch decision. It depends on how much enlargement each channel requires, how clean the source files are, and whether added processing time improves listing consistency.
The simplest method is interpolation. Bicubic interpolation calculates new pixels from neighboring pixels. It is predictable, fast, and suitable for a modest size adjustment. It does not distinguish leather from a printed logo or background, so the same mathematical process applies across the frame.
The result can be soft edges and blurred fabric texture. On catalog images, the weakness often appears around product outlines, stitching, jewelry settings, thin straps, and small packaging text. If supplier files receive different amounts of blur, the catalog can look inconsistent even when every export has identical dimensions.
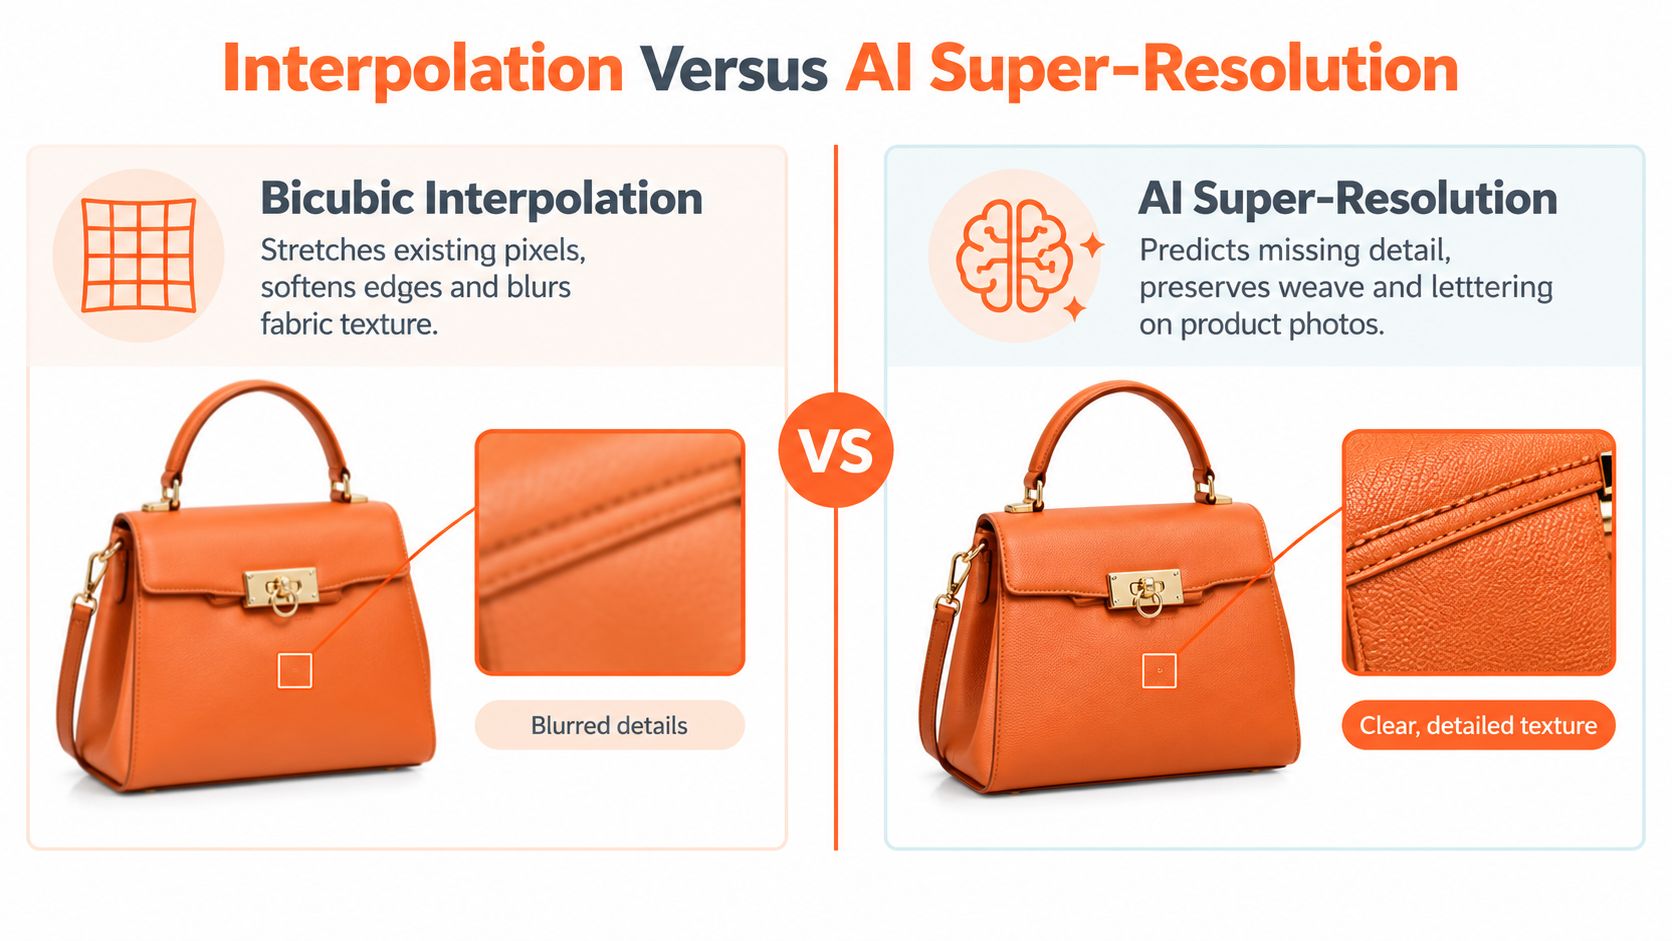
AI super-resolution uses a trained model to predict plausible missing detail. It evaluates patterns across the image, which can produce clearer edges and more convincing texture than a purely mathematical enlargement. The trade-off is accuracy. A model can add realistic detail that does not belong to the product.
Catalog images require faithful representation. A generated result that changes a logo, adds nonexistent stitching, alters a weave, or reshapes a small component can create a product-accuracy problem. Conservative settings are safer than creative enhancement when buyers need the image to match the item they receive.
How the methods behave across a catalog
Bicubic interpolation has a practical operational advantage. It behaves consistently and uses relatively little processing. For clean source files that only need a controlled export adjustment, that predictability may outweigh sharper reconstruction. It will not repair a badly compressed supplier image, but it will not reinterpret the product either.
AI super-resolution fits sources with recognizable edges and textures that must survive enlargement. Run it on a review sample first. Results can vary across white-on-white products, glossy surfaces, black clothing, and heavily compressed images, so one setting should not automatically cover every supplier class.
Quality metrics help compare methods, but they do not replace visual review. In super-resolution benchmarks, higher PSNR and SSIM indicate better reconstruction. Deep-learning methods often exceed bicubic interpolation by roughly +1 to +2 dB PSNR and +0.05 to +0.1 SSIM on average, according to this review of image super-resolution metrics. These are benchmark measures, not proof that every generated image will perform better for shoppers.
Use a small decision rule:
- Clean source, small size adjustment: interpolation may be enough.
- Visible texture and edge loss: test AI super-resolution.
- Small text or exact branding: inspect representative outputs at zoom.
- Severe blur or compression: replace the source where possible.
- Mixed supplier quality: process by source class, not one catalog-wide setting.
This guide to resolution in AI workflows explains how resolution targets affect AI processing. Choose AI reconstruction when its quality gain justifies the added compute and review work for the destination channel.
Mapping Resolution Targets to Marketplace Rules
A seller exporting one square file for every channel will create avoidable rework. An Amazon main image has different background and sizing requirements from an Etsy or Shopify product image, so set the destination rules before enlarging pixels. Keep one controlled master, then generate channel-specific outputs from it.
Amazon requires the main image to use a pure white background, RGB 255,255,255, with the product occupying about 85% of the frame. Amazon says files under 500 pixels on the longest side cannot be uploaded, while 1,000 pixels or more on that side enables zoom, according to its official main-image requirements. For a working catalog target, prepare the Amazon main-image export with the longest side at 1600 pixels or more, then verify the current listing rules before upload.
Etsy files are commonly prepared at 2000 pixels on the shortest side. Shopify product imagery is commonly prepared as a square file up to 4472 × 4472 pixels. These targets are summarized in this comparison of Amazon, Shopify, and Etsy product-photo requirements.
| Platform | Target Dimensions | Key Rules |
|---|---|---|
| Amazon | Longest side at 1600 pixels or more | Main image uses RGB 255,255,255 pure white, with the product about 85% of the frame. Amazon says 1000 pixels or more on the longest side enables zoom. |
| Etsy | 2000 pixels on the shortest side | Preserve important product edges and apply a consistent crop across the collection. |
| Shopify | Square, up to 4472 × 4472 pixels | Use a consistent square canvas and stable product placement across variants. |
Use the original supplier file as the reference, not as the upload file. Create a normalized master with consistent orientation, color handling, and naming, then branch it by marketplace:
- Amazon branch: correct the background, set the pure white canvas, position the product consistently, and upscale when the longest side falls below the working target.
- Etsy branch: retain enough canvas to reach the 2000-pixel shortest-side recommendation without stretching a portrait product into a square.
- Shopify branch: create a square output, center the product consistently, and keep visual scale similar across variants.
Composition decisions affect the upscale decision. Reframing after enlargement spends compute on pixels that the crop removes. Background removal can also change the subject's visible area, so define whether measurements apply to the original canvas or the final product placement.
For repeatable outputs, follow this Amazon listing image-size workflow when translating marketplace rules into catalog presets. The objective is consistent channel compliance, not one identical file everywhere.
Managing Compute Costs in Batch Pipelines
Doing this for a whole catalog?
MerchLoom runs background removal, upscaling and AI editing across every product photo you have — one prompt, whole batch. Try 2 batches free, no signup.
Try it freeA supplier folder can contain thousands of images, but only some need 4K treatment. Upscaling every file before cropping, background removal, or marketplace formatting wastes compute on pixels that will not survive the final composition. Treat the upscale as a production decision: first establish the image that will be published, then enlarge only the approved output that falls below its target.
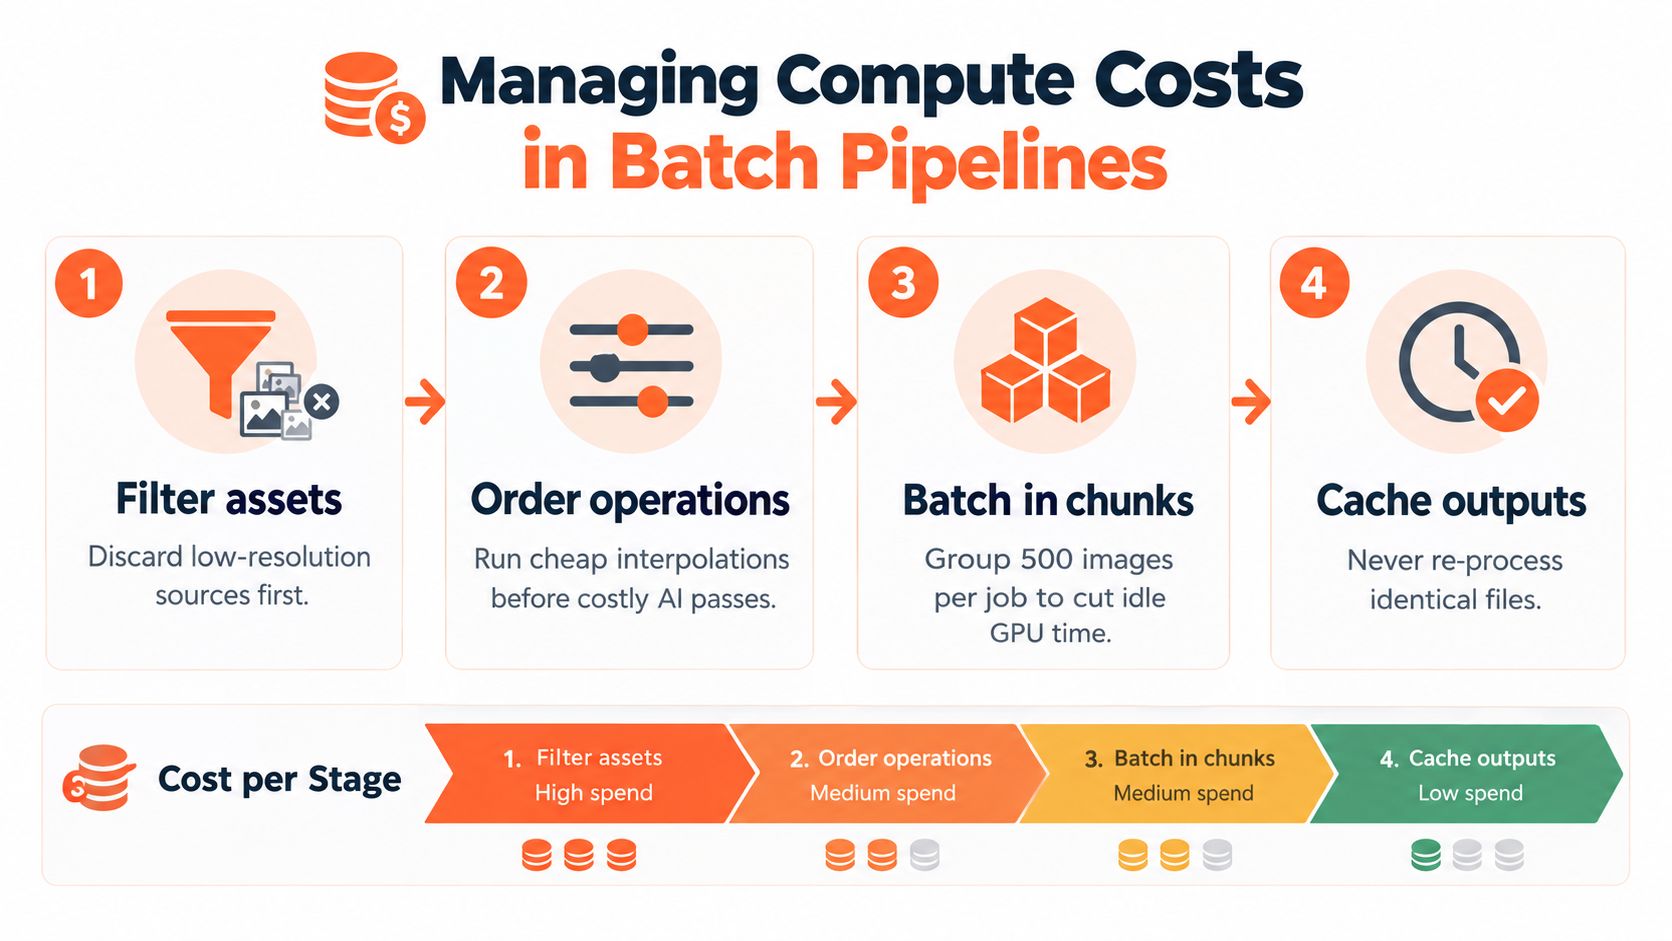
Begin with inexpensive checks. Reject empty files, duplicates, unsupported formats, and visibly unusable sources. Standardize orientation, trim unnecessary canvas, and apply the destination crop before the expensive model when those changes define the final image. If isolation removes a large background area, processing the isolated product can reduce the pixels carried into later stages.
A practical order is:
- Filter assets. Keep only files that can produce a usable listing image.
- Normalize the source. Correct orientation and apply basic color handling.
- Remove the background or excess canvas. Do this before enlargement when the model only needs the product.
- Set the final composition. Establish aspect ratio, crop, and product placement for the marketplace.
- Upscale the approved composition. Use AI super-resolution only when the output remains below its working target.
- Export and validate. Check dimensions, background color, file opening, naming, and visible artifacts.
Order is not fixed in every catalog. A tiny, soft source may produce poor segmentation, so a modest enlargement can improve edge detection before background removal. Test both sequences on a small sample, then apply the cheaper reliable path to the wider batch. The right choice depends on the source quality and segmentation tool.
A CVPR 2023 4K benchmark reported stronger reconstruction quality after normalization for 720p to 4K, 3×, and 1080p to 4K, 2×, while the normalized variant took longer to run, as documented in the NTIRE 2023 4K super-resolution benchmark. In production, the highest benchmark score may not justify the added runtime for every product image.
Batch principle: Reserve expensive compute for assets with a realistic chance of becoming useful listing images.
Record completion at every stage and cache results under a source-file fingerprint or stable asset ID. Queue jobs so a failed subset can be retried without restarting the catalog. For workflows spanning cloud environments, this overview of job scheduling across AWS, GCP, and Azure explains queue coordination and retry handling.
For storage-backed image operations, the guide to AI image processing for Cloudinary shows how the same approach can connect processing steps. Reduce unnecessary pixels early, process only approved assets, and retain intermediate outputs so catalog decisions remain auditable.
Running Automated Workflows Across Full Catalogs
A full catalog rarely fails because one image needs more attention. It fails when each supplier folder is handled differently. One batch may need background removal and reframing, while another needs color correction and an upscaled export for a specific marketplace. A defined workflow keeps those decisions attached to the collection instead of relying on memory.
MerchLoom can run chained AI pipelines across a collection rather than processing images individually. Bring files from cloud storage or an e-commerce backend, describe the required operations in plain English, and set the sequence for each output. The pipeline might remove the background, reframe the product, correct color, and enlarge the image to the required listing dimensions.

Set rules before processing
Connect the system that already stores the photos, such as Google Drive, Dropbox, Shopify, WooCommerce, Amazon S3, Cloudinary, or another supported service. Select a collection or folder, then define outputs by channel:
- Amazon output: pure white background, stable product placement, and the required longest-side target.
- Etsy output: shortest-side target and a crop that keeps the full product visible.
- Shopify output: square canvas, consistent margins, and a suitable maximum dimension.
- Review output: a smaller sample containing difficult materials, dark products, white products, and small labels.
Run a representative sample before sending the entire catalog through the pipeline. Check lettering, edges, texture, framing, and the final pixel dimensions. If the model invents surface detail or damages text, change the sequence or exclude that source class. A fast batch is not useful if the same defect reaches hundreds of listings.
For catalogs stored in Amazon S3, this Amazon S3 image-processing workflow covers the storage connection pattern. Keep originals and processed files separate, and retain links between the source asset, channel export, and review status. Stable filenames or asset IDs also make failed jobs easier to identify and rerun.
MerchLoom's first images can be tried with no account. It uses pay-per-image credits that never expire, allowing sellers to test a representative set before processing the rest. Review both output quality and workflow cost before committing compute to the full catalog.
Quality Control and Source Material Limits
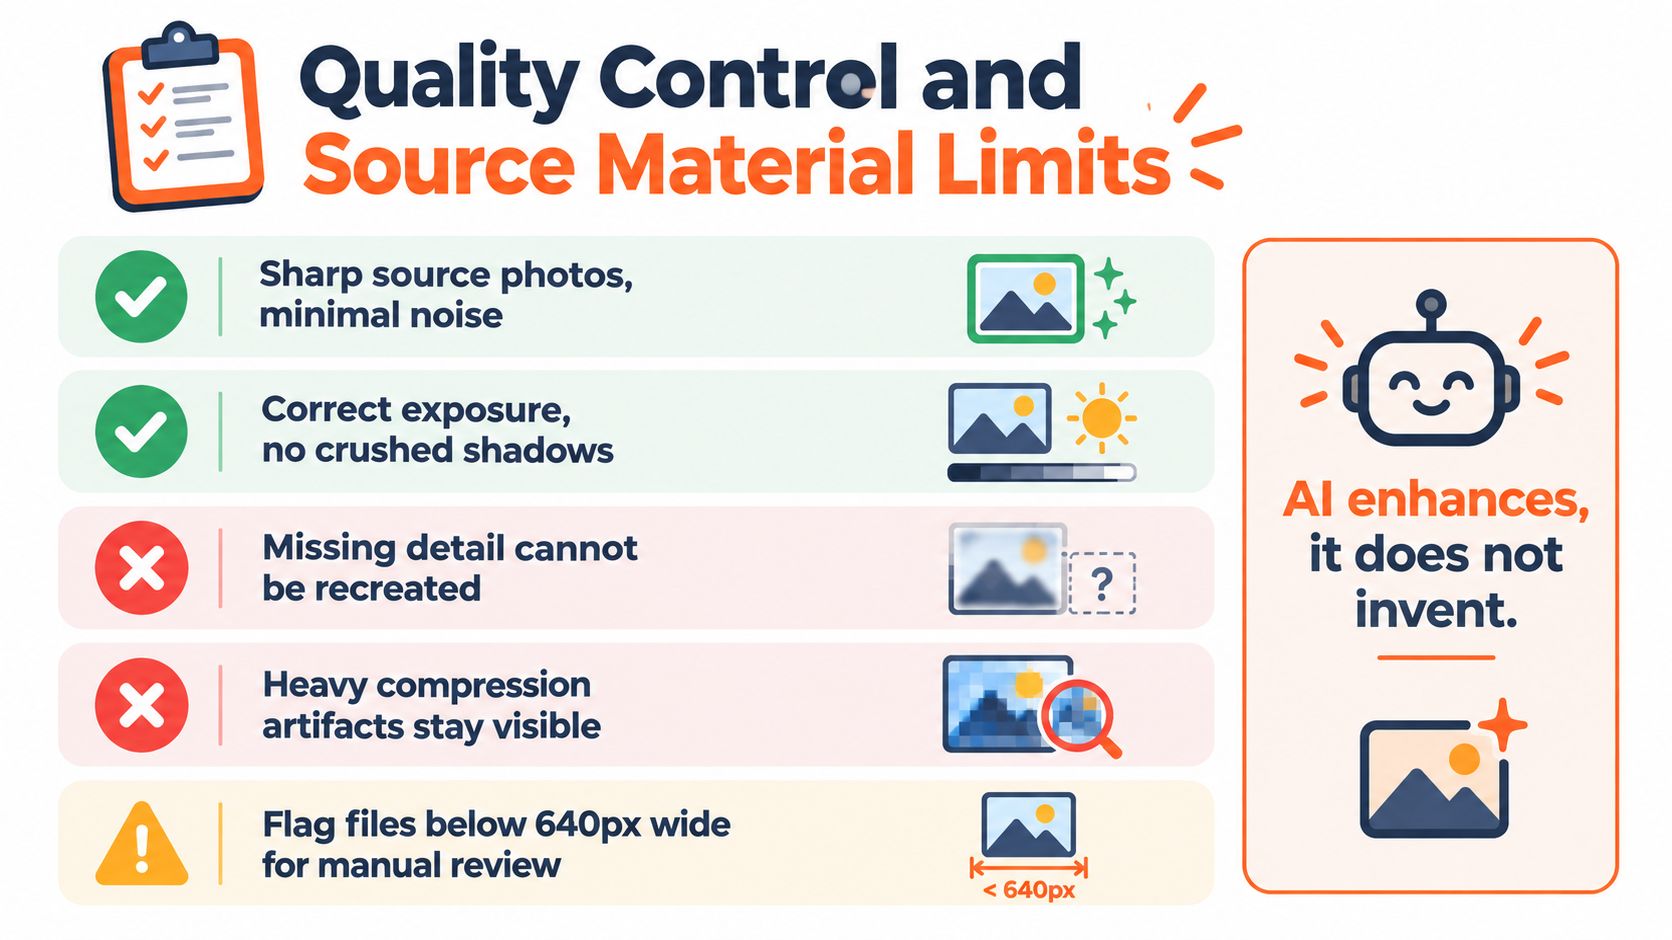
Upscaling can't repair every bad supplier photo. Its core mechanism is interpolation or AI prediction, and neither can recreate missing source detail. Real-world gains depend on the source quality, motion where video is involved, texture, focus, lighting, and dark scenes, not on the output resolution alone, as discussed in this comparison of native and upscaled 4K.
A sharp, correctly exposed image with modest resolution can respond well. A heavily blurred, crushed, noisy, or compressed image may become a larger version of the same problem. AI can make an edge look plausible, but plausible isn't the same as accurate when the edge belongs to a product buyers expect to receive.
Review the batch by failure type
Don't inspect only the first few alphabetically sorted files. Sample by product category and visual difficulty:
- Sharp sources: Confirm that labels, seams, corners, and small components remain faithful after enlargement.
- Dark products: Check shadow areas for mushy texture, halos, and artificial sharpening.
- White products: Look for edges disappearing into the background or gaining gray outlines.
- Reflective surfaces: Inspect metal, glass, and glossy packaging for repeated or invented highlights.
- Fine lettering: Compare every important logo or product marking with the source.
Reject a source when the product shape is unclear, the focus is irrecoverable, or compression blocks dominate the subject. Don't let a clean white background hide a soft product. Buyers judge the object first, and inconsistent sharpness across a collection can make the store feel unreliable.
Use a simple acceptance checklist before publishing:
- Does the product shape match the original?
- Are labels and markings readable without invented characters?
- Do edges remain clean against the chosen background?
- Is the product the same apparent size as comparable listings?
- Does the file meet the destination's dimensions and format rules?
- Does the image still look credible at marketplace zoom?
Quality control is part of the upscale step, not an optional final polish.
Run the checklist on a sample from every supplier batch and every processing recipe. If the results change after a model update or a new source-camera mix, pause the full run and test again. MerchLoom can chain the work across the collection, but a person still needs to approve the visual standard and remove failures.
MerchLoom lets you chain background removal, reframing, marketplace-specific sizing, and AI upscaling across full product collections instead of editing one file at a time. Try the first images without an account, review the output, and visit MerchLoom to run the approved workflow with pay-per-image credits that never expire.
Stop editing product photos one at a time
Upload your catalog or connect your store. Describe the result once. MerchLoom does the rest.
Try it free — no signup