
Photography of Jewellery: A Guide for E-Commerce Sellers
Master the photography of jewellery for your online store. Practical tips on lighting, camera settings, and batch processing for higher conversions.
You've photographed the new collection, edited the obvious dust, and uploaded a few listings. Then the problems appear. One ring looks warm, another looks blue. Some products fill the frame, while others sit tiny in the same square canvas. Amazon rejects a main image, Etsy crops a necklace awkwardly, and the catalogue feels assembled from different stores.
Photography of jewellery at catalogue scale needs a system, not a lucky shot. Set one camera position, one lighting arrangement, one framing rule, and one export process before you photograph the next batch. You don't need a full studio team, but you do need decisions that can be repeated across hundreds or thousands of products.
Starting Your Catalogue Photography Workflow
A jewellery catalogue usually starts with a practical compromise. You may be photographing rings between customer messages, processing earrings after packing orders, or preparing a seasonal drop while managing every product page yourself. The mistake is treating each item as a separate creative project. If every product receives a different crop, background, colour treatment, and camera angle, editing becomes slow and your storefront loses visual continuity.
Create a reference setup first. Choose one background, mark the product position, fix the tripod height, and photograph a small group of different pieces. Include a reflective ring, a fine chain, a stone-heavy pendant, and a watch or bracelet if those products are part of your range. This test batch will expose problems before you repeat them across the entire catalogue.
The commercial demand is substantial. The global jewelry photography services market is estimated at USD 21,032 million in 2024, reflecting demand for professional product imagery across e-commerce platforms, as reported in this market estimate for jewelry photography services. Another published estimate in the same market-tracking snippet places the market at about USD 23 billion in 2024 and projects about USD 45 billion by 2031, so the exact estimate varies by scope, but the business need is clear.
Build a repeatable shot list
Use the same image roles for every SKU:
- Hero view: A clean primary image showing the complete piece.
- Detail view: A close crop of the stone, setting, clasp, engraving, or texture.
- Profile view: Useful for showing thickness, height, and construction.
- Scale view: A controlled image that helps buyers judge size.
- Wear view: On a hand, wrist, neck, or ear when fit and drape matter.
A shopper browsing distinctive pieces, such as tattoo-inspired jewelry, still needs clear product evidence before buying. Decorative styling can support the brand, but it shouldn't replace scale, material detail, and accurate colour.
Keep a simple naming system before you shoot. Use the SKU, view type, and channel in the filename or folder structure. For practical setup ideas that apply to small products, see this guide on how to photograph small items. The more consistently you organise files at the start, the less time you'll spend correcting them later.
Selecting the Right Lenses and Camera Settings
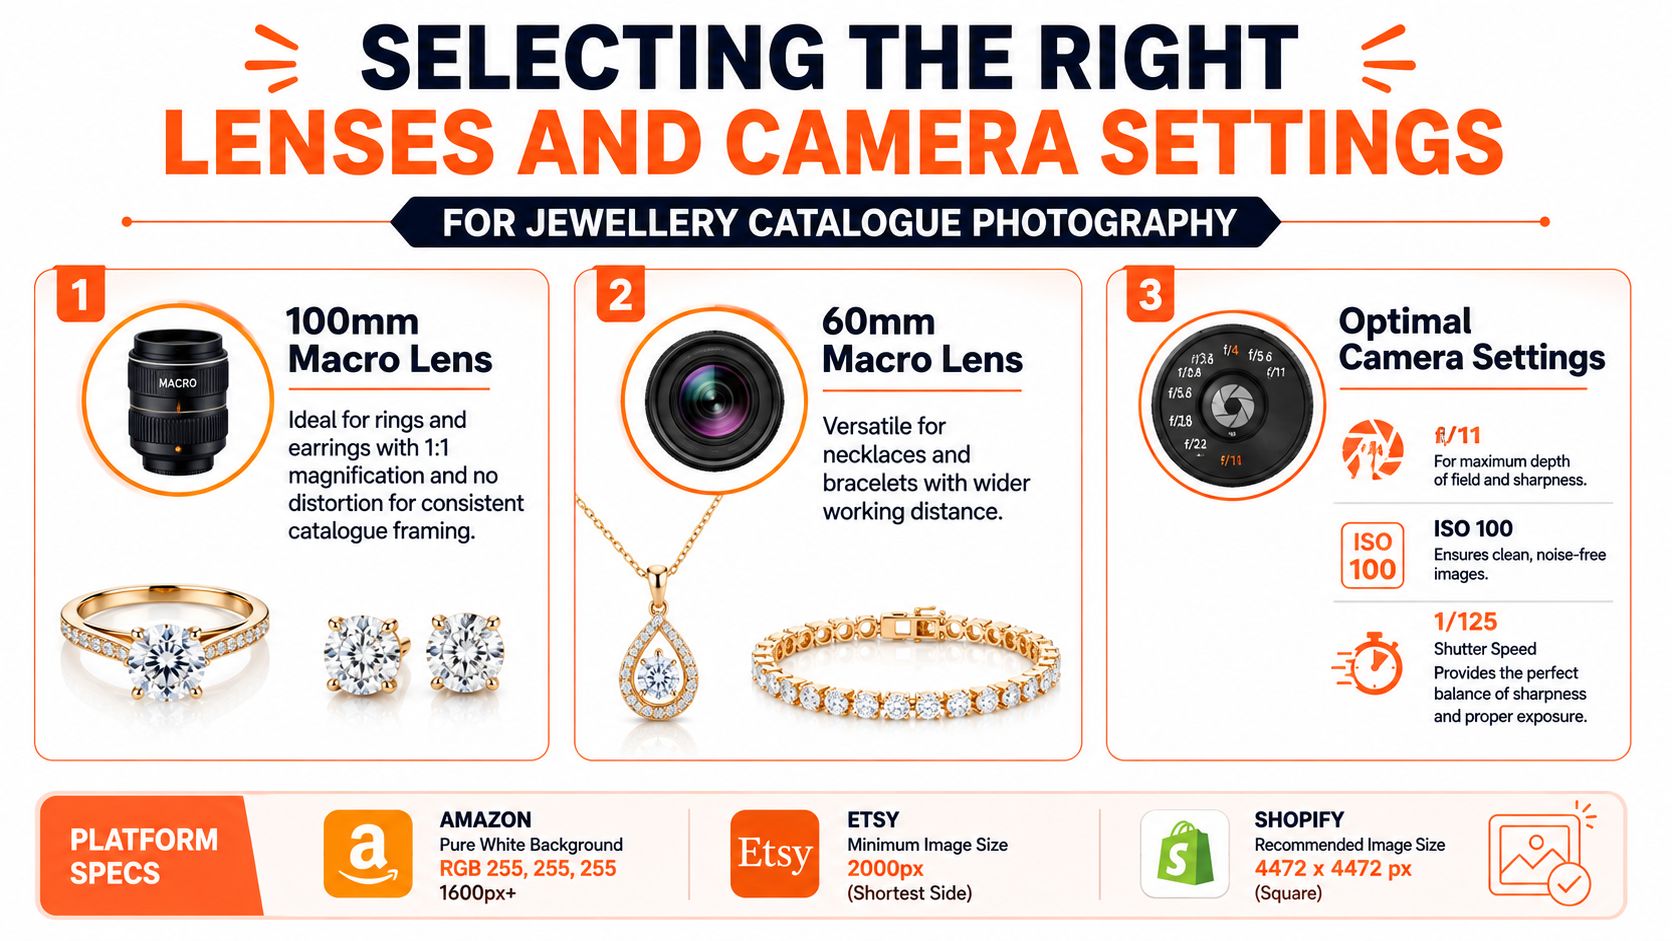
Jewellery needs a macro lens that lets you fill the frame without forcing the camera too close to the product. A focal length between 90 mm and 105 mm is considered optimal for jewelry photography, because it supports detailed, relatively undistorted macro views for e-commerce pages, as outlined in this technical jewellery photography guidance.
A 100 mm macro lens is a strong default for rings, earrings, pendants, and small stones. It gives you working distance around the product, which leaves room for flags, diffusers, and your lighting setup. A 60 mm macro lens can work well for necklaces and bracelets when you need a wider view, but it may place the camera closer to the piece. That can make reflection control more difficult.
Choose settings that can be repeated
Start with manual exposure. Fix the aperture, shutter speed, ISO, and white balance so the camera doesn't make a different decision for every product.
- Aperture: Begin around f/8 to f/11. This provides useful sharpness without relying on a very small aperture that can soften fine detail through diffraction.
- ISO: Keep it at ISO 100 when your camera and lighting allow it. Add light rather than pushing the ISO across a full catalogue.
- Shutter: Use 1/125 second as a practical starting point when the camera is fixed and the lighting is continuous. Adjust it if the exposure requires it, but keep the setting consistent within the batch.
- White balance: Set a fixed value or use a grey reference. Auto white balance can make silver look different from one frame to the next.
- Framing: Mark the product centre and keep the same space around each item.
A catalogue needs predictable output more than dramatic settings. If you're exploring automated fashion and accessory visuals, AI fashion photography can offer useful context for on-body presentation, but generated visuals still need comparison against the product.
For close-up technique and setup decisions, use this practical guide to macro product photography. Check the full-resolution file before moving on. Jewellery can look sharp in a thumbnail while the setting or engraving is soft at zoom.
Mastering Lighting to Control Reflections
Polished jewellery reflects its surroundings. Your camera, ceiling, clothing, windows, and light modifiers can all appear in a metal surface. The goal isn't to remove every highlight. The goal is to decide which highlights describe the form and which ones make the product look dirty or distorted.
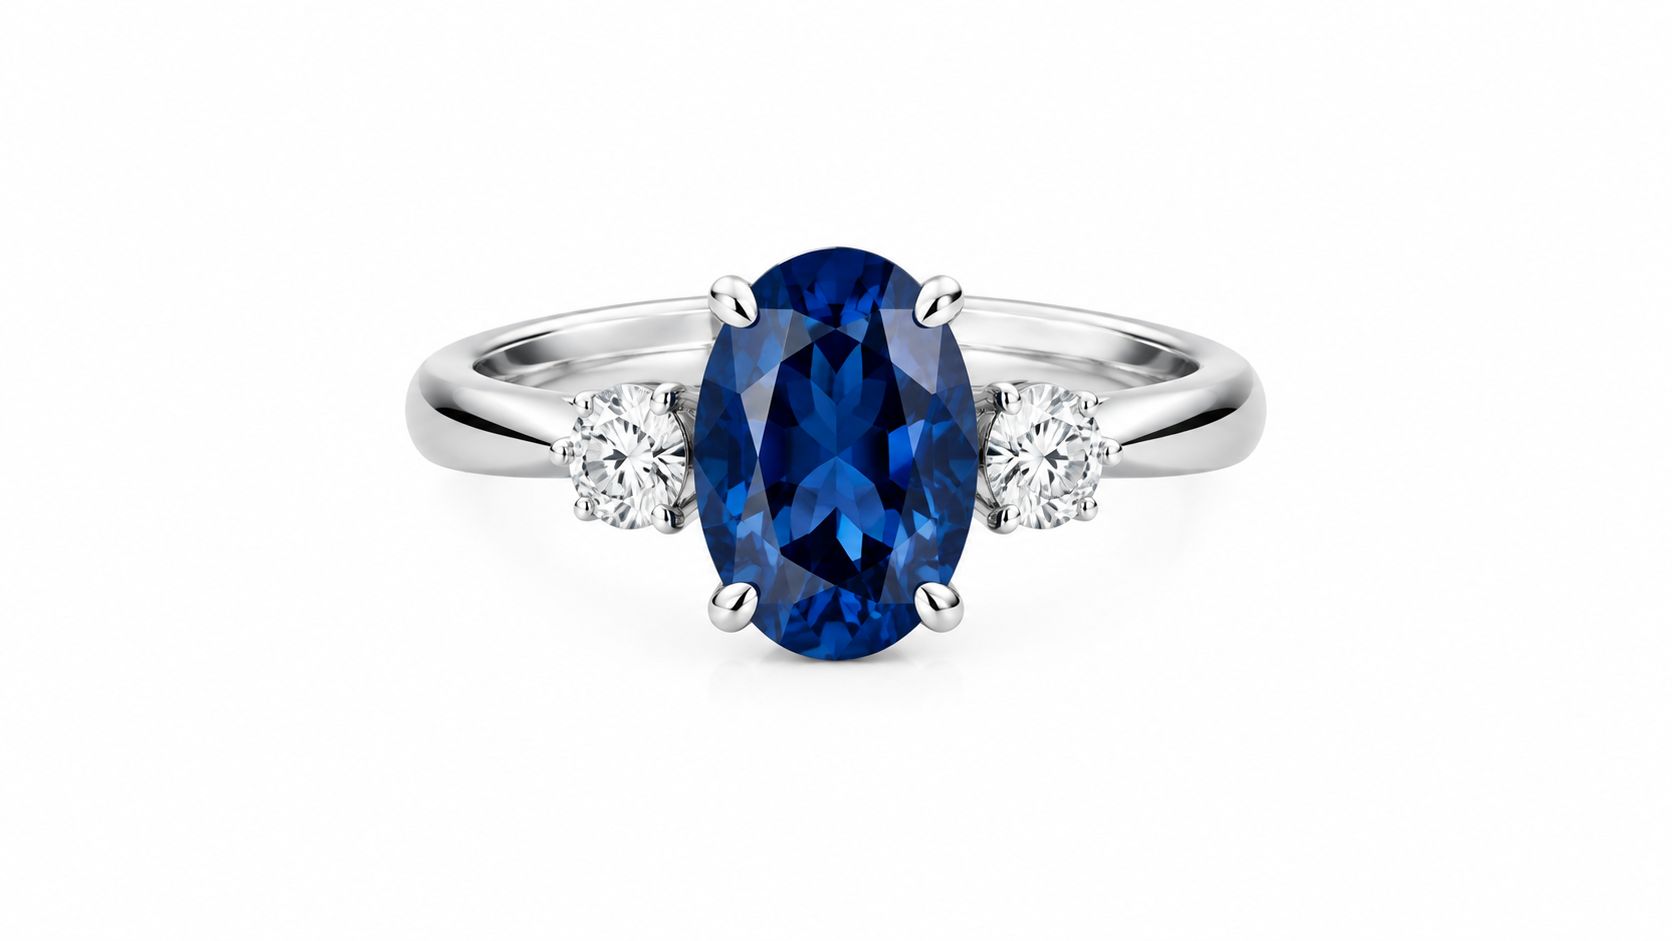
Start with a large diffuser, softbox, or light tent placed close to the product. Broad diffused light is preferred over a small point source because it softens reflections on polished metal, while a small source creates hard, distracting glare, as explained in this jewellery photography lighting guide.
Create one lighting position
Use two diffused sources at roughly opposite 45-degree angles when the piece needs even coverage. Keep their height and distance fixed. If one side goes dark, add a white card as a reflector before adding another lamp. White cards brighten a surface, while black cards or flags absorb reflections and can create cleaner edges on silver and white gold.
Inspect the product at full zoom. Look specifically for window frames, overhead fixtures, the camera body, and bright strips from the softbox. A reflection that's invisible in the preview may become an obvious line across a polished shoulder when the image is enlarged.
Use a small focused light only when the stone needs additional sparkle. Keep it weak enough that it doesn't create a clipped white spot or change the colour of the gemstone. A clean metal catalogue image and a sparkle-led detail image may need different lighting, but keep each shot type consistent across the collection.
Cross-polarization can help with highly polished metal or glass. Place polarizing filters on the lights and a polarizer on the lens, rotated 90 degrees relative to the light filters. This can suppress much of the specular reflection, but it can also reduce gemstone sparkle and make stones look too dark. Test the setup on both metal and stone before using it for a batch.
Practical rule: Fix the lights first, then move flags and cards. Changing the product position for every item creates framing and shadow differences that are difficult to correct later.
Doing this for a whole catalog?
MerchLoom runs background removal, upscaling and AI editing across every product photo you have — one prompt, whole batch. Try 2 batches free, no signup.
Try it freeRecord a simple lighting diagram with distances, modifier positions, and camera height. For a repeatable approach to product photography lighting, keep the diagram beside the shooting table rather than relying on memory.
Achieving Sharpness with Focus Stacking
At macro distances, depth of field can collapse to millimetres. A ring may have a sharp front edge while the back of the setting is soft, even when the image looks correctly focused on the camera screen. Stopping down further can increase depth of field, but very small apertures can introduce diffraction and reduce the micro-detail buyers need to inspect.
Focus stacking solves this by combining frames focused at different depths. The camera and product stay fixed, while the focus point moves from the nearest critical detail to the farthest edge. The final composite can show more of the piece sharply than a single exposure.
A repeatable stacking sequence
Use this process for pieces that need front-to-back sharpness:
- Lock the camera: Mount it on a stable tripod. Turn off any movement in the product, chain, stones, and lighting.
- Fix exposure: Keep aperture, shutter speed, ISO, white balance, and light position unchanged throughout the stack.
- Frame the SKU: Match the same camera height, angle, and product placement used for the rest of that shot type.
- Start near: Focus on the nearest critical point, such as the front edge of a setting.
- Move deeper: Advance focus in consistent micro-steps until the far edge is covered.
- Blend the frames: Use focus-stacking software or a controlled post-production workflow to align and merge the images.
- Inspect the mask: Check prongs, chain edges, pavé stones, and reflective borders for seams.
A documented technical workflow uses a 100 mm macro lens at 1:1, f/8, approximately 0.1 mm focus increments, and about 15 frames to produce an objectively sharp result while avoiding the softening associated with very small apertures, according to this focus-stacking workflow paper. Treat those settings as a starting reference, not a universal requirement. A shallow pendant may need fewer frames, while a deep ring may need more.
Keep every frame aligned
Tether the camera to a computer or monitor when possible. You'll see focus coverage, dust, exposure changes, and framing errors before you process the entire group. If tethering isn't available, use a fixed tripod and mark the table positions so each SKU begins in the same place.
The biggest batch mistake is changing something mid-stack. A shifted light, altered white balance, or product movement can produce seams that are harder to repair than a soft photograph. For troubleshooting, use this guide to fix blurry photos, then decide whether the issue needs a new capture or a post-production correction.
Meeting Platform Requirements and Batch Processing
A technically good photograph can still fail if the export doesn't match the destination. Set your master file large enough for reuse, then create channel-specific versions from that master. Don't crop the original repeatedly for Amazon, Etsy, and Shopify. Each manual crop becomes another opportunity to cut off a chain, change the product scale, or introduce a different amount of empty space.
Amazon main images require a pure white background at RGB 255,255,255, and the longest side should be at least 1600 pixels for high-quality zoom on detail-heavy products, according to this Amazon product image requirements guide. Keep the jewellery fully visible and inspect the corners and background with an eyedropper before export.
Etsy listing images are commonly recommended at 2000 pixels on the shortest side, while Shopify product images are typically square and can be used up to 4472 by 4472 pixels. These targets are useful when preparing one catalogue for several channels, but verify any current marketplace instructions before upload because platform policies can change.
Separate the master from the outputs
Keep three layers of files:
- Camera master: The original capture or focus-stacked composite.
- Clean catalogue master: Corrected colour, dust removal, controlled retouching, and a consistent crop.
- Channel output: The exact canvas, background, filename, and resolution required by each marketplace.
Retouching should improve presentation without changing the product's truth. Don't enlarge a stone, remove a genuine inclusion, alter a metal colour, or reshape a setting. Buyers use close views to judge details, so an attractive but inaccurate image creates returns and support work.
Manual editing becomes the bottleneck when every image needs the same background removal, padding, reframing, colour correction, and upscale. A batch workflow applies those operations in a defined order. For example, you can isolate the product, correct the base crop, place it on a channel background, resize the canvas, and export with a naming rule. Review remains necessary, especially for fine chains, transparent stones, dark metal, and overlapping earrings.
Use batch processing for product images when the same decisions apply to a collection. MerchLoom lets you bring images from existing storage or commerce sources, describe the desired workflow, and run chained AI pipelines across a batch rather than editing one image at a time. You can try the first images with no account, and the service is pay-per-image with credits that never expire. It still needs human review, and it isn't a complete Photoshop replacement.
Process a small test group before sending the full catalogue. Compare the first, middle, and last outputs. If the product scale, background tone, or shadow treatment drifts, stop and correct the workflow before processing the remaining files.
Finalizing Your E-Commerce Photography Process
A catalogue workflow is finished when the files pass a repeatable check, not when one image looks good on screen. Use the same process for a new ring, a seasonal necklace range, or a reshoot after packaging changes.
Run this final catalogue check
- Product preparation: Remove dust, fingerprints, stickers, and fibres before capture.
- Camera position: Lock the tripod, angle, lens, and product mark.
- Exposure: Keep aperture, ISO, shutter speed, and white balance consistent within each batch.
- Lighting: Recreate the recorded diffuser positions and inspect reflections at full zoom.
- Sharpness: Use a focus stack for pieces that cannot stay sharp in one frame.
- Accuracy: Check that metal colour, gemstone tone, shape, and visible inclusions remain truthful.
- Shot coverage: Export the hero, detail, profile, scale, and wear views required by each listing.
- Platform output: Prepare Amazon at pure white RGB 255,255,255 with the longest side at least 1600 pixels, Etsy at 2000 pixels on the shortest side, and Shopify as a square image up to 4472 by 4472 pixels.
- Quality control: Review representative files from the start, middle, and end of every batch.
On-body images answer questions a clean hero image cannot. They show scale, drape, and fit, while the catalogue view confirms product details. Keep the worn image complementary rather than using it as a substitute for an accurate product view. For care-related customer education, link shoppers to these shining jewelry maintenance tips.
After capture, MerchLoom can handle repeatable cleanup, reframing, background work, and channel exports through chained AI pipelines. Review every output, preserve the original masters, and reuse the approved workflow for the next collection.
Use MerchLoom to process jewellery photos in batches, with chained AI pipelines for background removal, reframing, colour correction, and listing-ready resolution. Try your first images without an account, then pay per image with credits that never expire, while keeping human review in the workflow.
Stop editing product photos one at a time
Upload your catalog or connect your store. Describe the result once. MerchLoom does the rest.
Try it free — no signup