
How to Fix Blurry Photos: An E-commerce Seller's Guide
Learn how to fix blurry photos in your product catalogue. Our guide covers AI tools, batch processing for e-commerce, and prevention tips for sharp images.
You finish a product shoot, drop the files into a folder, zoom in on the first few images, and feel that sinking pause. They aren't obviously ruined at thumbnail size. They're just soft enough to fail as a main listing image on Amazon, weak enough to make a Shopify collection page look sloppy, and inconsistent enough that the whole catalogue feels amateur.
That's the fundamental problem with blurry photos in e-commerce. One weak image is annoying. A batch of weak images turns into delays, reshoots, messy editing, and listings that go live below the standard your products deserve.
Most advice on how to fix blurry photos treats the issue like a one-off personal snapshot problem. Sellers don't work that way. You're usually dealing with dozens, hundreds, sometimes thousands of images that need to hold up across marketplace requirements, mobile screens, zoom views, and ad creatives. The fix has to work at catalogue scale, not just on one hero shot.
The Cost of a Blurry Product Photo Catalogue
The expensive part isn't the blur itself. It's the chain reaction after it.
A blurry main image slows listing launches. A slightly soft apparel gallery image creates doubt. A weak close-up makes texture, finish, and quality harder to judge. Then your team starts compensating. Someone sharpens too aggressively. Someone else swaps in an older image. Someone postpones the upload because “we might need a reshoot”. That's how a photography problem becomes an operations problem.
The revenue hit is not theoretical. A 2023 California E-commerce Association survey found that 42% of listings with blurry product photos experienced a 25 to 35% drop in conversion rates, translating to an average annual revenue loss of $147,000 for mid-sized sellers according to Zenfolio's summary of the CECA findings.
Why this gets worse in batch workflows
If you're editing one family photo, you can spend twenty minutes trying every slider in Lightroom and Photoshop. If you're managing a spring apparel drop, that approach collapses immediately.
A catalogue problem has three ugly traits:
- It hides until late: blur often looks acceptable in grid view, then falls apart when you crop for Amazon or zoom in for Etsy.
- It spreads inconsistency: some images are crisp, others are “good enough”, and the whole storefront loses polish.
- It wastes skilled time: your team starts doing repetitive rescue work that should have been prevented or automated.
Practical rule: In e-commerce, image quality problems almost never stay inside the creative team. They reach merchandising, customer service, returns, and paid acquisition.
I've seen sellers tolerate soft images because the products themselves were strong. That works only until competitors show the same category with cleaner, sharper photography. Buyers don't compare your images to your intentions. They compare them to the next listing in search results.
The catalogue standard is different from the single-photo standard
A casual user can ask, “Can I save this one image?”
A seller needs to ask better questions:
- Will this image survive cropping and resizing across platforms?
- Can I apply the same fix across the whole set without introducing artefacts?
- Is the time spent rescuing these files worth more than a reshoot?
- Will the final catalogue look consistent side by side?
That's why the best answer to how to fix blurry photos starts before the editing software opens. It starts with a quality threshold and a workflow that protects it.
If your broader issue is that product images don't look polished even when they are technically sharp, this guide on how to make product photos look professional is a useful companion because sharpness alone won't carry a listing.
Diagnosing the Blur in Your Product Images
Not all blur is the same, and the wrong fix wastes time.
Sellers often call every soft image “blurry”, then throw sharpening at the whole batch. That usually makes things worse. Sharpening can add edge contrast. It can't reliably fix camera shake, and it won't rescue a file that focused on the backdrop instead of the product.
The first job is diagnosis. Look at the file at full size, not just in grid view, and identify what kind of failure you're dealing with.
Blur Type Diagnostic Chart
| Blur Type | Visual Cue | Common E-commerce Cause |
|---|---|---|
| Motion blur | Edges have a directional smear or streak | Handheld shooting, subject movement, slow shutter during apparel or on-model shoots |
| Focus blur | Nothing looks truly sharp where it should | Autofocus picked the wrong point, focus-and-recompose error, shallow depth of field |
| Digital softness | Image looks mushy or low-detail without clear streaking | Low-quality source file, noise reduction, excessive compression, weak mobile capture |
Motion blur looks smeared
Motion blur has direction. Text edges drag slightly. Jewellery highlights stretch. Fabric hems look as if they shifted during exposure. On flat lays, this usually comes from camera movement. On model shoots, either the subject moved or the camera did.
This is the easiest blur type to spot and one of the hardest to fix cleanly by hand. Traditional sharpening often just makes the streaking look harsher.
Focus blur looks soft in the wrong place
Focus errors are a bigger culprit than many sellers realise, especially in fashion.
A 2024 report on California marketplace sellers found that 73% of blurry photos in fashion and vintage apparel catalogues stemmed from focus errors during dynamic shoots, leading to 29% higher return rates, as reported in Adobe's guide citing that report.
That tracks with what happens in real shoots. The camera catches a sleeve seam, a necklace clasp, or the background edge, while the part the buyer needs to inspect, usually the chest logo, texture, or face, goes soft.
If one small area is sharp but the important selling detail isn't, you don't have a sharpening problem. You have a focus problem.
Digital softness is the sneaky one
Digital softness is less dramatic. There's no visible streak, and autofocus may not have failed outright. The file just lacks bite.
This usually shows up when sellers rely on compressed marketplace downloads, overprocessed phone images, or files that were resized too many times before final export. It's also common when noise reduction smears fine detail, especially in darker warehouse setups.
A quick check helps:
- Zoom to fine detail: look at stitching, labels, texture, or printed text.
- Compare edge behaviour: motion blur smears in one direction, while digital softness just looks dull.
- Check the focus plane: if the table edge is sharp and the product front isn't, autofocus missed.
- Review the batch: if every image from one setup looks soft, suspect settings or light, not a single bad frame.
If you regularly fight low-detail files after resizing and platform exports, understanding resolution in AI image workflows helps because a lot of “blur” complaints are really resolution and processing-order problems masquerading as focus issues.
Preventing Blur at the Source with Better Shooting Habits
The cheapest fix is the one you never need to run.
Rescuing blur in post is slower, less consistent, and more expensive than getting the shot right in camera. For static products, prevention is boring in the best way. It turns image editing from damage control into routine finishing work.
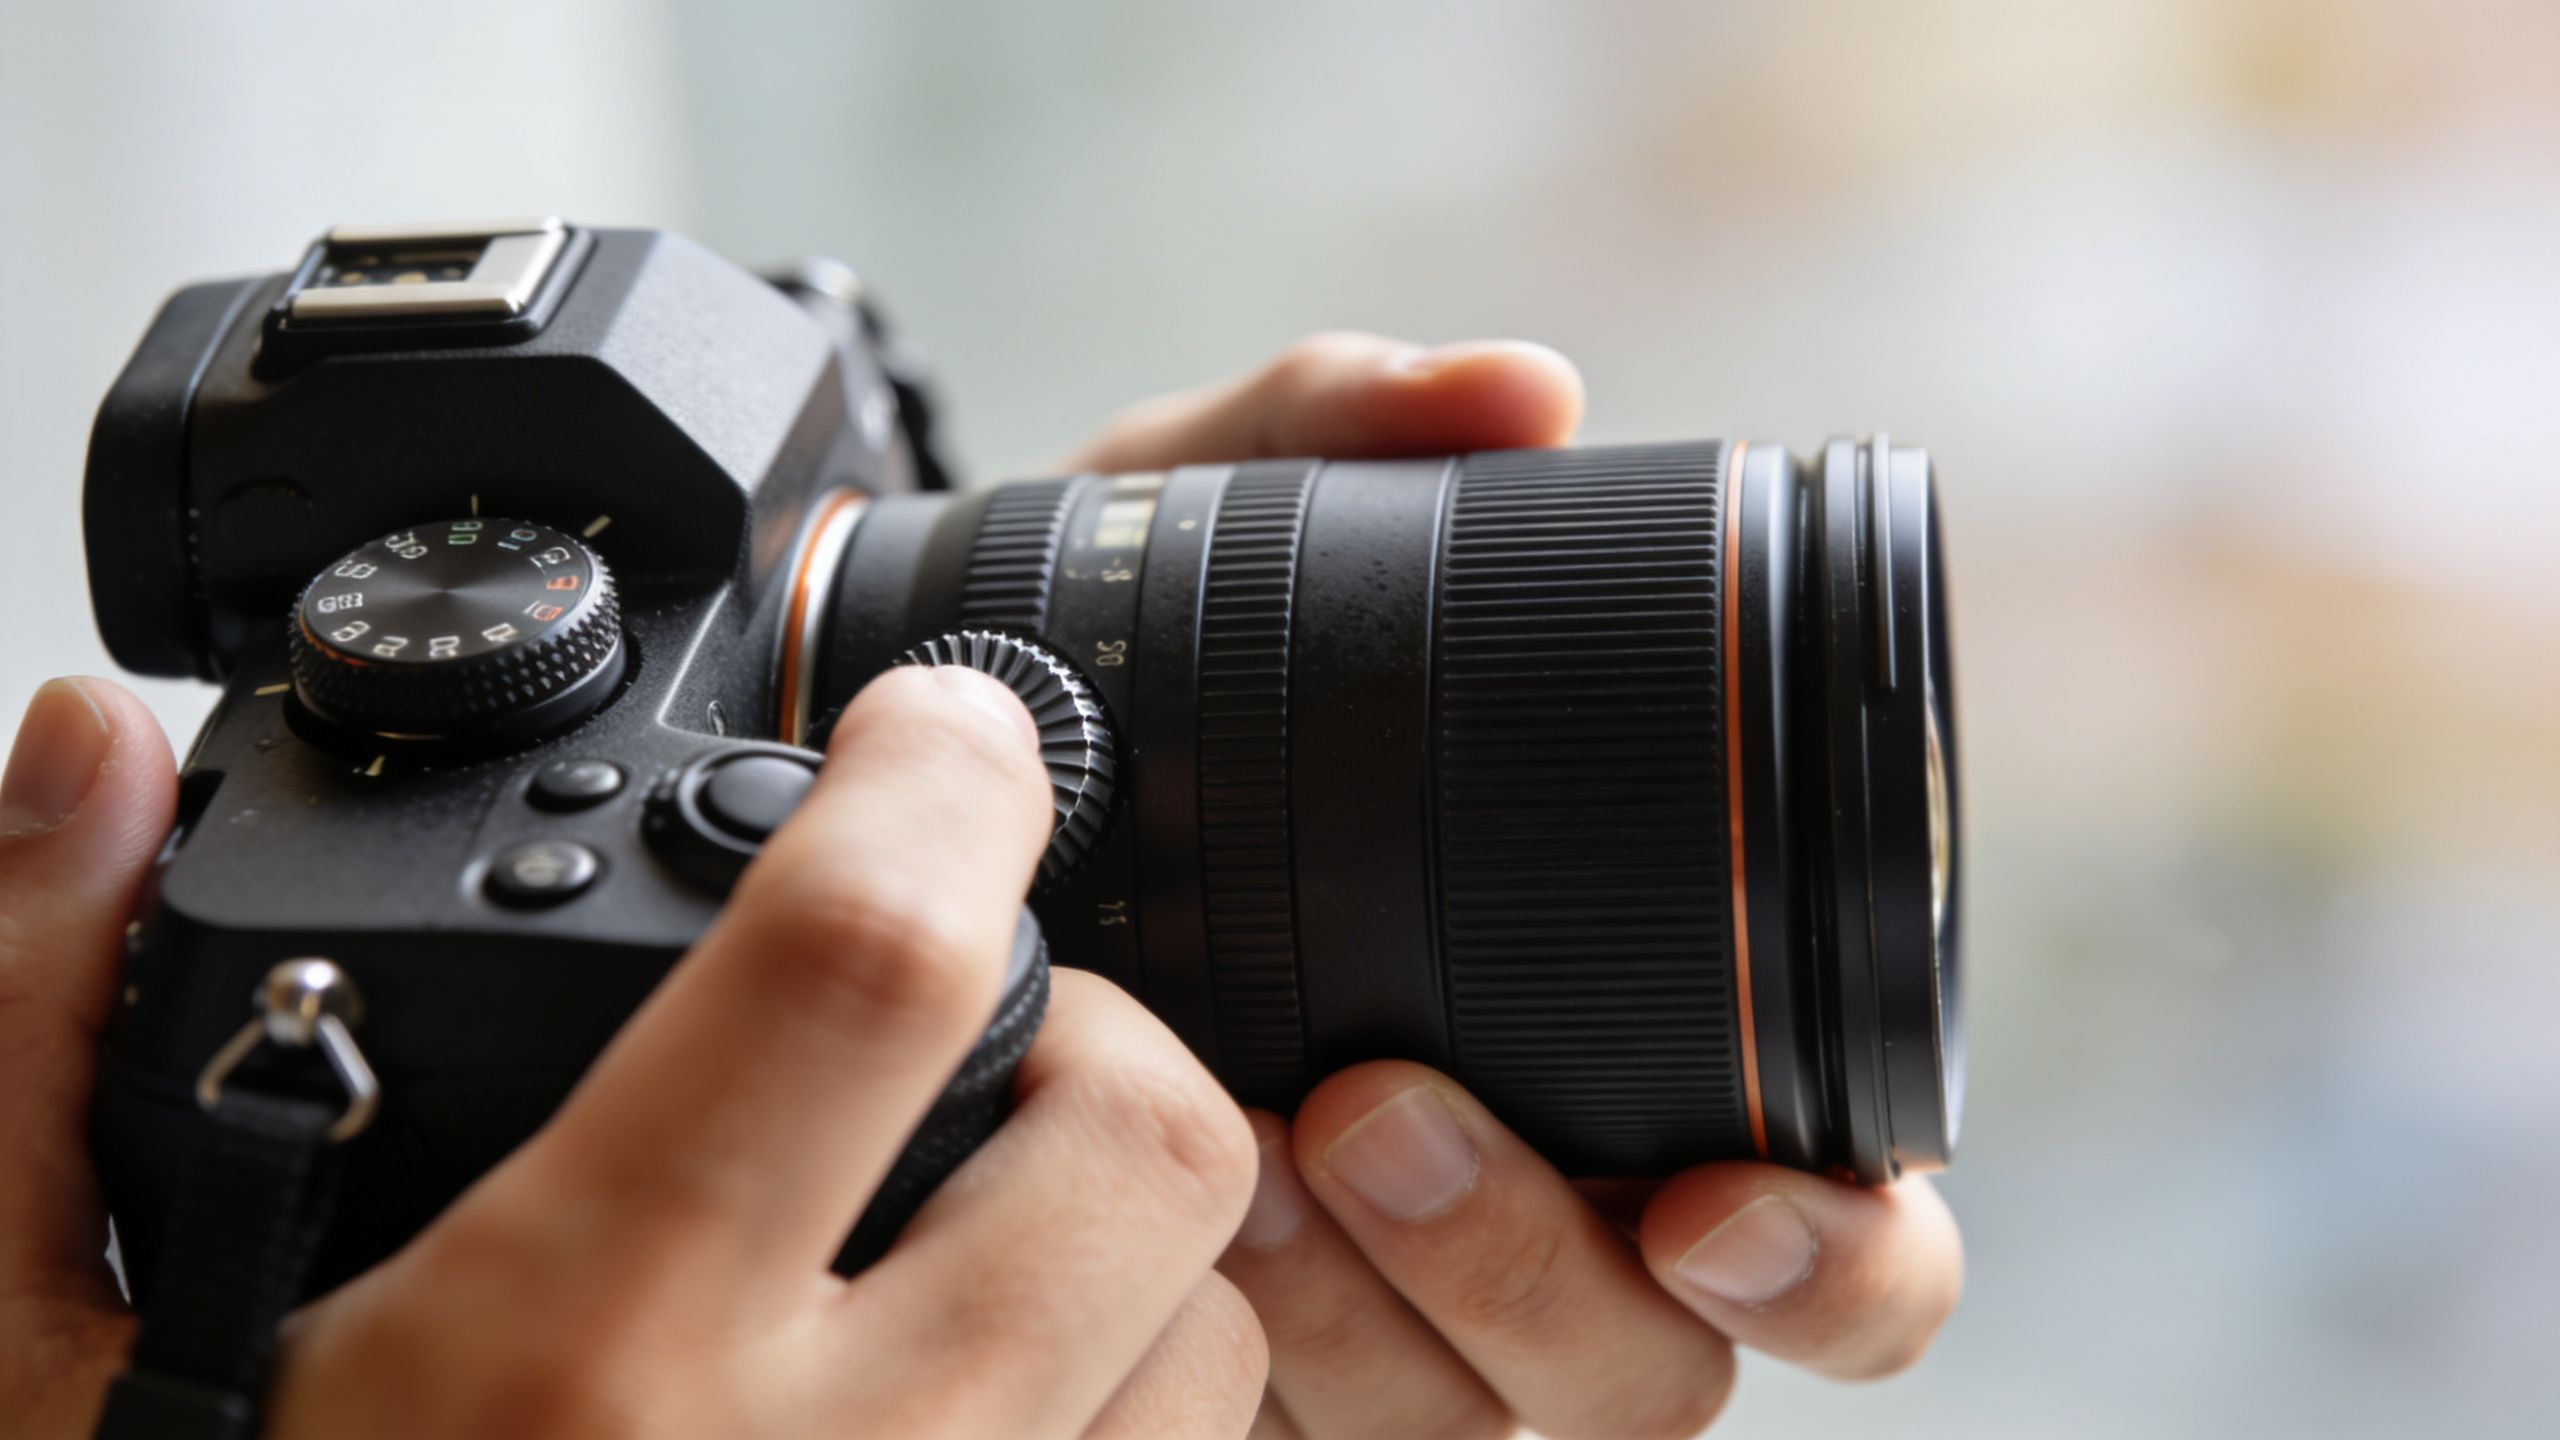
Use a simple pre-shoot sharpness checklist
You don't need a complex camera setup. You need habits that hold up when you're tired, behind schedule, and halfway through a large catalogue.
- Start with shutter speed: if you're handheld, use the 1 over focal length rule as your floor. Longer lenses need faster shutter speeds.
- Lock the camera down when possible: tripods are not glamorous, but they remove a huge source of avoidable blur for tabletop work.
- Keep aperture sensible: ultra-wide apertures look nice until the front of the product is sharp and the rest falls away.
- Check focus before changing sets: zoom in on the first few frames from each setup instead of trusting the rear screen preview.
For file output, sharp capture still needs to survive export. If you're preparing print inserts, packaging assets, or mixed-use creative files alongside listings, LitPDF's professional file preparation tips are worth reviewing because weak export settings can undo otherwise solid source images.
Use the autofocus setup that actually holds up
For moving subjects or any setup where the model, prop, or camera position shifts, the autofocus mode matters more than sellers think.
A practical protocol is to switch to Continuous AF (AF-C), set aperture to f/2.8 to f/5.6, and use burst mode at 10fps+. This combination produced an 85% keeper rate for shots with motion, compared to 62% for single-shot mode, according to Matt Rutter's autofocus workflow breakdown.
That matters in practice because single-shot behaviour is often fine until the subject leans, turns, or takes one step. Then your “good enough” setup turns into a folder full of near-misses.
What works: AF-C, deliberate focus point placement, and short bursts on anything with movement.
What wastes time: hoping one frame from a casual handheld sequence will be the sharp one.
A lot of backdrop problems also create focus confusion, especially when low-contrast products blend into the scene. If your sets themselves are making sharpness harder to achieve, this guide to choosing a studio photo backdrop is useful because cleaner separation often improves autofocus reliability.
Here's a practical walkthrough if you want a quick visual refresher before your next shoot:
Prioritise repeatability over cleverness
A seller processing hundreds of images does not need artistic camera improvisation on every SKU. You need a repeatable system that junior staff can follow and that produces a predictable hit rate.
That usually means:
- Tripod for static products
- AF-C plus controlled bursts for movement
- Moderate aperture instead of chasing the shallowest depth of field
- Immediate zoom-checks at set changes
- Reshoot on the spot when a setup starts drifting soft
Doing this for a whole catalog?
MerchLoom runs background removal, upscaling and AI editing across every product photo you have — one prompt, whole batch. Try 2 batches free, no signup.
Try it freeIf your workflow depends on “we'll sharpen it later”, the workflow is broken.
Choosing Your Weapon Manual vs AI Deblurring Tools
Once blur gets into the files, you have two broad options. You can push traditional sharpening controls manually, or you can use AI deblurring tools that attempt to reconstruct detail from motion or focus errors.
Both have a place. They do different jobs.

Manual sharpening is precise but limited
Lightroom and Photoshop still matter. If the image is already almost sharp and just needs more edge definition, manual sharpening gives you control that AI tools sometimes overdo.
In Lightroom, most sellers end up working in the Detail panel. Amount increases apparent edge contrast. Radius changes how wide the sharpening halo reaches. Masking helps protect flatter areas from becoming crunchy. In Photoshop, Smart Sharpen and high-pass based methods can work for selective corrections.
Manual sharpening works best when:
- The file is only mildly soft
- The product has clean edges that benefit from controlled contrast
- You need selective treatment on one area
- You're finishing a hero image, not a whole catalogue
Manual sharpening fails when the image is out of focus or smeared by motion. You can make it look punchier, but not recovered.
AI deblurring handles harder saves
AI tools such as Topaz Photo AI and Adobe's AI-assisted features are better at dealing with moderate blur because they analyse patterns and try to rebuild lost structure rather than just increasing local contrast.
That doesn't mean they perform miracles. They can introduce artefacts, create weird texture, or make fabric and skin look synthetic if pushed too far. But for difficult files, especially mobile captures and fast-moving apparel shots, they're often the only realistic rescue option.
A 2025 survey found that 68% of small Canadian DTC brands and vintage resellers shoot product photos via smartphones, and AI post-processing yields a 92% success rate on fixing motion blur from these devices, compared to 55% for manual sharpening techniques, according to the source cited in this video reference on mobile deblurring workflows.
That fits what many resellers deal with now. They're shooting inventory quickly on phones for Depop, Poshmark, Etsy, and Shopify. The problem isn't studio-grade perfection. The problem is getting mobile-origin files into a listing-ready state fast enough to keep inventory moving.
AI is strongest when the source image is usable but compromised. If the frame is completely missed, the smartest software still won't create truthful detail out of nothing.
Side-by-side trade-offs
Here's the practical comparison most sellers need:
- Manual tools give more control. They suit careful finishing, selective sharpening, and files that are already close.
- AI tools save more images. They're better when motion blur or focus miss has already happened.
- Manual work is slow. Fine for one hero image. Bad for a 300-image upload queue.
- AI is faster but less predictable. You gain speed, but you must watch for texture artefacts and overprocessed edges.
If you want a deeper technical look at one of the most common AI enlargement paths after deblurring, Armox Labs' Topaz image upscaler guide is a useful reference because upscaling and deblurring often get paired in product-image repair.
For sellers still relying on Photoshop for rescue work, this walkthrough on how to sharpen an image in Photoshop is helpful because the difference between crisp and crunchy usually comes down to restraint and masking.
What I'd use when
If I'm fixing one homepage banner image, I'll spend more time with manual controls.
If I'm reviewing a mixed batch of marketplace photos, I separate them into three buckets:
- Needs light sharpening only
- Needs AI deblur and review
- Needs reshoot
That triage mindset matters more than tool loyalty. Sellers waste time when they ask, “Which app is best?” The better question is, “Which files are worth saving, and what level of effort does each deserve?”
The E-commerce Workflow Batch Fixing Your Entire Catalogue
Fixing one blurry image can be editing. Fixing hundreds is production.
That's where most advice on how to fix blurry photos breaks down. It explains one slider, one plugin, or one before-and-after example, then leaves sellers alone with a folder full of SKUs and no system for getting them live across Amazon, Shopify, Etsy, and social formats.
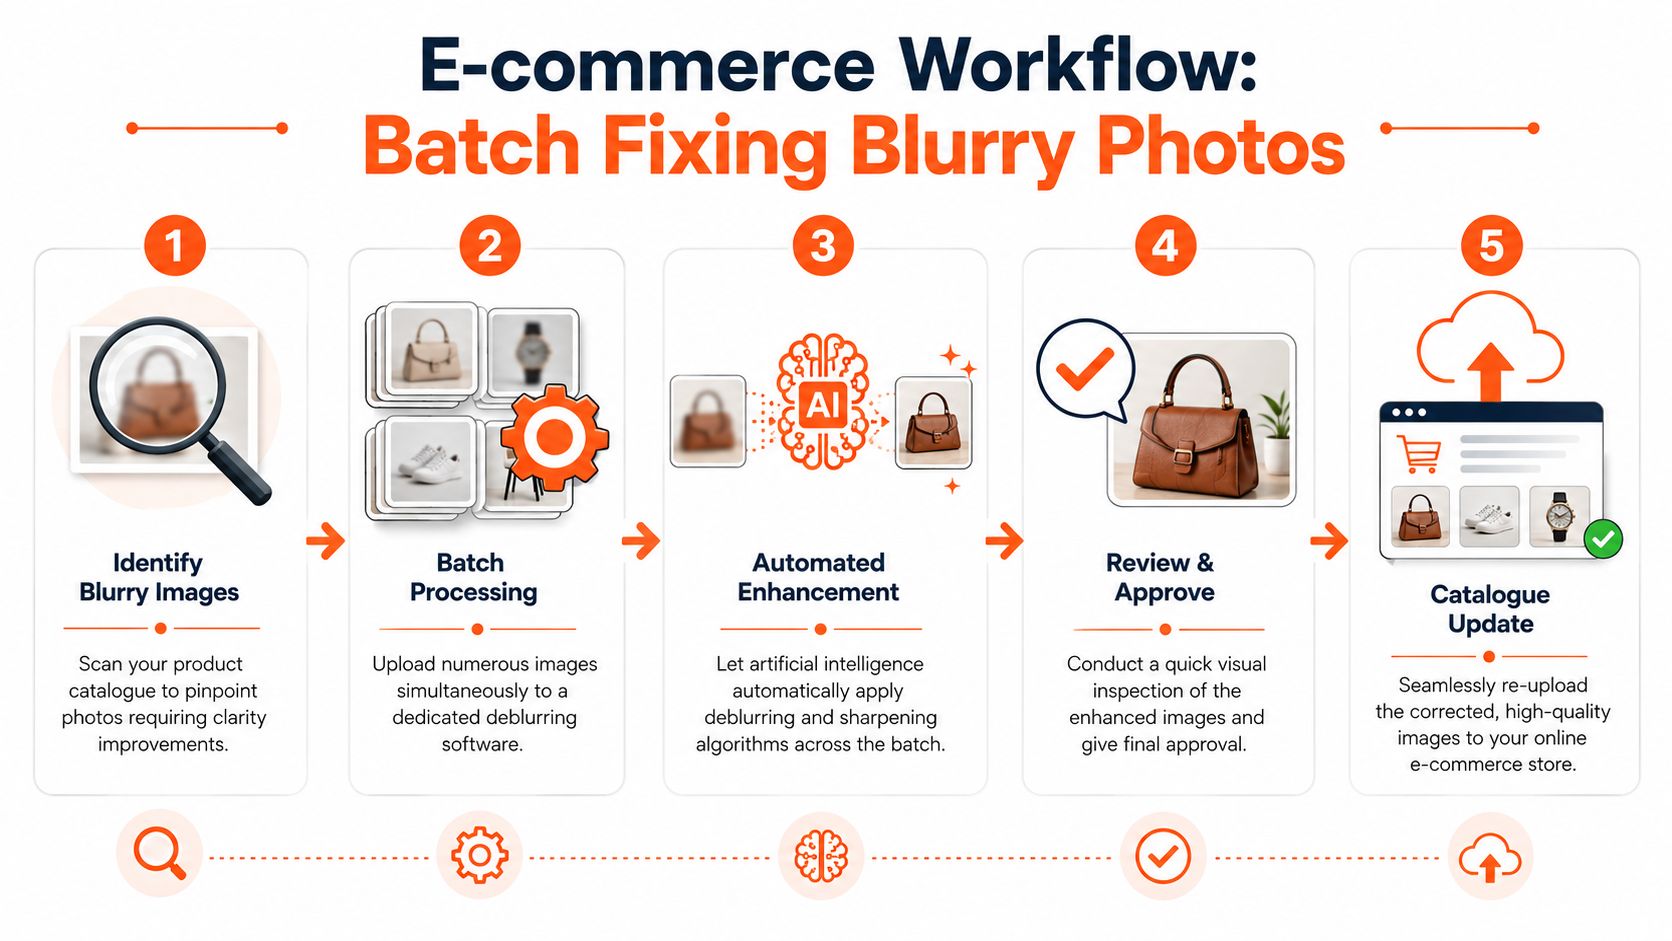
Batch logic beats hero-image perfection
Catalogue work needs a pipeline. Not just tools. A pipeline.
A source cited for Canadian e-commerce workflows says only 12% of Canadian online sellers use automated batch tools, despite 45% reporting image quality as a top barrier to conversion. It also notes that AI platforms sequencing deblurring after background removal can save up to 87% on compute costs in this discussion of the batch-processing gap.
That cost-ordering point matters. If you upscale or run heavier enhancement before trimming unnecessary background area, you pay to process pixels that won't survive to the final listing. Sellers doing this manually often don't notice the waste because it's hidden inside time, plugin exports, and repeated passes.
A workable catalogue pipeline
For most product catalogues, this order is practical:
- First, sort the batch: separate clear files, salvageable files, and reshoot files.
- Then remove background where required: especially for Amazon-style white background outputs.
- Run deblur on the salvageable set: don't waste AI recovery on already-sharp files.
- Apply resizing or upscaling for channel requirements: square Shopify crops, Etsy-ready larger dimensions, marketplace variants.
- QC in context: check not only the full-size image, but also the thumbnail, crop, and zoom behaviour.
Batch editing is not about applying the same effect to everything. It's about applying the right sequence to the right group.
If you also create video or moving product content and want the same quality mindset applied there, Enhance video quality for creators is a useful adjacent reference because the same logic applies: processing order, source quality, and review discipline matter more than any single button.
What doesn't scale
Some workflows look productive but aren't:
- Opening every image individually in a desktop editor
- Applying global sharpening to the whole catalogue
- Cropping for every marketplace by hand
- Running expensive enhancement before deciding whether the file should be reshot
- Exporting multiple times from different apps and hoping consistency survives
Teams that need real throughput usually move toward chained AI pipelines, where background removal, reframing, colour cleanup, and upscale steps run in a deliberate order across collections. That's also where a tool like MerchLoom fits naturally. Not as a magic fix for bad photography, but as the kind of batch processor built for plain-English, multi-step image workflows at catalogue scale.
If you're evaluating that kind of automation more broadly, this piece on Gemini AI workflows is a useful reference point for thinking about how AI systems can sequence repetitive production tasks instead of just applying one-off edits.
Final Checks Knowing When to Reshoot an Image
Some photos aren't worth saving.
That's the decision sellers delay too long. They keep tweaking sharpening, trying another deblur model, exporting a new version, and burning more time on a file that should have been reshot in five minutes.
Use a simple save-or-reshoot test
Reshoot the image if any of these are true:
- The key selling detail is missing: fabric texture, label text, gemstone edges, finish, or product contours still don't read clearly after a light correction pass.
- The fix changes the product truthfully: deblurring introduces fake texture, strange outlines, or “painted” surfaces.
- The batch won't stay consistent: one rescued file looks noticeably different from the rest of the set.
- You're stacking corrections: heavy deblur, heavy sharpening, heavy denoise, and crop rescue all on one image usually means the source file was too weak.
Keep the standard tied to the catalogue
A single image can look acceptable in isolation and still fail inside the full collection. That's why final review should happen in context. Check the image next to adjacent products, in thumbnail view, and in the destination crop. If it breaks consistency, it's not fixed.
A listing image is ready when it looks sharp without calling attention to the edit.
The practical path is straightforward. Prevent blur during the shoot whenever possible. Use manual sharpening for light finishing. Use AI deblurring for files that are worth saving but not worth hand-editing for ages. Build batch workflows for catalogue-scale work. Reshoot the files that still fight you.
That's how to fix blurry photos without turning image prep into a permanent bottleneck.
If you're dealing with blurry photos across entire product collections, MerchLoom is built for that kind of workload. You can upload batches, chain steps like background removal, reframing, colour correction, deblurring, and upscaling, then review results as they come through instead of fixing images one by one. It's a practical option when your problem isn't one bad photo, but a catalogue that needs to get live.
Stop editing product photos one at a time
Upload your catalog or connect your store. Describe the result once. MerchLoom does the rest.
Try it free — no signup