
Make Collage iphone: Boost Your Listings in 2026
Learn to make collage iphone photos for product listings. This guide covers built-in tools, apps, & scaling for your e-commerce catalog in 2026.
You’ve got the photos on your iPhone already. The front shot is good, the back shot is clean, and there’s a close-up of the fabric that buyers need to see before they commit. The usual instinct is to turn those into one collage quickly, upload it, and move on.
That works for one listing.
It breaks down when you’re doing the same thing for a whole catalogue. Sellers on Etsy and Shopify in California run into this constantly. CA-based merchants accounted for 15% of U.S. online sales in 2025 according to Statista’s regional e-commerce report, referenced here. The practical problem isn’t making one pretty image. It’s making the same kind of listing-ready collage over and over without losing hours to your camera roll.
Beyond a Single Collage The E-commerce Challenge
A casual collage and a selling collage are not the same job.
Those searching make collage iphone typically seek a fast way to combine a few personal photos. A seller usually wants something narrower and more demanding. The collage has to show the right angles, feel consistent with the rest of the shop, and fit the places where it will be used, from a product page to a social post.
That gap is why standard iPhone tutorials feel incomplete. They usually stop at “pick a layout and save.” They don’t deal with the bigger issue. You may need to repeat that process across hundreds of SKUs, seasonal drops, or refreshed listings, and you can’t afford to redesign every image manually.
A collage is easy to build once. A catalogue workflow is hard to keep organised if every product starts from scratch.
A vintage seller listing dresses, jackets, and accessories often needs the same visual pattern every time. One frame for the full front, one for the back, one for a texture detail, maybe one for the label. The challenge isn’t technical in the pure sense. It’s operational. If the layout changes every time, your shop starts to look inconsistent. If you spend too long on each one, listing speed slows down.
That’s why I treat collage-making as a workflow choice, not just a design choice. The iPhone is excellent for quick production, especially when the photos are already in your library. But once you start thinking in collections instead of single posts, the question changes from “How do I make this collage?” to “How do I make this style repeatable?”
If your product images also need to work in social content, it helps to think about mockup consistency at the same time. This guide on Instagram post mockup workflows is useful for that broader visual planning.
The Native iPhone Method for Fast, Simple Grids
A seller photographing ten products before lunch does not need a design app for every listing image. Sometimes the job is simpler. Get a clean front shot, a detail, a back view, combine them fast, and move on. On iPhone, the built-in Photo Grid shortcut is the quickest way to do that when speed matters more than formatting options.

How to use Photo Grid on iPhone
Setup takes a minute, then the process is repeatable:
- Open the Shortcuts app on your iPhone.
- Go to the Gallery tab.
- Search for Photo Grid.
- Tap Add Shortcut.
- Run Photo Grid and select your images.
- Tap Add and let the shortcut generate the collage.
- Save the result to Photos or Files from the Share sheet.
For a one-off collage, this method is hard to argue with. It is built in, free, and fast enough for a supporting product image, a quick promo tile, or a simple marketplace listing visual.
Where the native shortcut works best
Photo Grid works best when the source photos already match. Similar lighting, similar crop, and a clear shot order make the result look intentional. If you are building a 2 to 4 image collage from product photos taken in the same session, the shortcut can produce something usable in seconds.
That makes it a good fit for sellers who need output now, not a design session.
Practical rule: use Photo Grid when the photos are already consistent and the collage is not carrying your whole brand presentation.
A little prep improves the result more than people expect. If one image has a messy backdrop while the others are clean, the collage looks uneven right away. Tidying a source photo first with this guide on how to blur background on iPhone can save the layout from looking improvised.
Where it starts to break down
The shortcut applies an automatic layout, so your inputs matter a lot. Mix a tall mirror shot with a tight square detail photo and the crop can get awkward fast. Hemlines disappear, labels get cut off, and negative space ends up in the wrong frame.
That trade-off is fine for a quick personal collage. It is less helpful for e-commerce, where image consistency affects click-through, trust, and marketplace compliance.
Use this checklist before you run it:
- Match orientation first: keep all selected images mostly vertical or mostly square.
- Choose selling shots only: front, back, detail, and one context image often covers the product well.
- Keep the grid tight: adding more photos can make each frame too small to be useful on mobile.
- Review the crops: check corners, sleeves, labels, and textures before you export.
The other limitation is scale. If you are making one collage for one listing, the native route is efficient. If you are producing the same layout across fifty dresses, thirty jackets, and a new accessories drop, repeating this by hand becomes slow and inconsistent. That is the point where a quick iPhone trick stops being a workflow and starts becoming production overhead.
Using Third-Party Apps for Greater Creative Control
A seller hits a different set of problems once the collage needs to do more than combine a few photos. The layout has to hold a brand style, fit the channel, and still show the product clearly on a small screen. That is where third-party apps start to earn their place on an iPhone.
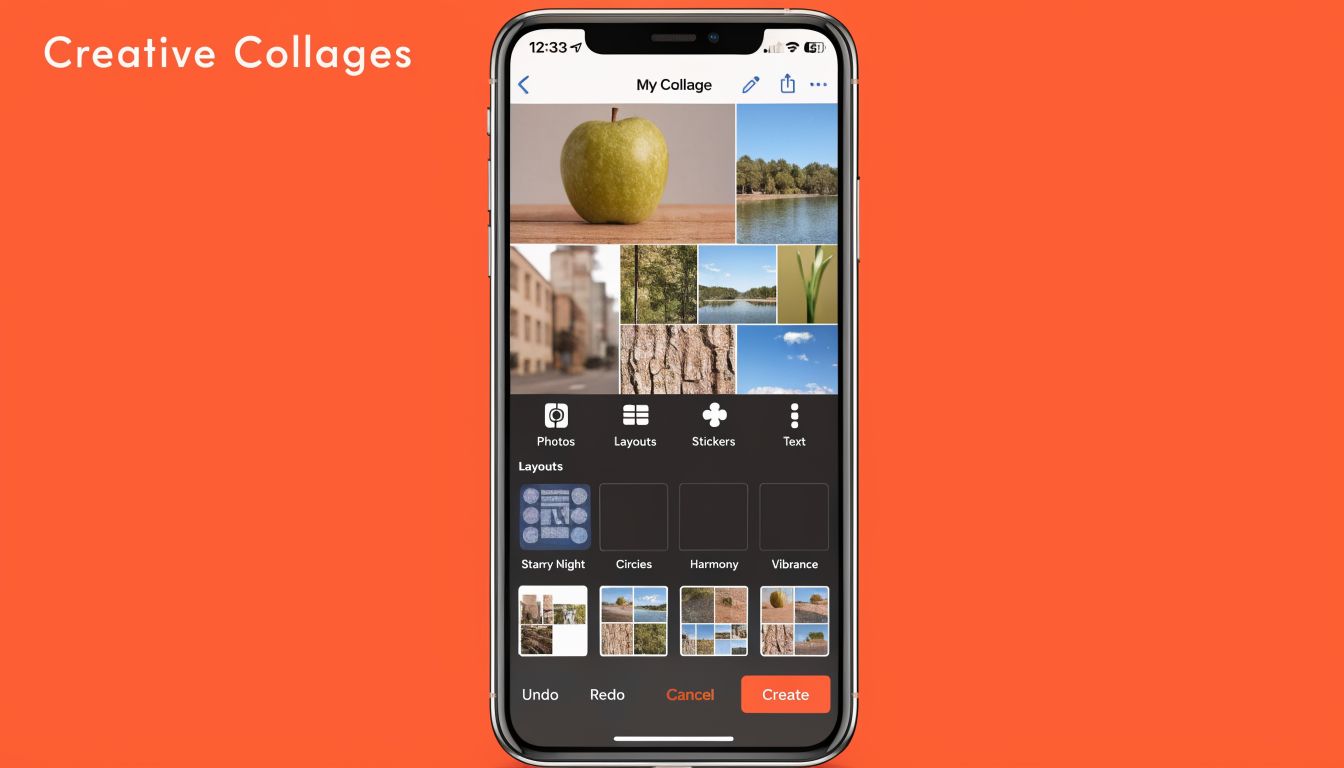
Why sellers move beyond the native shortcut
The native shortcut is fast, but the layout decisions are mostly made for you. That works for a quick one-off image. It gets restrictive when you need a taller social format, more deliberate image hierarchy, or a collage that feels consistent with the rest of your catalogue.
Google Photos is a practical middle step for many sellers because it adds template choice without pushing you into a full design app. As noted in this guide to making iPhone collages with Google Photos, it offers multiple templates, supports larger image selections than the native method, and gives you more export flexibility. In day-to-day use, that means better control over which shot leads, how tightly detail images crop, and whether the final shape suits a listing, story, or promo slot.
Creative control matters, but so does restraint. More layout freedom can improve a collage. It can also produce busy, low-clarity graphics if every frame fights for attention.
A practical Google Photos workflow
For product work on an iPhone, keep the process tight:
- Start with a defined purpose: decide whether the collage is for a listing image, a social post, or a promo banner before you choose the photos.
- Pick images with distinct jobs: lead shot, alternate angle, close detail, and one context image is often enough.
- Open Google Photos and create the collage: test a few layouts, but judge them by readability first, not novelty.
- Check crop pressure: make sure important features like stitching, labels, closures, or flaws are still visible.
- Export and review at real size: a collage that looks fine in the editor can become cramped in a marketplace thumbnail.
Vertical formats are often the better fit for social selling because they use screen space more efficiently than square layouts. If the goal is more styled creative rather than a standard grid, this guide on how to superimpose images online for layered product visuals is a useful companion.
A short demo helps if you want to see the flow before trying it:
The trade-off with app-based collages
Google Photos gives you better composition control than the native shortcut. It does not solve production volume.
That distinction matters for e-commerce. A seller can build a stronger collage for one featured product or one campaign asset inside an app like this. Repeating the same standards across hundreds of SKUs is still manual work, and manual work creates drift. Spacing changes. Crops shift. One listing looks polished, the next looks improvised.
Here is the practical comparison:
| Method | Best for | Main limitation |
|---|---|---|
| Shortcuts Photo Grid | Fast one-off listing images | Very little design control |
| Google Photos | Branded one-by-one collages | Still manual for every item |
I treat third-party apps as a useful middle layer. They improve single-image output. They do not give a store a repeatable catalogue workflow on their own.
Creating Professional Collages for E-commerce
Doing this for a whole catalog?
MerchLoom runs background removal, upscaling and AI editing across every product photo you have — one prompt, whole batch.
Try MerchLoomA collage only helps sales if it makes the product clearer.
That sounds obvious, but many sellers build collages the way they’d build a lifestyle post. They prioritise variety, decoration, or novelty. Buyers usually want something else. They want to understand the item fast. The best e-commerce collage answers the buyer’s likely questions before they have to zoom in.

Build the collage around buyer intent
For most product types, a strong collage includes a clear hierarchy.
The main image should establish the item immediately. Supporting frames should add proof. That usually means detail, scale, texture, fit, packaging, or a problem area you’d rather disclose cleanly than explain later in messages.
A useful pattern for fashion, vintage, and handmade listings looks like this:
- Lead frame: Full product shot with the cleanest angle.
- Support frame: Rear view or alternate angle.
- Proof frame: Fabric, label, stitching, flaw, or material detail.
- Context frame: Lifestyle or in-use shot, if it helps the buyer understand scale or styling.
If every frame says the same thing, the collage wastes space.
Many iPhone collages commonly fall short due to weak shot selection. The tool may work fine, but the images chosen are often inadequate. Four similar photos don’t make a stronger listing than one excellent image.
Marketplace rules change the design
Creative tips don’t solve compliance. For sellers, that’s the main constraint.
According to this discussion of photo collage guidance for iPhone users, fashion e-commerce brands struggle to create collages that fit marketplace requirements such as Amazon’s 1000x1000px grids. The same source notes that iOS 19 added AI layout suggestions, but those suggestions still don’t provide the specific reframing needed for marketplace compliance.
That matters because each channel asks something different from the image set. Amazon tends to be stricter about presentation. Shopify often needs square consistency across collection pages. Etsy sellers usually care about readable detail and a layout that still looks sharp when cropped in search previews.
This is also why combined-image workflows matter. If you’re testing layouts or merging product views into one listing asset, it helps to think in terms of an AI image combiner workflow, not just a casual collage app.
What actually improves results
Use these standards when reviewing a collage before upload:
- Consistent background: Mixed backgrounds make even good products look disorganised.
- Balanced crops: Don’t let one frame feel cramped while the others have empty space.
- Readable detail: Close-ups should show something useful, not just visual noise.
- Platform fit: Check the final crop where buyers will see it first, not only in your editing app.
Clean product collages sell best when they reduce doubt, not when they show off editing skill.
The hard part is consistency. You can make one polished collage by hand on an iPhone. Producing the same standard across dozens of listings is where manual editing starts to wobble.
From One Collage to an Entire Catalogue Workflow
Once you need the same outcome across a large product set, the bottleneck becomes repetition.
A seller can tolerate a manual process for a handful of listings. It becomes expensive in time and attention when every item needs the same sequence: select photos, fix crops, align backgrounds, build the collage, save, resize, export, repeat. That isn’t creative work after the first few rounds. It’s production work.
Manual collage work doesn’t scale cleanly
The main problem isn’t that iPhone methods are bad. It’s that they are one-collage-at-a-time tools.
That means every decision gets remade by hand. Which shots go where. Whether the crop is close enough. Whether the output is right for your storefront, marketplace listing, and social version. Sellers often underestimate how much inconsistency that introduces until they step back and look at a collection page.
A repeatable catalogue process needs a stable sequence:
- Start with a folder or collection of product images.
- Apply the same visual cleanup logic across the set.
- Assemble images into a consistent layout style.
- Resize or reframe for each destination.
- Review output while the batch is running, not only at the end.
That’s a different mindset from “make collage iphone” for a single image. You’re designing a system, not just editing a file.
What a batch workflow should do
The best batch workflows handle the steps sellers normally piece together manually. A useful system should let you standardise source images, keep framing consistent, and produce outputs that fit multiple channels without rebuilding the collage every time.
Look for these capabilities:
- Background handling: Especially important when some source images were shot in different conditions.
- Reframing by destination: A square store image and a taller social image often need different emphasis.
- Real-time review: You want to catch issues before the full set is finished.
- Iteration without starting over: If the first layout choice is too tight, you should be able to refine from processed outputs.
Sellers don’t need more editing choices. They need fewer repeated decisions.
Batch image processing platforms prove useful. Instead of opening each item one by one on your phone, you define a chain of steps and apply it across the whole collection. That’s the only approach that keeps visual consistency intact when inventory grows.
When to stop editing on your phone
Use the iPhone when the task is immediate, small, and close to the camera roll. Don’t use it as the centre of your catalogue operation once the same edits start recurring.
A good rule is simple. If you’re creating one collage for one listing, your phone is enough. If you’re trying to create a house style across a full collection, manual mobile editing is usually the wrong layer for the job.
That shift is what separates a workable side-hustle process from a listing pipeline that can support real volume.
Choosing the Right Tool for the Right Job
The right collage method depends on scale.
If you need one quick product grid, the native iPhone shortcut is the fastest route. If you need more design freedom, a third-party app like Google Photos gives you better layouts and more control over the final look. Both are valid. Both are useful.
But neither solves the catalogue problem on its own.
For a busy seller, the practical workflow is tiered. Use iPhone tools for quick one-offs and urgent edits. Use app-based collages when you want a more polished branded asset. Then move repeated production work into a batch system once you’re dealing with a large inventory, multiple channels, or recurring layout rules.
If you’re improving listing visuals more broadly, this guide on how to make product photos look professional is a good next step.
If you’re ready to move from one-off iPhone edits to a catalogue workflow, MerchLoom is built for that exact shift. You can upload large image sets, chain steps like background removal, reframing, colour correction, collage preparation, and upscaling, then review results as they process. It’s a practical option for sellers who want their listings to stay consistent without turning photo prep into a full-time job.
Stop editing product photos one at a time
Upload your catalog or connect your store. Describe the result once. MerchLoom does the rest.
Try MerchLoom