
Superimpose Images Online: Guide for E-commerce Sellers
Learn to superimpose images online, from simple overlays to automated batch processing for your entire e-commerce catalog. A practical guide for busy sellers.
You start with one product image. Then five. Then fifty. A new seasonal badge needs to go on every hero shot before the weekend sale goes live, and suddenly “superimpose images online” stops sounding like a quick design task and starts feeling like production work.
That’s the gap most sellers run into. The internet is full of tutorials for layering one image over another, but catalogue operations are different. You’re not making a poster. You’re trying to keep listing images consistent across Shopify collections, Amazon white-background requirements, and Etsy’s square-heavy presentation, while also keeping your team out of an endless loop of clicking, dragging, exporting, and redoing small mistakes at scale.
The Reality of Catalogue-Scale Image Editing
A seller launches a new collection and needs to add a “New Arrival” badge to 50 product photos. The first few images are easy enough. Upload photo, upload badge, drag it into the corner, resize it, export, repeat. By image 12, the work is already mind-numbing. By image 37, small inconsistencies creep in. One badge sits too close to the edge. Another is slightly larger. A third is exported in the wrong format.
That’s the difference between a casual edit and catalogue maintenance. One-off overlay tools can work for a single social image or quick mock-up, but they break down when the job is repetitive and tied to revenue. Existing online overlay tools focus on manual, one-by-one image layering and don’t address the automation needed for large seller workflows. In California, e-commerce represents $124B in 2025 sales, and 68% of marketplace sellers cite image processing time as a top bottleneck, with manual repetition costing around 20 hours per week according to the summary tied to Overlay.imageonline.co.
For online sellers, the true cost isn’t only time. It’s interruption. Every hour spent nudging logos and badges into place is an hour not spent fixing listings, sourcing products, adjusting ads, or answering customers.
A lot of teams try to solve this with discipline. They create naming rules, badge folders, and export checklists. That helps, but it doesn’t remove the grind. It just organises the grind.
The problem usually isn’t that sellers don’t know how to edit. It’s that they’re using single-image habits for batch-scale work.
There’s also a quality issue. Marketplace images have to feel consistent. If your Shopify product grid shows three different badge sizes, two different margins, and mismatched logo opacity, the store looks less organised than it is. Customers notice that kind of unevenness even if they can’t articulate it.
If you’re still cleaning up product imagery by hand, it’s worth reviewing broader ways to make product photos look professional. The visual polish matters, but the workflow behind it matters just as much.
Foundations of Superimposing Images for Quality Results
Before worrying about scale, get the base mechanics right. Most bad overlays come from a few predictable mistakes: wrong file type, poor transparency handling, or using an asset that’s too small for the final image.
Layers, transparency, and why PNG usually wins
Superimposition is just layer stacking. You have a base image such as a product photo, and an overlay such as a logo, sale badge, label, or decorative element. The overlay sits above the base image. If the overlay has transparency, the background photo shows through where it should.
That’s why PNG files are usually the practical choice for overlays. A transparent PNG logo or badge drops cleanly onto a product image without a white box around it. JPGs don’t support transparency in the same way, so they often create ugly rectangles or require extra cleanup before they can be used well.
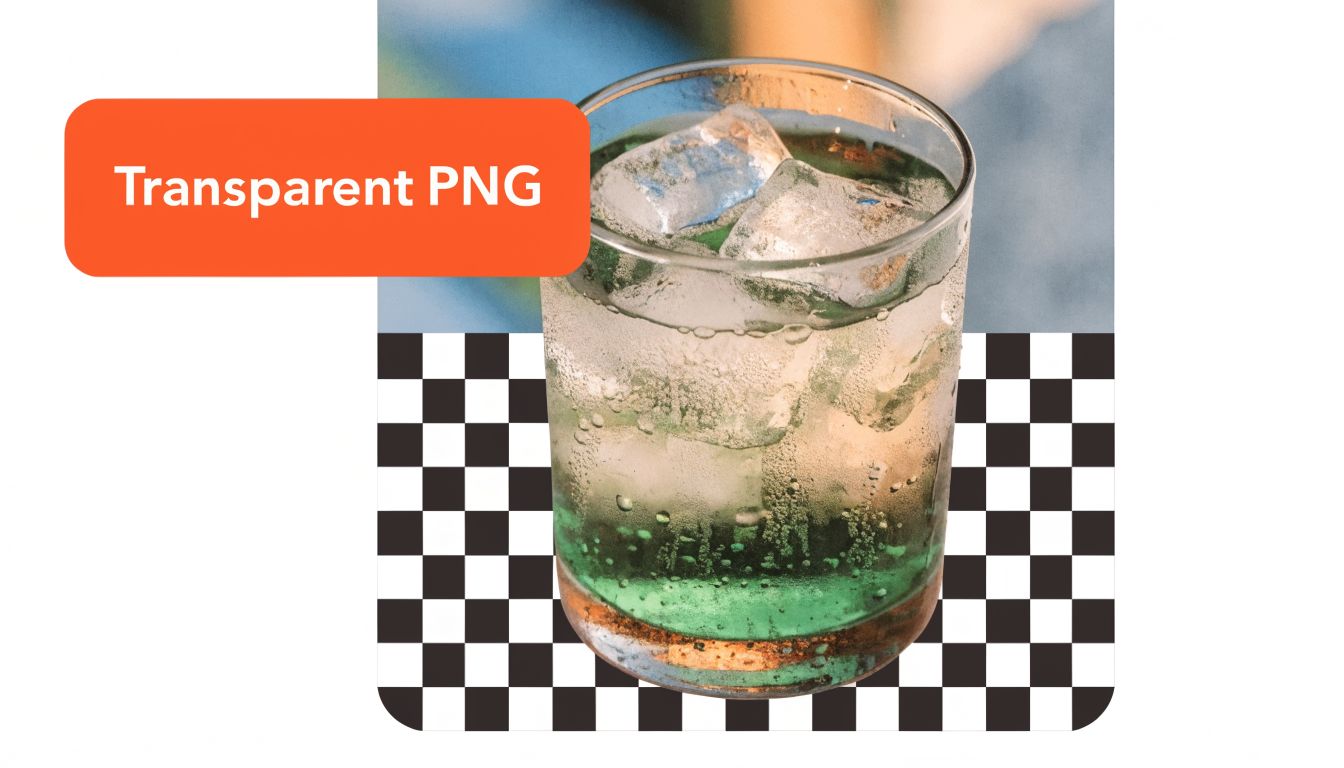
The checkered background you see in editing tools usually means transparency. For catalogue work, that’s what you want for most overlay assets.
A simple mental model helps:
- Base image: Your main product or lifestyle shot.
- Overlay asset: Logo, badge, watermark, design element, or secondary product image.
- Output image: The flattened file you publish to your store or marketplace.
Resolution is where many overlays fail
Resolution mismatch is a critical failure point. A low-resolution overlay placed onto a high-resolution product image won’t look crisp. According to Cloudinary’s guide to image overlays, compositing a 72 DPI overlay onto a 300 DPI e-commerce image creates visible degradation, and that loss in quality can’t be cleanly fixed later with upscaling.
For sellers, this matters more than it sounds. Product photography often needs to meet marketplace expectations at 300 DPI, so logos, badges, and watermarks need to match those specifications before you start batch work.
Practical rule: Build your overlay library at the same quality level as your product photos, not as an afterthought pulled from an old folder.
A few habits prevent expensive rework:
- Source overlays at final-use quality. Don’t grab a tiny badge from an email footer and expect it to survive on a large listing image.
- Check sharpness at 100% zoom. If the badge or logo looks soft there, it will still look soft after export.
- Set a mid-pipeline quality check. Review sample outputs before processing an entire collection.
- Use responsive placement logic where possible. Relative scaling works better than hard-coded dimensions when images vary across channels.
Keep the asset library tidy
Organizations often don’t fail because editing is difficult. They fail because assets are messy. Use one approved folder for current logos, one for badges, and one for watermarks. Name versions clearly. Retire old files. If a team member can’t tell which logo is current, bad outputs are inevitable.
Clean overlays start with clean assets.
Manual Online Tools for One-Off Overlays
Manual online editors still have a place. If you need to superimpose images online for one product launch image, a quick social graphic, or a mock-up for internal review, browser-based tools are often enough. They’re easy to access and don’t require setup.
The usual workflow in browser tools
Most manual editors follow the same pattern. You upload the main photo first, then upload the overlay asset, then place and adjust it.

The steps are straightforward:
- Upload the background image. This is your product photo, banner, or lifestyle shot.
- Add the overlay file. Usually a PNG logo, sticker, watermark, or badge.
- Resize and position it. Most tools provide drag handles and alignment guides.
- Adjust opacity if needed. Useful for subtle branding or watermarking.
- Export the final image. Usually as JPG or PNG, depending on use.
This works fine for one image. It even feels fast for the first few files.
Then the catalogue reality shows up. Now imagine repeating those same clicks for 200 images in a Shopify collection. Then doing it again for a second marketplace format. Then catching that the badge was slightly too large in the first batch and having to redo the lot.
Where these tools help and where they don’t
The strength of manual tools is flexibility. You can eyeball placement, make small creative decisions, and tweak each image independently. That’s useful when every image is different or when you’re experimenting.
Their weakness is consistency. If the process depends on your hand, your eye, and your patience, the output changes from file to file.
A simple comparison makes it clearer:
| Use case | Manual online tool fit |
|---|---|
| One social post | Strong |
| Single logo placement on one product image | Strong |
| Testing badge designs | Strong |
| Applying the same overlay to a full collection | Weak |
| Multi-platform export for listings | Weak |
| Repeatable marketplace workflow | Weak |
If you’re doing prep work before overlays, browser-based background tools can still be useful. A practical starting point is understanding how Canva background removal works in simple listing workflows, especially if your team already uses Canva for lightweight design tasks.
Manual tools are best treated as sketchpads, not production lines.
Use them deliberately
There’s nothing wrong with using a one-off editor. The mistake is expecting it to behave like a system. For single-image needs, it’s perfectly reasonable. For catalogue operations, it turns routine edits into repetitive labour.
That’s why many sellers feel busy even when the edits themselves are simple. The task isn’t technically hard. It’s operationally draining.
Beyond Simple Overlays with Blending and Masking
Not every overlay should look like a sticker placed on top of a photo. Sometimes the better result is subtler. A watermark should feel integrated into the image. A label on packaging should sit naturally on the product surface. A garment composite should look like one coherent asset, not an obvious cut-and-paste.
Blending for more natural composites
Blending modes change how an overlay interacts with the image beneath it. In practical e-commerce terms, this helps when a flat graphic needs to feel more embedded in a product shot or lifestyle image.
For example, a plain black logo over a textured fabric shot can look harsh at normal opacity. A blend mode such as Multiply may help it interact more naturally with fabric shadows and texture. A soft watermark on a wood background can also look less artificial when it blends with the material instead of sitting above it as a solid graphic.
Use blending when:
- The overlay should feel printed or embossed. Think packaging marks, fabric graphics, or subtle branding.
- Texture matters. A lifestyle scene often needs the underlying material to show through.
- You want lower visual aggression. Watermarks that shout too loudly often cheapen product imagery.
The trade-off is predictability. Blend modes can look great on one image and poor on another if lighting or colour varies across the set. For mixed catalogues, that means testing on representative samples before applying the approach widely.
Masking for control instead of compromise
Masking lets you hide part of an overlay without deleting it permanently. That matters when one object should appear behind another, or when you need a product to interact with the scene more realistically.
A common example is apparel. You may want to place a graphic onto a shirt mock-up while keeping folds, sleeves, and natural garment contours intact. Another example is placing a product partly behind a foreground prop in a lifestyle image to create depth.
A good mask preserves options. You can revise edges later without rebuilding the file from scratch.
For catalogue teams, masking is often more useful than advanced retouching because it solves practical problems:
Doing this for a whole catalog?
MerchLoom runs background removal, upscaling and AI editing across every product photo you have — one prompt, whole batch.
Try MerchLoom- A badge can sit behind part of a product instead of covering key details.
- A model or mannequin can be separated from the background more cleanly.
- Composite shots can look layered rather than flat.
If your workflow includes object cleanup or composite refinement, it helps to understand content-aware fill techniques and where they fit into image editing. Even if you don’t use Photoshop directly, the principle matters: remove distractions non-destructively whenever possible.
Know when polish becomes overwork
However, sellers can overdo it. Blending and masking can improve a hero image, campaign banner, or premium product composite. They’re less useful if you apply bespoke craft to every image in a large, fast-moving catalogue.
Use them where realism directly improves conversion or brand presentation. Don’t turn every routine listing image into a retouching project.
Automating Superimposition for E-commerce Catalogs
At some point, the question changes from “How do I place this logo?” to “How do I stop placing this logo by hand?” That’s when image editing becomes workflow design.
For catalogue-scale work, the answer is a pipeline. Instead of opening each image and repeating the same actions manually, you define the sequence once. The system then applies it consistently across the collection.
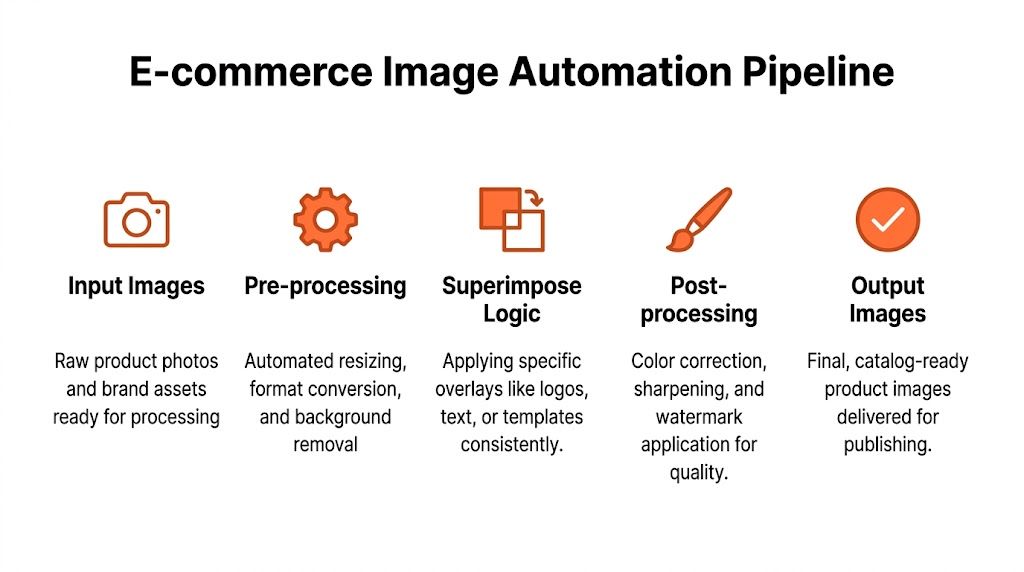
What a pipeline actually looks like
A practical e-commerce pipeline might look like this:
- Remove the background from all raw product photos.
- Resize and crop them for the target channel.
- Superimpose a brand badge in the top-right corner.
- Apply a watermark only to marketplace versions.
- Export separate outputs for Amazon, Shopify, and Etsy.
That’s not creative theory. It’s production logic. One defined job, many consistent outputs.
A strong pipeline also handles exceptions better. If your square Shopify images need one overlay position and your marketplace images need another, that should be handled as a rule, not as a memory test for whoever is editing that day.
Order matters more than most teams realise
Automated systems outperform ad hoc tool stacks. The sequence of operations affects both cost and output quality. According to the summary tied to Dzine.ai’s overlay tools page, AI-automated, cost-optimised pipelines can cut compute costs by up to 65% compared with single-purpose tools. The same source states that sequencing tasks intelligently, such as removing a background before superimposing an overlay, can reduce processing costs by up to 87% on upscaling tasks.
That matters when you’re processing hundreds of images. A poor sequence forces more expensive operations on unnecessarily large or messy files. A smart sequence trims waste before the heavier work begins.
Working principle: Don’t upscale clutter. Clean the image first, then spend processing power on the final asset.
This is one reason single-purpose tools often feel fine in isolation but expensive in aggregate. They solve one task at a time without considering the economics of the whole job.
Consistency beats individual effort
Manual editing depends on whether the person doing it remembers all the rules. Pipelines don’t rely on memory in the same way. Once the placement, sizing, and export logic are defined, the output becomes repeatable.
That’s especially important for stores selling across multiple channels. Amazon wants one thing. Shopify’s collection grid rewards another. Etsy often needs image presentation that reads well in a square-first environment. If your process for superimpose images online doesn’t account for those differences upfront, your team ends up patching them later.
A short decision list helps when choosing an automated setup:
- Start with repeat work. Seasonal badges, watermarks, marketplace logo placement, and standard framing are the obvious first candidates.
- Define channel-specific outputs. Don’t create one image and hope it works everywhere.
- Add a review checkpoint. Sample outputs early instead of discovering a bad rule after a full batch finishes.
- Keep iteration easy. A good workflow should let you revise the rule and reprocess cleanly.
If your team is already exploring AI-assisted production logic, it’s worth reading how Gemini AI fits into broader content and automation workflows. The useful part isn’t the model name. It’s the shift toward describing work in plain language and letting systems execute repeatable tasks.
Real-World Batch Superimposition Pipelines in Action
Pipelines become easier to understand when they’re tied to actual catalogue jobs. Most sellers don’t need abstract automation theory. They need repeatable recipes that solve everyday bottlenecks.
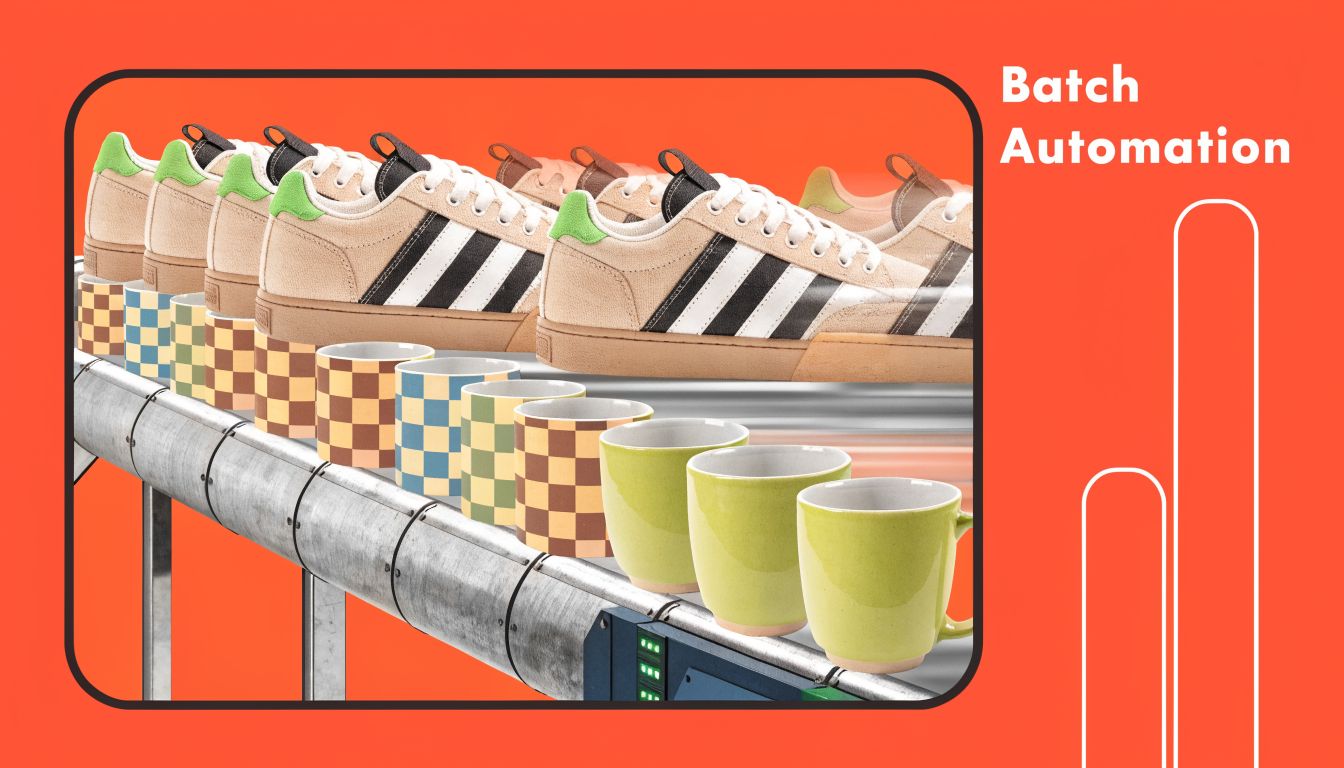
Apparel mock-up generation
A clothing seller has one clean blank shirt template and a folder of design files. The goal is to generate a full mock-up set without manually placing each design on each garment.
The batch logic is simple. Use the shirt image as the base. Treat each design as a separate overlay input. Apply the design to a fixed print area, scale it according to the template rules, then export listing-ready images in the right aspect ratio for the store.
A lot of sellers waste time with drag-and-drop mock-up editors. They’re fine for testing one design. They’re painful for a large release.
The workflow often looks like this:
- Base asset: Approved blank garment template
- Overlay input: Folder of artwork files with transparent backgrounds
- Placement rule: Centre chest or print zone alignment
- Output set: Product mock-ups ready for collection upload
A related approach appears in tools and workflows built for AI image combination and batch compositing, especially when the same base visual needs to be reused with many overlay variations.
Conditional sale badges by collection
This is common in retail operations. Not every product gets the same label. New arrivals may need one badge, discounted items another, and evergreen products none at all.
A batch pipeline handles this by assigning overlays based on metadata, file grouping, or collection rules. If an image belongs to the sale folder, apply the sale badge. If it belongs to the new-arrivals folder, apply the new-arrival badge. If it’s part of the core line, leave it clean.
That’s much better than maintaining multiple nearly identical image sets by hand. It reduces errors and makes seasonal refreshes less disruptive.
The best catalogue workflows don’t just process images. They encode business rules into image production.
A practical review of batch production in motion helps make this clearer:
Marketplace standardisation
Marketplace imagery often demands the least creative freedom and the most operational discipline. A seller needs a clean white background, consistent product scale, a small brand mark for certain channels, and exports that fit listing requirements without manual adjustment.
In this case, the pipeline is less about flair and more about compliance and clarity. Remove the original background. Centre the product on white. Apply the approved logo only where appropriate. Export the result in the correct shape and size for the destination.
This is usually where catalogue teams feel the biggest relief from automation, because the work is repetitive and the output standard is strict.
A simple comparison shows the difference:
| Task | Manual approach | Batch pipeline approach |
|---|---|---|
| White background creation | Edited one image at a time | Applied as a repeatable rule |
| Logo placement | Positioned by eye each time | Anchored consistently |
| Multi-channel sizing | Exported in separate rounds | Generated automatically |
| Seasonal relabeling | Reopened and redid files | Updated the rule and reran |
Watermarks for high-risk image use
Some sellers need image protection more than others. Vintage resellers, handmade shops, and niche catalogues often want watermarks on selected images while keeping hero shots cleaner. A batch rule can apply a subtle watermark only to channels where copying risk is higher, leaving store-native imagery less cluttered.
That selective approach is usually better than watermarking everything. It protects the catalogue where needed without making all imagery look defensive.
From Manual Edits to an Automated Asset Factory
Superimposing images starts out as a simple edit. For a seller running a real catalogue, it quickly becomes a recurring operational job. That’s why so many teams feel trapped by work that seems small in isolation but grows heavy in aggregate.
The fix isn’t just finding a faster editor. It’s changing the model. Manual tools are useful for one-offs, testing ideas, and occasional creative jobs. They’re poor substitutes for a system that needs to produce consistent listing assets again and again.
The practical progression looks like this:
- Learn the basics well enough to avoid quality mistakes.
- Use manual tools when the task is one-off.
- Reserve blending and masking for images where polish adds real value.
- Move repeatable overlay work into batch logic as soon as patterns emerge.
Once you make that shift, image production stops behaving like a pile of interruptions. It starts acting like infrastructure. New badges, updated logos, sale overlays, white-background compliance, and channel-specific exports become repeatable processes instead of recurring fire drills.
That’s the major benefit. You don’t just save clicks. You get back attention. Your team spends less time babysitting image edits and more time managing the business itself.
If your store is stuck in the one-image-at-a-time cycle, MerchLoom is built for the batch reality most sellers live in. You can upload full collections, describe the workflow in plain English, and run chained image pipelines for background removal, reframing, overlays, and marketplace-ready exports without turning catalogue updates into a manual production sprint.
Stop editing product photos one at a time
Upload your catalog or connect your store. Describe the result once. MerchLoom does the rest.
Try MerchLoom