
Lifestyle Product Photography with Models That Converts
Run lifestyle product photography with models across an entire catalog. Covers briefs, casting, lighting, retouching, and batch AI workflows for online stores.
You've got hundreds of product photos waiting in a folder, several models to coordinate, and three marketplaces asking for different crops. The first few images look good. By SKU two hundred, the poses drift, white balance changes, hands cover product details, and your listings no longer look like one catalog.
Treat lifestyle product photography with models as a production system, not a one-off creative project. Before anyone steps in front of a camera, lock the output specs, shot list, model direction, file naming, quality checks, and export presets. That's how you make model-led imagery repeatable across Amazon, Shopify, Etsy, eBay, WooCommerce, Poshmark, and Depop.
What Lifestyle Model Photography Has to Do for Your Catalog
A model image has three practical jobs. It must show scale, demonstrate how the product is used, and set an accurate expectation for fit, proportion, color, and styling. A beautiful frame that hides the product or exaggerates its appearance may earn attention, but it can also create disappointment after delivery.
Start with the export plan. Amazon's main image requires the actual product on a pure white background, with RGB values of 255,255,255, and Amazon says images should be at least 1,000 pixels on either height or width for zoom. The longest side must not exceed 10,000 pixels, and it shouldn't be below 500 pixels according to Amazon's image requirements. For your working catalog, prepare the main image at 2000 x 2000 pixels, then keep lifestyle frames at 1500 x 1500 or 2000 x 2000 when square marketplace placement is expected.
Shopify's commonly cited practical square upload size is 2048 x 2048 pixels, while the platform ceiling is 4472 x 4472 pixels, as outlined in this Shopify product photography guide. Etsy recommends at least 2000 pixels on the shortest side, and its guidance is useful when you're exporting a master that must survive thumbnail crops and zoom. Etsy lifestyle crops can use up to 2700 x 2025 pixels, but keep the original master larger where possible.
| Platform | Main image | Lifestyle frames | Min images per SKU |
|---|---|---|---|
| Amazon | 2000 x 2000 px, pure white RGB 255,255,255 | 1500 x 1500 or 2000 x 2000 px | 5 to 7 |
| Shopify | 2048 x 2048 px square | 2048 x 2048 px square, plus campaign crops | 5 to 7 |
| Etsy | Up to 2700 x 2025 px | 2000 px minimum on shortest side | 5 to 7 |
Use five to seven frames per SKU as a working minimum. Cover the front view, side or three-quarter view, in-use scene, product detail, and packaging. Add a fit or scale frame when the category needs it. The exact mix changes by product, but the listing should answer the shopper's main questions without forcing them to infer size or use.
Practical rule: The model frame supports the product. It shouldn't replace the clean proof shot, detail view, or packaging image.
This matters beyond the product page. Product images feed marketplace search results, social posts, retargeting ads, collection pages, and email placements. If you also need short-form visual assets, AI tools for e-commerce videos can help you think through how still photography and video assets should share product views, backgrounds, and naming conventions.
Industry data supports treating image depth as a conversion asset. One analysis found that listings with one image converted about twice as well as listings with no images, while listings with two images converted about twice as well as listings with one image. The same analysis reported that 67% of consumers considered image quality vital to purchase decisions, ahead of product information at 63%, detailed descriptions at 54%, and reviews at 53%. Those figures come from Pixelz's product-image analysis, and they point to a simple operational conclusion. Build the image library before you build the listing.
Planning the Brief, Casting, and Styling
A model or freelancer should receive a usable production package on day one. A message that says “natural lifestyle shots for our new collection” isn't a brief. It leaves the model guessing about posture, styling, crop, expression, and how many usable frames you need from every SKU.
Build the brief around the SKU
Start with the product category and target customer. A linen shirt for office wear needs different body language from a running jacket or a jewelry piece intended for gifting. Add three to five reference images that show framing, light, styling, and energy. Don't use references only because they look attractive. Use them because they answer a production question.
Add mood keywords, but attach them to visible instructions. “Relaxed” might mean a seated pose, lowered shoulders, and a candid gaze. “Premium” might mean controlled hand placement, clean negative space, and slower movement. Then create the per-SKU shot list:
- Hero frame: Product centered, clear silhouette, usable in a square crop.
- Three-quarter frame: Model angled enough to show depth and fit.
- Use frame: Product actively worn, held, applied, carried, or opened.
- Detail frame: Close view of texture, closure, seam, label, finish, or function.
- Packaging frame: Product and included components shown together.
Cast for consistency, not only appearance
Casting needs to reflect the catalog and the customer. Record the required body-type diversity, age range, and skin-tone range before contacting models. For hand-visible products, inspect hand and nail condition. Nails, rings, dryness, and identifiable marks can become part of the visual language across every SKU, so decide whether they fit the brand.
Batch work also demands stamina and control. A model who can hold an expression, repeat a pose, and make small adjustments without losing the product position is more useful than someone who delivers one striking frame but needs extensive correction after every change.
Styling should keep attention on the item being sold. Avoid visible logos unless they belong to the product. Use neutral base layers that let the product lead, and balance skin exposure carefully when the range includes products designed for different skin tones. Keep accessories limited and document every approved look so a freelancer can reproduce it later.
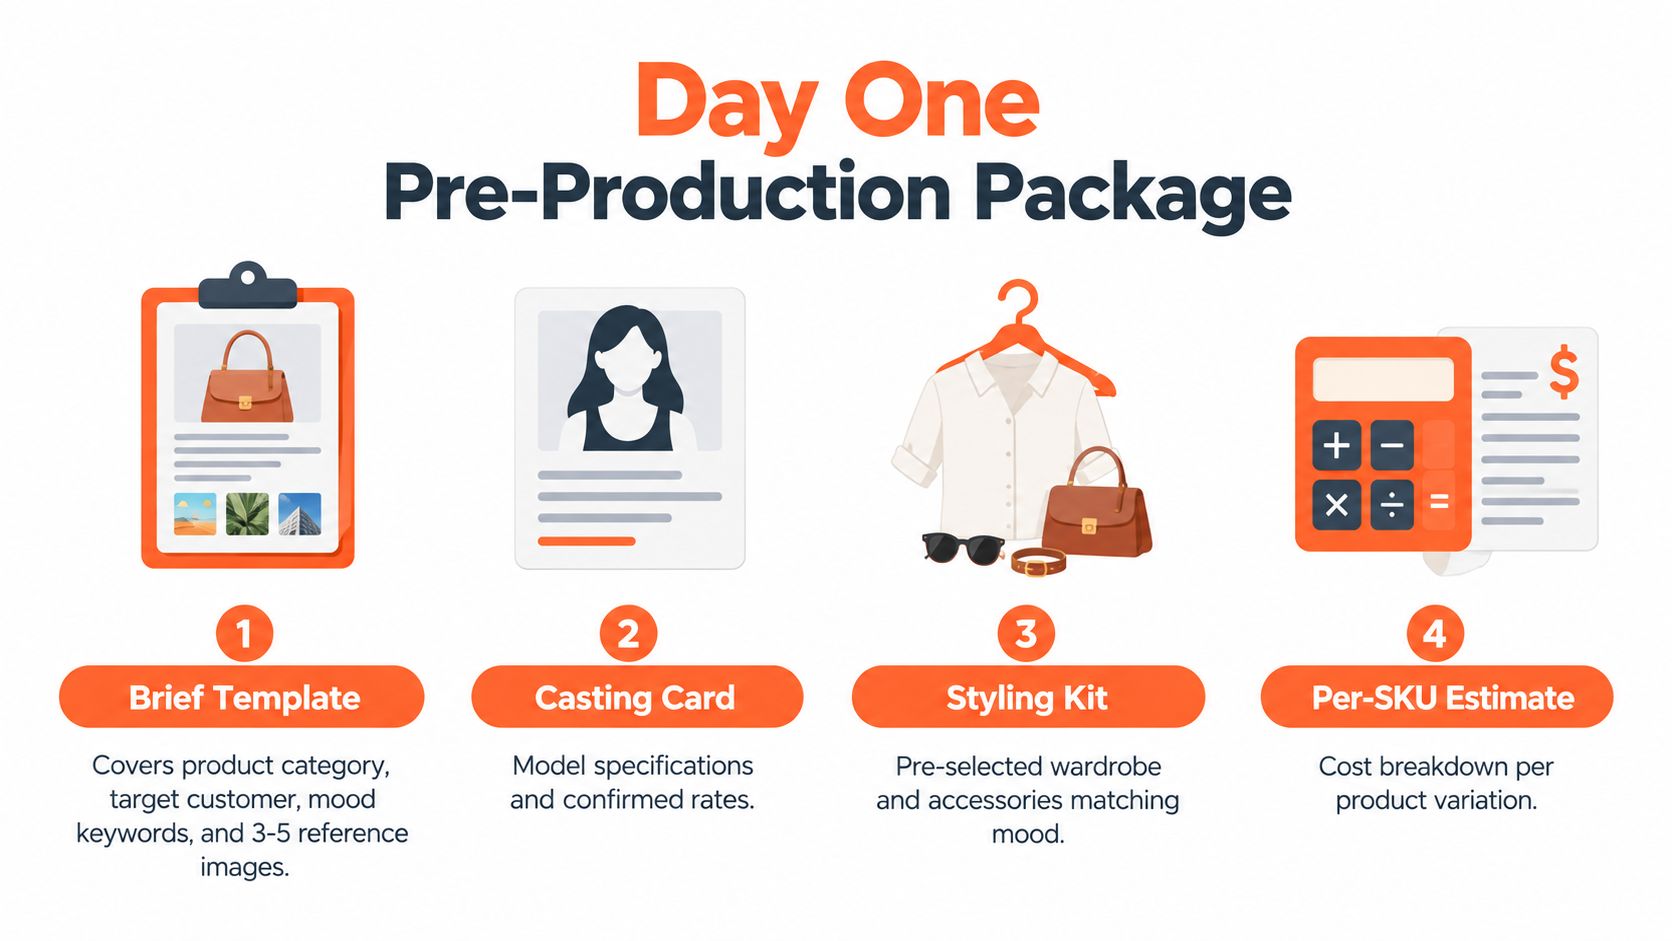
Get sign-off before the shoot
Have the model or freelancer confirm the number of looks, frame count per look, hand-placement references, prop list, and turnaround for selects. Put the agreement in the same shared document as the shot list. It prevents the common failure where everyone remembers the creative direction but nobody remembers the deliverables.
For apparel-specific examples of model positioning and product presentation, use this guide to using a model for clothing photography.
Copy this checklist into a Google Doc:
- Product category and target customer
- Three to five visual references
- Mood keywords with pose examples
- Approved model specifications
- Look count and wardrobe list
- Accessories and prop restrictions
- Per-SKU shot list
- Pose, gaze, and hand-placement direction
- Required crop formats
- Number of selects per SKU
- Model release status
- Selects turnaround
- File naming convention
- Marketplace destinations
Setting Up the Shoot, Lighting, and On-Set Quality Checks
A repeatable shoot day needs fixed decisions. Use a full-frame camera body with a 50mm or 85mm prime for lifestyle framing. Both focal lengths keep the model's proportions natural while giving you enough working distance for clothing, accessories, beauty, and handheld products.
Shoot tethered to Capture One or Lightroom. The camera screen is too small for reliable catalog QA. A tethered monitor lets you check whether a logo is covered, a sleeve has twisted, a product edge is sharp, or the model has moved outside the intended crop before the set changes.
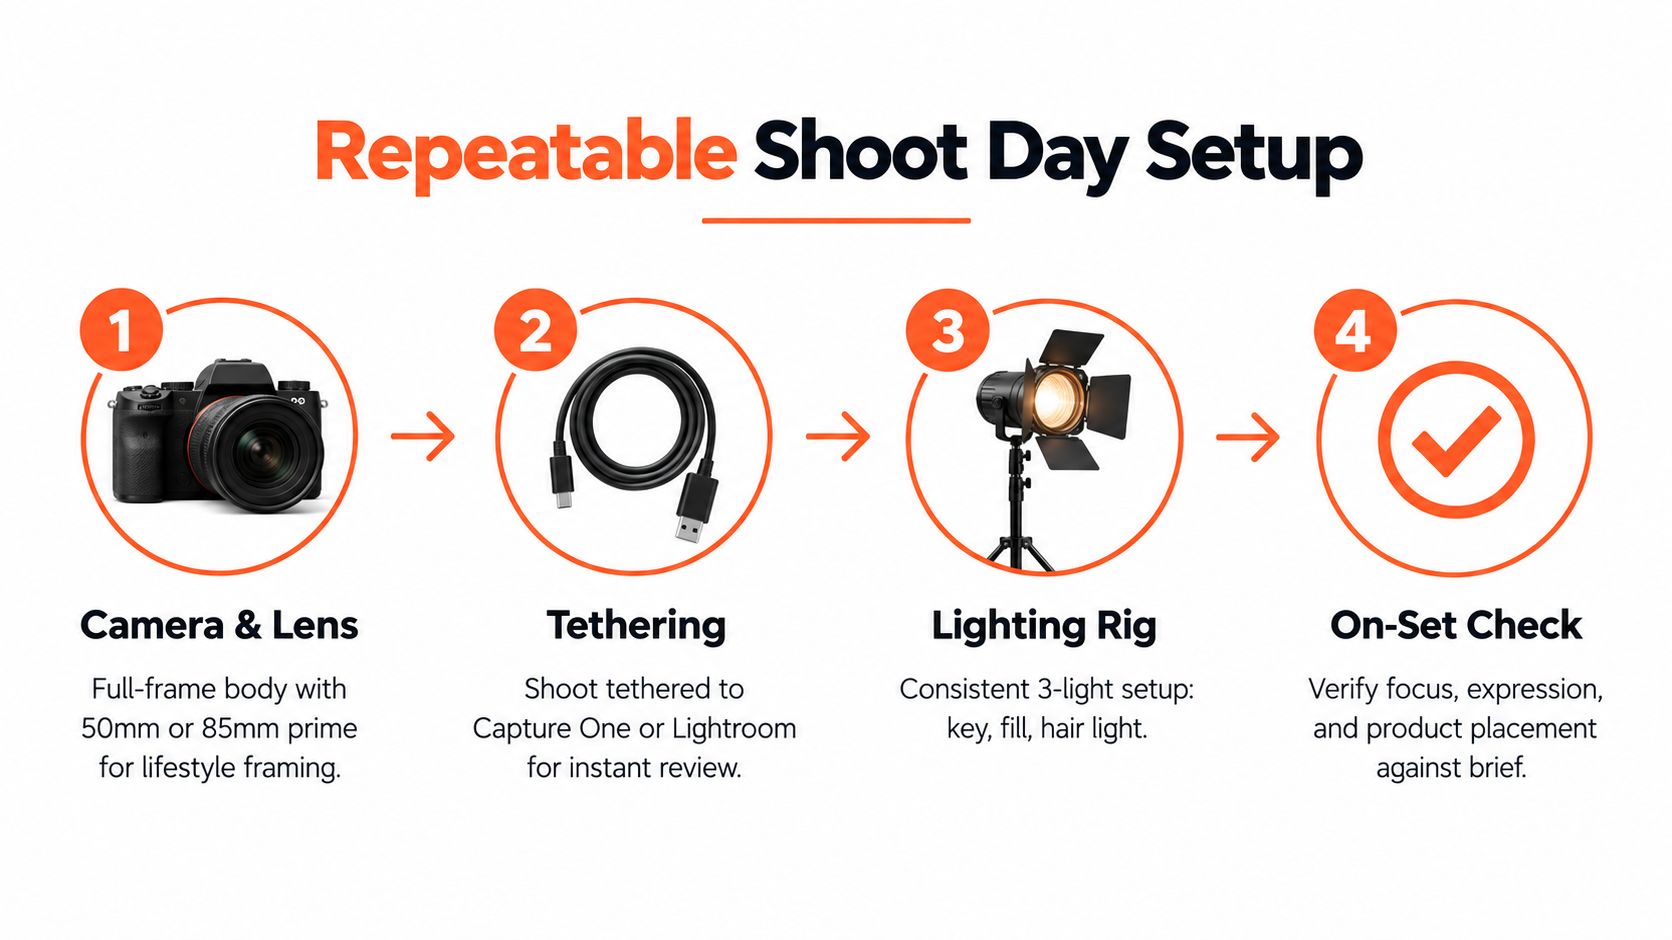
Keep the lighting diagram fixed
Use a two-light foundation with separation added where needed. Place a large softbox as the key light at 45 degrees to the model. Put a reflector or second softbox opposite it as fill. Add a hair or rim light when the product edge needs separation from the background.
Choose the background based on the output. A neutral backdrop gives you room to crop and repurpose the frame. A styled set works for editorial lifestyle images, but it introduces more variables. If you use a set, photograph a reference frame before the batch and keep furniture, props, camera height, and light positions recorded.
Lock exposure across SKUs:
- Aperture: f/8 for product sharpness
- Sync speed: 1/160
- ISO: 100
- White balance: approximately 5500K
These settings are a starting point, not a substitute for checking the actual product. Reflective packaging, black fabric, pale garments, and transparent containers can all need lighting adjustments. Record any intentional change in the SKU notes rather than improvising without documentation.
Use a short QA loop
Name folders by SKU before shooting. Place a color checker in the first reference frame for each lighting setup. Use in-camera flags for obvious rejects, then review the tethered frame before moving on.
Give each frame a 30-second quality check. Verify focus, exposure, product color, expression, hand placement, and the intended crop. That half-minute prevents a full batch from reaching post-production with the same defect repeated across every product.
For prop-led scenes, document where each prop sits and how much visual space it occupies. This workflow for product photography with props is useful when you're building scenes that need to stay consistent across a collection.
A practical shoot order is hero first, alternate angle second, in-use frame third, detail fourth, and packaging last. If time gets cut, you'll still have the most important proof shots for the listing.
Directing the Model Across Hundreds of Shots
The model is part of your production system. Direction must be clear enough that the model can self-correct while you keep the catalog moving.
Print a pose card for each SKU. Show product placement on the body, hand position, gaze direction, and three expression options: neutral, smile, and candid. Walk the set once before the batch starts, then mark foot positions for hero, three-quarter, and detail poses. Every product should be photographed from those same marks unless the product requires a documented exception.
Use a small command vocabulary:
- “Reset” returns the model to the marked position.
- “Hold” freezes the pose while you check the frame.
- “Product forward” keeps the item visible instead of turned into the torso.
- “Eyes to camera” creates a direct sales frame.
- “Eyes away” gives you a more editorial alternate.
Doing this for a whole catalog?
MerchLoom runs background removal, upscaling and AI editing across every product photo you have — one prompt, whole batch. Try 2 batches free, no signup.
Try it freeShort commands reduce explanation and keep retakes quick. They also help a replacement model understand the set without learning a completely new directing style.
Direct hands like product placement
Hands communicate scale, but they can destroy a frame when fingers cover a logo, seam, clasp, button, or label. Mark the acceptable hand zone on the pose card. For rings, bracelets, and beauty products, photograph one clean placement without fingers crossing the primary feature, then capture a natural-use variation.
Capture expression variations early in each pose. The first ten frames often give you the cleanest set before fatigue, wandering attention, or repeated movement changes the look. Schedule a reset every forty minutes with water, shade, and five minutes away from the set. Tired models make more placement errors, and tired operators miss them.
| Category | Primary pose | Hand placement | Expressions | Shots per SKU |
|---|---|---|---|---|
| Apparel | Front and three-quarter standing | At side, pocket, or garment edge | Neutral, smile, candid | 5 to 7 |
| Jewelry | Seated or close three-quarter | Supporting wrist, neckline, or clasp area | Neutral, soft smile, direct gaze | 5 to 7 |
| Beauty | Close portrait or application pose | Product held below face or at application point | Neutral, smile, candid | 5 to 7 |
| Bags | Standing, walking, or shoulder carry | Handle or strap shown clearly | Direct gaze, away gaze, smile | 5 to 7 |
| Accessories | Natural-use pose | Product held without covering its main detail | Neutral, smile, candid | 5 to 7 |
The table is a starting point, not a rigid performance target. A handbag needs clear strap and scale proof. A necklace needs neckline visibility. A cosmetic product needs application context without hiding the packaging.
For more direction on building a repeatable model shoot, see this model photography workflow. Keep the same command vocabulary and pose-card format for the next collection so your visual language doesn't reset every season.
Post-Production, Batch Processing, and Marketplace Export
Post-production should be organized around the listing, not around individual photographs. A technically attractive frame is still unfinished if it has the wrong crop, missing marketplace version, inconsistent product color, or a background that breaks the catalog grid.
Create a dated folder structure when the RAW files arrive:
Date / SKU / Model / Marketplace / RAW
Keep the folder names boring and predictable. A freelancer or VA should be able to find the Amazon hero, Shopify square, and Etsy crop without asking where you put them.
Cull before you retouch
Select the hero and two alternates per SKU. Reject frames with soft focus, blocked product details, awkward fingers, visible styling errors, or inconsistent expression. Don't spend time correcting a weak frame when another frame already solves the same listing need.
Apply a saved preset for white balance, exposure, and product color. Validate the preset against the color-checker frame from the shoot. Skin retouching should remain consistent across the collection. Remove temporary blemishes and distractions, but don't smooth away texture that helps shoppers judge the product or model appearance.
Export three tiers:
- Master: 4000 px, sRGB JPEG, retained for future crops.
- Marketplace hero: Exact platform dimensions and background rules.
- Thumbnail: 800 px for internal review, collection planning, and quick approvals.
Use actions, presets, or batch workflows for repeated corrections. Manual edits belong only where the product requires them. If every SKU receives a different exposure treatment, your collection will look assembled from separate shoots even when it came from one set.
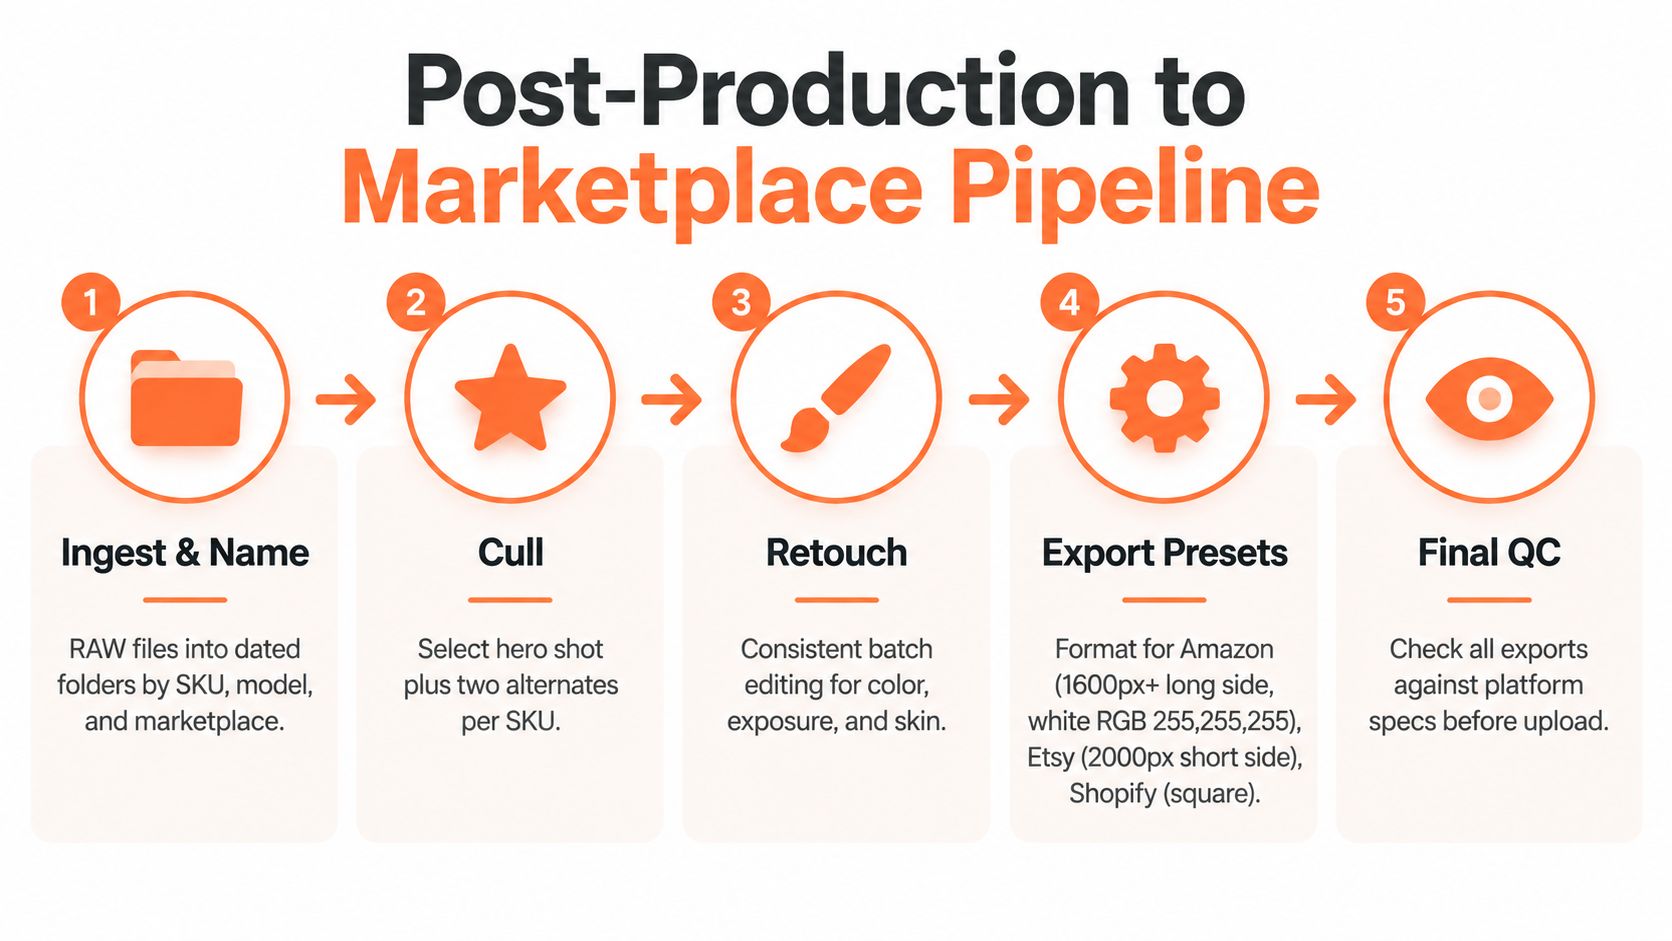
Keep one output spec sheet
Your export sheet should list the destination, file type, crop, background, and naming rule. Use these working targets:
| Destination | Output target | Critical check |
|---|---|---|
| Amazon main | 2000 x 2000 px | Pure white RGB 255,255,255, actual product, no text or watermark |
| Etsy lifestyle | Up to 2700 x 2025 px | At least 2000 px on the shortest side |
| Shopify hero | 2048 x 2048 px | Square crop and consistent product scale |
| TikTok Shop | 1:1 and 3:4 | Confirm the current listing template before export |
Amazon's main image rules prohibit graphics, illustrations, mockups, placeholders, text, logos, watermarks, props, and inset images on the main image. Keep those elements in secondary or campaign assets, not in the primary marketplace slot.
MerchLoom fits as the batch layer between ingest and listing. It can automate background removal, upscale images to marketplace dimensions, place products into lifestyle backplates, and reframe output for square, portrait, and 16:9 placements. It doesn't remove the need for human review, and it isn't a full Photoshop replacement. Check hands, faces, product edges, color, and scale before publishing.
That review also needs a naming and version policy. Keep the original, processed, and approved files separate. For teams running paid campaigns, a resource on creative asset management for Meta Ads can help you organize variants, approvals, and usage across ad placements.
Use this e-commerce image-editing workflow when you need to map the same processing order across a large catalog. The order matters. Background removal, reframing, color review, and upscale should happen in a controlled sequence, not as unrelated edits scattered across folders.
Releases, Model Consent, and Platform Compliance
A release belongs beside the product files. Don't leave consent PDFs in a separate drive where nobody can connect them to the published SKU.
Collect a signed model release for every recognizably featured person. That includes hands-only images when the hands are identifiable. If anyone is under eighteen, collect a minor release and guardian identification copy. The commercial-use language should cover derivative crops for marketplace thumbnails, advertising, social use, and catalog updates.
Define the usage term. A perpetual term is common for evergreen catalogs, but the agreement should also state permitted regions and channels. If your model's image appears on Amazon, your Shopify store, an Etsy listing, and paid ads, those uses should be clear before the shoot.
Keep these files inside the SKU folder:
- Signed release: PDF with the model's legal name and signature.
- Guardian documents: Required for a minor.
- Usage summary: Channels, regions, term, and restrictions.
- Approval record: Notes showing which looks and final images were approved.
Amazon prohibits watermarks and non-product text overlays on the main image. Its main image also needs the actual product on a pure white background, so lifestyle composites belong in secondary images or other marketing placements. Etsy allows lifestyle context, but stock-looking composites can weaken trust. Shopify doesn't conduct the same marketplace image review, but ad networks may reject faces used without proper releases.
Maintain one spreadsheet with SKU, model name, release path, expiry, permitted regions, and publication status. A legal review should take less than a minute per SKU because the evidence is organized, not because the paperwork is informal.
Turning One Workflow Into a Repeatable Catalog Pipeline
A catalog pipeline needs four fixed artifacts: one master brief, one lighting diagram, one tethering folder structure, and one batch export chain. The product changes. The production method shouldn't.
Lock the shot-list spreadsheet first. Include SKU, variant, model, pose card, required frames, props, crop formats, and approval status. Add a release tracker next. Then save the RAW-to-final preset chain and the marketplace export presets. Your working output set can include Amazon 2000 x 2000 main images, Etsy lifestyle crops, Shopify 2048 x 2048 squares, and vertical 1500 x 2000 social assets.
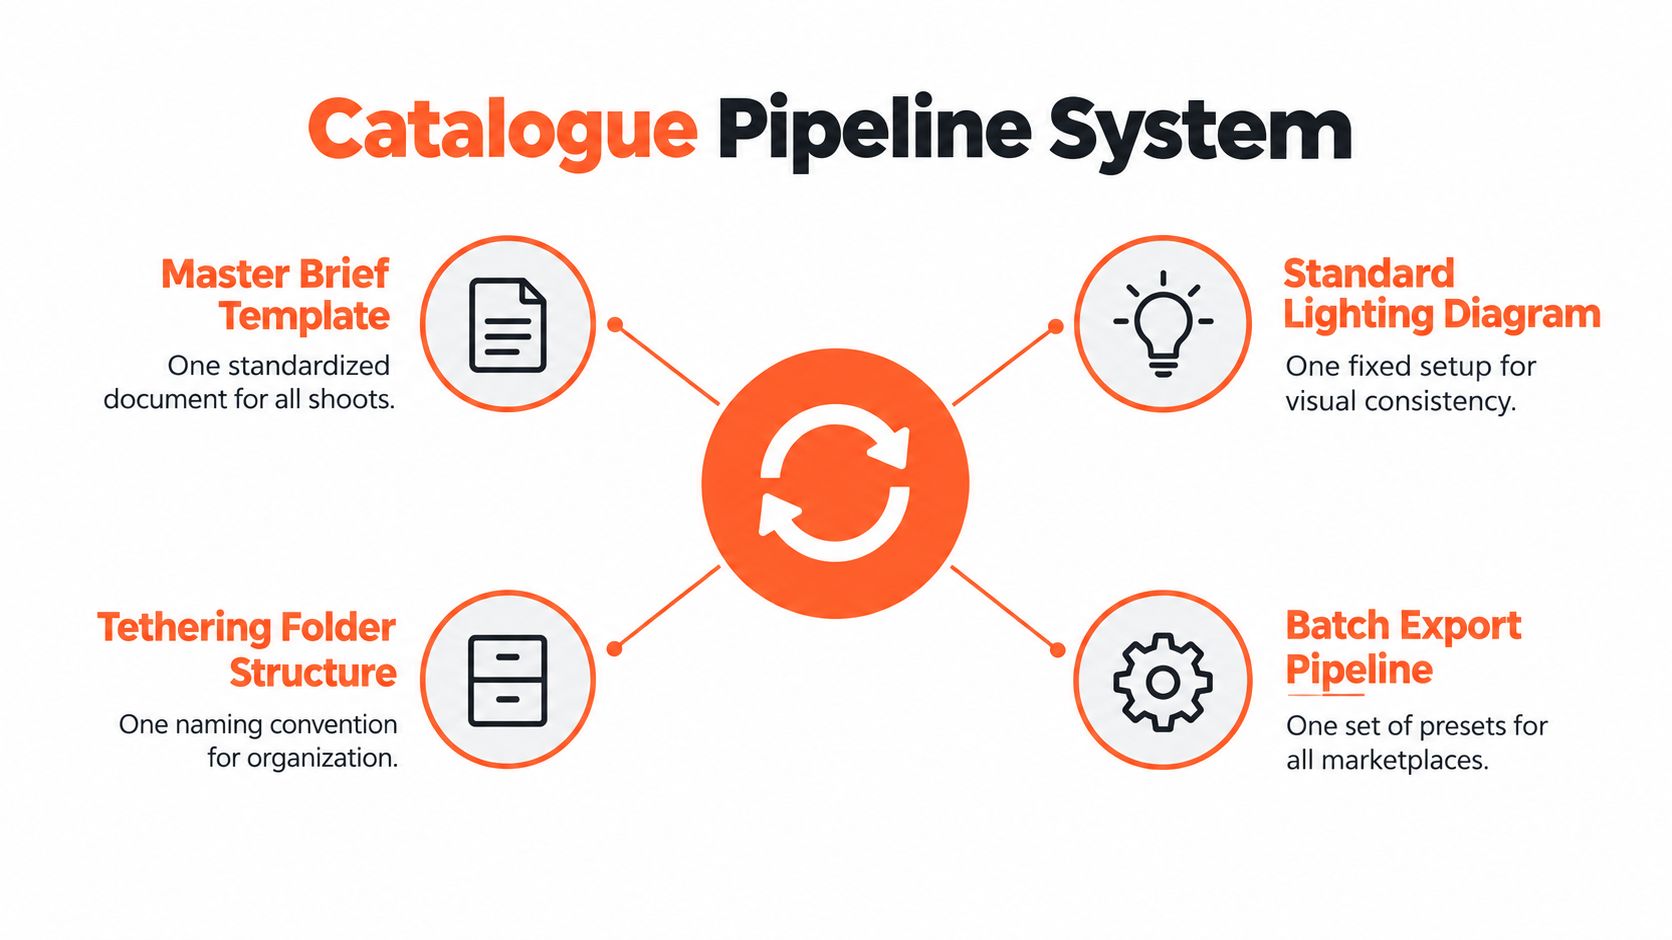
Set operating targets
Use your own products and team to establish capacity. A useful planning benchmark is 30 to 50 SKUs per shoot day, with two shoot days for a catalog drop and a 48-hour post-production turnaround. Those are operating targets, not promises. Complicated styling, multiple models, reflective products, and strict retouching will reduce throughput.
Keep promotion separate from production, but reuse approved frames. If you need a practical channel plan, this guide to promote your photography on Instagram can help you turn the same approved lifestyle assets into social content without creating a second, disconnected visual system.
MerchLoom can sit at the fixed step between ingest and listing. Use the same batch workflow for background removal, upscaling, scene placement, and marketplace reframing every cycle. The platform supports trying initial images without an account, then uses pay-per-image credits that never expire. Review every result before publication, especially model faces, fingers, product edges, and color.
For scene-based variants, this AI product scene generator can fit into the same documented process. Treat generated scenes as production outputs that need approval, not as automatic replacements for every photographed frame.
Paste this SOP into Notion or Drive:
- Create the shoot folder using the approved date and collection name.
- Duplicate the master brief and add every SKU and variant.
- Assign models, looks, pose cards, and release status.
- Set the documented lighting diagram and camera settings.
- Shoot tethered, using SKU folders and a color-checker reference.
- Complete the on-set QA loop before changing products.
- Cull the hero and two alternates per SKU.
- Apply saved color and exposure presets.
- Run the batch image workflow for background, scale, scene, and crop variants.
- Export Amazon, Etsy, Shopify, social, and campaign files from the spec sheet.
- Complete human QC for product accuracy, model consent, dimensions, and naming.
- Upload only approved files and archive the final set beside the release records.
Start with your next collection, not your entire back catalog. Build the brief, shoot one controlled batch, record every exception, and update the SOP before the next shoot.
MerchLoom lets you run model-led scenes, background removal, upscaling, and marketplace reframing across a whole collection through chained AI pipelines instead of one image at a time. Try your first images without an account, review the output yourself, and visit MerchLoom to build a pay-per-image workflow with credits that never expire.
Stop editing product photos one at a time
Upload your catalog or connect your store. Describe the result once. MerchLoom does the rest.
Try it free — no signup