
Model for Clothing: Choose the Right Type for Your Catalog
A practical guide to choosing a model for clothing listings. Compare live, ghost, and AI options, costs, rights, and batch workflow tips for e-commerce.
You've got 300 unedited garment photos, a deadline in two days, and no decision about the model for clothing imagery. That choice can't wait until the editing stage. Choose the model type first, then set the framing, background, file size, naming system, and rights process around it.
Start with a catalog plan, not Photoshop. List every sales channel, group products by garment type, and decide which image style each SKU needs. A model that works for one shirt may create a reshoot problem across an entire collection. The history of professional clothing modeling shows why this matters. In 1853, Charles Frederick Worth asked Marie Vernet Worth to present his designs to clients, helping turn clothing display into a specialized commercial occupation. The history of fashion modeling) later expanded through photography and agencies such as Ford Models, founded in New York in 1946.
Why the Model You Pick Changes Your Whole Catalog
Your model choice determines more than whether a shirt looks attractive. It locks in background color, framing, crop, file format, lighting, and reshoot cost for every SKU. A flat lay creates one type of catalog. A live model creates another. A ghost mannequin requires a different editing path entirely.
A late switch is expensive in operational terms. If you photograph 200 products flat, then decide the collection needs on-model fit context, you're not fixing one image. You're rebuilding the entire image set. That means new photography, new cropping, new color checks, and possibly new usage paperwork.
Choose the production logic first
Start by writing down the catalog constraint that matters most:
- Fit communication: Use a live model when buyers need to see drape, length, sleeve position, or movement.
- Silhouette clarity: Use a ghost mannequin when the garment shape matters more than the person wearing it.
- Color accuracy: Use flat lay when you need a clean view of the actual fabric and color.
- Variant testing: Use AI-generated imagery when you need to test many colors or styling contexts without arranging a new shoot for each one.
- Repeatable shape: Use a 3D avatar when the same body proportions and poses must remain available across future collections.
Your product photography system should support the decision. The product photography workflow guide is useful for thinking about the relationship between source images, editing, and final marketplace files, but the practical rule is simple: define the output before you create the input.
Ghost mannequins usually feed cleanly into batch background removal because the product silhouette stays predictable. Live-model images need more review. You'll crop faces, match color across different poses, check hands and hair, and confirm that the release covers every intended use.
Catalog rule: Name the model type before you open an editor or upload a single product image.
Create a column in your SKU sheet called model_type. Fill it with live, ghost, flat, 3D, or AI. Then assign the required marketplace outputs. That small step prevents a visual decision made halfway through production from forcing a full catalog reshoot.
The Five Model Types for Clothing Imagery
There are five practical choices for a clothing catalog. They solve different problems, and none works equally well for every SKU.
| Model Type | Cost Per Image | Batch Speed | Best For |
|---|---|---|---|
| Live model | $25–$150 | Slowest | Fit storytelling and premium presentation |
| Ghost mannequin | $5–$20 | Fast and consistent | Garment silhouette and clean product views |
| Flat lay | $0–$5 if self-shot | Fast | Color accuracy and low-cost catalog coverage |
| 3D avatar | $2–$8 render cost | Fast after setup | Repeatable body shapes and pose control |
| AI-generated model | $1–$4 per image | Fastest at volume | Variant testing and large catalogs |
Live models show how clothing sits on a body. That's valuable for dresses, trousers, fitted jackets, and anything where length or proportion affects purchase confidence. The downside is operational friction. You need scheduling, styling, consistent lighting, model releases, and a repeatable way to recreate the look when a new color arrives.
Ghost mannequins remove the visible body while preserving the garment's shape. They're strong for shirts, jackets, and structured products where the customer needs to understand the neckline, side seams, and overall form. Use the same mannequin size, camera height, lighting setup, and crop for the whole category. For more detail on this approach, see the guide to a mannequin for clothes.
Flat lay is the cheapest option when you can shoot it yourself. It gives you a direct view of fabric color and surface detail, but it can flatten the fit story. Keep the garment position fixed. Mark the camera position. Use the same fold rules, styling distance, and background for every colorway.
3D avatars make sense when you want a reusable digital body. They require setup, but future renders can follow the same proportions and pose library. They're useful for collections with recurring silhouettes, especially when you need consistent visuals across seasonal drops.
AI-generated models are efficient for high-volume testing and long-tail variants. They can place garments in multiple contexts, but they need human review. Check prints, logos, hems, collars, hands, skin edges, and garment layering before publication. AI is an image-production component, not a replacement for product truth.
For most sellers, the practical answer is a hybrid. Use ghost or flat images for the core product view, then add live, 3D, or AI imagery where fit and styling information adds value.
Matching the Model to Amazon, Etsy, and Shopify Rules
Platform specifications should set the model plan before brand preference. Configure the strictest channel first, then derive the crops and supporting images required by the other stores. This makes model selection a catalog-wide production decision, not a choice made for one attractive photo.
Amazon requires a clean primary image
Amazon's main product image must use a pure white background, RGB 255, 255, 255, and Amazon recommends at least 1600 pixels on the longest side to enable zoom. Keep the Amazon product image requirements beside your export checklist during catalog preparation.
Use the primary slot for the garment only. Remove mannequin parts, props, colored backdrops, and decorative elements. A ghost mannequin works when the final composite removes the neck and body form cleanly. A live model belongs in a secondary image unless the primary file is edited to satisfy Amazon's product-image rules.
Create the white-background master first. Derive the secondary views from that approved garment source. The same source keeps color and silhouette consistent across the hero image and supporting frames.
Etsy gives you more visual freedom
Etsy accepts lifestyle imagery and varied backgrounds, so flat lay and live-model photography can both fit the platform. Make the first image explain the product clearly. Use later frames for scale, styling, texture, and fit context.
Etsy recommends listing photos at least 2000 pixels on the shortest side. Follow its Etsy listing image guidance when setting the catalog master. Export one consistent file set instead of repairing listings one at a time.
Shopify is flexible, but inconsistency still costs you
Shopify allows product and collection images up to 4472 × 4472 pixels and 20 MB. Community guidance commonly recommends 2048 × 2048 square images for a uniform store appearance. Use the Shopify product image guidance to set the working frame.
Shopify does not require one model type. Your store still needs one visual system. Pick a square master, define the garment's position inside it, and repeat the same model identity or mannequin treatment across each collection. Record the required output for every SKU across Amazon, Etsy, Shopify, eBay, WooCommerce, Poshmark, and Depop before production starts.
How to Choose the Right Option for Your Store
Use three inputs: catalog size, budget per SKU, and brand identity. Don't choose based on the image you like most. Choose based on what you can reproduce when the catalog doubles.
| Catalog Size | Budget per SKU | Recommended Model | Why It Works |
|---|---|---|---|
| Under 50 SKUs | Under $5 | Ghost mannequin or flat lay with batch cleanup | Low setup cost and simple repetition |
| 50–500 SKUs | $5–$25 | Hybrid of ghost, live, and AI try-on | Covers core products and long-tail variants |
| Over 500 SKUs | Above $25 or premium line | Consistent live or curated AI model system | Supports identity, fit context, and repeatable templates |
Under 50 SKUs
Start with ghost mannequin or flat lay. Add batch background removal and a fixed crop. You don't need a complex model library yet. You need clean product coverage and files that pass each channel's technical requirements.
From 50 to 500 SKUs
Doing this for a whole catalog?
MerchLoom runs background removal, upscaling and AI editing across every product photo you have — one prompt, whole batch.
Try MerchLoomUse a hybrid. Photograph a live model once per collection drop for the main styling story. Use ghost images for core sizes and standard product views. Use AI try-on for long-tail colorways only after you've approved the garment source and checked the output.
Above 500 SKUs
Prioritize repeatability over novelty. Choose a consistent live model system or a curated AI model identity with fixed poses, body proportions, lighting, and framing. Your templates must survive new colors, new categories, and new channels.
Brand position matters too. Functional basics need clarity. Mid-market lifestyle brands need context and styling. Premium or designer products need controlled presentation, precise color, and rights documentation that can support continued use.
A $2 image you can recreate in seconds may be more useful than a $30 image that ties your catalog to one face for years.
Make the choice before the shoot. Changing the model type after editing has started creates duplicate work in every downstream folder.
Rights, Releases, and AI Person-Image Rules
A recognizable face creates a rights obligation. Every live-model product image should have a signed release that covers commercial use, duration, territory, and edited or composite versions. Don't assume a release for one marketplace listing covers paid social ads, email campaigns, print lookbooks, or retailer submissions.
Read the scope clause. A release that names one use can leave gaps elsewhere. Keep the document with the image record, not in a disconnected inbox where you can't find it during a campaign or takedown request.
Keep a usable asset record
Store these items for every shoot:
- Release PDF: Use a consistent file name tied to the model ID.
- Shoot date: Record the date beside the original files and exported images.
- Model ID: Match the ID to every image file and folder.
- Usage scope: Note whether the image can appear in listings, advertising, email, print, or social campaigns.
AI-generated and AI-composited people still require governance. Amazon requires disclosure when an image depicting a real person is AI-generated or altered. Etsy prohibits misleading AI person imagery in listings. Shopify leaves disclosure to the merchant, while consent is required for biometric data.
That means you need provenance records even when no traditional model attended the shoot. Save the source garment photo, the generation or compositing record, the approved output, and the reviewer's decision. Don't publish an image you can't explain.
For apparel concepts that rely on distinctive graphics, boutique graphic tee ideas can help you think through how artwork and garment presentation interact. Treat the visual idea as separate from the rights file. You still need proof that you can use the artwork, model image, and final composite.
The guidance on using editorial images on social media reinforces the same operational principle. Editorial access, commercial product use, and paid amplification aren't interchangeable permissions.
If you can't produce the paperwork and source trail, don't publish the image on channels where customers can reuse it through reviews, social sharing, or paid amplification.
Running a Catalog-Scale Image Workflow
Run the same five-step pipeline for every SKU. The order matters because early cleanup reduces the amount of expensive processing you need later.
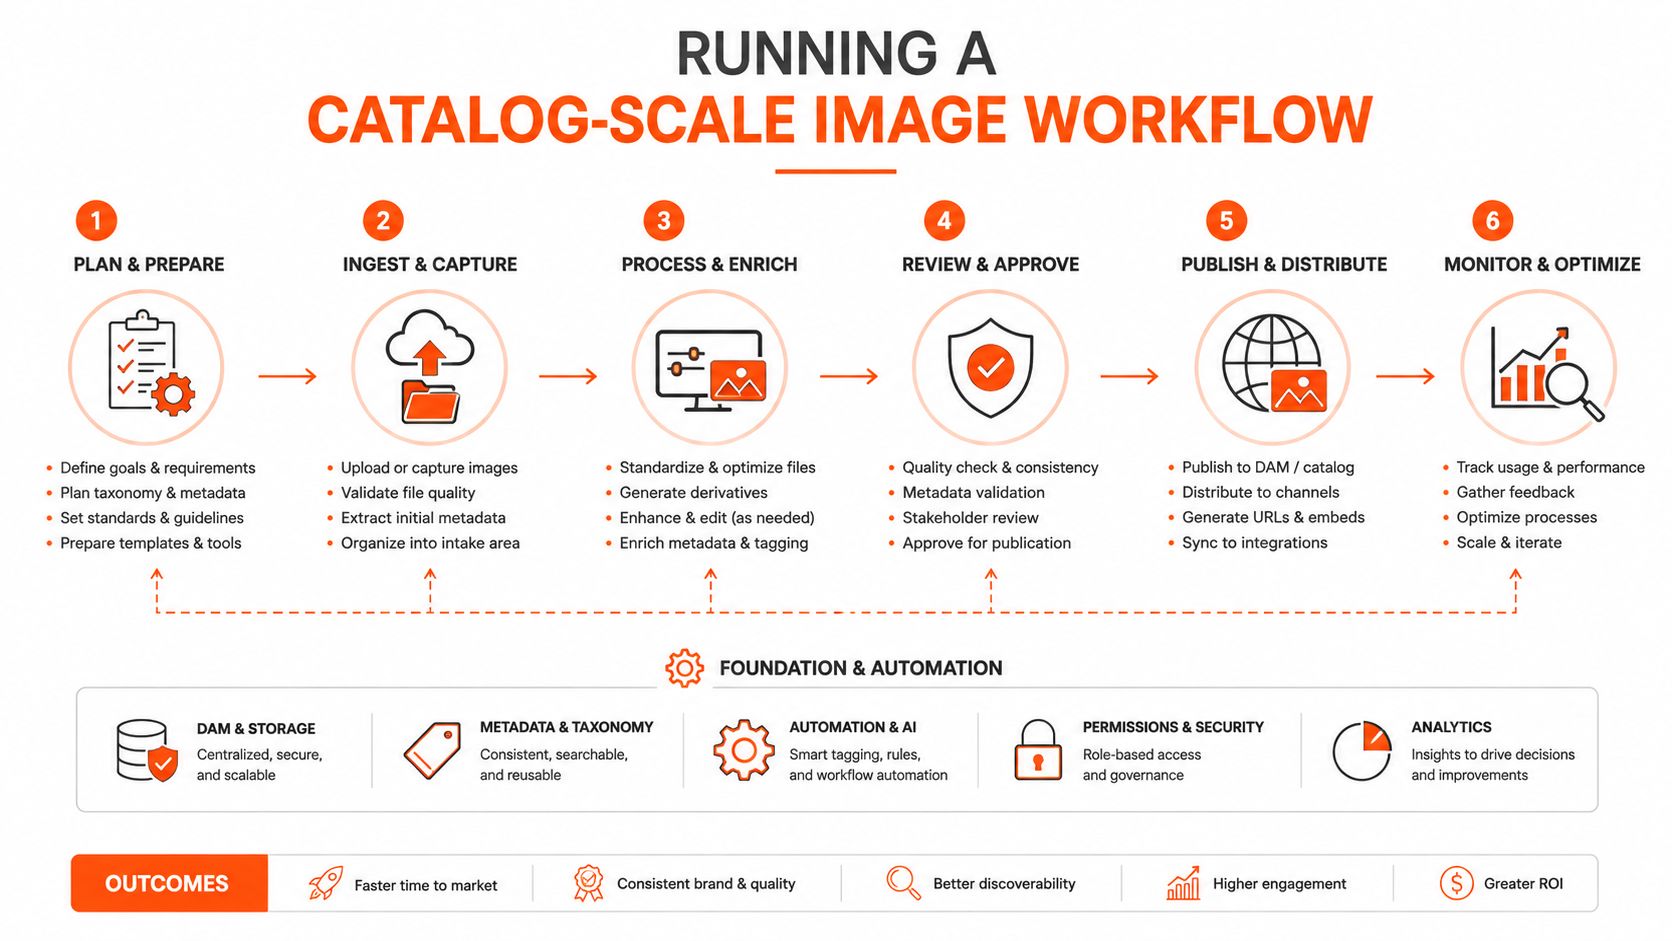
Process the source before the expensive steps
Step 1, remove the background. Start with the raw product image before upscaling whenever possible. Clean segmentation gives later compositing, cropping, and model placement a better source.
Step 2, normalize the frame. Choose one aspect ratio per channel. Use 1:1 for Amazon main images, 4:5 for Instagram, and 16:9 for lookbook banners. Don't improvise the crop for each SKU. A reusable template is the point.
Step 3, place the garment on the selected model type. Use one preset for each category. A hoodie preset can control body position, crop, shadow, and garment scale. A dress preset needs different controls for hemline and full-body framing.
Step 4, name the exports predictably. Use a structure such as TSH-104_ghost_black_front.jpg. Include the SKU, model type, colorway, and frame. Your future self should understand the file without opening it.
Step 5, separate the folders. Keep originals, edited masters, and marketplace exports apart. If Amazon changes a requirement, you should re-export the third folder. You shouldn't need to reshoot or rebuild the product image.
Batch the work by SKU group
Process similar garments together. Put black tees, hoodies, dresses, or outerwear through their matching preset instead of switching settings for every file. Batch 50–100 SKUs per session when the collection supports it, so setup work is spread across enough products.
MerchLoom fits into steps one and three by running chained AI pipelines for background removal and virtual try-on across a collection rather than one image at a time. The first images can be tried with no account. It's pay-per-image, and credits never expire. Review the results before publishing, especially around logos, prints, sleeves, collars, hands, and fabric edges.
The batch image editing workflow is useful when you need to connect source imports, repeatable processing, and channel-specific exports. It isn't a full Photoshop replacement. Keep manual review for images where the garment structure or brand mark must be exact.
Your Repeatable Checklist for the Next Batch
Run this checklist before exporting final files. It's designed for a seller handling hundreds or thousands of product photos, not for fixing one image after a listing goes live.
- Assign the model type: Confirm live, ghost, flat, 3D, or AI for every SKU.
- Map the channels: Record whether each product needs Amazon, Etsy, Shopify, eBay, WooCommerce, Poshmark, or Depop exports.
- Confirm the file rule: Check the required background, aspect ratio, and pixel dimension for each destination.
- Check the file name: Include the SKU, model type, colorway, and angle.
- Remove the background: Create one clean alpha source before any upscale.
- Standardize the frame: Place every garment inside the agreed pixel box and crop template.
- Export the largest master first: Derive smaller marketplace files from that approved master.
- Separate the folders: Keep raw, edited, and final channel exports apart, with a date stamp.
- Review random products: After each batch, spend 30 minutes checking five random SKUs against the rules.
- Log the error: Put every miss in a shared sheet so the next batch doesn't repeat it.
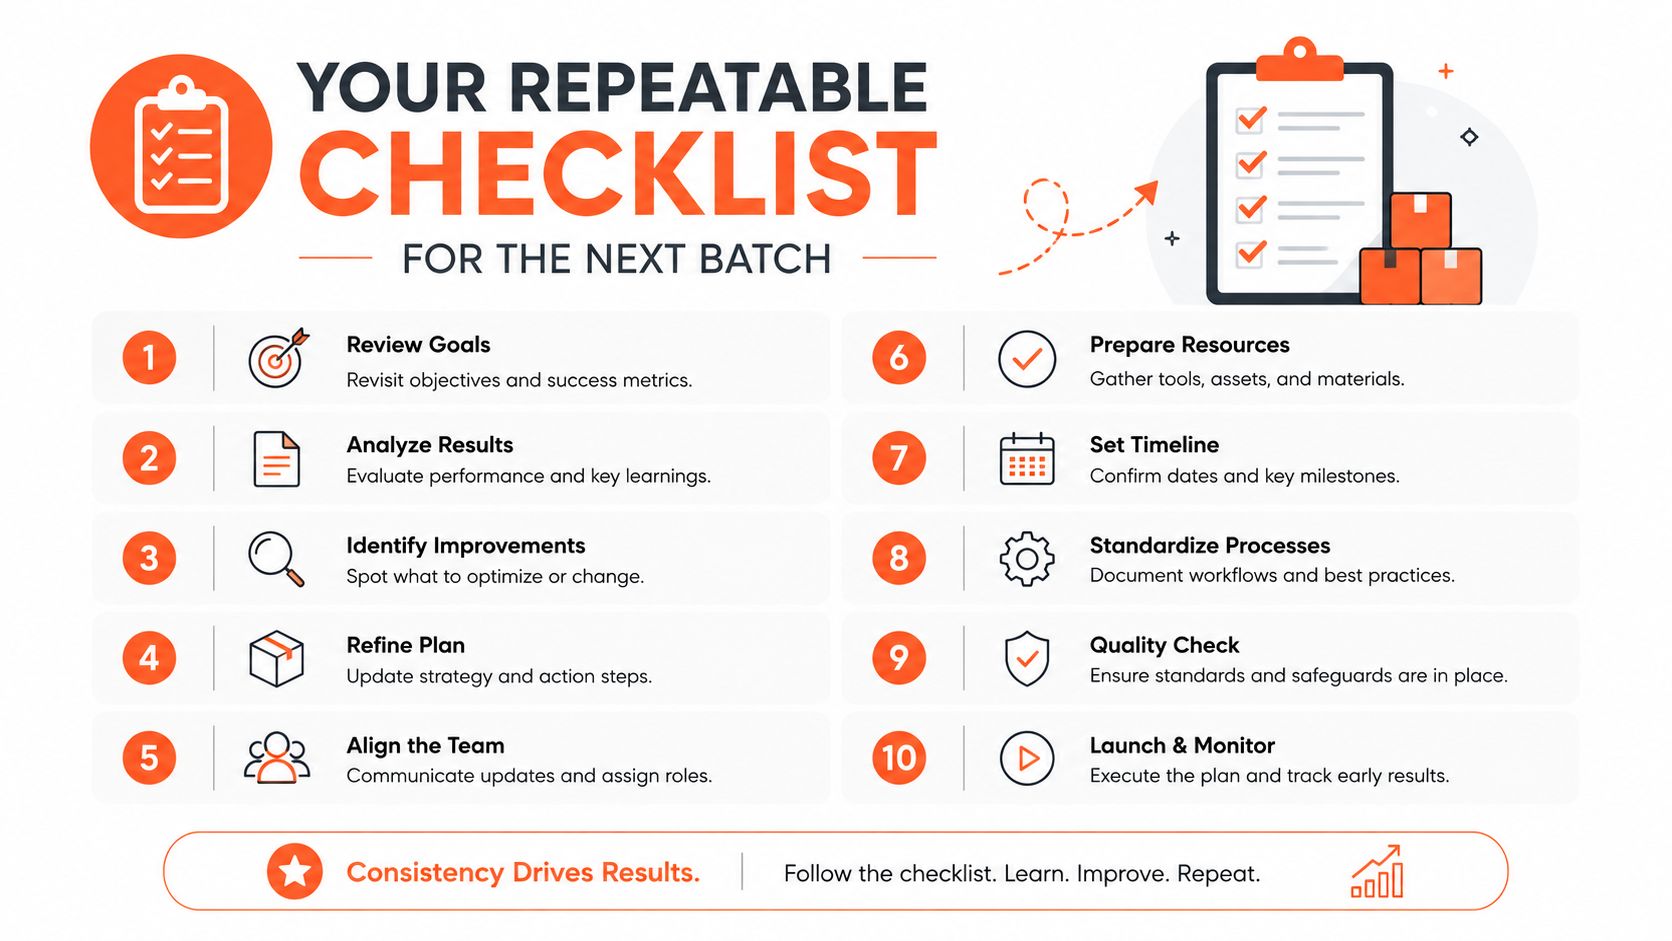
The final habit prevents catalog drift. Revisit your model-type decision quarterly. As the catalog grows past roughly 200 SKUs, the cost balance between live, ghost, and AI can change, so the choice that worked at launch may no longer be the cheapest or most consistent option.
Store the decision in the catalog sheet, not in memory. When a new person helps with editing, they should follow the same rule without asking you to explain it again. That's how a model for clothing becomes an operating system instead of a one-off styling choice.
MerchLoom lets you import product photos, chain background removal and virtual try-on steps, and run the same workflow across a full clothing collection. Try the first images with no account, then visit MerchLoom to build repeatable, pay-per-image catalog processing with credits that never expire.
Stop editing product photos one at a time
Upload your catalog or connect your store. Describe the result once. MerchLoom does the rest.
Try MerchLoom