
Models Photo Shoot Guide for E-commerce Scale
Plan your models photo shoot for e-commerce. This guide covers planning, lighting, and posing to create consistent images optimized for batch AI processing.
You finish a model shoot with a full card of images. The lighting looked clean. The model did their job well. The clothes looked strong on set. Then the intensive work begins.
Half the frames are slightly different in crop. Poses drift from one SKU to the next. One look was shot a bit warmer than the others. A few garments crease differently because nobody reset them between changes. The images are usable, but not usable together. That's the difference that matters for an online catalogue.
A good models photo shoot for e-commerce isn't judged by whether one hero image looks expensive. It's judged by whether the whole set can move through editing, approval, resizing, background work, and channel formatting without turning into a manual cleanup project. That matters even more now in California, where apparel and DTC teams are operating under faster content cycles, more frequent assortment refreshes, and greater use of AI-assisted production across retail marketing teams, pushing shoots away from bespoke editorial production and toward repeatable asset pipelines, as noted in this industry discussion of AI and retail workflow shifts.
If you sell on Amazon, Shopify, Etsy, and paid social at the same time, you're not producing one image. You're producing a structured asset set with multiple downstream uses. That changes the brief, the lighting, the styling, the shot order, and the way you direct talent.
Editorial work still has value. If you want a reminder of how premium image direction shapes brand perception, Vivien Lauren's blog post on luxury photoshoot impact is useful context. But catalogue production lives by a different rule: consistency beats flair when you need hundreds of files to behave the same way.
That's why the smartest place to improve results is before retouching starts. The more organised the source images are, the less cleanup you need later. If your current process still relies on fixing weak captures in post, it helps to first tighten the basics of how to make product photos look professional at capture stage, not after the shoot.
Introduction
Most e-commerce teams don't have a photo problem. They have a workflow problem disguised as a photo problem.
The set looks fine when reviewed image by image. It falls apart when you line up fifty products on a collection page. Necklines sit at different heights. One model stance makes trousers look tapered, another makes them look wide. A crop that works on Shopify doesn't carry cleanly into a marketplace square. By the time someone notices, the team is already in retouching.
A scalable models photo shoot starts with a brief that treats images as production assets, not isolated pictures. That brief needs to answer practical questions early:
- Channel use: Which frames are for Amazon white background listings, which are for Shopify category tiles, and which are for social placements.
- Crop logic: Whether the subject needs safe space for square, portrait, and tighter mobile crops.
- Shot hierarchy: Which views are essential across every SKU, and which are optional.
- File handling: How names, folders, and look groups will map into post-production.
- Styling limits: What the model can wear, hold, or layer without hiding product information.
Practical rule: If the brief can't tell an assistant what “done” looks like, it's not a production brief. It's just inspiration.
That's the true shift in catalogue photography. The camera work matters, but the bigger gain comes from designing a session that produces images AI tools can process reliably in batches. When the source files match in framing, colour, pose logic, and background separation, automation becomes useful. When every shot is different, automation becomes a cleanup tax.
Pre-Shoot Planning for Batch Success
Most mistakes in a models photo shoot happen before the first frame. They start in loose briefs, vague styling direction, and background choices that look fine to the eye but create friction later.
California's modelling ecosystem gives a strong clue about what good evaluation images look like. In casting, digitals remain a standard. The guidance is simple: photos against a white background, from multiple angles, with no makeup and no editing, so natural features are visible. The same guidance also notes that polished professional photos still matter, but with light makeup and no heavy retouching because agencies want a realistic representation, as described in this guidance on model shoot preparation and digitals. For sellers, that principle translates cleanly. Start with accuracy, then add polish.
Build the brief around outputs
A mood board helps with taste. It doesn't help much with volume.
For catalogue work, the brief should lock these decisions before booking day:
- Required image set: front, three-quarter, side, back, detail, and any platform-specific hero.
- Background standard: white, light grey, textured wall, or in-room set. Pick one base standard per look group.
- Framing rule: full length, knee-up, waist-up, and detail crops. Decide where the head and feet should sit in frame.
- Retouching tolerance: natural skin texture, garment cleanup only, or stronger beauty retouching for selected assets.
- Platform variants: white background versions, square crops, and room for text overlays if paid social is involved.
Many teams benefit from sketching the set first. If you're still deciding whether to use a continuous roll, corner cyc, or compact booth setup, this guide to a photography booth for sale is a practical reference for thinking through repeatability rather than aesthetics alone.
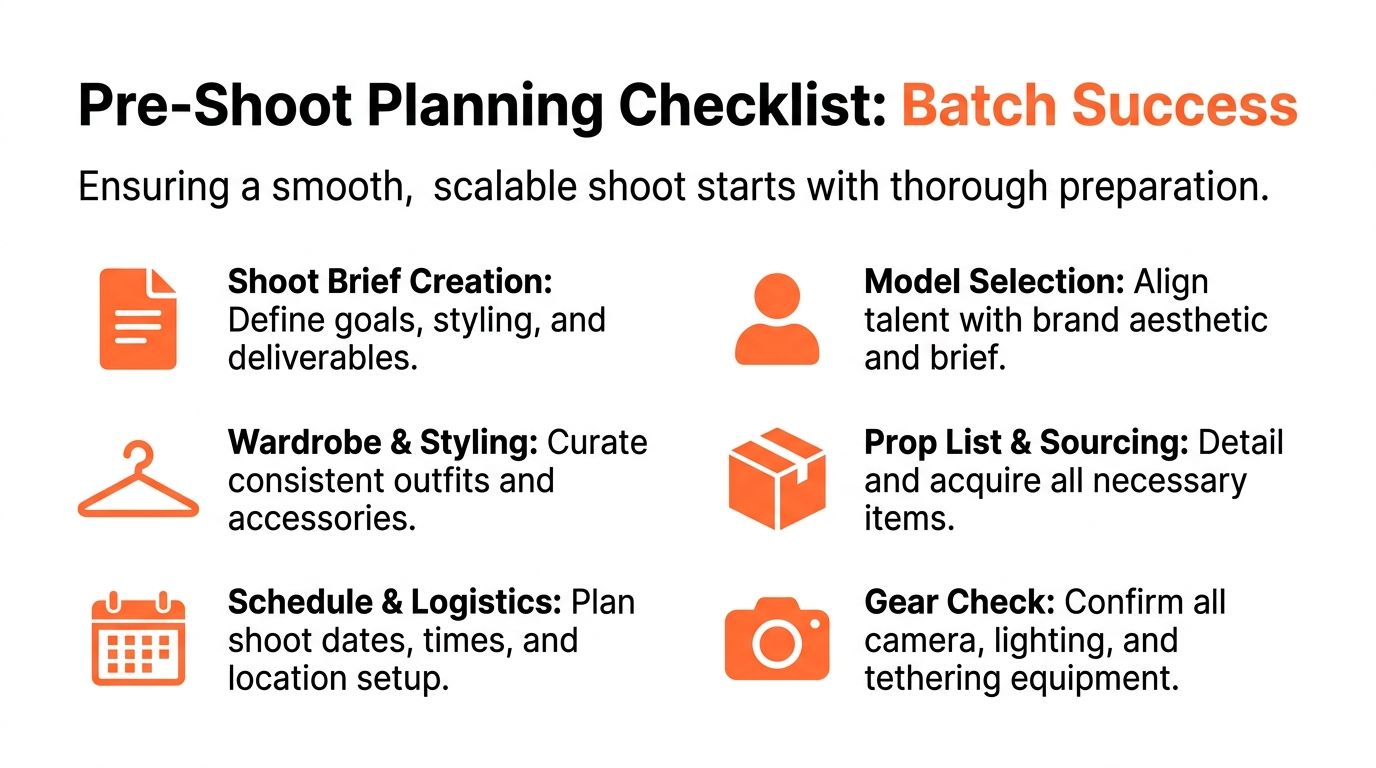
Ensuring a smooth, scalable shoot starts with thorough preparation.
Choose what makes post-production easier
A neutral setup usually wins.
Busy locations create edge-detection problems, inconsistent reflections, and colour contamination on fabrics. Natural environments can work for campaign images, but they slow down background replacement and batch colour correction. If the job includes later cutouts, alternate crops, or AI scene generation, use a clean backdrop and keep subject separation obvious.
Wardrobe planning needs the same discipline. Some items create predictable headaches.
| Wardrobe choice | What happens on set | What happens later |
|---|---|---|
| Fine stripes | Can shimmer or produce moiré | Harder to keep detail consistent across exports |
| Highly reflective fabrics | Pick up hotspots and colour casts | Slower retouching, inconsistent highlights |
| Sheer materials | Lose edge clarity against bright backgrounds | More difficult masking and clean background removal |
| Heavy texture on dark garments | Can block up under flat lighting | Requires tighter exposure control to preserve detail |
Do and don't rules for product prep
- Do steam every garment before it reaches set. Wrinkles multiply when you process a collection together.
- Don't leave tags, pins, or fit clips visible unless they're part of a deliberate styling plan and someone has signed off on cleanup time.
- Do standardise accessories when consistency matters across a range.
- Don't let styling drift product by product. A changing sleeve roll or necklace length can make category pages feel messy.
- Do test troublesome fabrics in advance under your actual lights, not just by eye in the prep area.
The cleanest catalogue shoots are often the least dramatic on set. That's usually a good sign.
Wardrobe and Styling for a Scalable Catalogue
A fashion stylist can make a single frame look strong. Catalogue styling has a narrower job. It needs to make the product readable across many SKUs, many crops, and many screens.
That means fit, finish, and consistency matter more than novelty. If one jumper is tucked, the next half-tucked, and the third left loose, the collection stops reading like a system. Buyers may not articulate why, but they notice when the presentation shifts.
Style for comparison, not surprise
On a category page, shoppers compare products fast. They're not studying a single frame in isolation. The clothing needs to sit on the model in a way that helps comparison.
A few practical rules usually hold:
- Keep silhouettes readable. Oversized layering can be visually interesting, but it hides garment shape.
- Reset hems, collars, cuffs, and straps before every look. Small shifts become obvious when products appear side by side.
- Match the styling logic across the range. If dresses are shot with minimal jewellery, don't suddenly style one look heavily unless there's a strategic reason.
- Prepare base undergarments properly. Wrong underlayers create lines, transparency issues, and avoidable retouching.
Why neutral presentation usually wins
Many guides discuss dramatic camera angles, but they rarely tie that advice to shopping behaviour. For California's mobile-driven retail environment, neutral eye-level compositions tend to preserve fit and proportion better than stylised low or high angles, which can distort the product on smaller screens, as explained in this discussion of camera angles in photography. That has styling implications. If your framing is neutral, the garment has to do more work on its own.
That's also why trend-heavy styling can be risky for core catalogue images. On social, a dramatic boot pose or exaggerated lean might be fine. On a product detail page, that same pose can pull the eye away from sleeve length, rise, drape, or structure.
If your business also uses generated or hybrid apparel visuals, it's worth understanding how presentation standards carry into virtual try-on clothing workflows. The cleaner and more standardised the original fit reference is, the more reliable later variations tend to be.
Watch the fabrics that fight back
Some materials cost more time than they're worth unless you plan for them.
- Satin and high-sheen synthetics need careful light control or they develop bright patches that move from frame to frame.
- Black textured knits can lose surface detail if exposure drifts even slightly.
- Open weaves and lace are harder to separate from pale backgrounds.
- Tiny checks and narrow stripes can produce distracting pattern interference.
A scalable wardrobe plan doesn't avoid these products. It flags them early so the crew can slow down where needed and keep the rest of the set moving.
Camera and Lighting for Consistent Renders
A catalogue shoot usually breaks at the same point. Look three or four goes on set, someone nudges a light, the model steps six inches forward, auto white balance shifts, and the files stop matching. The problem is not just visual inconsistency. It is extra masking, colour correction, and alignment work later, especially if the images will feed AI editing or generation tools across a large SKU count.
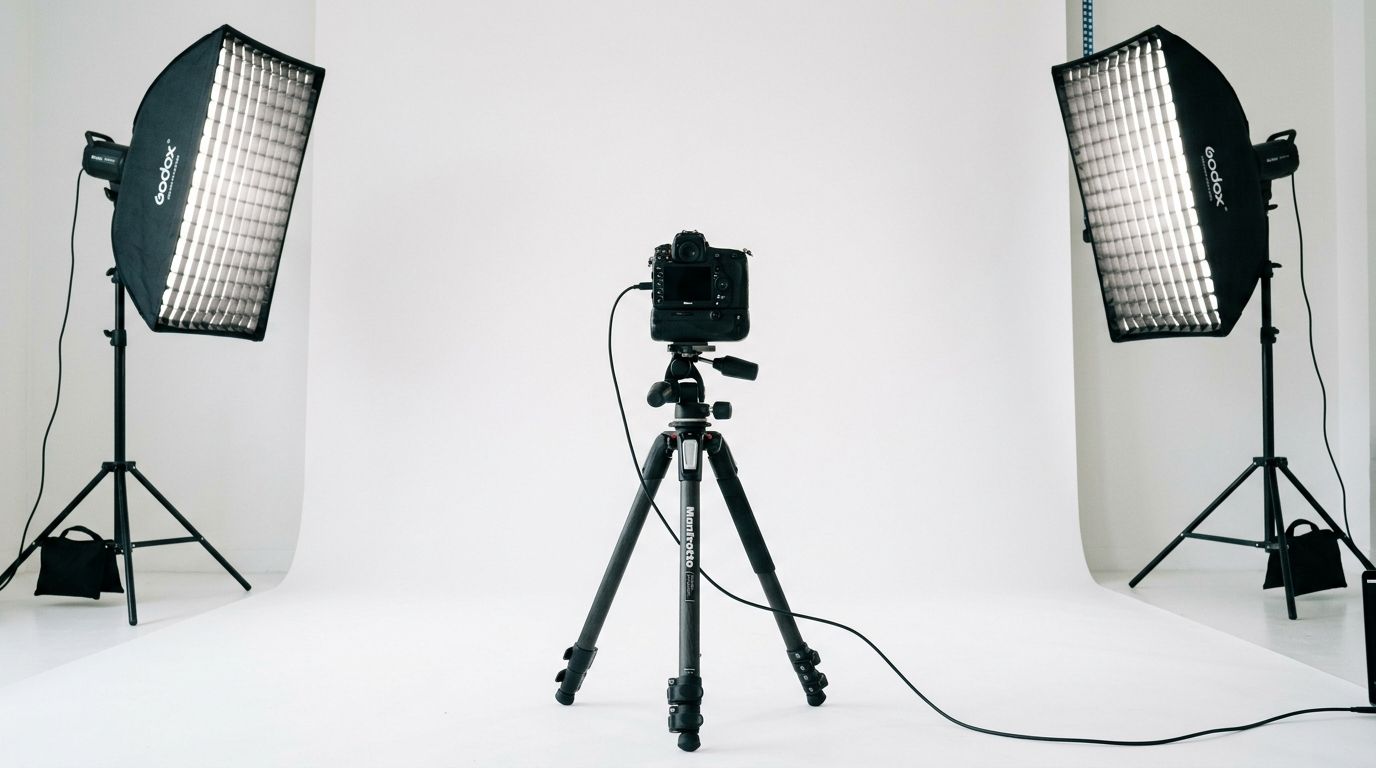
Camera and lighting need to be built for repeatability first. That means fixed subject distance, fixed camera height, controlled falloff, and exposure that protects fabric detail without blowing the sweep.
Build one reliable light first
Start with a large soft key that gives even coverage across face, torso, and lower garment. Then add only what solves a specific problem. Teams that add lights too early usually create new cleanup problems, such as doubled shadows under hems, uncontrolled shine on coated fabrics, or bright edge spill on hair.
A practical base setup often looks like this:
| Element | Job on set | Why it helps later |
|---|---|---|
| Large softbox as key | Gives even light across the model and garment | Soft transitions are easier to mask and standardise |
| Reflector or soft fill | Lifts shadows without killing shape | Dark fabrics hold detail from frame to frame |
| Background light only if needed | Keeps the sweep clean without clipping edges | Reduces haloing around hair, lace, and pale sleeves |
| Tripod-fixed camera | Locks framing, height, and lens position | Crops, overlays, and batch alignment stay consistent |
The white background is where crews often lose discipline. If the sweep is pushed too bright, edge contrast drops and extraction gets harder, not easier. That is a poor trade if the end goal is fast retouching or AI-assisted background replacement. This guide to a white photoshoot background is useful because it focuses on setup choices that preserve separation.
Light the model first. Bring up the background only to the level your output requires.
Doing this for a whole catalog?
MerchLoom runs background removal, upscaling and AI editing across every product photo you have — one prompt, whole batch.
Try MerchLoomFix the variables you can control
Manual exposure is standard for this kind of work. So is fixed white balance. Once those drift between looks, the batch stops behaving like a batch.
Use one focal length for the set unless there is a clear product reason to change it. Keep aperture consistent enough that collars, sleeves, and front panels stay sharp in the approved standing positions. Keep ISO low so knit texture, stitching, and fine edges survive cropping and post work. I would rather spend a minute refining light placement than spend hours later correcting ten small exposure differences across a hundred files.
Reflective materials need even tighter control. Sequins, foil prints, lamé, coated denim, and jewellery trims all react to small changes in angle and source size. The same lighting discipline used to enhance product photos of jewelry applies here too. Specular highlights need shape and consistency, not more power.
A practical demo helps here:
Use camera angles that batch cleanly
For catalogue work, neutral eye-level framing usually wins because it preserves proportion. Hem length reads more accurately. Rise, shoulder line, and sleeve shape stay comparable across products. Automated crops also perform better when the body scale and horizon feel stable.
Low angles and dramatic tilt can still have a place, but they belong in campaign selects or secondary content. In the core image set, they introduce avoidable variation. If one dress is shot slightly low and the next is shot dead level, the garments can look different in length even when they are not. That creates confusion for shoppers and noise for any downstream system trying to standardise the set.
The camera position should survive the whole day, not just the first look. That is the standard I use.
Directing Poses and Creating Efficient Shot Lists
A catalogue shoot slows down fast when the team has to invent the next frame while the model is standing on set. The cost is not only time. It shows up later in post, where uneven poses create mismatched crops, inconsistent body lines, and extra cleanup for every SKU.
The fix is a directed pose system. Each garment gets a small set of repeatable views, shot in the same order, with the same body orientation. That gives the model a rhythm, gives styling clear checkpoints, and gives post-production predictable source files that batch well.
A shot list that actually scales
Start with a fixed base sequence for every SKU or look:
- Front view with balanced stance and clear neckline.
- Three-quarter view to show shape without hiding seam lines.
- Side view for volume and drape.
- Back view with hair moved where needed.
- Detail frame for texture, fastening, cuff, collar, or print.
- Movement option only if the garment benefits from it.
That sequence works because it answers the same product questions every time. Shoppers can compare items faster. Editors can select faster. AI tools also perform better when each set contains the same visual logic instead of a random mix of flattering but inconsistent poses.
Optimizing model direction for repeatable, high-quality results.
Direct the garment, not the expression
Loose prompts create slow shoots. “Be natural” usually produces a pose that feels good in the moment but hides a placket, twists a hem, or changes the way the garment hangs.
Clear direction is faster:
- Show both sleeves equally
- Shift weight but keep the hem level
- Turn enough to reveal side seam
- Lift chin slightly so the collar sits clean
- Move hair off the back panel
- Keep hands away from branding and closures
I direct to the selling feature first, then adjust for polish. If the product page needs to show sleeve volume, pocket placement, or the shape of a waistband, the pose has to support that job. Mood is secondary in core catalogue frames.
If a pose makes the garment harder to read, it isn't useful for e-commerce.
Movement shots need the same discipline. Use them only for pieces where motion explains the product, such as wide-leg trousers, pleated skirts, or dresses with drape. One controlled movement frame is usually enough. Five similar motion takes create edit noise and make set-to-set consistency harder to maintain.
Build pose codes into the capture plan
The strongest shot lists are easy to call out on set and easy to sort later. I prefer short pose codes that everyone can remember, because they reduce hesitation during capture and reduce ambiguity during handoff.
A practical naming structure might follow this pattern:
| File element | Example | Purpose |
|---|---|---|
| SKU | DRS482 | Ties image to product record |
| Look or colour | BLK | Separates variants |
| Pose code | FRT, 34, SID, BCK, DTL | Makes batch sorting easy |
| Sequence | 001, 002 | Preserves order |
This structure helps long after the shoot ends. If the team later builds crop rules, background replacements, or variant-specific automations, organised source files produce cleaner inputs for AI image prompt workflows and fewer exceptions that need manual correction.
On-Set Workflows for a Flawless Handoff
A catalogue shoot doesn't end when the card is full. It ends when the files can move into post without anyone asking basic questions such as which image is approved, which pose is missing, or which folder contains the navy variant.
Historically, model photography has shifted from loosely directed portrait sessions toward a more repeatable production workflow. Current guidance for model shoots stresses strict time management, formal call sheets, and a planned mix of wide shots, mid-length shots, and head-and-shoulder shots, especially in high-cost markets where lost time matters, as outlined in this guide to modern model photo shoot workflow. That production mindset should continue all the way through handoff.
Tethered review prevents expensive surprises
Tethering isn't just for client theatre. It's quality control.
When the image lands on a laptop immediately, the team can catch the problems that are easiest to miss on a camera screen:
- Focus drift on eyes or garment texture
- Twisted seams or collars
- Hands covering product details
- Flyaway hair across key features
- Inconsistent crop height
- Colour shifts between looks
If you spot those problems while the model is still in position, they take seconds to fix. If you spot them later, they become retouching notes, patch jobs, or reshoot requests.
Organise the shoot like a production line
Bridging image capture to processing with integrated digital practices.
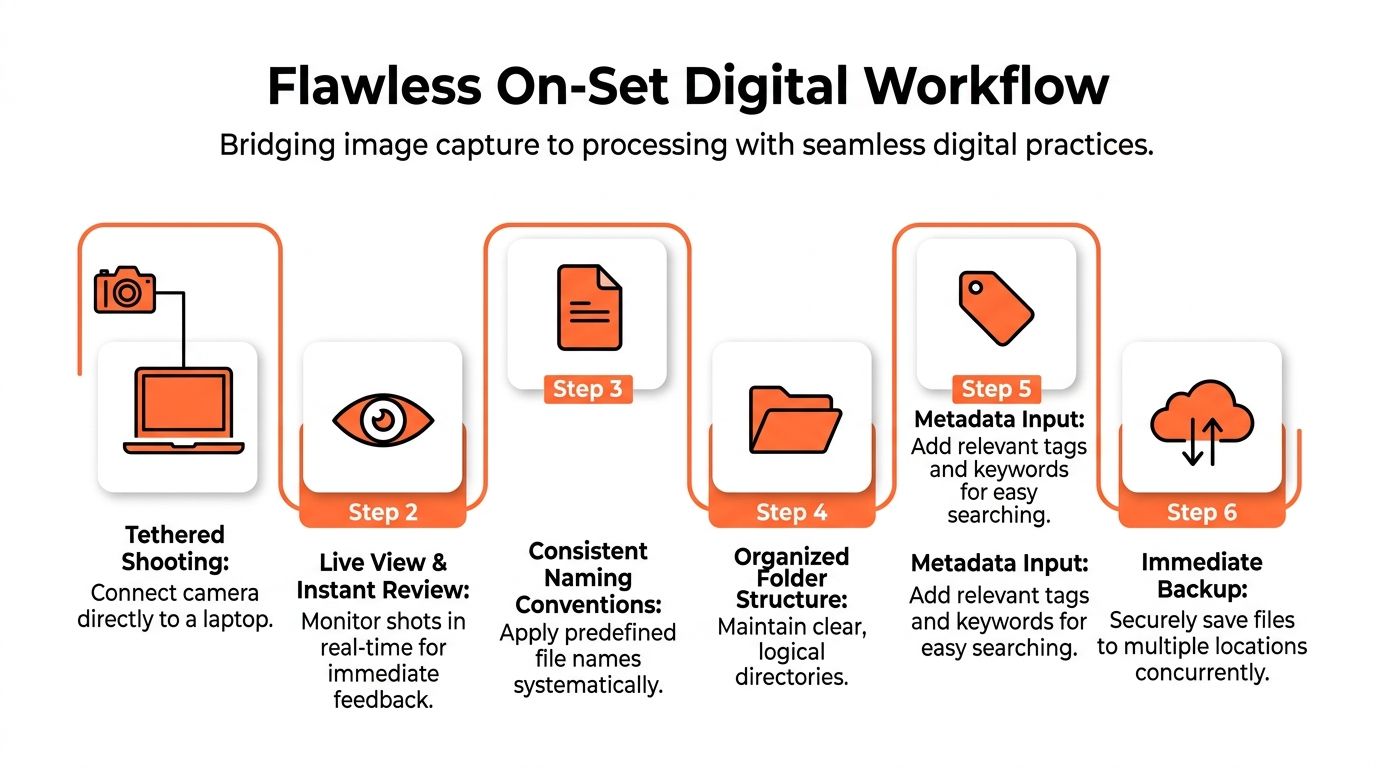
The cleanest handoffs usually come from a simple system that nobody has to interpret. For example:
- One master job folder for the day
- Subfolders by SKU or look group
- Selects folder separated from full capture
- Reference folder for brief, shot list, call sheet, and styling notes
- Backup destination running during capture, not after wrap
This isn't glamorous, but it's the difference between “here are the finals” and “we think these are the finals.”
A short QC loop beats a long cleanup cycle
I prefer a repeatable review rhythm instead of waiting until the end.
After each look, check three things only:
- Did we capture every mandatory angle?
- Do the garments sit correctly in the approved frames?
- Does this look match the framing and visual standard of the previous one?
That short loop keeps the day moving. It also protects your downstream work. AI tools, retouchers, and listing teams all perform better when the incoming files are consistent. If the front view sits at one crop height for every SKU and the naming convention already identifies pose and variant, the post pipeline can act on the images much more predictably.
Why this matters for batch processing
The cheapest minute in post is the minute you never need to spend.
When the shoot is planned around standard backgrounds, repeatable pose logic, fixed framing, and disciplined file organisation, batch editing becomes realistic. Background removal behaves more consistently. Reframing for Amazon, Shopify, Etsy, and paid placements takes less manual intervention. Colour correction can be applied more evenly. Alternate exports become an output decision instead of a repair exercise.
That's the core value of a well-run models photo shoot. It doesn't just create nice images. It creates a library of assets that can move through the rest of your commerce system without friction.
If your team is handling growing catalogues and you're tired of editing one image at a time, MerchLoom is built for that handoff. You can bring in existing product and model images from the tools you already use, run chained AI workflows across full collections, and generate marketplace-ready outputs for different channels without rebuilding the process for every batch. It's a practical fit when the shoot is already structured well and you want the post-production side to match that same level of discipline.
Stop editing product photos one at a time
Upload your catalog or connect your store. Describe the result once. MerchLoom does the rest.
Try MerchLoom