
How to Remove a Glare from a Photo
Master how to remove a glare from a photo using in-camera techniques, Photoshop edits, & AI automation. Enhance e-commerce product images.
You've got the product centred, the background looks clean, and the framing is right. Then you zoom in and see the problem. A hard white streak across a bottle label. A blown highlight on a watch crystal. Reflections in eyeglasses that hide the eyes in an otherwise usable portrait.
For a casual edit, that's annoying. For an online seller, it becomes operational fast. One bad image can be fixed by hand. A catalogue full of them turns into a queue problem, a consistency problem, and eventually a listing problem across Amazon, Shopify, and Etsy.
That's the context behind how to remove a glare from a photo. The best method isn't the one with the most control. It's the one that gives you acceptable quality at the volume you have to process.
The Hidden Cost of Glare in E-commerce Photography
A catalogue shoot can look fine in the first pass and still fail in production. The product is sharp. The framing is usable. Then the review queue starts catching the same issue over and over: glare hiding label text, blowing out packaging detail, or flattening the finish that helps the item sell.
That matters because glare creates cost in places teams feel immediately. Retouching time goes up. Approval slows down. Variant sets stop matching. Listings miss launch windows because one or two reflective products need more work than the schedule allowed.
For a single image, that is an editing task. For a catalogue, it is a throughput problem.
A seller launching a new range needs a standard that holds across every SKU, every angle, and every output. The main image has to read clearly on a marketplace search page. Secondary images have to stay consistent on the product page. If glare wipes out printed information, texture, or true colour, the image stops answering buyer questions and starts creating avoidable uncertainty.
One image problem versus catalogue problem
The trade-off is simple. Manual cleanup gives tighter control, but it does not scale well. Batch processing keeps volume moving, but it can miss edge cases on transparent, metallic, or high-gloss surfaces.
That is why teams should ask operational questions early:
- How many images need hand retouching versus a faster repeatable fix?
- Which products break automated cleanup most often, such as glassware, watches, cosmetics, or laminated packaging?
- Will the correction stay believable at zoom level on product pages and marketplaces?
- How much editor time is justified for a hero image compared with a routine catalogue angle?
Practical rule: If glare blocks buying information, treat it as a production issue.
The same product set often needs multiple outputs. A marketplace-ready image on a white background for product listings, a branded storefront crop, and resized versions for ads or email can all expose glare differently. If the fix is inconsistent, the catalogue starts to look uneven even when each file seems acceptable on its own.
Lighting choices also affect how much cleanup lands on the post-production team. Teams that explore layered lighting design usually give editors cleaner files to start from, which reduces the number of images that need slow manual repair later.
Casual users can spend ten minutes fixing one reflection and move on. Commerce teams do not have that margin at scale. They need to decide which images earn careful retouching, which can be processed in batches, and which should be rejected before they waste more time in editing.
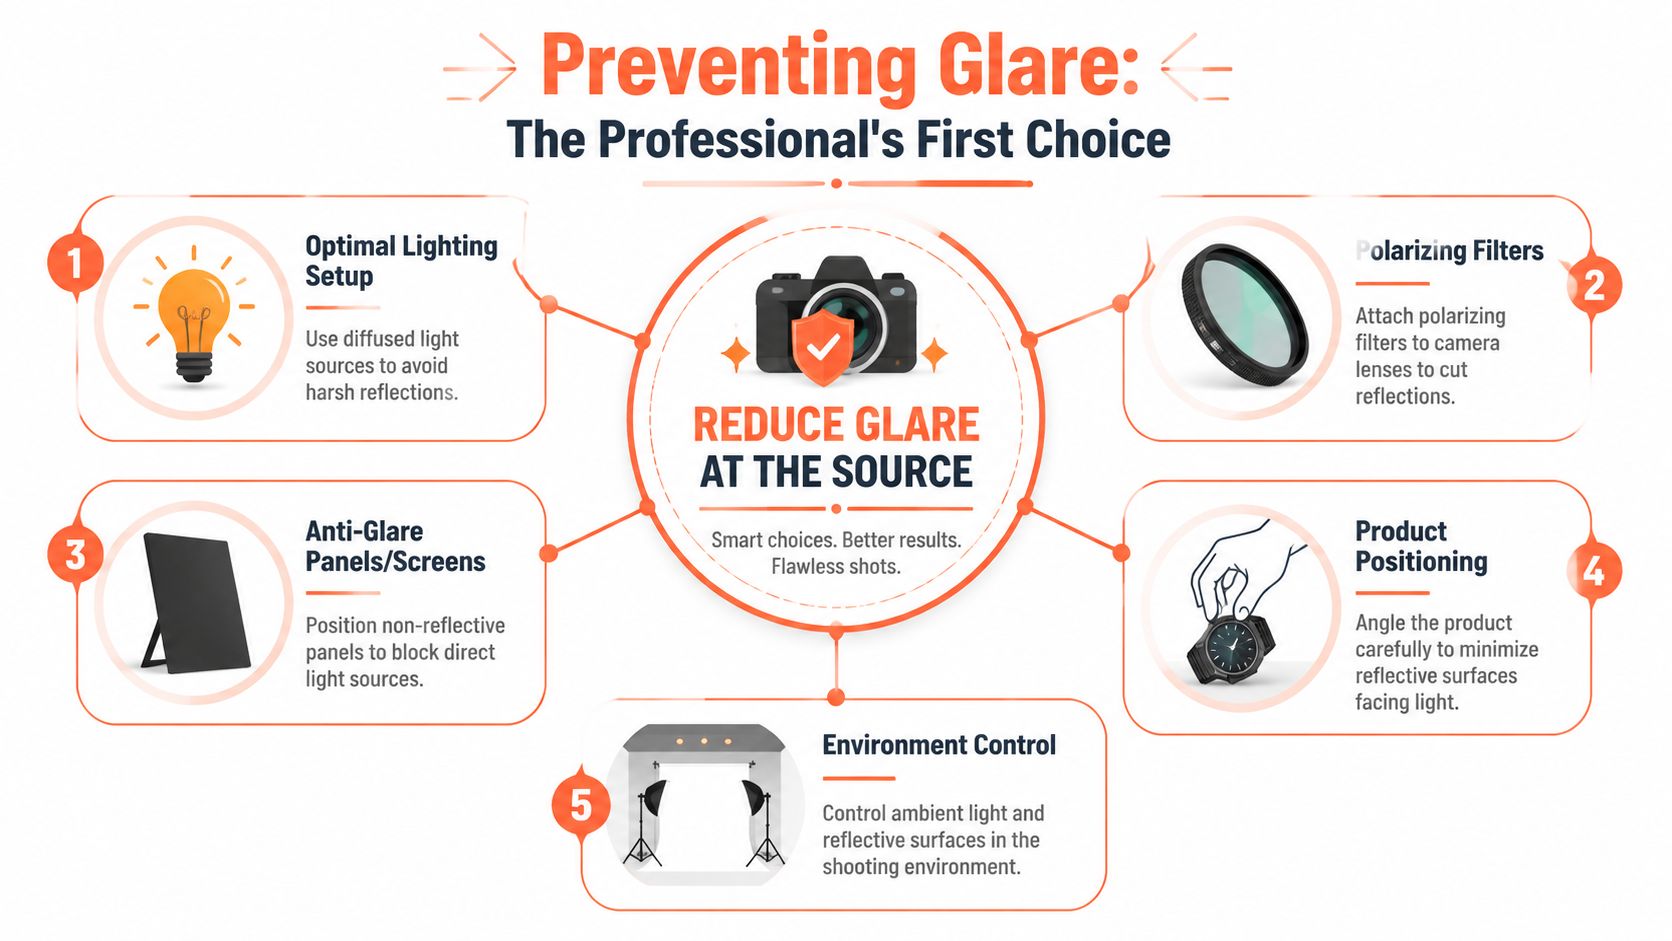
Prevention First How to Reduce Glare at the Source
The cheapest glare removal is the one you never have to do.
For product photos, especially glossy items under controlled lighting, the workflow often starts before editing by changing the shooting angle, using diffusers, or applying polarizing filters, then doing selective correction only when needed. A community photography discussion also points to a polarizing filter as a way to reduce sun glare at certain angles, which reinforces that some glare issues start at capture, not in post, as described in this guide to glare reduction approaches in product photography.
Change the angle before you change the file
Glare is often directional. If light bounces straight back into the lens, you get a bright reflection. Small changes in camera angle or product position can move that reflection out of the visible area without changing the overall look of the image.
This matters most with:
- Glass and acrylic products, where reflections tend to be broad and obvious
- Metallic finishes, where highlights can clip quickly
- Glossy packaging, where a reflection can cover brand text or ingredient panels
If a seller is photographing rows of similar products, I'd rather spend more time on the set getting the angle right than spend the next day repairing the same reflection across the whole batch.
Use larger, softer light
Hard light creates harsh specular highlights. Soft light spreads the reflection and makes it easier to manage. In practice, that means bigger modifiers, more diffusion, and better control over the environment.
A softbox isn't just about softer shadows. On reflective products, it changes the shape of the reflection itself. A large diffused source creates a cleaner, more predictable highlight than a small bare source.
If you're still refining your setup, it helps to explore layered lighting design so you can think in terms of primary light, fill, and ambient control rather than a single lamp pointed at the product.
Some glare problems aren't editing problems at all. They're lighting problems that got exported into a file.
Add physical control tools
A circular polarizing filter can help in the right conditions. It won't solve every reflection, and it won't rescue a badly lit studio setup on its own, but it can reduce certain forms of glare before they hit the sensor.
A few practical options:
- Polarizing filter on the lens for certain reflections, especially when angle matters
- Diffusers between light and product to soften hotspots
- Flags or black cards to block unwanted reflections from the room
- Cleaner shooting environment so the product doesn't reflect random objects, windows, or coloured walls
For white-background product work, prevention and set design go together. A clean backdrop helps, but it won't fix reflective spill or poor light placement. In such cases, a practical setup guide to a white photoshoot background workflow can help you tighten the whole capture process, not just the backdrop itself.
Know when prevention has reached its limit
Not every glare issue can be eliminated in camera. Eyeglasses, curved watch faces, laminated prints, and high-gloss packaging still produce problem areas even in a careful setup. The goal isn't perfection on set. It's to reduce the severity of the edit so post-production becomes selective instead of reconstructive.
That distinction matters. Toning down a manageable highlight is quick. Rebuilding lost text or missing eye detail is slow.
Manual Glare Removal for Single Hero Shots
Manual editing is still the best option when the image matters enough to justify the time. Think homepage banners, primary listing images, campaign assets, or a founder portrait where glare on glasses covers the eyes. In those cases, control matters more than speed.
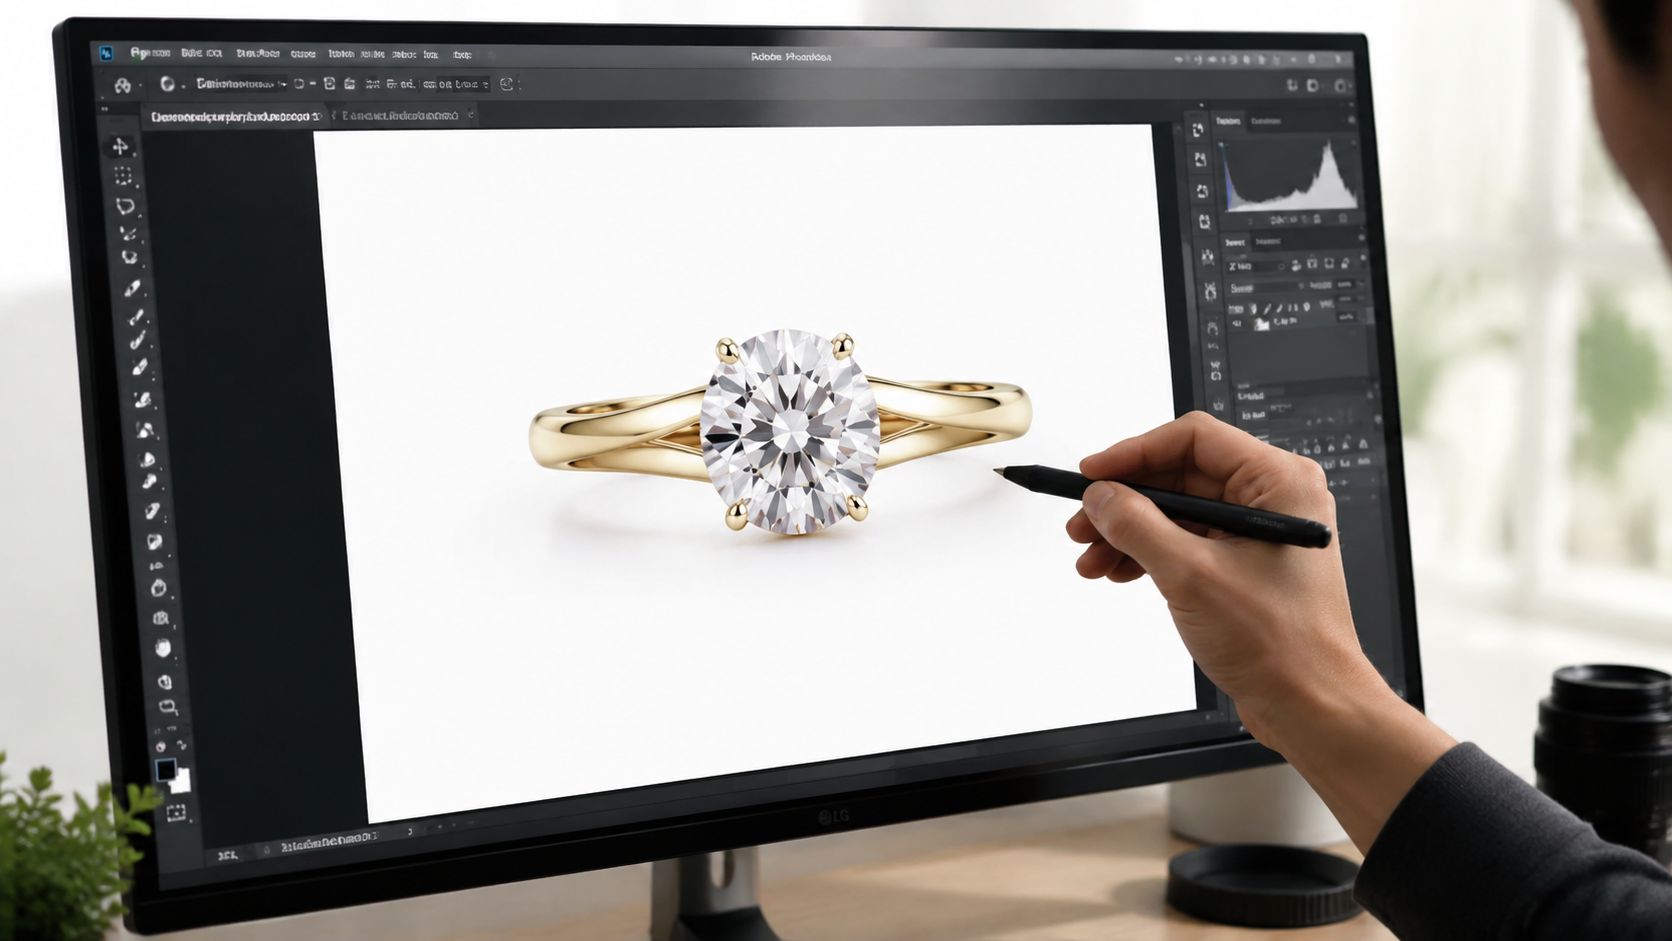
A practical Photoshop workflow is to first duplicate the background, then use Shadows/Highlights or Camera Raw to reduce highlight intensity before switching to Clone Stamp or Healing Brush for texture reconstruction. Guidance on this workflow also stresses masking and previewing adjustments so you don't flatten the rest of the image, as outlined in this Photoshop glare-removal workflow.
Start with non-destructive edits
The duplicate layer is not optional. You need a clean fallback, and you need to compare your correction against the original. Glare edits go wrong in predictable ways. Editors remove too much brightness, the corrected area turns muddy, and the product loses the crisp local contrast that made it look premium in the first place.
A reliable sequence looks like this:
- Duplicate the background layer so the base image stays untouched.
- Open Camera Raw or use Shadows/Highlights to pull back the brightest areas.
- Mask the adjustment so it affects only the glare zone.
- Zoom in and evaluate texture loss before trying to paint over anything.
The trap here is global correction. If you reduce highlights across the whole frame, the glare may soften, but the image often ends up flat. Jewellery loses sparkle. Glass looks dull. Metals lose shape.
Rebuild detail only where needed
Once you've reduced the brightness, you're often left with a second problem. The hotspot is gone, but the underlying texture is still damaged or invisible. That's where the Clone Stamp and Healing Brush come in.
They do different jobs:
- Clone Stamp is better when you need exact control over sampled texture or edge detail.
- Healing Brush is better when the surrounding tone is similar and you want the correction to blend naturally.
For a watch face, I'd usually use highlight reduction first, then reconstruct tiny sections of edge detail around the bezel or dial markings. For a portrait with glasses glare, the order matters even more. You don't want to blur the eye area trying to remove the lens reflection.
The best manual retouch doesn't look edited. It looks like the glare never happened.
Hard case example with eyeglasses
Eyeglasses are where a lot of quick tutorials fall apart. A bright reflection may cover only part of the lens, which means you're not just removing glare. You're rebuilding skin edge, eyelid shape, iris detail, or lash contrast through a semi-transparent surface.
That's one reason object-removal habits can be useful here. The discipline is similar. Work in small areas, sample from believable nearby information, and don't let one repair create three new ones. If your team needs a refresher on careful cleanup technique, this walkthrough on removing objects in Photoshop overlaps nicely with the same retouching mindset.
A few practical checks for glasses edits:
Doing this for a whole catalog?
MerchLoom runs background removal, upscaling and AI editing across every product photo you have — one prompt, whole batch.
Try MerchLoom- Preserve the frame edge so the glasses still look real
- Keep skin tone consistent under and around the lens
- Don't invent eye detail that wasn't present in the file
- Leave some natural reflection if needed because fully dead lenses can look artificial
Here's a useful visual walkthrough of the tool-based process in action:
Where manual work stops making sense
Manual retouching wins on quality when the editor is skilled and the image count is small. It loses the moment you apply it to catalogue scale. If you have hundreds of product photos with similar reflective issues, hand-editing each one is rarely the right allocation of time.
That's why I keep manual glare removal for hero assets and exception cases. It's the premium path, not the default path.
Choosing Your Method Prevention vs Manual vs AI
Organizations don't need one universal answer. They need a way to sort images by importance, difficulty, and volume. That's the only sane way to decide how to remove a glare from a photo without overprocessing the whole catalogue.
A useful way to think about it is operationally. Prevention reduces future editing load. Manual retouching protects your highest-value assets. Automated AI handles the repetitive middle where consistency matters more than pixel-level craft.
Glare Removal Method Comparison
| Method | Speed per Image | Cost per Image | Quality & Control | Scalability |
|---|---|---|---|---|
| In-camera prevention | Fast after setup is dialled in | Low once the shoot is organised | Strong, because the file starts cleaner | High for repeated product setups |
| Manual editing | Slow | High in staff time or retouching cost | Highest control on difficult images | Low |
| Automated AI | Fast | Usually lower than hand retouching for batches | Good for routine glare issues, weaker on edge cases | High |
How to choose in practice
Use prevention when you control the shoot. This is the best option for reflective products you'll photograph repeatedly, especially if the same lighting setup will be used across a collection.
Use manual editing when the image is strategically important or visually difficult. That includes hero shots, portraits with eyeglasses glare, and products where the reflection sits over text, logo details, or fine texture.
Use AI when the issue is common and the output standard is consistent rather than perfect. That's the normal condition for catalogue maintenance.
Decision shortcut: If a human can describe the correction in one sentence and the same issue appears across many images, it's a good candidate for automation.
There's also a downstream content question. Once the still image is clean, some teams adapt those assets for richer storefront content. If you're expanding product visuals into motion assets, it can help to turn your images into professional videos after the core photo cleanup is stable.
For sellers managing many SKUs, the bottleneck is rarely the fix itself. It's the repetition. That's why batch operations matter more than isolated edits. A good primer on batch product photo editing workflows is often more useful than another one-image tutorial, because the core challenge is keeping output consistent while the queue keeps growing.
The E-commerce Workflow Automated Removal for Catalogues
The biggest change in glare removal has been the shift from manual retouching to AI-assisted correction in the 2020s. Current tools now advertise glare cleanup that can be applied in seconds, support common file formats such as JPEG, PNG, and WebP, and export results up to 4K, which shows how the work has moved from labour-intensive hand editing to batch-ready automation, as described in this overview of AI glare removal capabilities.
That shift matters because catalogue work isn't built around one image. It's built around queues. New products arrive, old listings need refreshes, marketplaces require different crops, and internal teams want the same visual standard across everything.

What automation is actually good at
Automated glare removal works best when the defect is recurring and the desired result is predictable. A faint reflection on a bottle label across multiple product angles is a strong candidate. So is a repeated hotspot on glossy packaging from the same studio setup.
It works less well when the glare hides unique detail that doesn't exist elsewhere in the image. That includes partially obscured eyes behind glasses, intricate engraved surfaces, or reflections covering critical printed text.
In practical e-commerce terms, AI is useful for:
- Routine product cleanup across many images in a launch batch
- Standardising output when the same lighting issue affects multiple SKUs
- Preparing derivative versions for storefronts, marketplaces, and ads
- Reducing manual review volume so editors only inspect exceptions
Build the workflow, not just the edit
Many sellers waste time by thinking in terms of isolated tools instead of processing order. Glare removal usually isn't the only step. The image may also need background cleanup, cropping, reframing, upscaling, or format-specific output.
A sensible catalogue workflow might look like this:
- Ingest a batch from storage or a commerce platform
- Apply glare correction to the affected set
- Run background or scene cleanup if required
- Reframe for destination channels such as square storefront images or marketplace formats
- Export reviewed versions into the right folders
That operational view matters more than whether one tool has a clever interface. Teams save time when the process is repeatable.
The trade-off nobody should ignore
Automation gives speed and consistency, but it can also hide mistakes at scale. A poor manual edit damages one image. A poor automated rule can damage an entire collection before anyone notices.
That's why the best automated setups include review gates. Some batches can run almost hands-off. Others need spot checks on the first few outputs before the rest of the queue continues.
If you're thinking about automation beyond glare alone, a broader guide to AI image workflow automation helps frame the problem correctly. The question isn't just “can AI remove this reflection?” It's “where should this step sit in the full production pipeline so the team doesn't redo work later?”
Automation is strongest when the standard is clear. It struggles when the brief is vague.
For catalogue teams, that means being explicit about what must remain untouched. Logos, packaging text, colour fidelity, and material texture should stay stable. If the tool can't preserve those reliably, the image needs either manual intervention or a reshoot.
Quality Control and Deciding When to Reshoot
No glare-removal method is perfect on every image. Manual edits can drift into over-retouching. Automated edits can smear texture, bend edges, or shift colour in subtle ways that only show up when the image sits next to the rest of the collection.
That's why quality control needs to be fast and specific. Not a vague visual once-over. A short checklist that catches the failures that matter to buyers and marketplaces.
A practical QC checklist
Review corrected images at normal viewing size first, then zoom in on the repaired area.
Check these points:
- Surface texture: Does the material still look like glass, metal, plastic, fabric, or skin?
- Edge integrity: Did logos, labels, frame lines, or product contours stay sharp?
- Colour stability: Did the corrected area shift warmer, cooler, or greyer than the surrounding surface?
- Detail continuity: Does the repaired patch blend, or does it look smeared or repeated?
- Batch consistency: Do similar products now look like they were photographed under the same standard?
If your team also has to deliver cleaner marketplace-ready files after correction, this kind of review pairs well with a basic photo-in-HD quality check workflow, because sharpening or upscaling can make bad glare repairs more visible rather than less.
Set a reshoot threshold
A reshoot is usually the right call when the glare covered information the edit can't reconstruct cleanly. That includes product text, fine engraving, transparent edges, or facial detail behind eyeglasses that isn't recoverable from the file.
I'd reshoot when any of these conditions show up:
- The repair changes the product truth, such as altered colour, logo shape, or printed details
- The corrected area draws attention to itself more than the original glare did
- The same issue appears across multiple images from the same setup, which means capture changes will save more time than more editing
- The image is commercially important enough that “good enough” isn't good enough
A fast reshoot beats a slow fake repair when the file is missing critical visual information.
Don't let automation set your brand standard
Automation should follow your quality threshold, not define it. If the output is acceptable for secondary catalogue angles, use it there. If the homepage hero image still looks synthetic after correction, move that image to manual retouching or reshoot it.
Experienced sellers achieve greater efficiency. They stop asking whether a glare can be removed at all and start asking whether it should be removed this way, at this image priority, for this destination.
That's the answer to how to remove a glare from a photo. Prevent it when you can. Retouch it by hand when the image earns that effort. Automate it when scale matters more than perfection. Then review the result like someone who has to publish the whole catalogue, not just fix one frame.
If you're handling glare across full product collections, MerchLoom is built for that catalogue-scale reality. You can bring in batches from the tools you already use, run chained AI image workflows across the collection, and keep outputs consistent for storefronts, marketplaces, and campaign assets without editing one file at a time.
Stop editing product photos one at a time
Upload your catalog or connect your store. Describe the result once. MerchLoom does the rest.
Try MerchLoom