
How to Reduce Image File Size for E-Commerce Catalogs
Learn how to reduce image file size across hundreds of product photos. Practical resize, format, and compression settings for Amazon, Etsy, and Shopify sellers.
You're staring at a folder full of product shots, and half of them are too large for the job they need to do. The fix isn't to keep dragging a quality slider until the file looks “small enough.” The fix is to treat image reduction as a catalog pipeline: resize to the actual display size, compress second, strip metadata last.
That sequence matters because the biggest savings come from removing pixels you never needed in the first place. A 4000×3000 photo resized to 1600×1200 cuts the pixel count by more than 80%, and a 12 MB JPEG resized to 1920 px wide and re-saved at 85% quality typically drops to about 1.2 MB, roughly 90% smaller while still looking similar at normal viewing distance, according to the practical guidance at Pixkit. If you're also trying to improve site performance, the work starts here, because image weight usually drives the slowest pages.
For a seller with hundreds or thousands of SKUs, the goal isn't “make one file smaller.” It's to build a repeatable path that gives every listing the right dimensions, the right format, and the same export logic every time. If you already work from cloud folders, platform exports, or a shared catalog, the internal workflow guide on ecommerce image automation fits that same batch-first mindset.
Why Catalog Scale Changes Everything About Image Optimization
A single oversized file is a nuisance. Hundreds of oversized files turn into a workflow problem, a speed problem, and a consistency problem. At catalog scale, the question is no longer whether one image looks acceptable. It is whether every SKU can move through the same process without someone hand-tuning each export.
Practical rule: resize first, compress second, strip metadata third. Reverse that order, and you keep too many pixels in play, which makes the compressor work harder than it should.
The logic is straightforward. Compression works best after the image already matches the dimensions it needs on the page. A 4000×3000 image resized to 1600×1200 removes most of the data volume before encoding begins, so you start from a smaller file instead of forcing the encoder to fight through extra pixels. That is the kind of savings you want in catalog work, because it reduces effort across the full product set rather than just on one file. The practical guidance at Pixkit guide points in the same direction.
A usable workflow is this. Resize to the display target. Compress to the lowest setting that still looks clean at normal viewing distance. Strip metadata so you do not ship non-visual bytes that add weight without helping shoppers. For a seller who processes large product sets, that order keeps outputs predictable across the whole line, which matters more than squeezing one hero image a little harder. If the rest of your store is already slowed down by heavy assets, the broader improve site performance work starts here, because image weight is one of the easiest things to fix across the catalog.
For teams that manage exports from shared folders or marketplace feeds, a repeatable setup matters even more. A catalog-wide process keeps resizing, compression, metadata stripping, and batch export tied to the same rules instead of being rebuilt for every product. If you already work that way, a catalog image automation workflow fits the same batch-first approach.
Platform Dimensions You Must Hit Before Compressing
Different marketplaces want different source sizes because they render product images differently. If you upload files that are far larger than the display target, you waste bandwidth, and the platform may downsample them in ways you can't control. Start with the platform target, then export from a single master file into the sizes each channel needs.
Here's the practical baseline for the major storefronts sellers use most often:
| Platform | Recommended Size | Aspect Ratio | Background |
|---|---|---|---|
| Amazon | Longest side 1600px or more for zoom, main image on pure white RGB 255,255,255 | Match the product, but keep the main image clean and centered | Pure white |
| Etsy | 2000px on the shortest side | Keep proportions consistent across the listing set | Neutral or product-appropriate |
| Shopify | Square, up to 4472×4472 | Square works well for catalog consistency | Flexible, depending on theme |
Amazon's main image rules are strict because the first image has to support zoom and stay visually clean. Etsy pushes sellers toward a larger shortest side so thumbnails and product pages still look sharp. Shopify supports very large square files, which is useful if your theme crops images aggressively or if you reuse the same master across multiple layouts. For a seller handling one catalog across all three, the master file should stay high enough to serve the largest required use, then branch into platform exports.
A good workflow keeps the aspect ratio locked. Adobe's image-size controls support proportion locking, which is exactly what you want when you're building one source file into multiple outputs. If you also publish short-form content, the sizing mindset carries over to assets like Facebook reel specs for e-commerce, because the same rule still applies, match the image to the actual display context before compressing it.
For Amazon-specific image planning, the size logic becomes especially important on the main image and secondary gallery files. A separate reference on Amazon listing image size is worth keeping close when you build templates for marketplace exports.
A master file that's too small limits every downstream export. A master file that's too large just makes every batch slower.
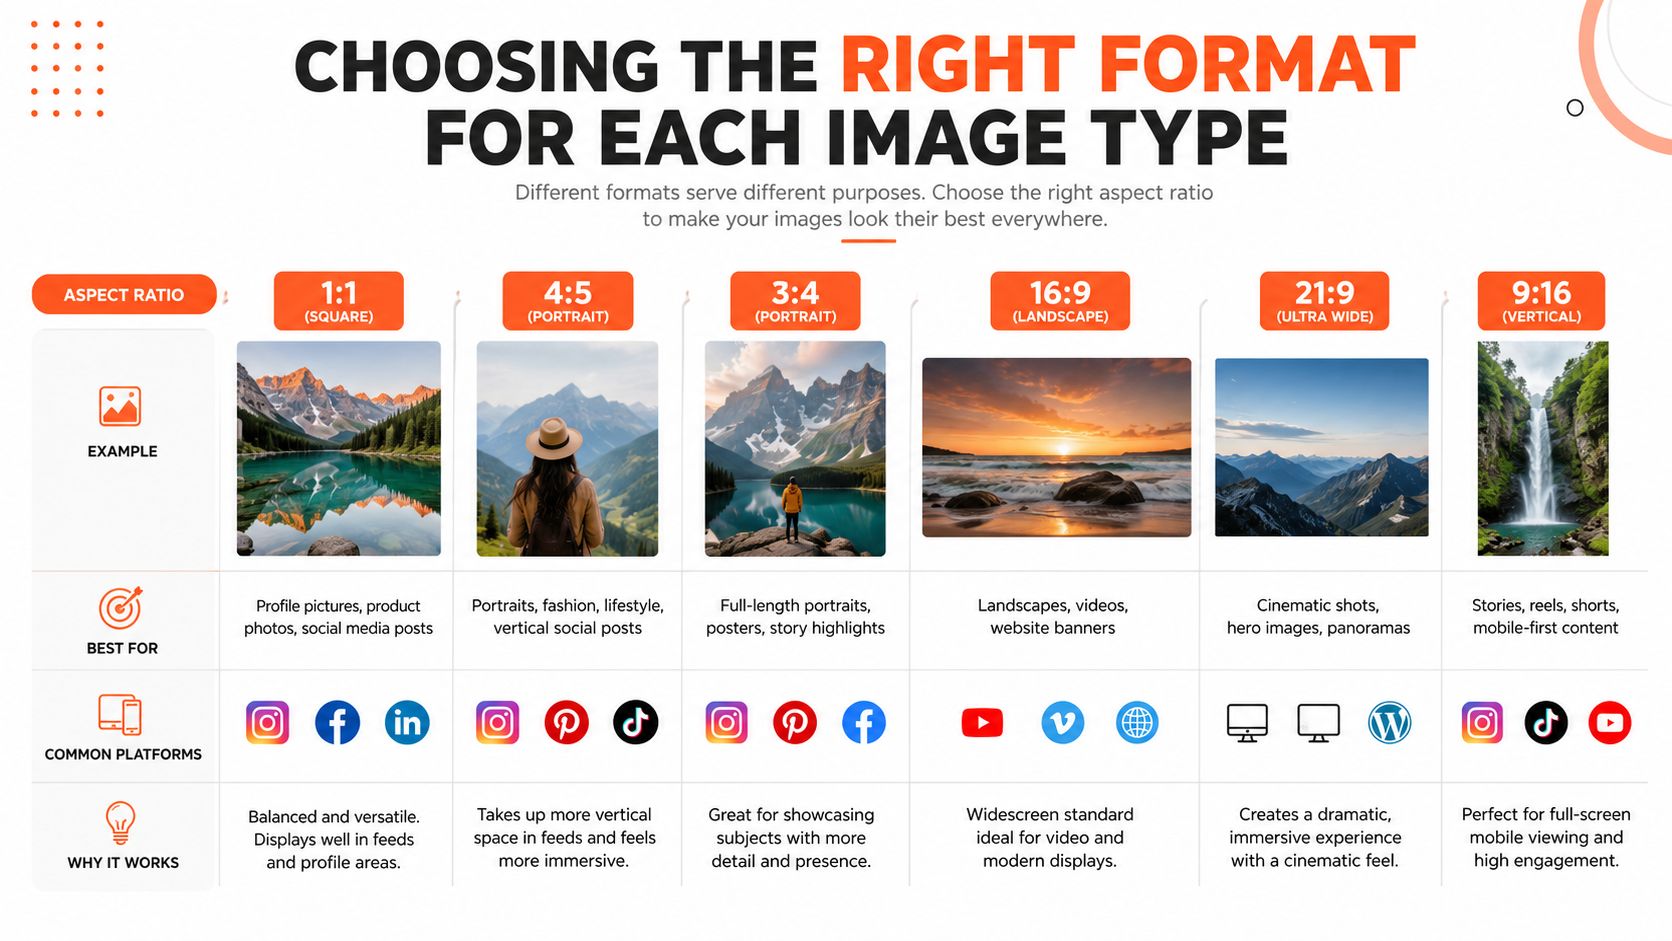
Choosing the Right Format for Each Image Type
A shirt photo, a transparent packshot, and a promo graphic all need different handling. Use the wrong format and the file gets heavier than it should. Use the right one and the catalog stays light without making the listing look unfinished.
JPEG for standard product photography
Use JPEG for most product photos with gradients, shadows, skin tones, fabric texture, or complex color transitions. It remains the default for photographic content because it usually gives the best balance between quality and file weight. For apparel, home goods, consumer electronics, and collectibles, JPEG is usually the first format to test in a catalog workflow.
WebP for transparent packshots and leaner delivery
Use WebP when you need smaller files for graphics with transparency. As Pixkit notes, WebP can produce files 50 to 80 percent smaller than PNG for graphics with transparency. That makes it a practical choice for packshots, cutouts, and storefront assets where you need a clean edge without carrying PNG's heavier file size.
PNG for sharp edges and text
Use PNG when the asset has text overlays, line art, icons, or transparency that needs to stay crisp. PNG is the safer format when edge clarity matters more than file weight. It is not the format I would default to for a large product-photo catalog, but it still belongs in the toolkit for graphics and branded elements.
AVIF when support fits your channel mix
AVIF can compress very well, but marketplace support is still the limiting factor. If a channel or theme does not handle it reliably, it should not be the default choice for product listings. For most catalogs, the practical rule stays simple, photo equals JPEG, transparent packshot equals WebP, graphic with text equals PNG.
If you want a clearer view of the artifacts that show up when quality is pushed too far, the trade-offs are covered in the internal guide on JPEG compression artifacts. For motion assets, the same file-size discipline applies, and how to reduce MOV file size follows the same idea of matching format to the final delivery use.
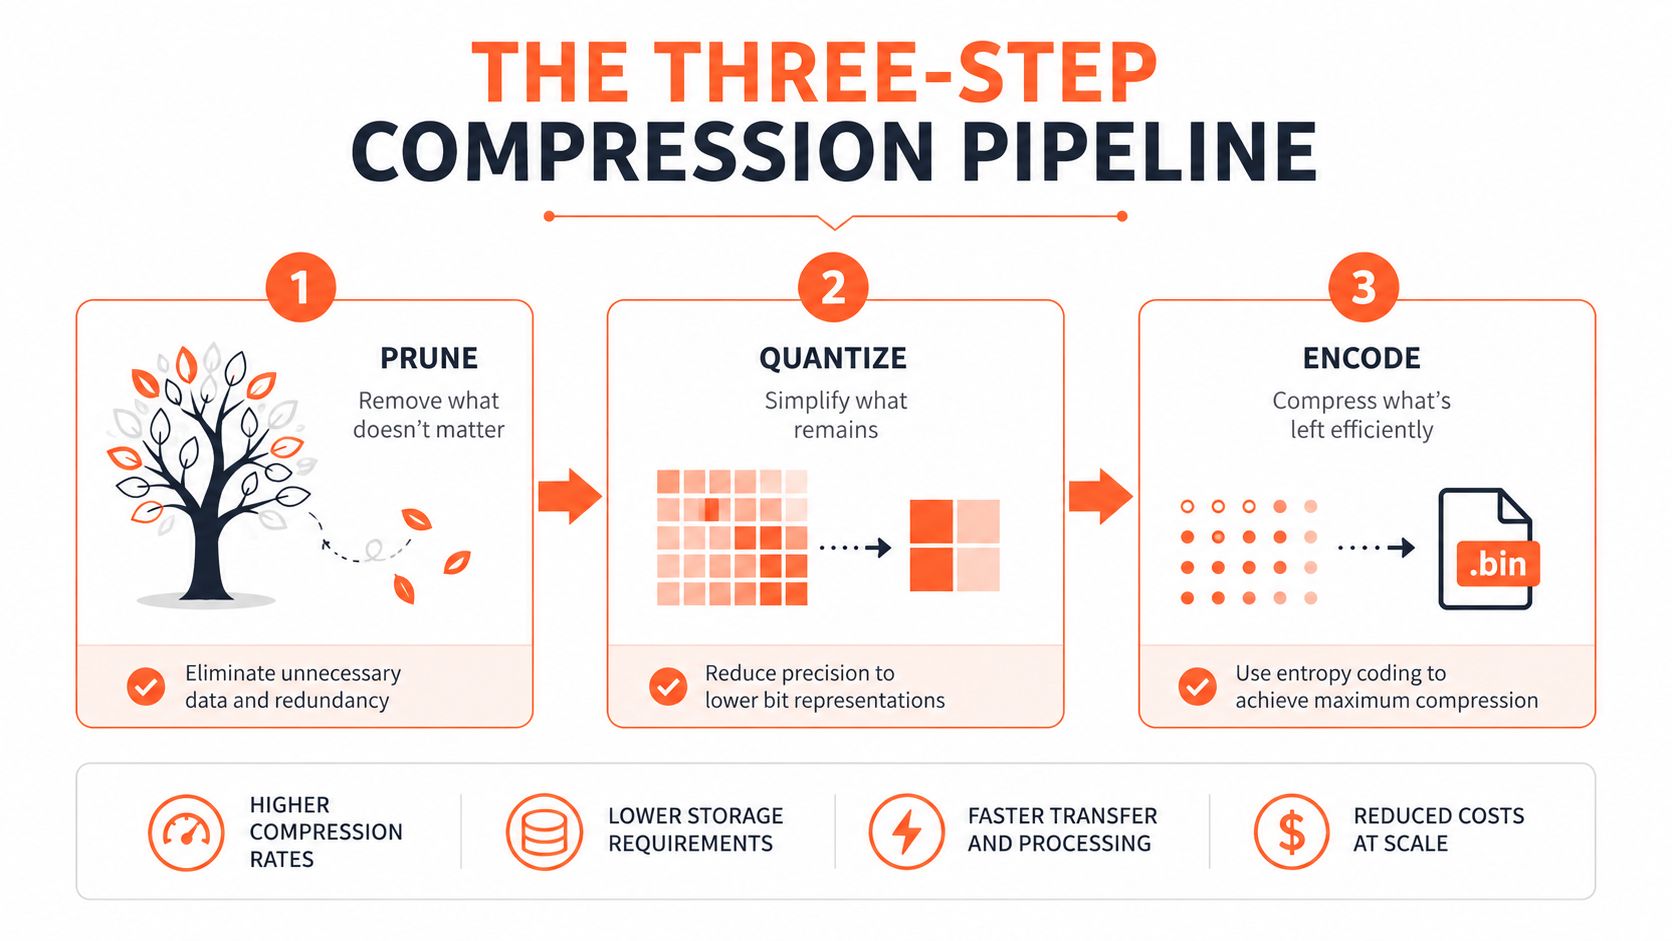
The Three-Step Compression Pipeline
Doing this for a whole catalog?
MerchLoom runs background removal, upscaling and AI editing across every product photo you have — one prompt, whole batch. Try 2 batches free, no signup.
Try it freeStep 1 Resize to the actual display size
Start by reducing the pixel dimensions to the size the image will occupy on the storefront. Adobe's export guidance points in the same direction, reduce dimensions and quality together, not quality alone. For many product detail pages, 1920px on the longest side is a practical starting point, especially when you want enough detail for zoom without shipping a huge file.
This is the step that creates the biggest immediate reduction in file weight. A smaller pixel grid gives the encoder less work to do, and it usually gives you a cleaner final result than trying to over-compress a giant original file. If you are setting this up as a repeatable workflow, the same resize logic can be handed off through an AI image workflow for Cloudinary or another automated pipeline.
Step 2 Compress with a quality target
After resizing, start at JPEG 80% or WebP 75%, then inspect the image at 100% zoom. That range lines up with common web guidance, and it's usually where sellers find the balance between size and visual quality. Adobe's own image-optimization guidance also notes that 200KB to 500KB is generally the largest range you should use for website images, which is a useful ceiling for many listing pages.
If you need a hard cap for a specific upload rule, tools can target output size directly. Adobe also shows 0 to 100 quality control in export dialogs, which makes this kind of tuning repeatable once you've found the right baseline.
Step 3 Strip metadata
Remove EXIF and other metadata after compression. Those bytes don't help shoppers see the product, but they still add weight. The Img2Go compression workflow notes that metadata removal can trim non-visual bytes, which is useful when you're optimizing at scale and every small saving adds up across the catalog.
If you also work with video assets, the same sequence thinking shows up in the broader process. The practical guide on how to reduce MOV file size follows the same basic principle, reduce what's unnecessary before you push delivery.
Review at full size before you batch export. If you see banding, halos, or unreadable text in a graphic, the quality is too low for that asset type.
Batch Processing Across Your Entire Product Catalog
Single-image edits break down fast when your back office has 300 SKUs waiting. The true win is a batch workflow that groups assets by use case, applies the same export logic every time, and keeps file sizes consistent across the catalog. That consistency matters more than a perfect one-off export because buyers see your whole storefront, not just the prettiest file.
The cleanest way to run this is by asset type. Hero images can keep a slightly higher-fidelity setting because they need more detail on the product page. Thumbnails and secondary angles can take lighter compression because shoppers are browsing quickly and those images are displayed smaller. A catalog that uses one export preset for every image usually wastes space on some files and hurts quality on others.
MerchLoom is one way to run those chained steps across a whole collection through AI pipelines instead of handling one image at a time. The first images can be tried with no account, and it uses pay-per-image pricing with credits that never expire. That makes sense when you want to test a batch before committing to a full run, especially if your source files already live in cloud storage or a storefront feed.
A batch system also keeps the work auditable. You can review output as it streams, catch a bad crop early, and reuse processed images as inputs without re-uploading the originals. That matters when you're working through a seasonal collection or a product refresh and don't want to repeat the same cleanup steps for every SKU.
The internal guide on batch product photo editing is relevant here because the catalog problem is always about repeatability. One photo is editing. Hundreds of photos are operations.
Quality and Size Trade-Offs That Matter at Scale
Compression has a cost, and the cost shows up in the listing. If you push too far, edges break, gradients band, and small text becomes hard to read. If you stay too conservative, the site carries unnecessary weight and every gallery page takes longer to load.
The right file size depends on the image's job. A hero image that supports zoom needs more fidelity than a thumbnail tucked under a main gallery shot. A lifestyle image with a smooth background usually tolerates compression better than a detailed infographic with type and line elements. That's why a single global quality number rarely works for an entire catalog.
Adobe's web guidance puts the useful upper band for many website images at 200KB to 500KB, and that's a practical ceiling to work around when you're standardizing exports. But that range doesn't mean every file should sit in the middle. It means you should define a band by asset type, then keep files inside it unless the product itself demands more detail.
The other trade-off is dimension control. Shrinking below the display size can make a listing look soft even if the file is smaller. That's especially costly on product pages where buyers zoom in or compare variants side by side. Don't sacrifice merchandising quality just to hit a number.
Bigger isn't always better, but smaller isn't always better either. The job is to match file weight to how the image is actually used.
Order matters here too. If you're doing background cleanup, reframing, or upscaling, it's usually cheaper to remove what you don't need before you run the expensive step. That's one reason batch systems that optimize processing order are useful for catalog teams. They cut wasted compute and keep the final output more consistent.
Your Repeatable Image Optimization Checklist
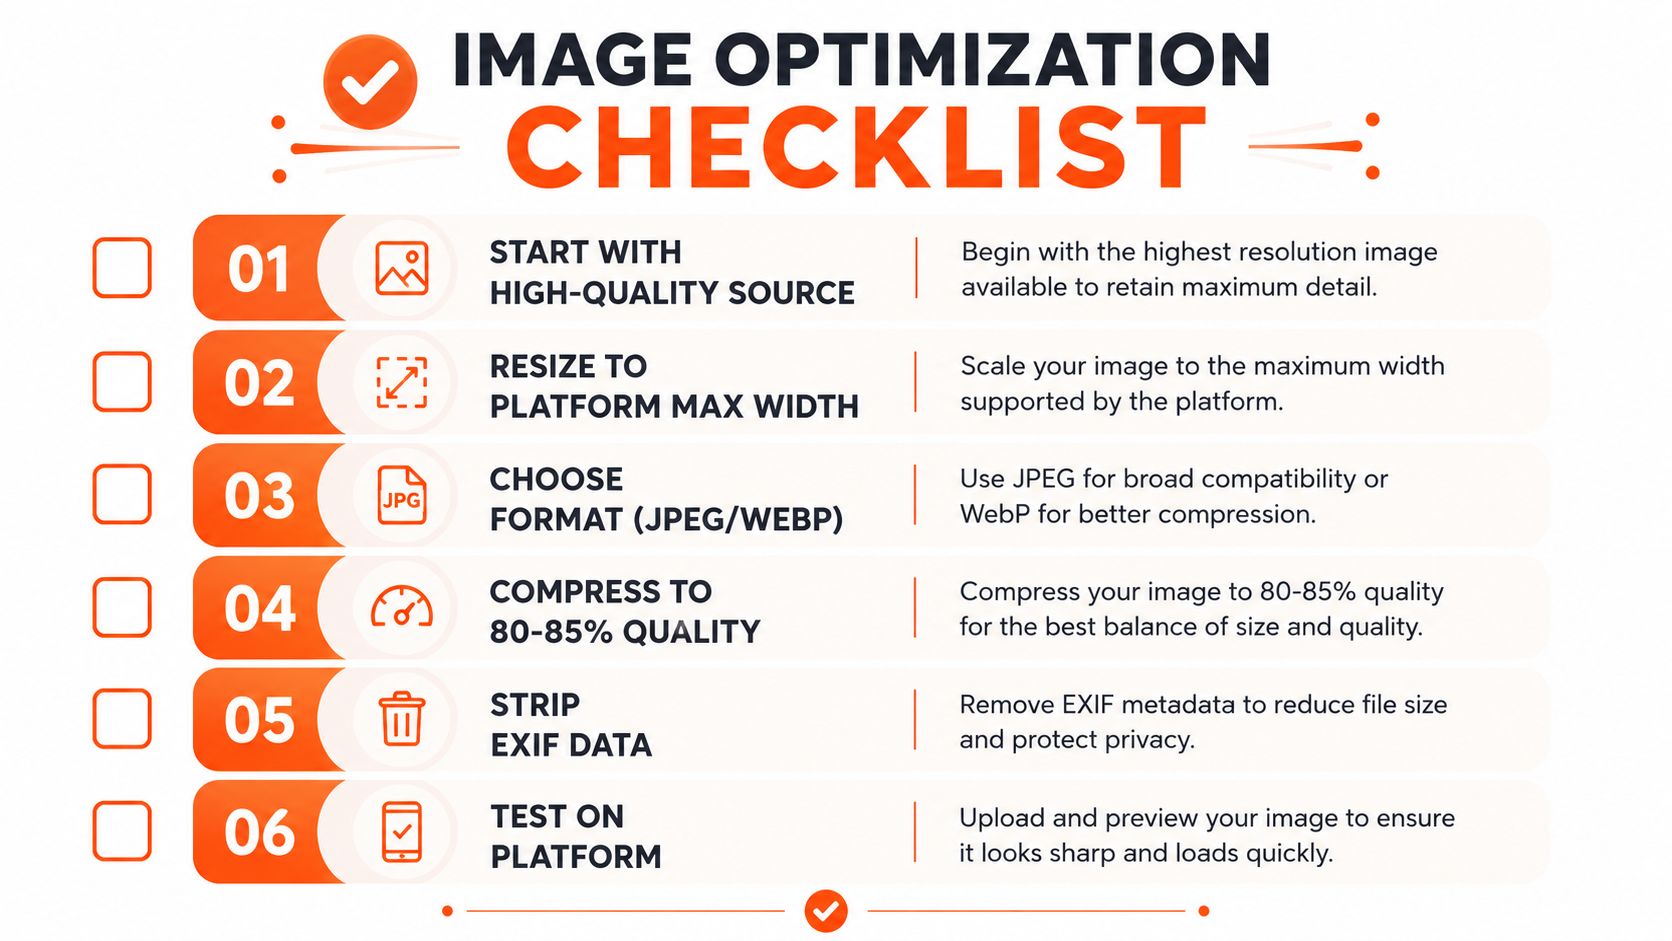
Use the same sequence on every batch. That's what keeps the catalog clean.
- Start with the source file. Check whether the original is larger than the display need, because oversized sources slow everything down.
- Resize to the platform target. Keep the aspect ratio locked and export separate sizes for Amazon, Etsy, Shopify, and any other channel you sell on.
- Choose the right format. JPEG for photos, WebP for transparent packshots, PNG for text-heavy graphics.
- Apply the quality setting. Start around 80% for JPEG or 75% for WebP, then inspect the file at 100% zoom.
- Strip metadata. Remove EXIF and any other non-visual data that doesn't help the shopper.
- Test on the platform. Check the image in the actual listing context before you send the rest of the batch through.
If you want to run that exact process across a full catalog, MerchLoom can handle the batch work through chained image pipelines, with no subscription and credits that never expire. The first images can be tested without creating an account, which makes it easy to validate the output before you process the rest of the storefront.
If your next upload queue has more than a handful of product photos, process ten images first and compare them on the live listing. Then move the rest of the batch through the same settings, or test MerchLoom on those ten files and see how a repeatable catalog pipeline handles resize, compression, and metadata cleanup across the whole set.
Stop editing product photos one at a time
Upload your catalog or connect your store. Describe the result once. MerchLoom does the rest.
Try it free — no signup