
Fix Pixelated Picture
Fix pixelated picture. Learn how to fix pixelated product photos at scale. Covers AI upscaling, batch workflows, and marketplace requirements
You've got a folder full of product photos that looked acceptable on your phone. Then you upload them to Amazon, Etsy, Shopify, or your own store, open the zoom view, and see blocky edges around the bag, soft lettering on the packaging, and hardware that looks almost melted. Fixing one pixelated picture is manageable. Fixing two hundred while keeping every product accurate is where sellers lose time and create return problems.
Start with the original file, not the marketplace download. Make a copy, inspect it at 100% zoom, and identify whether the problem comes from low resolution, JPEG compression, noise, or an overly large crop. Don't sharpen first. Remove compression artifacts, denoise carefully, upscale conservatively, then apply light sharpening at the end.
Why Pixelated Images Drive Returns
A pixelated product image weakens trust before a shopper reads the title. Buyers use photographs to judge material, stitching, finish, print quality, size, and included parts. If those details disappear into square blocks, the listing feels uncertain. If an enhancement tool invents them, the listing can become misleading.
Pixelation happens when the visible information in a discrete grid of samples becomes insufficient for the display size, often because an image has been enlarged, compressed, or captured at low resolution, as described in this history of early digital photography and pixelation. A resizing command can create a larger canvas, but it can't recover detail that the camera never recorded. It estimates the colors between existing pixels.
The basic idea goes back to early digital imaging. In 1957, Russell Kirsch and colleagues at the U.S. National Bureau of Standards scanned a photograph into a 176 × 176-pixel grayscale file, which contained 31,136 pixels. In December 1975, Steven Sasson's Kodak prototype created 100 × 100-pixel black-and-white images, equal to 0.01 megapixels, stored them on cassette tape, and took 23 seconds to capture an image. Those limits were extreme, but the underlying principle still applies to a small product file today. A finite grid can't supply unlimited fine structure.

Why simple resizing fails
Basic interpolation smooths transitions between neighboring pixels. That can make an image look less jagged at a distance, but it may also blur product edges, small type, and repeating patterns. Sharpening then increases contrast around those softened edges. The result can look crisper in a thumbnail while becoming harsher and less truthful at full size.
AI super-resolution goes further. It estimates likely texture, edges, and shapes from patterns learned during training. That can improve the perceived quality of a mildly soft photograph, but it also creates a risk. A model may turn an indistinct label into incorrect lettering, add seams to clothing, or change the shape of a clasp.
For catalogue work, separate appearance improvement from detail recovery. A file can look cleaner without becoming a reliable source for product facts. If you want a more detailed explanation of the underlying issue, this guide to the meaning of pixelation is useful, but the operational decision is simple: never treat an enlarged image as proof of a detail that wasn't visible in the original.
Marketplace zoom makes the weakness more obvious. Amazon recommends at least 1,000 pixels for zoom functionality, although its specification also sets a minimum of 500 pixels on the longest side. Etsy recommends listing photos with width and height of at least 2,000 pixels. Meeting a dimension target doesn't guarantee trustworthy detail. It only gives the platform enough canvas to display the file at the requested size.
The Correct Order for Image Restoration
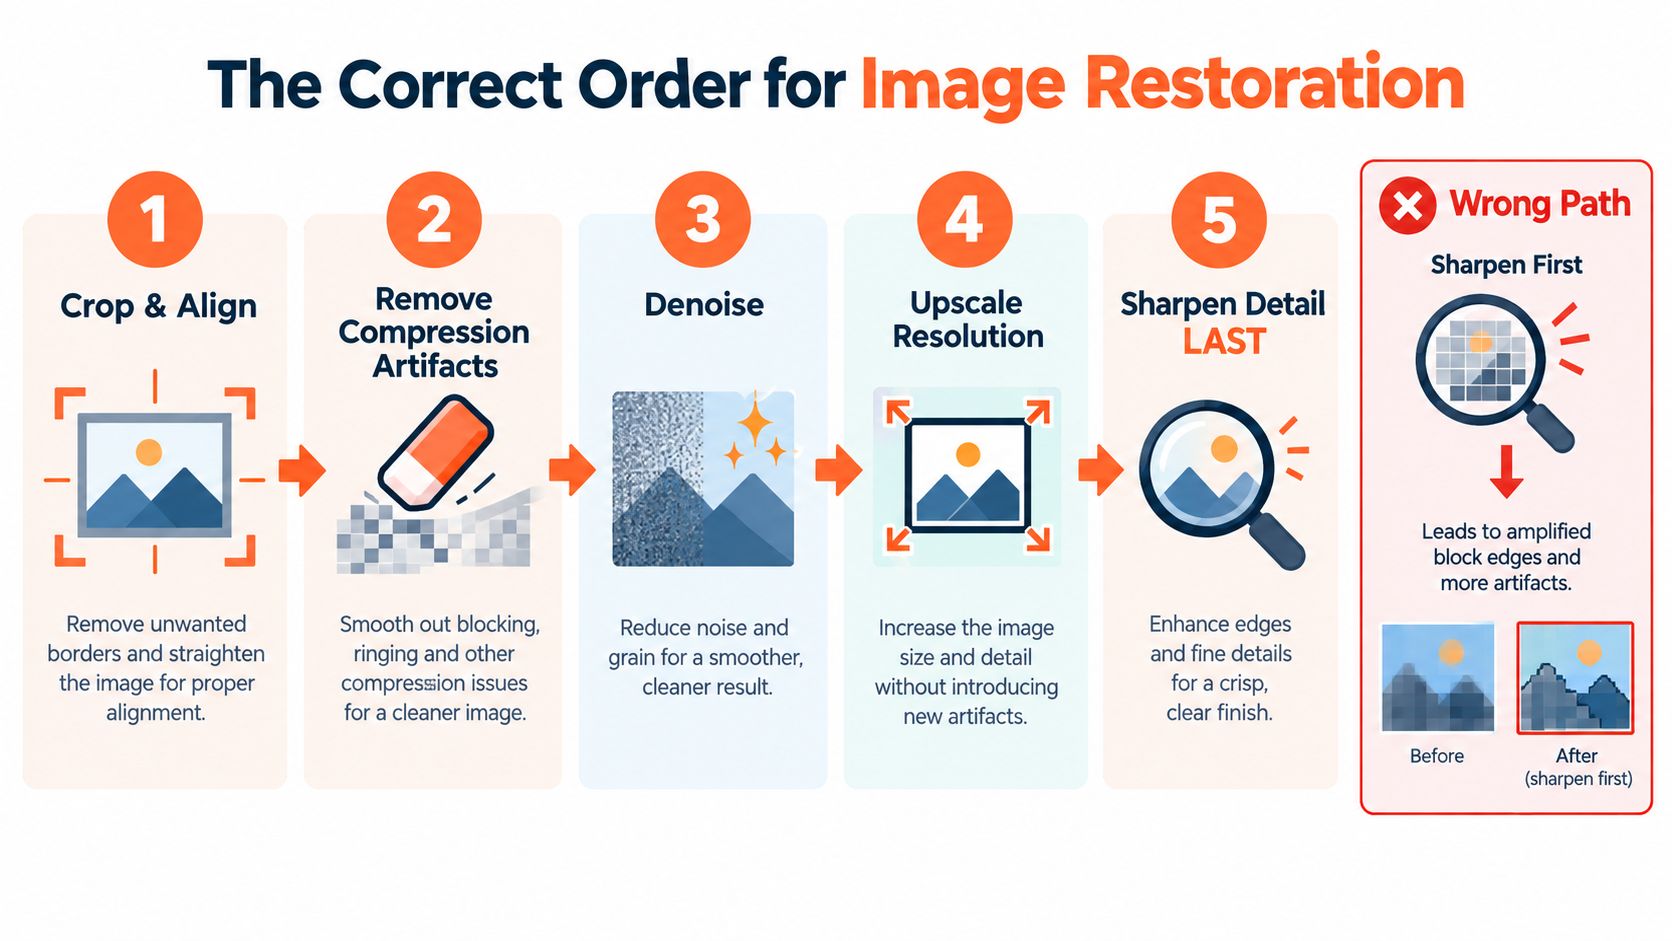
The sequence matters more than the button labeled “enhance.” Sellers often sharpen a small JPEG, upscale it, and wonder why the finished image has dark squares, bright outlines, or crunchy edges. The sharpening step has emphasized defects that should have been removed first.
Use this order for every catalogue batch:
- Crop and align the source. Remove unwanted margins, straighten the product, and apply the same framing rule to comparable items. Save the untouched original separately.
- Remove compression artifacts. Look for visible square boundaries, mosquito noise around text, and ringing near high-contrast edges. JPEG uses block-based transform compression, so deblocking should address 8×8-block boundaries, instead of just increasing sharpness, as explained in this technical discussion of image restoration artifacts.
- Denoise lightly. Reduce grain and color speckles without flattening fabric, brushed metal, or natural texture. Over-denoising creates plastic-looking products.
- Upscale at the required scale. Use a model intended for the chosen enlargement. A ×2 pass is usually safer for mildly pixelated source material. A second controlled pass can be preferable to one aggressive jump.
- Sharpen detail last. Use a restrained setting and inspect edges at 100%. Halos around a white shoe or dark outline around a box are signs that the setting is too strong.
The practical limit for state-of-the-art single-image super-resolution is approximately ×4 before errors become visually consequential, according to the cited restoration research. That doesn't mean every source can safely support ×4. It means you should treat that scale as a boundary, not as a default export setting.
Practical rule: If the source contains large JPEG blocks, sharpening first makes those blocks more prominent and reduces the effectiveness of later restoration.
A batch-friendly decision process
Classify the source before processing it. A low-resolution but clean image needs a different treatment from a heavily compressed image of the same dimensions. A product label with tiny text needs stricter controls than a lifestyle photo where texture can be interpreted more freely.
| Source problem | First action | Main risk |
|---|---|---|
| Large square blocks | Deblock | Amplified block edges |
| Grain or color speckles | Denoise lightly | Flat, artificial texture |
| Mild softness | Conservative ×2 upscale | Over-smoothed edges |
| Tiny text or logos | Preserve source and review manually | Altered lettering |
| Severe enlargement need | Consider a reshoot or alternate image | Invented detail |
The wrong path is easy to recognize. If sharpening creates a bright rim around the product, stop and return to artifact removal. If a model generates a checkerboard pattern, distorted geometry, or a new mark on the packaging, reject the output rather than trying to hide the defect with more sharpening.
For a visual reference, this AI image enhancement workflow can help you think about the order of operations before setting up a repeatable pipeline.
A video demonstration can be useful after you understand the sequence, especially when comparing artifact removal with sharpening.
Choosing Between Conservative and Creative Enhancers
Two enhanced images can look equally sharp in a thumbnail and behave very differently under inspection. One preserves the visible evidence in the original. The other creates a more convincing interpretation of missing information.
Super-resolution is plausible reconstruction, not guaranteed recovery of original detail. The problem is ill-posed. Several high-resolution images can produce the same low-resolution input, so a model may invent texture, lettering, seams, facial details, or fine product contours. This is why an attractive output can still be commercially wrong.
Conservative reconstruction
A conservative model should be your default for product identity. It aims to preserve the silhouette, color, edges, and visible structure without adding dramatic texture. Use it for:
- Logos and labels: Keep every character tied to the source. If the text is unreadable, don't let the model guess.
- Apparel construction: Check seams, buttons, zippers, hems, and printed graphics.
- Jewelry and hardware: Verify the count, position, shape, and finish of stones, clasps, buckles, and handles.
- Packaging: Compare symbols, ingredient panels, barcodes, and closure details against the original.
A conservative result may look less exciting. That is often the correct trade-off for a catalog image. Buyers need a faithful representation, not a more attractive version of a product that doesn't exist.
Perceptual or creative enhancement
A detail-oriented model can produce a stronger visual impression, especially in lifestyle imagery, editorial clothing shots, or scenes where exact microtexture isn't a buying decision. It can also create false confidence. A texture that looks like wool may be a model-generated pattern. A soft logo may become a different logo.
If you work with apparel, keep image preparation connected to the wider fashion photography editing workflows, particularly when crops, fabric appearance, and model presentation need to stay consistent across a seasonal collection. The same discipline applies to accessories and home goods.
Run two candidates when the source is important: one conservative reconstruction and one perceptual version. Compare both against the original and select using task-specific checks, not just perceived sharpness. Technical metrics can help with regression testing, but they don't prove that an unseen commercial detail is correct. A reviewed ESRGAN configuration reached 27.03 dB PSNR and 0.8153 SSIM on Urban100 at ×4, yet those figures don't establish that a product logo or clasp has been reconstructed accurately, as discussed in the reviewed super-resolution comparison.
Doing this for a whole catalog?
MerchLoom runs background removal, upscaling and AI editing across every product photo you have — one prompt, whole batch. Try 2 batches free, no signup.
Try it freeA sharper edge is useful only when it still belongs to the product you sell.
For mild pixelation, choose ×2 and keep a no-upscale fallback. Reserve ×4 for assets where invented detail is acceptable, and avoid aggressive enlargement of tiny text, measurements, safety marks, or legally significant branding. The image upscaling software guide is relevant when you're comparing workflows, but the model choice should follow the image's commercial purpose.
Marketplace Requirements and Safe Dimensions
Platform requirements give you export targets, not permission to stretch every source until it passes a checklist. Set the final dimensions after cropping and reframing, then inspect the actual exported file. A source that meets the requirement before a square crop may fall below it afterward.
Amazon
Amazon's specification requires the main image to use a pure white background with RGB values 255,255,255. The product should be clear, entirely within the frame, and occupy about 85% of the image. Amazon accepts JPEG, TIFF, PNG, and non-animated GIF files, with JPEG recommended.
The longest side must be at least 500 pixels and no more than 10,000 pixels. Amazon recommends at least 1,000 pixels because that enables zoom, and its guidance says images should be clear, non-pixelated, and free of jagged edges. It also warns sellers not to artificially enlarge small images, so a severely degraded source may need a reshoot or an alternate product view instead of an aggressive upscale. Check the final export against the Amazon listing image size guidance.
Etsy
Etsy recommends listing photos with width and height of at least 2,000 pixels. The first listing photo should be at least 635 pixels in both dimensions to avoid appearing lower in search results, according to Etsy's official image requirements.
Use a consistent square or portrait crop across a collection. Consistency keeps products at comparable visual scales in thumbnails and prevents one listing from appearing tiny beside another. Upscaling can help when a clean source is slightly too small, but it won't recreate missing edge detail.
Shopify
Shopify allows product and collection images up to 5,000 by 5,000 pixels, or 25 megapixels, with a file size below 20 MB. Shopify says square product images commonly display best at 2,048 by 2,048 pixels and recommends a consistent aspect ratio. Its documentation lists PNG, JPEG, TIFF, BMP, GIF, SVG, HEIC, and WebP among supported formats, with PNG identified as the best general choice followed by JPEG. These details are in Shopify's product media documentation.
For a catalogue, standardize the canvas before export. Keep the original aspect ratio in your archive, create a marketplace-specific derivative, and apply the same background, padding, and product scale rules to comparable items. A consistent profile matters more than forcing every platform to use the same file.
Scaling Your Workflow with MerchLoom
Manual editing breaks down when every product needs the same sequence but not the same judgment. You open a file, remove the background, crop it, enlarge it, export it, and repeat. After dozens of images, a different crop, sharpening level, or background shade slips through.
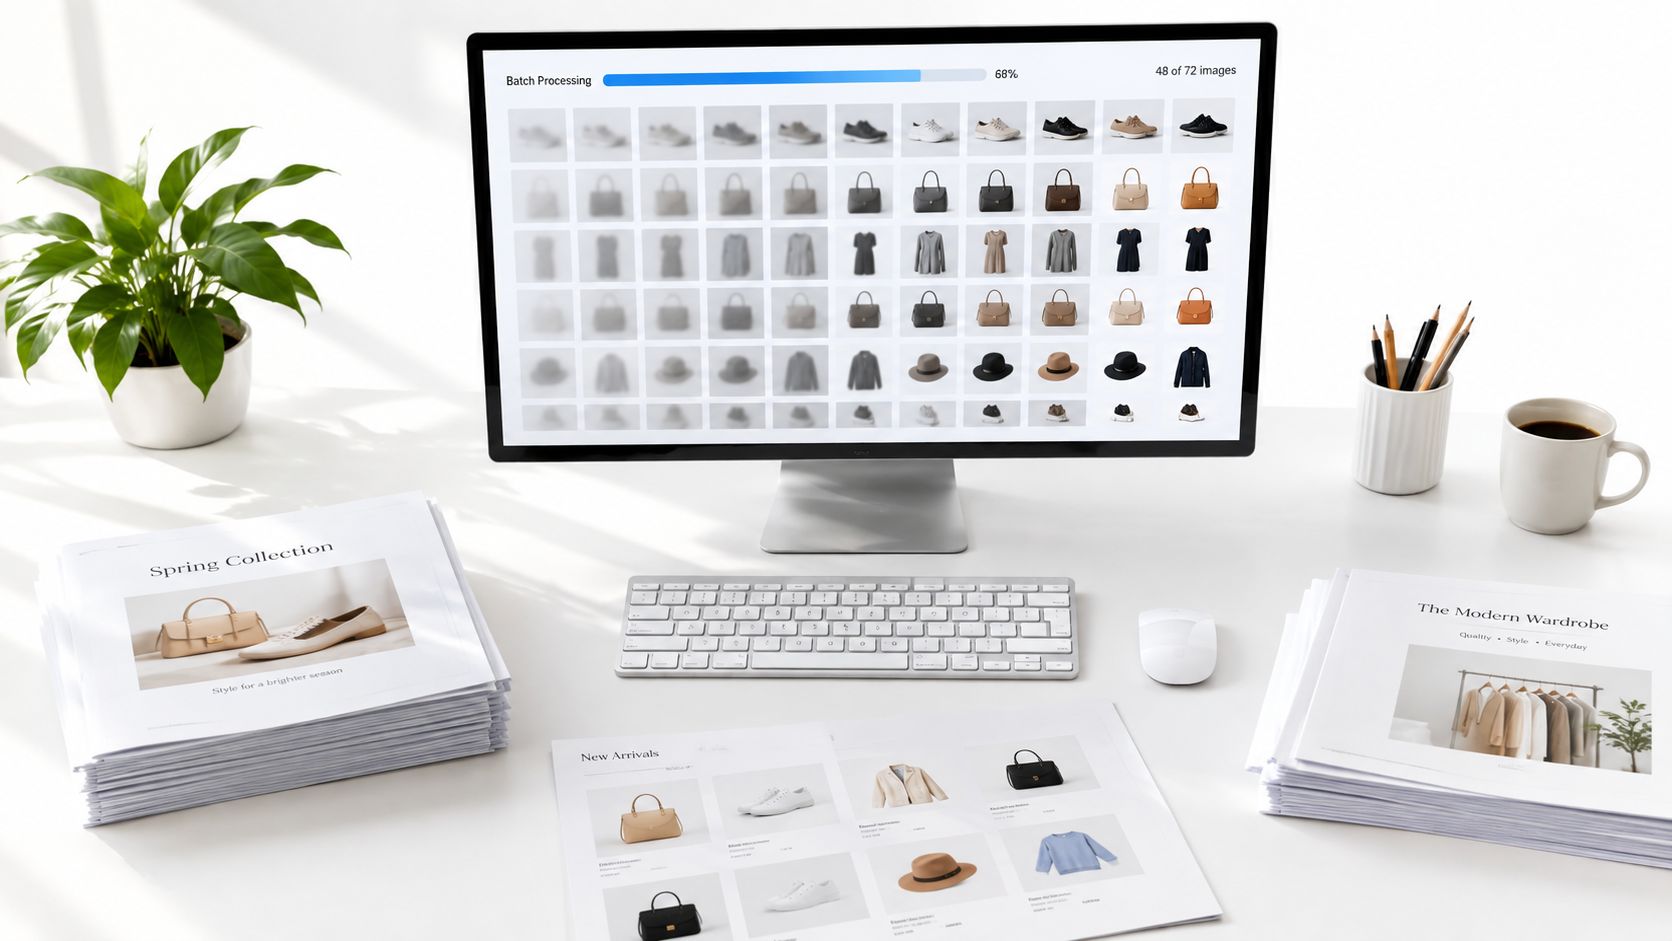
MerchLoom can run chained AI pipelines across a collection instead of processing one image at a time. You can bring images from sources such as Shopify, Google Drive, Dropbox, or other connected storage, then define a repeatable workflow for background removal, reframing, denoising, and resolution correction. The important part is keeping each stage in the same order for the whole batch.
Build the pipeline around review points
Start with a small sample from different product categories. Include a black item on white, reflective hardware, a label with text, a patterned garment, and an image with visible JPEG damage. A pipeline that works for a plain mug may fail on a transparent bottle or a black jacket.
Use this structure:
- Preserve the original: Never overwrite the source file. Store the enhanced derivative beside it with a clear naming rule.
- Normalize the frame: Apply the target aspect ratio, product position, and background treatment before enlargement.
- Clean before enlarging: Remove blocking and noise before the resolution step.
- Generate a preview: Review representative outputs at 100% and at marketplace display size.
- Route uncertain files: Flag altered text, halos, warped edges, or inconsistent product scale for manual review.
- Export by destination: Create separate profiles for Amazon, Etsy, Shopify, and other sales channels rather than relying on one universal canvas.
MerchLoom streams results while a batch runs, so you can review output, refine the workflow, and reuse processed images without re-uploading them. It uses a pay-per-image credit model, and credits never expire. You can try the first images without an account. That makes it practical to test a small sample before committing a full catalog, while still keeping a human approval step.
The AI batch image editing workflow is useful when you're deciding how to organize repeated operations. MerchLoom isn't a full Photoshop replacement, and AI output still needs review. Its value here is the repeatable chain, not an automatic guarantee that every repair is accurate.
Verifying Fidelity to Avoid Misleading Listings
A sharper image can reduce trust if it changes what the buyer receives. An enhancer may add fabric texture, alter a logo, move a seam, reshape a product edge, or make a small accessory look included when it isn't. Those errors often appear polished enough to survive a quick thumbnail review.
Baymard reports that low-quality imagery is an issue at 14% of e-commerce sites, while inadequate zoom is an issue at 11%, and notes that shoppers need several visual forms, including detail views and scale references, rather than one larger image alone. That finding supports a practical conclusion: if the source can't support inspection, the right fix may be a reshoot, macro detail photo, dimension graphic, lifestyle image, or clearer descriptive copy.
Inspect the details buyers use
Compare the restored file with the original in a two-panel view. Don't judge only the background or overall crispness. Check the parts that can change a buying decision:
- Silhouette: Confirm that the outline, proportions, openings, and corners match.
- Color: Compare the main body, trim, and reflective areas under the same viewing conditions.
- Text and logos: Reject guessed letters, altered symbols, and softened marks presented as readable.
- Hardware: Count buckles, buttons, rings, handles, stones, and fasteners.
- Construction: Inspect seams, folds, stitching, soles, closures, and printed patterns.
- Included items: Make sure the image hasn't made an accessory or component appear present when it isn't.
- Scale: Use a separate detail or scale reference when buyers need to understand size.
For video, a similar approval habit helps. DwellShot's video review process for AI listing content offers a useful way to think about frame-by-frame checks before publishing visual assets. The same principle applies to still images. Review the output where a buyer is most likely to challenge it.
Source of truth: The original file determines what you can claim. The enhanced file determines only how clearly you can present it.
Classify each image by purpose. A hero image may tolerate mild perceptual cleanup if the product identity remains unchanged. A label, measurement graphic, detail view, or close-up of a legally significant mark requires source-faithful treatment. If a product-defining region is uncertain, keep the original view, add another photograph, or reshoot it.
Finalizing Your High-Resolution Catalog
A dependable catalog workflow has three gates: remove artifacts before sharpening, export to the correct marketplace dimensions, and verify that enhancement hasn't changed the product. Keep originals, use consistent crops and backgrounds, and separate “resolution improved” from “detail trustworthy” in your review process.
If a source remains too small after conservative treatment, replace it rather than forcing a dramatic enlargement. A practical high resolution photo guide can help when you need to improve the capture stage instead of repairing every downstream file.
MerchLoom lets you chain background removal, cleanup, upscaling, reframing, and export steps across a full product collection instead of fixing each pixelated picture manually. Try your first images without an account, then use its pay-per-image credits, which never expire, to process only the files you need. Visit MerchLoom and test a small, varied batch before publishing the rest.
Stop editing product photos one at a time
Upload your catalog or connect your store. Describe the result once. MerchLoom does the rest.
Try it free — no signup