
Meaning of Pixelation: A Guide for E-commerce Photos
Understand the meaning of pixelation and why it hurts sales. Learn how to fix and prevent blocky product photos for Amazon, Shopify, and Etsy at scale.
You upload a product photo that looks clean in Finder or Google Drive. Then it goes live on Shopify, gets reused in an Amazon listing, and suddenly the edges look blocky, the fabric texture disappears, and the whole listing feels cheaper than the product is.
That's the moment most sellers start asking about the meaning of pixelation. Not as a design term, but as an operations problem. If you manage five images, you can patch them by hand. If you manage five hundred, pixelation turns into rework, inconsistent listings, and a catalogue that no longer feels trustworthy.
For a casual editor fixing one family photo, pixelation is annoying. For an online seller, it affects how products are perceived across collections, marketplaces, ads, and zoom views. Once low-quality images spread into your catalogue, every resize, export, crop, and platform-specific requirement makes the problem harder to contain.
Why Pixelation Is an E-commerce Nightmare
A common failure starts innocently. A team pulls product shots from an old supplier folder, crops them square for Shopify, stretches a few into a homepage banner, then exports hero images for Amazon. The photos looked acceptable at small preview size. On the live listing, they don't.
Customers don't analyse the file. They judge the product.
When a necklace clasp, leather grain, or label print turns into visible blocks, the item looks lower quality than it is. That hurts confidence fast. On marketplaces where shoppers compare similar products side by side, image quality often decides which listing feels more credible.
Where sellers usually get burned
Pixelation creates problems in places that busy teams often miss:
- Zoom views break first: The image may look fine in a small grid, then fall apart when a customer opens gallery zoom.
- Cross-platform exports expose weak files: A photo sized loosely for one storefront may fail badly when reused for another marketplace. Sellers dealing with Amazon image specs usually discover this after upload, not before. A practical reference is this Amazon listing image size guide.
- Batch inconsistency makes the brand look disorganised: One product looks sharp, the next looks fuzzy and blocky, and the whole catalogue feels cobbled together.
Practical rule: If a product photo only looks good at thumbnail size, it isn't ready for e-commerce.
The core issue isn't that one image looks bad. It's that weak source files multiply. Marketing reuses them in ads. Marketplace teams crop them differently. Designers drop them into collection pages. Soon the same poor asset appears in ten places, each with a slightly different failure.
That's why pixelation isn't just an image-editing annoyance. It's a catalogue control problem.
Understanding the Meaning of Pixelation
The simplest way to understand the meaning of pixelation is to think about a mosaic. From a distance, you see the picture. Up close, you see the individual tiles. Digital photos work the same way, except the tiles are pixels.
A pixel is the smallest controllable element in a raster image or display. In technical terms, Wikipedia's definition of a pixel explains that in digital imaging, a pixel is not a physical entity with extent but an abstract point of information, a zero-dimensional sample of a picture that exists only at a specific coordinate. Pixelation happens when the display no longer smooths those samples well enough and you start seeing the raw dots instead of the intended image.
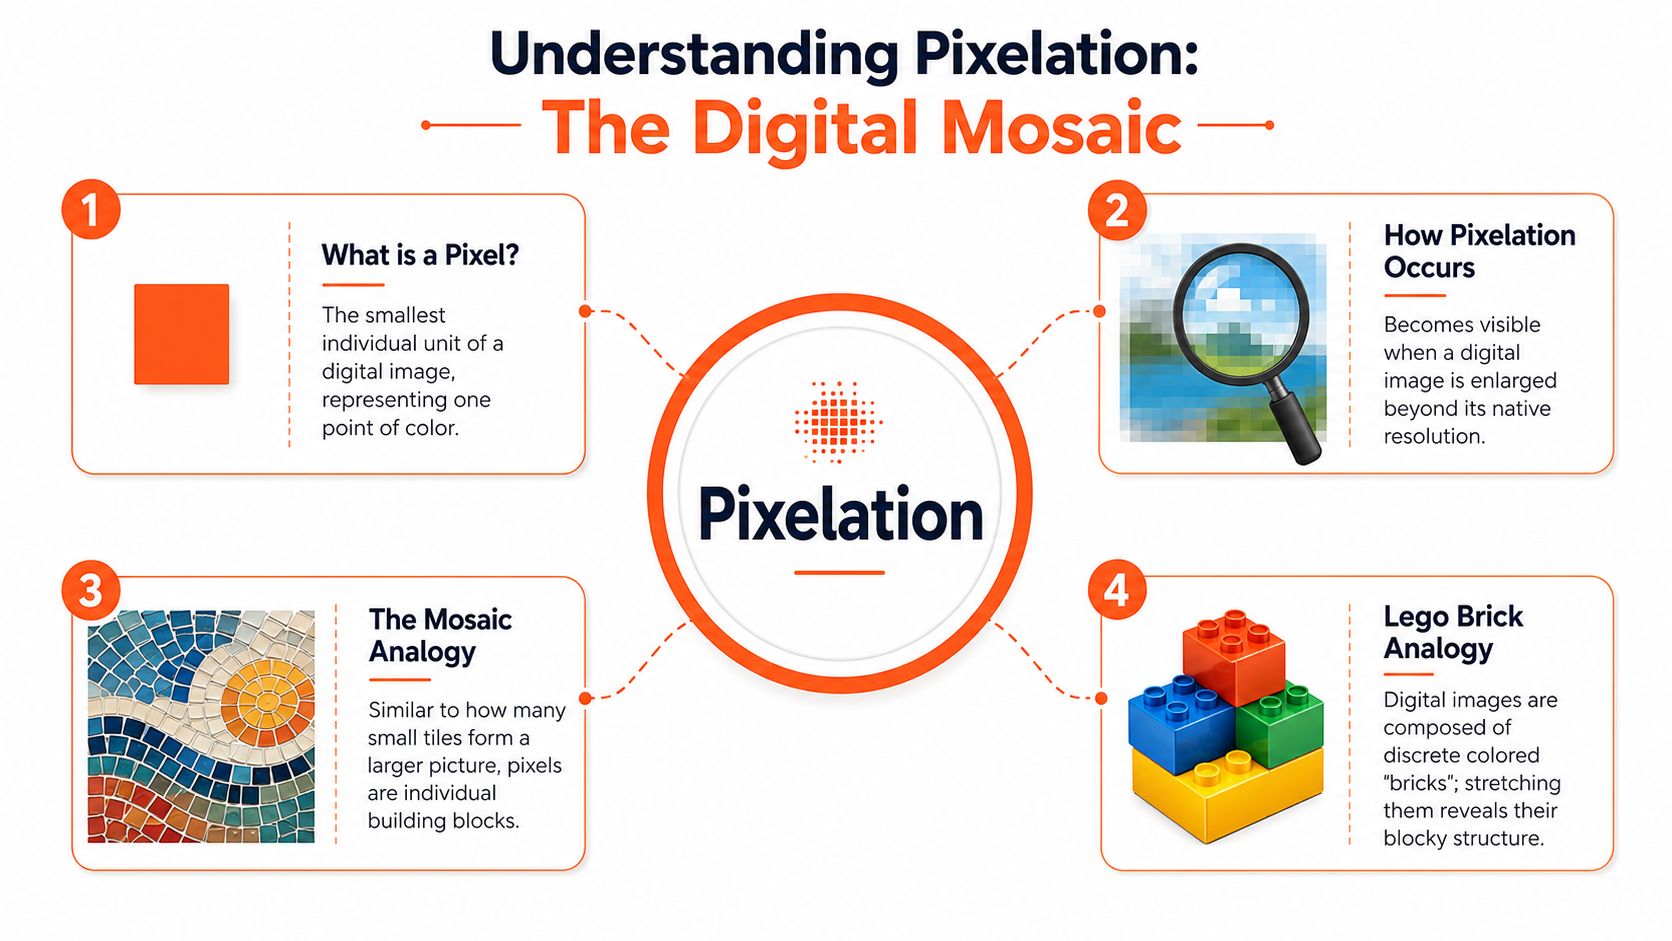
The mosaic and Lego version
If you build a product photo out of tiny coloured squares, the image can look smooth when enough squares are packed together. But if you enlarge that same image too much, each square becomes obvious. That's pixelation.
The Lego analogy works too. A Lego model can suggest curves and detail from a normal viewing distance. If you enlarge the view without adding more bricks, the blocky structure becomes the main thing you notice.
What pixelation is and what it isn't
Pixelation is not the same as blur.
Blur softens edges. Pixelation reveals structure. A blurred handbag strap may look smeared. A pixelated strap looks blocky because the square grid is now visible. That distinction matters because the fix is different. Sharpening won't rebuild missing image detail.
Historically, the word itself was formally recorded in 1991 to describe a computer graphics display effect where individual pixels become visibly distinct when an image is shown too large for its available resolution, according to the etymology of pixelation. That's still the most practical definition for sellers. You're seeing the grid because the file doesn't have enough usable image information for the size you're asking it to fill.
Why this matters in daily workflow
Many new marketers focus on DPI because print training sticks with them. In web and marketplace work, the more immediate concern is whether the image has enough pixel dimensions for its display use. If your team needs a refresher, this quick guide on how to check the DPI of an image helps clear up the metadata side without confusing it with actual listing quality.
Pixelation means the image has stopped feeling continuous and started showing its grid.
For one edited photo, that's easy to spot. For a catalogue, the danger is that nobody notices until images are already published across product pages, collection grids, ads, and marketplace feeds.
The Technical Causes of Unwanted Pixelation
Most unwanted pixelation comes from four operational mistakes. They don't always start in the design team. Sometimes the problem begins with the supplier, the camera setting, or the export method someone used months ago.

Low-resolution source files
This is the most common cause. The original image is too small.
That happens when a seller downloads a vendor thumbnail, grabs a compressed image from an old website, or shoots with reduced output settings because the team thought “web size” was enough. Once the source is small, every crop makes it worse. A square crop from an already limited file can strip away the remaining margin you needed for zoom or alternative placements.
Improper scaling
Scaling is where pixelation becomes visible. The file might survive at one display size, then break when stretched.
As explained in Wikipedia's entry on pixelation, when an image is enlarged beyond its pixel density capacity without interpolation, the rendering engine must stretch existing pixel data. Upsizing a 1000x1000 image to 2000x2000 without resampling will double the physical size of each pixel, instantly triggering visible pixelation.
For sellers, this often happens when someone reuses a thumbnail as a banner, turns a marketplace crop into a hero image, or enlarges a square product shot for a promotional tile.
Over-compression
Compression can make a file lighter, but aggressive compression strips subtle transitions and edge detail. Product photos rely on those transitions. Metal reflections, stitching, embossed packaging, and cosmetics textures all suffer when the export is pushed too hard.
Compression damage doesn't always look identical to pixelation, which is why teams often misdiagnose it. If your exports keep producing rough edges and ugly detail breakup, this breakdown of JPEG compression artifacts in product images is worth reviewing before anyone starts “fixing” the wrong problem.
Wrong format and repeated re-saving
A catalogue often passes through too many hands. Someone exports a JPG. Another person crops it and saves another JPG. A third person downloads that version from a CMS and exports it again. The image keeps degrading.
This is one reason master files matter. You want one high-quality source asset, then controlled exports for each use case. Reworking already exported web files is where many catalogues lose quality.
A fast diagnosis checklist
If you're trying to work out why a listing looks blocky, check these in order:
- Start at the source: Is the original file genuinely large enough, or did it begin life as a small supplier image?
- Check the crop history: A heavily cropped lifestyle image may no longer have enough detail for a close product view.
- Review export settings: Low-quality JPG exports can ruin fine product texture.
- Trace the handoffs: If multiple people saved over the same asset, quality may have been lost in stages.
A useful companion read is this guide for creators on image resolution, especially if your team needs a plain-English explanation before standardising a better process.
Pixelation vs Other Common Image Artifacts
Teams waste time when they treat every quality issue as the same problem. A pixelated image won't improve just because someone adds sharpening. A blurry image won't improve because you upscale it. Diagnosis matters.
What to look for
Doing this for a whole catalog?
MerchLoom runs background removal, upscaling and AI editing across every product photo you have — one prompt, whole batch.
Try MerchLoomPixelation has a distinct visual signature. You can see square structure. Other artifacts create different damage patterns, and the fix depends on naming the problem correctly.
| Artifact | What It Looks Like | Common Cause |
|---|---|---|
| Pixelation | Visible square blocks, especially on edges and detail areas | Image displayed larger than its native resolution can support |
| Motion blur | Directional smear, as if the product or camera moved during capture | Movement during shooting |
| Softness or out-of-focus detail | Whole image looks gentle or hazy rather than blocky | Incorrect focus or shallow depth of field |
| JPEG compression artifacts | Messy edge noise, patchiness, or ringing around contours | Strong lossy compression and repeated JPG exports |
| Aliasing | Stair-step “jaggies” on diagonal or curved lines | Limited sampling or poor edge rendering |
Why sellers confuse these issues
A new marketing hire often opens a bad image and says it looks “low quality”. That's accurate, but not useful. The team still needs to know whether the problem came from capture, scaling, export, or rendering.
Pixelation usually shows itself on edges, logos, text, and product contours first. Blur affects the whole image differently. JPEG artifacting tends to create noisy or dirty-looking borders rather than clean square blocks.
If you can see little square units, think pixelation. If edges look smeared, think blur. If edges look dirty or noisy, think compression.
The practical consequence
Wrong diagnosis leads to wasted edits.
If a product photo is out of focus, no amount of careful resizing will make it sharp. If it's pixelated because it was stretched too far, more sharpening usually makes the blocks harsher. If it's suffering from repeated JPG saves, the best move may be to go back to the master file rather than trying to rescue the damaged export.
For catalogue teams, this saves time. It stops people from applying the same fix to five different problems and wondering why nothing improves.
A Proactive Workflow to Prevent Pixelation at Scale
The cleanest fix for pixelation is not having to fix it later. That sounds obvious, but prevention only works when the workflow is standardised across the whole catalogue.
A single seller can remember a few rules. A growing team needs a repeatable system.
Start with a master asset standard
Every product should have a high-quality master file before anyone starts making platform-specific derivatives. That master becomes the source for Amazon, Shopify, Etsy, paid social, email, and any future channel you add.
The core rule is simple:
- Keep one untouched source: Don't treat exported marketplace JPGs as your working originals.
- Store organised variants: Separate masters from cropped, compressed, or platform-ready versions.
- Name files predictably: Teams move faster when they can identify source, ratio, and channel at a glance.
This matters even more when product lines expand. Without a master standard, sellers end up rebuilding image sets collection by collection.
Match exports to platform requirements
Different channels ask for different things. Your workflow has to respect that without creating dozens of manual exceptions.
Amazon is strict about the hero image. A product's main image must use a pure RGB(255, 255, 255) white background with no shadows or transparency, according to this overview of batch product image processing for Amazon workflows. If the team doesn't remove or standardise backgrounds before upload, listing rejection becomes a workflow issue, not just a design issue.
Etsy has a resolution threshold too. Etsy mandates that product images must be at least 2000 pixels wide to enable its zoom feature, which means sellers often need batch upscaling or at least batch validation before upload.
Shopify adds another layer because image performance still matters after quality is solved. A practical benchmark from this Shopify and Amazon product image workflow guide puts Shopify's sweet spot at 500KB for product images, with 200KB recommended only for mobile-first thumbnails. That's a good reminder that “bigger” isn't the only goal. The file still needs to load well.
Build one catalogue process, not thirty exceptions
Teams should organise image handling in this order:
- Acquire strong originals from camera, studio, or supplier.
- Create the master file and lock it down.
- Remove or standardise backgrounds where the marketplace requires it.
- Export channel-specific versions for Amazon, Shopify, and Etsy.
- Run visual QA in batches before publishing.
Operational advice: If your process depends on remembering which image needs which size by memory, the process is too fragile.
For brands that also produce packaging visuals, this same discipline applies outside the storefront. If your team works on cartons, inserts, or box mockups, this guide to print-ready bespoke packaging artwork is useful because it reinforces the same principle: start from the right source quality, then prepare the final output for the exact destination.
A connected asset pipeline also helps. Teams syncing images across cloud storage and storefront tools benefit from having a central workflow layer, and this article on an AI image workflow for Cloudinary is a good example of how to think about catalogue-wide consistency instead of isolated edits.
Fixing Pixelated Catalogues with AI Batch Processing
If you inherited a weak catalogue, prevention alone won't save you. You need a recovery plan.
That's where a lot of teams get stuck. They know the images are too small or too rough, but the idea of opening hundreds of files one by one in Photoshop turns the cleanup into a project nobody wants to own.

Why one-by-one repair fails
Manual editing works for a hero product or a campaign launch. It breaks for catalogues.
The problem isn't only time. It's inconsistency. One editor crops tighter. Another exports softer JPGs. A third upscales some images but not others. The catalogue ends up with mixed visual standards, which is exactly what buyers notice when they browse a collection page.
AI upscaling is useful here because it gives teams a practical way to improve existing low-resolution images across batches. It won't turn every bad file into a perfect studio original, but it can help recover listing-ready detail more efficiently than manual resizing alone.
Processing order matters
The best batch workflows don't just run edits. They choose the right sequence.
One of the most useful examples is background removal before enlargement. Removing backgrounds before upscaling in an AI pipeline can shrink image file sizes prior to the expensive resolution step, saving up to 87% in processing costs for large batches of e-commerce images. For sellers working through hundreds of SKUs, that's not a minor optimisation. It changes whether a cleanup project is manageable.
This also matters when the same image set feeds multiple channels. If the product needs a white-background marketplace version, a square Shopify crop, and an Etsy-ready large image, the workflow should create those from the improved source in one pass rather than through separate manual jobs.
What a realistic recovery workflow looks like
A sensible batch repair process usually follows this pattern:
- Audit the catalogue first: Group images by source quality so you don't waste upscale time on files that are already good.
- Fix structural issues early: Background cleanup, framing, and subject isolation often make later processing more efficient.
- Upscale only where needed: Not every image needs the same treatment or final dimensions.
- Export by destination: Generate outputs for specific marketplaces instead of one oversized “universal” file.
A lot of this thinking applies outside retail too. For example, teams handling property listings face the same volume-and-consistency issue, and this article on how realtors use AI for property photos shows how similar batch editing logic works when image quality affects presentation at scale.
If your team is comparing tools or trying to understand the technical side better, this explainer on resolution in AI image workflows is a useful next read.
A short walkthrough helps if you want to see how this kind of pipeline looks in practice:
The key shift is operational. Stop thinking of pixelation as a flaw inside one unlucky image. For sellers, it's usually a sign that the catalogue lacks a controlled image pipeline.
If you need to clean up a large product library without editing every file by hand, MerchLoom is built for that kind of batch workflow. It lets sellers import full image collections from the tools they already use, chain AI steps like background removal, reframing, and upscaling, and produce marketplace-ready outputs across Amazon, Shopify, and Etsy with much less manual rework.
Stop editing product photos one at a time
Upload your catalog or connect your store. Describe the result once. MerchLoom does the rest.
Try MerchLoom