
AI Image Enhancement for E-commerce: Practical Catalog Guide
Learn AI image enhancement for e-commerce. Denoising, sharpening, color correction, and upscaling at catalog scale for Amazon, Etsy, and Shopify listings.
You've got two hundred product photos sitting in a folder, and the listings need to go live Monday. Some are too small for marketplace zoom. Others have grey backgrounds, inconsistent white balance, or shadows that change from one SKU to the next. Fixing one image is easy. Preparing the entire catalogue without creating a second round of rework is the true challenge.
Start by defining one master treatment for the collection. Set the crop, background, colour balance, output dimensions, and file naming rules before processing anything. Then test that treatment on a representative group, including the sharpest, weakest, darkest, and most complicated product images. Guidance on how to improve image resolution with AI is useful here, but the practical question is whether the same result holds across every SKU.
The Scale Problem in E-commerce Image Workflows
Most tutorials about AI image enhancement begin with one damaged or blurry photo. That's the wrong starting point for a seller managing Shopify, Etsy, Amazon, eBay, WooCommerce, Poshmark, or Depop. Your problem isn't whether one lamp can look sharper. It's whether a full collection of lamps, colours, sizes, and variants will still look as if it came from one controlled shoot.
A manual workflow breaks down quickly. You remove the background on one image, crop another slightly differently, brighten a third, and upscale a fourth. Each file may look acceptable on its own. Viewed together on a collection page, the products sit at different heights, occupy different amounts of the frame, and show different white points. Customers notice the inconsistency before they notice the editing work.
Treat the catalogue as a production line
A catalogue workflow needs fixed decisions:
- Canvas: Choose a consistent square or channel-specific frame before processing.
- Product scale: Keep the item at a similar size within the frame across variants.
- Background: Define whether the collection uses pure white, transparent, or a styled scene.
- Colour: Use one correction profile for similar products instead of judging each file by eye.
- Output: Set dimensions and formats before the batch begins.
- Review: Inspect a sample from every source-quality group, not just the first few files.
A seller with hundreds of photos also has to track originals, processed files, rejected outputs, and final exports. If the workflow overwrites source images or produces unclear filenames, a small visual correction becomes a file-management problem. Keep the original untouched and add a predictable suffix or destination folder for each processing stage.
Practical rule: If you can't describe the intended output in a few repeatable settings, the workflow isn't ready for a full catalogue.
The technology is now practical because AI image enhancement has moved beyond isolated editing. Background removal, denoising, restoration, and upscaling can be combined for product libraries rather than applied as separate rescue jobs. For a more detailed explanation of how this fits into broader image editing for e-commerce, focus on repeatability first and visual polish second.
How AI Image Enhancement Techniques Actually Work
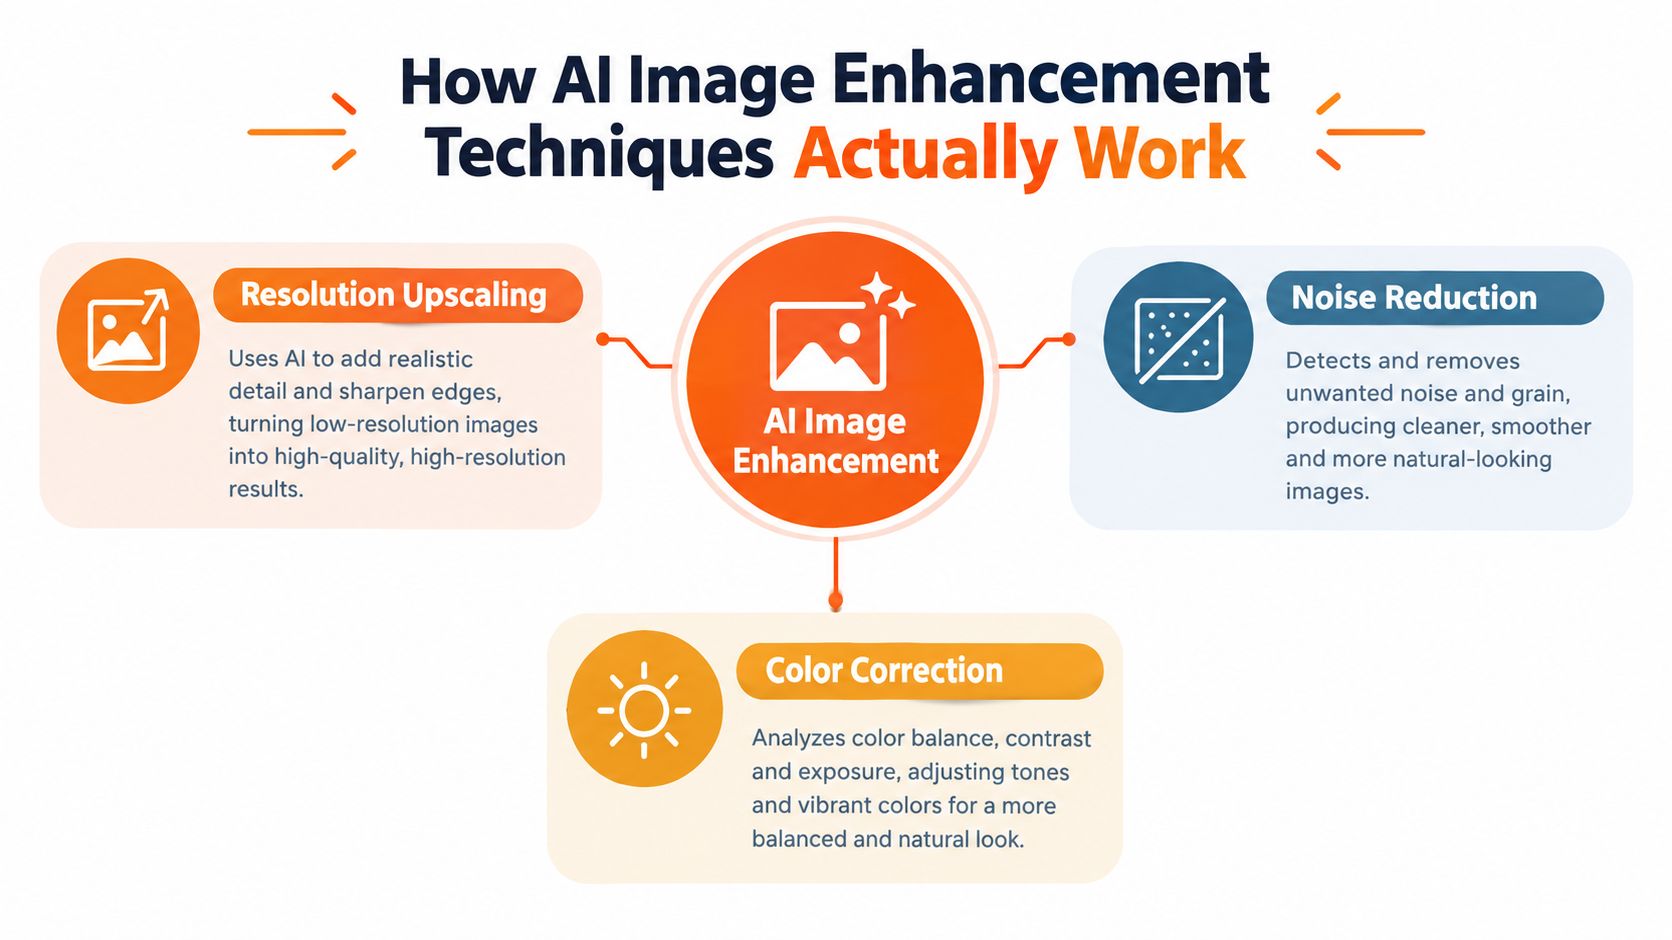
AI image enhancement is a group of separate operations, not one universal “make better” button. Each operation changes different parts of the pixel data, so the order matters. A catalogue can become less consistent when the same aggressive setting is applied to every image, especially if the source files came from different phones, cameras, or suppliers.
Denoising and sharpening
Denoising reduces random grain, usually from low light or high camera sensitivity. The model estimates which variations are unwanted noise and smooths them. Too much denoising can erase fabric weave, wood grain, fine jewellery detail, or the edge of a printed label.
Sharpening increases contrast around edges. It can make a product outline clearer, but it can also make noise, halos, and compression blocks more visible. If the source is noisy, denoise before sharpening. Running sharpening first often turns small defects into hard, obvious outlines across every image in the batch.
The catalogue test is simple. Open several similar products at the same zoom level and check thin edges, textured materials, and printed packaging. If one setting makes a cotton shirt look plastic or creates a dark border around a white appliance, reduce the strength for that source group rather than forcing the same treatment everywhere.
Colour correction and upscaling
Colour correction adjusts white balance, exposure, contrast, and sometimes saturation. It matters because variant confusion often starts with colour. If one red shoe looks orange and another looks burgundy because the photos were taken under different lights, customers may think the products are different versions.
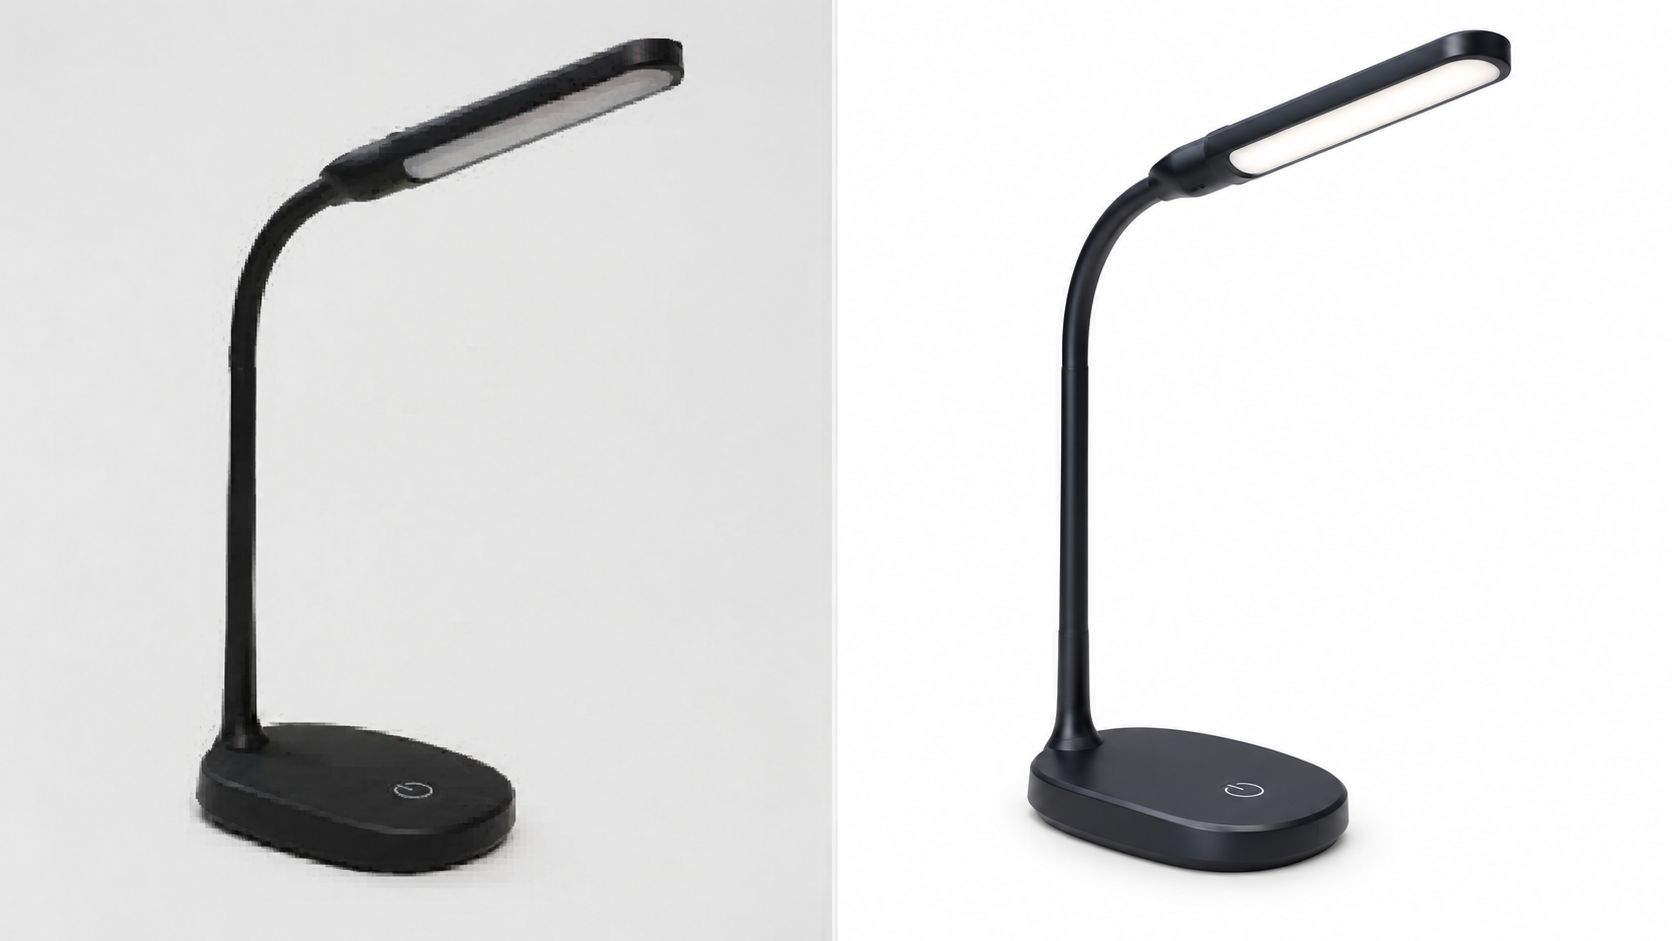
Upscaling creates a larger output from a smaller source. Basic interpolation spreads existing pixels across a larger canvas. Learned models estimate likely edges and textures from visual patterns. That can produce a more useful listing image, but it can also introduce details that were never captured in the original.
Use upscaling to meet a defined listing requirement, not to claim that missing product information has been recovered. Logos, text, stitching, and packaging edges need closer review after enlargement. A technical overview such as this guide to 4K upscaling can help clarify the difference between increasing dimensions and restoring trustworthy detail.
For broader workflow ideas, you can also browse the AdManage.ai features guide. The useful takeaway is to separate the operations, test their order on representative images, and compare outputs as a collection rather than approving files one at a time.
Platform Requirements at Catalog Scale
A catalogue with hundreds of images needs channel-specific rules before processing begins. Amazon, Etsy, and Shopify differ in background, framing, and dimensions, so one export can pass on one marketplace and create rework on another.
| Platform | Background | Minimum Dimension | Format Notes |
|---|---|---|---|
| Amazon | Main image must use pure white, RGB 255,255,255 | At least 1,600 pixels on the longest side, as specified in these Amazon product image requirements | Product should occupy at least 85% of the frame, according to the same requirements |
| Etsy | Product presentation should preserve clear detail | 2,000 pixels on the shortest side is a commonly cited target | Keep resolution consistent across the image set |
| Shopify | Flexible background choice based on the store design | Square images up to 4,472 × 4,472 pixels | A square master can support downstream channel exports |
Amazon's main image creates a strict production check. The background must be RGB 255,255,255, and the product must fill enough of the frame to meet the marketplace presentation standard. A pale grey studio background that looks acceptable on Shopify can fail Amazon's requirement, so store the background and framing rules as separate export settings.
Etsy's 2,000-pixel shortest-side target makes inconsistent source dimensions easy to spot. One crisp primary image beside a smaller export creates an uneven shop grid and zoom experience. Normalize dimensions across each product family before uploading variants, then inspect the smallest source files separately.
Shopify's flexible square format works well as a master asset. A square file up to 4,472 × 4,472 pixels can support other channel exports, provided the product remains correctly framed after cropping. Create the square canvas while there is still room to reposition the item. Stretching a portrait product at the final stage distorts proportions and creates avoidable rework.
Keep one high-quality master, then generate channel-specific versions from it. Maintain a rule sheet for background colour, canvas size, product occupancy, file format, and crop position. Batch processing should stop or flag files that fall outside those rules, rather than exporting a mixed catalogue without notice.
Benefits and Realistic Limitations
The main benefit of AI image enhancement at catalogue scale is repeatable preparation. A defined workflow can apply the same background treatment, colour logic, crop, and output size across a large group. That reduces the visual drift that appears when a seller edits each file during short gaps between customer messages, stock updates, and order fulfilment.
Doing this for a whole catalog?
MerchLoom runs background removal, upscaling and AI editing across every product photo you have — one prompt, whole batch. Try 2 batches free, no signup.
Try it freeClean backgrounds also reduce marketplace compliance work. A standard treatment makes it easier to identify files that don't meet the intended channel format before upload. Upscaling can help when a supplier sends small images and reshooting would delay a listing, but the larger file shouldn't be mistaken for a complete recovery of missing information.
Where automation helps
- White balance: Similar products can retain a closer colour relationship across variants.
- Background cleanup: The same removal or replacement logic can run across an entire collection.
- Resolution normalisation: Outputs can reach the target dimension instead of mixing small and large files.
- Catalogue maintenance: New images can follow the same treatment as older products when the workflow is saved.
- Rework reduction: Consistent settings make it easier to spot genuine exceptions instead of manually correcting every file.
The limitations are just as important. Severe motion blur rarely becomes clean product detail. Strong defocus can produce strange edges, warped shapes, or texture artifacts. An enhancement model may also infer a plausible pattern where the source contains too little information, which is dangerous for logos, labels, serial markings, and distinctive packaging.
Give brand-critical areas a human check. Zoom into text, logos, seams, buttons, jewellery settings, product edges, and printed colour blocks. If the model changes a logo or invents a texture, reject that output and use a milder treatment, a better source, or a reshoot.
The same issue affects lifestyle composites. A generated scene may look attractive while changing the product's proportions or adding details that aren't present. Use those images as merchandising assets, not as substitutes for accurate product views.
This video demonstration of image enhancement is best viewed with that limitation in mind. A visually sharper result still needs to be factually faithful to the item you're selling.
Building Batch Workflows with Chained Pipelines
A catalogue of hundreds of images becomes difficult when every file follows a separate download, edit, upload, and approval cycle. A chained pipeline sends each output directly into the next operation. Set the sequence once, then review results by source group and exception type instead of making isolated decisions for every SKU.
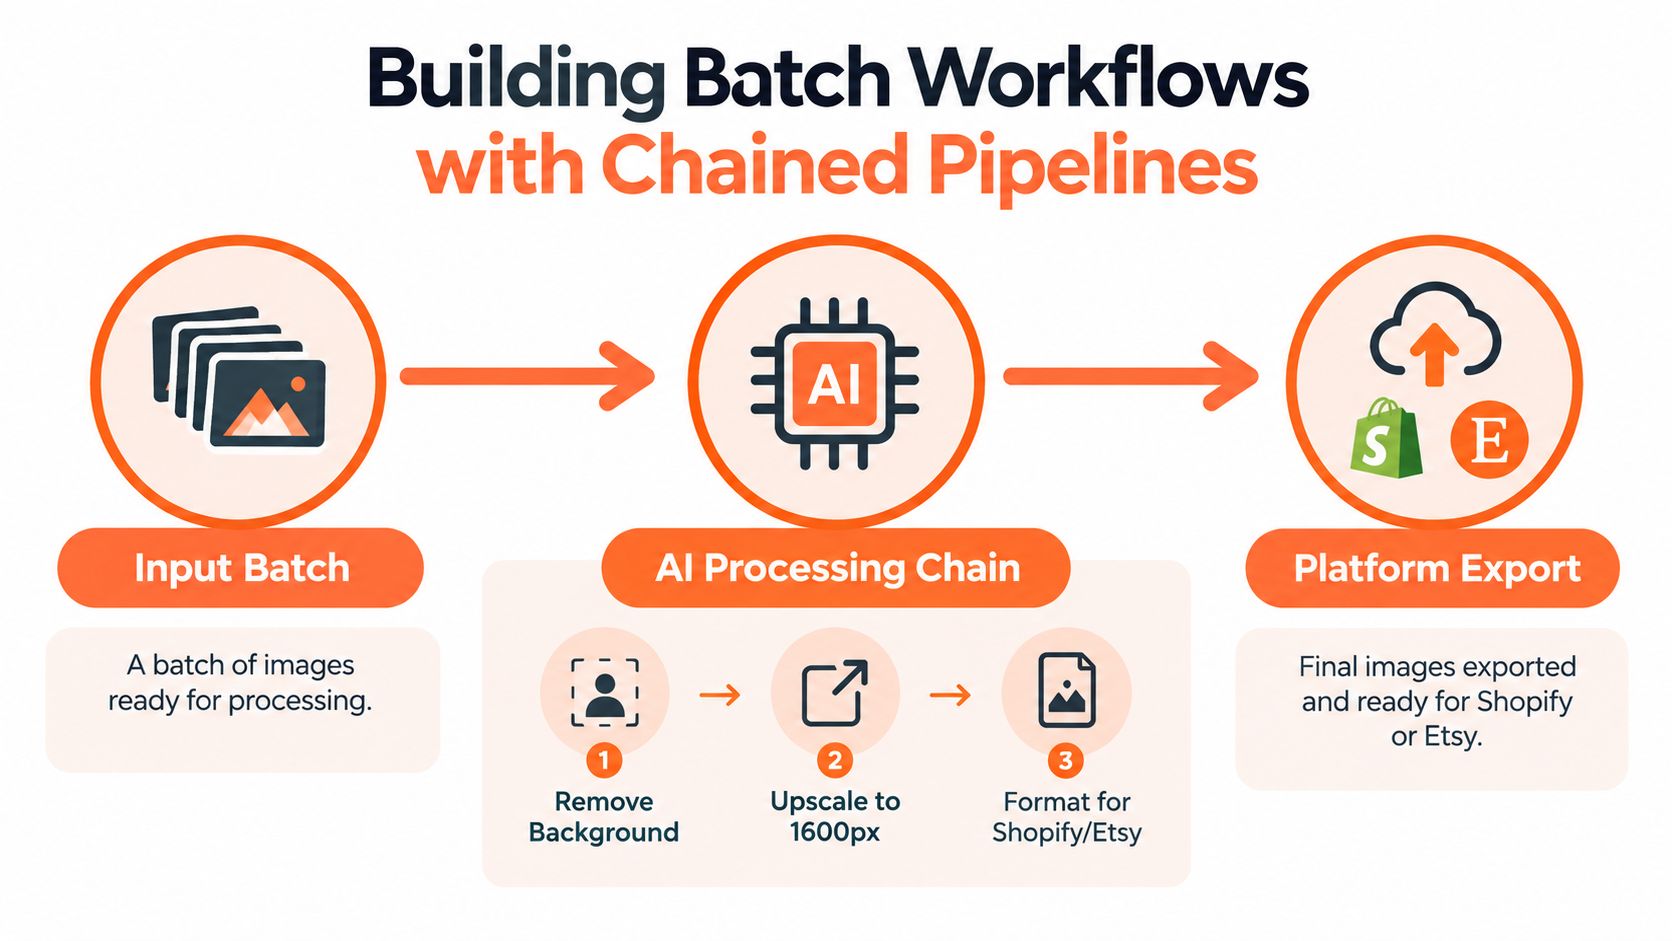
A practical sequence is:
- Inspect the source group. Separate dark, noisy, blurry, transparent, and already-clean files.
- Standardise the base. Correct orientation, crop behaviour, and the starting canvas.
- Remove the background. Run this before enlargement when the product and channel requirements allow it.
- Correct colour. Apply one treatment to comparable products and variants.
- Upscale to the channel target. Enlarge only to the dimension the listing requires.
- Export by channel. Create Amazon, Etsy, Shopify, and other marketplace versions from the master.
- Review exceptions. Send logos, text, reflective finishes, and unusual silhouettes for human inspection.
Order affects processing effort. Removing the background before upscaling can significantly reduce processing cost by shrinking images before the expensive enlargement step. At catalogue scale, that choice can determine whether a batch runs predictably or creates a queue of unnecessary work.
Why the sequence changes the output
Upscaling a cluttered original makes the model enlarge background texture, shadows, and unwanted edges. Removing the background first reduces the material processed later and produces a cleaner boundary for inspection after enlargement.
A single chain should not handle every source. A transparent PNG may need a different starting step from a JPEG photographed in a dim room. Reflective metal can require gentler correction than a matte surface. Create a few dependable paths and route files according to their condition, rather than forcing exceptions through the default workflow.
MerchLoom supports this batch approach. Import a collection, describe the intended result, and run chained AI pipelines across the files instead of editing each image separately. Initial images can be tested without an account, and its pay-per-image credits do not expire.
Sellers managing feeds or collecting listing information may also consult ecommerce scraping tools for the surrounding catalogue work. Keep feed operations separate from image processing so a data change cannot unexpectedly alter visual outputs.
Storage planning prevents another source of rework. Decide where source files, masters, channel exports, and rejected images will live before starting the batch. The Amazon S3 image processing guide is useful when the catalogue begins in object storage rather than a local folder.
Final Workflow and Quality Check
A reliable catalogue workflow ends with a review gate, not an automatic upload. The objective is to confirm that the output is consistent, compliant, and accurate enough for a customer to trust. Review by groups, because a problem affecting one source batch can appear across every related SKU.
Run the checks in order
First, compare colour. Put similar variants side by side. Check whites, skin tones in lifestyle images, metallic surfaces, and strong product colours. If one batch looks warmer or darker, correct the source group rather than manually repairing individual files.
Second, inspect identity details. Zoom into logos, packaging text, labels, tags, seams, buttons, and distinctive shapes. AI can hallucinate texture during upscaling or soften small lettering during denoising. Any change to a brand-critical element is a rejection, even if the image looks sharper at thumbnail size.
Third, verify the frame. Confirm that products have a consistent scale and position. Check that the main Amazon image uses pure white RGB 255,255,255, that the product occupies the intended portion of the frame, and that the longest side reaches at least 1,600 pixels. For Etsy, verify the 2,000-pixel shortest-side target. For Shopify, confirm that the square master stays within 4,472 × 4,472 pixels.
Fourth, check the file set. Confirm the format, filename, orientation, and destination folder. Don't mix a transparent file into a white-background Amazon set by accident. Don't replace originals with processed files until the review is complete.
Use exception-based approval
You don't need to inspect every pixel of every clean file at the same depth. Review a sample from each camera, lighting condition, product type, and processing path. Then inspect every file flagged for blur, text, reflective material, unusual geometry, or a failed background mask.
A catalogue library also needs history. Record which workflow produced each batch, when it was processed, and which files were rejected. Good product image library management makes future updates easier because you can reuse a known treatment instead of guessing how older assets were made.
The final decision should remain human. AI image enhancement is an operational tool for preparing product assets, not a replacement for checking whether the output still represents the product accurately. If a customer could interpret the image differently from the physical item, hold it back.
MerchLoom lets you import hundreds of product photos and run chained AI workflows for background removal, colour correction, resizing, and marketplace-ready exports. Try your first images without an account, then visit MerchLoom to process the catalogue on a pay-per-image basis with credits that never expire.
Stop editing product photos one at a time
Upload your catalog or connect your store. Describe the result once. MerchLoom does the rest.
Try it free — no signup