
Etsy Listing Photo Requirements: The Complete 2026 Guide
Master Etsy listing photo requirements for 2026. Our guide covers technical specs, best practices, and batch editing tips to make your products stand out.
You finished a product shoot, copied everything off your phone or camera, and now you're staring at a folder that has way too many files in it. Some are strong. Some are nearly identical. Some need background cleanup, better cropping, colour correction, or a sharper export. If you sell more than a handful of products on Etsy, that moment keeps repeating.
Most advice about Etsy listing photo requirements still assumes you're editing one image at a time. That's not how real catalogue work happens. Sellers need a repeatable way to turn raw photos into clean main images, context shots, size references, and marketplace-ready exports across an entire product line. If you also sell on Amazon, Shopify, or your own site, the pressure doubles. One platform wants a white background. Another favours square crops. Etsy needs enough resolution for zoom and clear thumbnails.
The sellers who stay sane build a system. The rest keep redoing the same edits every week.
Your Goal Is a System Not a Perfect Photo
A new Etsy seller usually starts by obsessing over one hero shot. They tweak brightness, crop three versions, compare backgrounds, then export and upload. That works for one listing. It falls apart when the next product needs the same treatment, and the next, and the next.
The practical job isn't “make this one image beautiful”. It's “create a shop where every listing looks trustworthy, consistent, and easy to browse”.
That changes how you work. Instead of chasing perfection on each file, you define a repeatable process:
- Choose one framing standard for your main photos.
- Use one lighting setup for most of the catalogue.
- Apply one colour and background treatment across similar products.
- Export one Etsy-ready size preset for the whole batch.
- Keep a shortlist of secondary image types so every listing tells the same story.
Practical rule: If you can't explain your photo workflow in five steps, it probably won't scale when your catalogue grows.
This is why busy sellers stop thinking like editors and start thinking like operators. You need a production line for photos, not a series of one-off rescues. That matters whether you're handling hundreds of SKUs or just trying to stop one listing from eating your afternoon.
If your current images feel inconsistent, start with a simple visual standard and document it. A useful reference point is this guide on how to make product photos look professional. Not because every listing needs studio polish, but because consistency does more for a shop than isolated brilliance.
Etsy Technical Photo Requirements Quick Reference
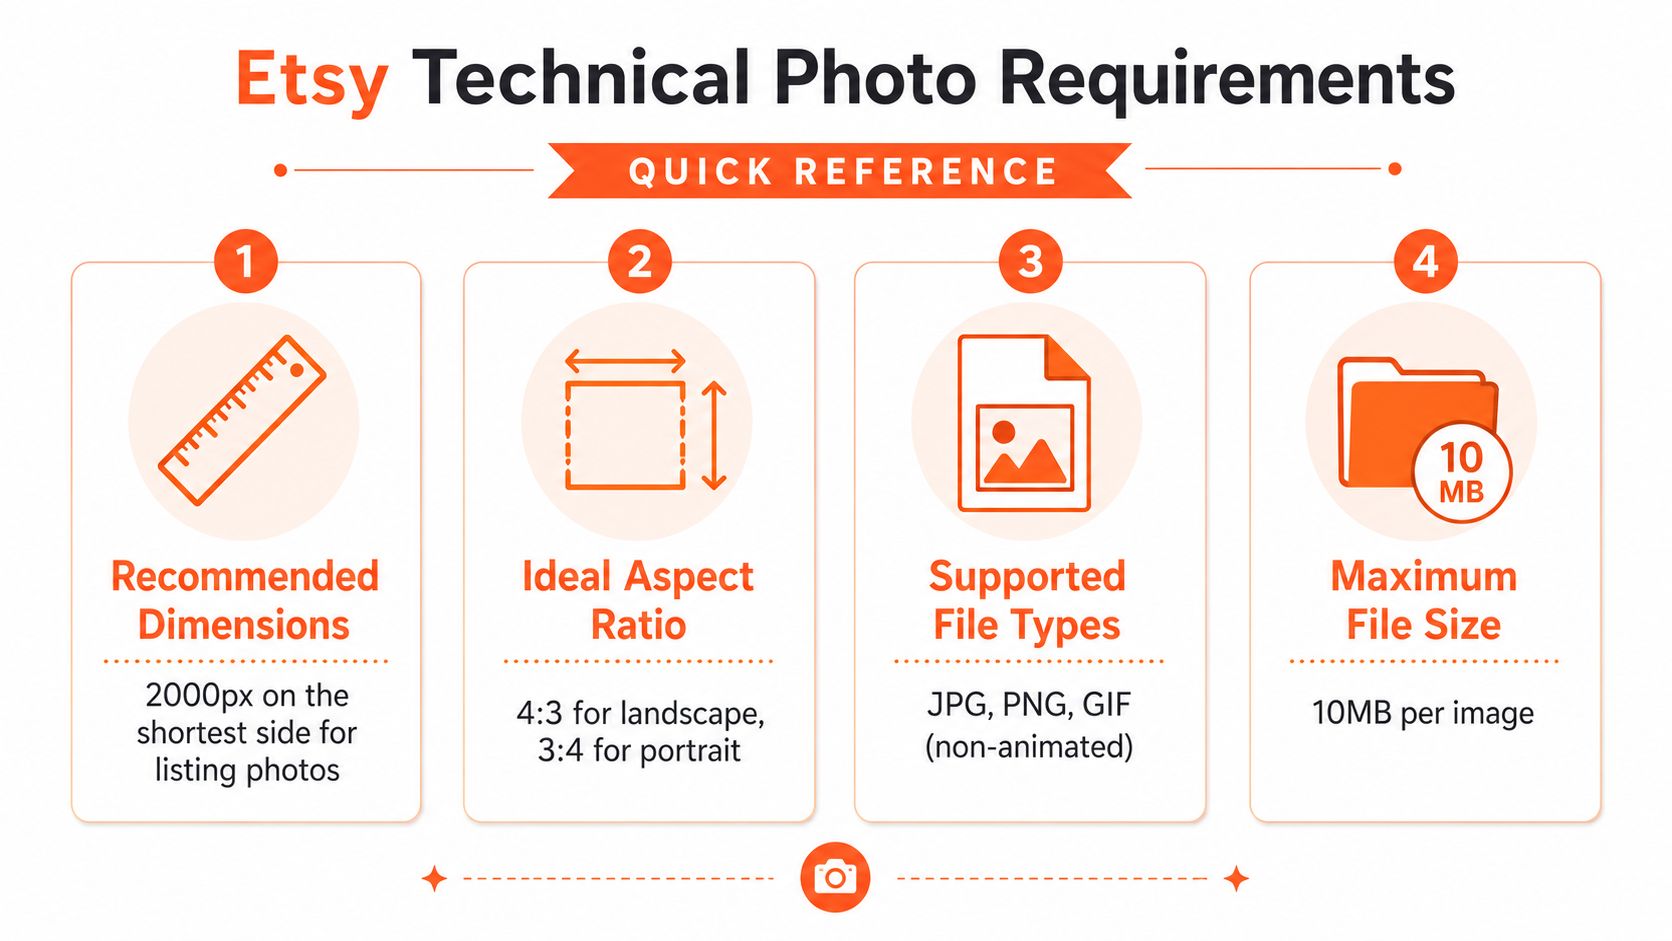
The technical side of Etsy listing photo requirements is where many shops lose quality. A photo can look fine on your laptop and still upload in a way that weakens thumbnails, disables zoom, or distorts colour.
The specs that matter
According to this breakdown of Etsy image requirements and best-practice dimensions, listing photos need at least 2000 pixels on the shortest side to activate Etsy's zoom function. The same source notes that 2000 × 2000 in square format and 3000 × 2250 in 4:3 are current best-practice sizes for strong display quality.
That same reference also states that images below 635 × 635 can be penalised in Etsy search, and files that miss the 2000px shortest-side threshold lose the zoom feature buyers use to inspect detail. It also recommends 72 PPI for web use and sRGB colour mode so colours display correctly on Etsy.
Quick reference table
| Requirement | What to use | Why it matters |
|---|---|---|
| Shortest side | At least 2000px | Keeps zoom available for buyers |
| Best-practice square | 2000 × 2000 | Clean, simple, easy to standardise |
| Best-practice landscape | 3000 × 2250 | Higher-fidelity 4:3 presentation |
| Absolute low-end threshold | Avoid going below 635 × 635 | Low-resolution images can hurt visibility |
| Resolution | 72 PPI | Suitable for web display |
| Colour mode | sRGB | Prevents odd colour shifts online |
What works in practice
For most sellers, the easiest scalable choice is to standardise on one master export preset and stick with it. If you prefer square listings because they're simpler to batch crop across your catalogue, a consistent square workflow is easy to maintain. If your products benefit from a wider frame, use a 4:3 export and keep the subject centred so the thumbnail still reads clearly.
When a buyer can't zoom in, they don't just lose detail. They lose confidence.
If you're auditing existing files, check dimensions first, then colour profile, then crop consistency. This guide to the size of Etsy listing photos is also useful when you need a quick operational reference rather than a design debate.
Photo Content Policies What You Can and Cannot Show
Technical compliance and policy compliance aren't the same thing. A file can be the right size and still break Etsy's image rules.
Etsy's listing image requirements policy says sellers must use original photos of the actual finished product buyers will receive. The primary image can't be a stock photo, rendering, or mockup with placeholder text such as “Your Text Here”. For customised products, the first image must show a finished customised example similar to the final item, while computer-generated mockups belong in secondary image slots.
What Etsy allows
The same policy states that accepted formats are .jpg, .gif, and .png. It also says animated GIFs and transparent PNGs aren't accepted. Etsy allows up to 10 photos and one video per listing, and the video must be 5 to 15 seconds. The policy also sets a 50MB maximum file size per image, though keeping files under 1MB is recommended for faster uploads and smoother metadata handling.
What sellers often get wrong
The common mistake is treating the main image like ad creative. Etsy treats it more like evidence. Buyers want to see the actual item, finished and photographable, not a concept.
That's especially important for personalised goods. If you sell engraved glassware, printed mugs, embroidered baby blankets, or custom wall art, your first image should show a believable finished example. Use later images to explain options, fonts, colours, and ordering steps.
A second mistake is leaning too heavily on digital mockups because they're faster. They are faster. They just shouldn't lead the listing if they replace the actual product.
For sellers who also post across social platforms, there's a separate set of rights and usage issues worth understanding around editorial images on social media. That won't change Etsy's policy, but it helps clarify where different image types do and don't belong.
The 5 Essential Photo Types Every Listing Needs
A strong Etsy listing answers buyer questions before the buyer types them. The easiest way to do that is to assign jobs to your image slots instead of filling them randomly.
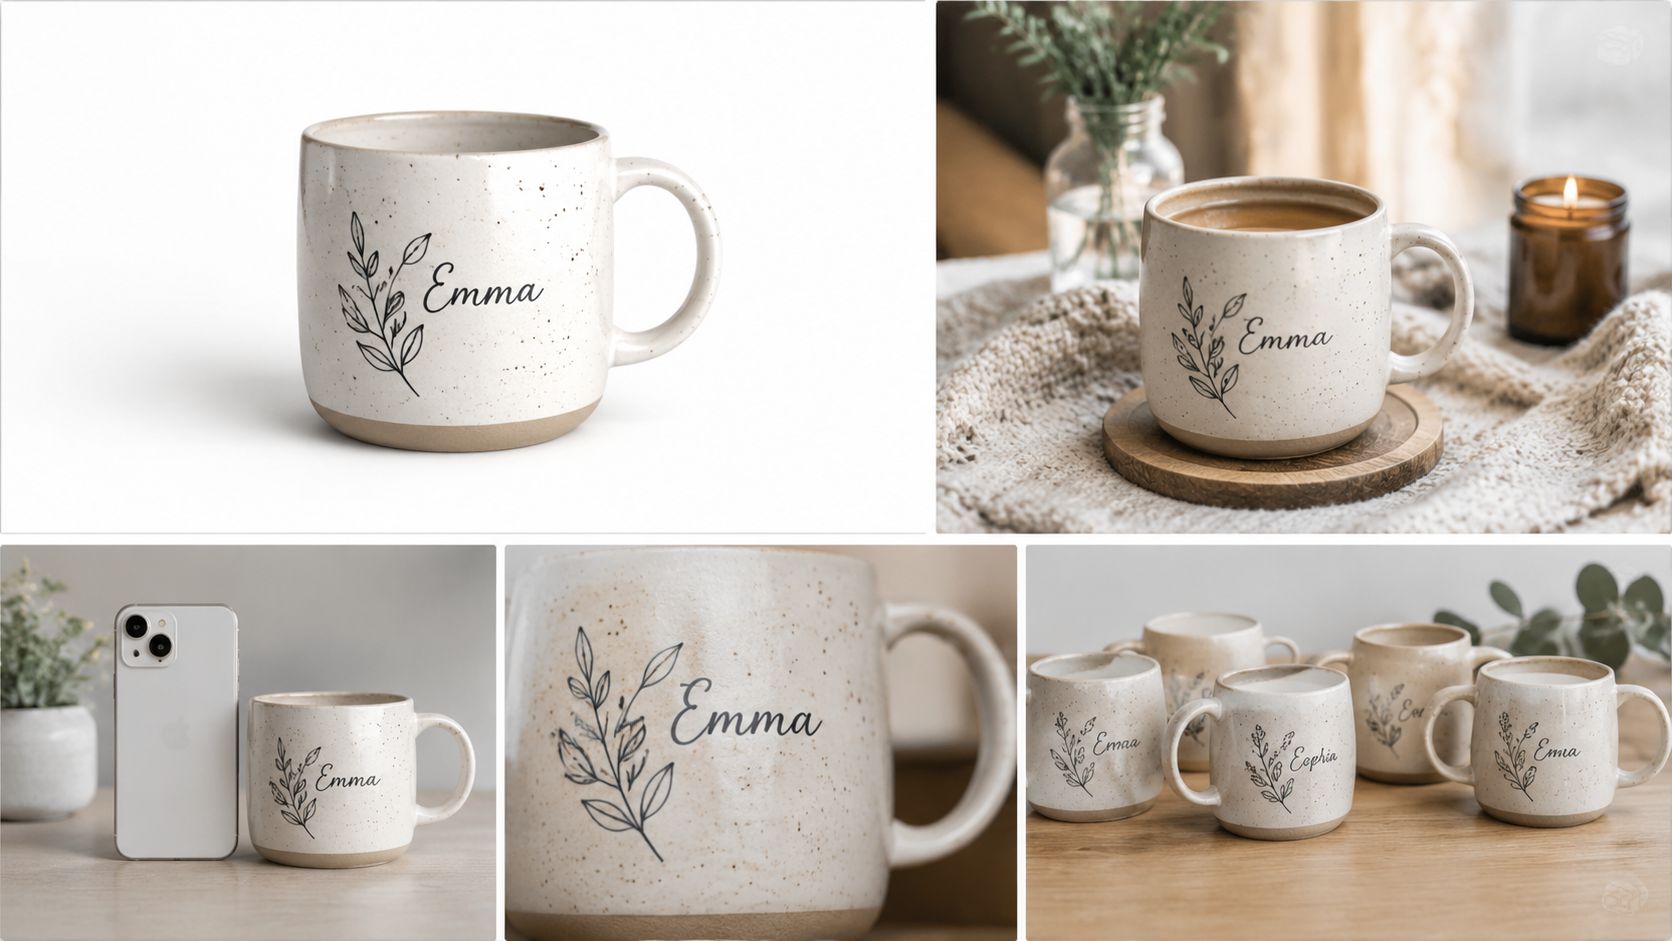
The clean main photo
This is your click image. It needs to read instantly at thumbnail size. Clean background, clear edges, obvious subject, no distracting props.
For most categories, the main shot should answer one basic question fast: what am I buying? If the product is handmade jewellery, the buyer should see the piece clearly. If it's a candle, mug, print, toy, or knit item, the subject should dominate the frame.
The lifestyle or context image
The buyer's next question is whether the product fits their life. Context solves that. A mug on a breakfast table, earrings worn on a model, a cushion on a sofa, or a print hanging on a wall helps the buyer picture ownership.
Lifestyle imagery is where many sellers gain emotional appeal without making the main photo messy.
The size and scale photo
This image reduces uncertainty. A hand holding the product, the item beside a familiar object, or the product shown in a real setting gives buyers proportion at a glance.
Sellers often skip this because they already listed dimensions in the description. Buyers still want to see size.
Buyers don't trust dimensions as much as they trust visual proof of scale.
If you need cleaner setups for jewellery, stationery, miniatures, or accessories, this guide on how to photograph small items is a practical reference.
The detail close-up
Handmade and crafted items sell better when the workmanship is visible. Texture, stitching, engraving, glaze variation, grain, clasps, seams, or print finish all belong here.
This image answers the quality question. It tells buyers whether the product feels careful or generic.
A short visual example helps:
The packaging or what's-included photo
This is the cleanup image for hesitation. It shows the full set, gift packaging, inserts, accessories, or bundled components. If your item arrives boxed, wrapped, tagged, or ready for gifting, show that.
A simple five-image structure works well for catalogue-scale production:
- Hero shot for search visibility
- Context image for lifestyle fit
- Scale image for size clarity
- Detail image for craftsmanship
- Included contents or packaging for purchase confidence
That structure is repeatable across hundreds of listings, which is why it works.
Creative Best Practices for Non-Photographers
Most Etsy sellers don't need a studio. They need a dependable setup they can reuse without guessing every time. Good creative choices are usually simple choices repeated consistently.
Use light that stays predictable
Natural light is still the easiest starting point. A bright window, indirect daylight, and one consistent shooting spot can carry most small-product catalogues. The problem isn't lack of expensive gear. It's inconsistency.
If one product is shot in cool morning light, another in warm evening light, and a third under room bulbs, your shop starts to look chaotic. Buyers may not describe that feeling, but they notice it.
- Pick one window and one direction. Reuse it so shadows and colour stay familiar.
- Turn off mixed indoor lighting. Competing light sources create muddy colour.
- Use a simple reflector. White card or foam board can soften shadow on the dark side.
Keep compositions boring in the best way
A lot of Etsy photo problems come from over-styling. Sellers add props, textures, flowers, books, fabric, beads, ribbons, plants, and signage until the product becomes a supporting actor in its own listing.
A cleaner approach scales better across a full catalogue:
Doing this for a whole catalog?
MerchLoom runs background removal, upscaling and AI editing across every product photo you have — one prompt, whole batch. Try 2 batches free, no signup.
Try it free- Main photos stay restrained. Neutral backgrounds and clear framing make batch edits easier.
- Lifestyle scenes earn their place. Add context when it explains use, mood, or fit.
- Leave breathing room around the product. Tight enough to read on mobile, loose enough to avoid awkward crops.
For sellers who want extra context without staging every set by hand, it can be useful to generate product images with AI for secondary visuals and concept exploration. That's most helpful when you treat those assets as support material rather than a substitute for compliant primary imagery.
Build one visual language for the whole shop
A shop looks more expensive when the images belong together. That doesn't mean every listing must be identical. It means the lighting, crop logic, background style, and colour treatment feel organised.
Shop-level rule: Consistency beats creativity when the two conflict.
That's why a simple white or neutral setup remains so effective for many categories. It creates fewer editing decisions and fewer surprises. If you're refining that approach, this reference on a white photoshoot background is useful because background choices affect not just aesthetics but speed, masking, and batch cleanup.
Common Photo Mistakes That Hurt Your Etsy Sales
The fastest way to improve a listing is often to stop doing what creates doubt. Etsy buyers don't need cinematic photography. They need clarity.
Mistakes that quietly weaken trust
- Blurry or soft main images. If edges aren't crisp, the product feels lower quality even when it isn't.
- Backgrounds with too much happening. Props, textures, and décor can overpower the item.
- Inconsistent colour across listings. A shop that swings from cool blue to warm yellow lighting looks unpolished.
- Tiny product presentation. If the item occupies too little of the frame, it disappears on mobile.
- Too few useful images. Sellers often upload a couple of angles and assume the description will do the rest.
What these mistakes do to the buyer
They create friction. Not dramatic friction. Quiet friction. The buyer hesitates, opens another tab, checks another listing, or decides to come back later and never does.
One of the biggest myths is that handmade products can get away with rougher presentation because buyers “care about authenticity”. Buyers do care about authenticity. They also care whether they can tell what they're buying.
Another common error is inconsistency between listings in the same shop. When one product has a bright clean main photo and the next has a dark busy scene, the shop stops feeling curated. It starts feeling accidental.
Audit your current catalogue with one question: does each image reduce uncertainty, or add it? If it adds confusion, it doesn't belong, even if you personally like the photo.
How to Batch Process Photos for Etsy and Beyond
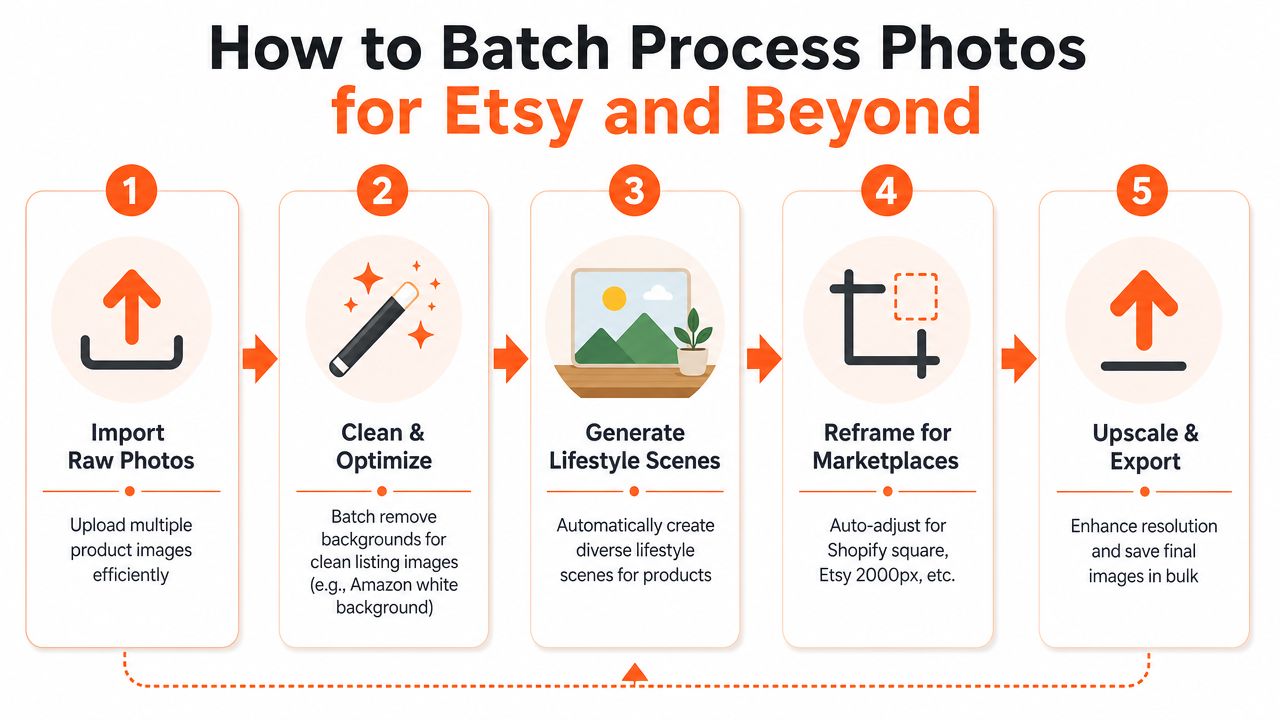
Editing photos individually is manageable when you're listing a handful of products. It becomes a bottleneck when you're running a real catalogue. Batch processing is what turns Etsy listing photo requirements into an operational workflow instead of a recurring chore.
A practical batch workflow
Most sellers need the same sequence over and over:
- Import the raw set from a shoot or phone folder
- Clean the image by correcting background and basic distractions
- Standardise framing so the product sits in a consistent position
- Create alternate versions for context, white background, or different storefronts
- Upscale and export the final files in marketplace-ready formats
That approach matters beyond Etsy. A single source image may need to become an Amazon-friendly white-background asset, a Shopify square crop, and an Etsy-ready file with enough resolution for strong product viewing. If you process each version manually, you'll keep repeating yourself.
What scales and what doesn't
What scales:
- Reusable presets
- Folder-based organisation
- Consistent crop rules
- Shared naming conventions
- Batch exports for each channel
What doesn't scale:
- Re-cropping every image by eye
- Fixing backgrounds one by one
- Making manual lifestyle composites for each listing
- Exporting separate versions ad hoc whenever a marketplace needs them
The real win from batch processing isn't speed alone. It's consistency across a whole catalogue.
For busy sellers, that's the difference between maintaining a clean visual brand and slowly accumulating mismatched listings. Even if you only sell on Etsy today, it helps to organise files as if you'll need them elsewhere tomorrow.
Building a Scalable Image Workflow with MerchLoom
Catalogue-scale editing works best when the workflow starts outside the editor. Sellers already have product photos sitting in cloud folders, marketplaces, storage buckets, or old shoot archives. The efficient move is to pull those assets into one repeatable pipeline rather than rebuilding the process for each launch.

Start with the source library
A workable system begins by importing the product collection in bulk. That usually means bringing in folders from storage you already use, then grouping files by product family, shoot date, or listing type. Once that's organised, you can apply the same logic across the collection instead of opening images one at a time.
For Etsy sellers, that usually means separating at least three output needs:
- Primary listing images that stay clean and compliant
- Secondary context images that show use, scale, and style
- Marketplace variants for other sales channels with different crop or background needs
Chain the steps in the right order
A strong image workflow usually follows a sequence. Clean the subject first. Then adjust framing. Then create alternates. Then export the final versions. If you upscale too early or keep changing aspect ratios manually, the process gets expensive in time and messy in results.
A batch-capable workflow can handle jobs such as:
- Background cleanup for consistent listing images
- Lifestyle scene generation for secondary gallery slots
- Reframing for square, horizontal, or platform-specific crops
- Upscaling for sharper final exports that meet Etsy's display expectations
It is beneficial for sellers to study broader operational examples, not just Etsy tutorials. Armox Labs' product photo academy is a useful resource because it focuses on workflow thinking rather than isolated edits.
Keep the system reusable
The best workflow is one you don't have to redesign next month. Save your crop logic. Reuse your background style. Stick to one naming pattern. Keep one approved look for your hero images and another for your context images.
That's what makes a platform like MerchLoom relevant in this category. It's built around importing existing product photos, running chained AI steps across full collections, creating clean listing images, generating lifestyle scenes, reframing for marketplaces, and upscaling the final outputs. Used well, that isn't about flashy automation. It's about removing repetitive decisions from an image queue that never stops growing.
Your Downloadable Etsy Photo Checklist
A listing should pass two tests before it goes live. First, it needs to meet Etsy listing photo requirements. Second, it needs to help a buyer feel certain enough to purchase.
Technical checks
- Shortest side is at least 2000px so the image is suitable for Etsy zoom.
- File format is JPG, GIF, or PNG and the export is compatible with Etsy's rules.
- Colour mode is sRGB so hues display correctly online.
- File size is controlled so uploads stay manageable and the listing remains easy to maintain.
- The image is sharp at thumbnail view and still readable when reduced.
- The crop is consistent with the rest of the shop.
Creative checks
- The main image shows the actual product clearly and doesn't rely on a fake-looking mockup.
- At least one image shows context or use so buyers can picture the item in real life.
- At least one image shows scale so size is easier to understand.
- A detail image highlights craftsmanship if texture, finish, or materials matter.
- A packaging or what's-included image removes ambiguity about what arrives.
- The overall set feels visually related to other listings in the shop.
Save this as a launch checklist and use it for every new product. Consistency is easier to maintain than to repair.
If you handle batches, turn this checklist into a folder review process. Check dimensions in bulk, scan for colour mismatches, and confirm each listing has the core image types before you upload.
Frequently Asked Questions About Etsy Photos
What are the requirements for Etsy listing videos
Etsy allows one video per listing and the video must be 5 to 15 seconds, according to Etsy's listing image policy referenced earlier. Keep it simple. Show movement, texture, scale, or use. A short turntable-style clip or handheld demonstration usually works better than heavy editing.
How should I photograph product variations like different colours or sizes
Use the main image for the strongest representative version of the product, then dedicate secondary images to variation clarity. Group colour options in one image if they're visually similar. Show size differences side by side when scale is part of the buying decision. The key is to reduce confusion, not to create a prettier collage.
Can I use AI-generated images for my main listing photo
For the main listing image, be careful. Etsy's policy requires original photos of the actual finished product buyers will receive. That means fully AI-generated hero images, placeholder mockups, or non-realistic representations are a poor fit for the primary slot. AI is more useful for secondary visuals, concepting, or controlled lifestyle support when it doesn't misrepresent the item.
Does Etsy compress my photos after upload
Etsy may process uploaded files for display, so don't rely on the platform to rescue a weak source image. Upload clean, correctly sized, properly cropped files from the start. If your original is soft, oddly coloured, or poorly framed, compression and resizing won't improve it.
How many photos should I actually use
Use enough images to answer the buyer's obvious questions. Etsy allows up to 10 photos, and using the gallery strategically is usually better than stopping at one or two images. For most products, a compact set of clean main, context, scale, detail, and packaging images is a strong baseline.
If you're tired of editing Etsy photos one by one, MerchLoom is worth a look. It's built for sellers who need to import existing product photos, process full batches, create clean listing images, generate lifestyle scenes, reframe for marketplaces like Etsy, Amazon, and Shopify, and upscale final exports without rebuilding the same workflow every time.
Stop editing product photos one at a time
Upload your catalog or connect your store. Describe the result once. MerchLoom does the rest.
Try it free — no signup