
Ebay Listing Photo Size Specs That Sell More
Get the exact eBay listing photo size specs, formats and optimization workflow to make listings zoom-ready and consistent across your catalog.
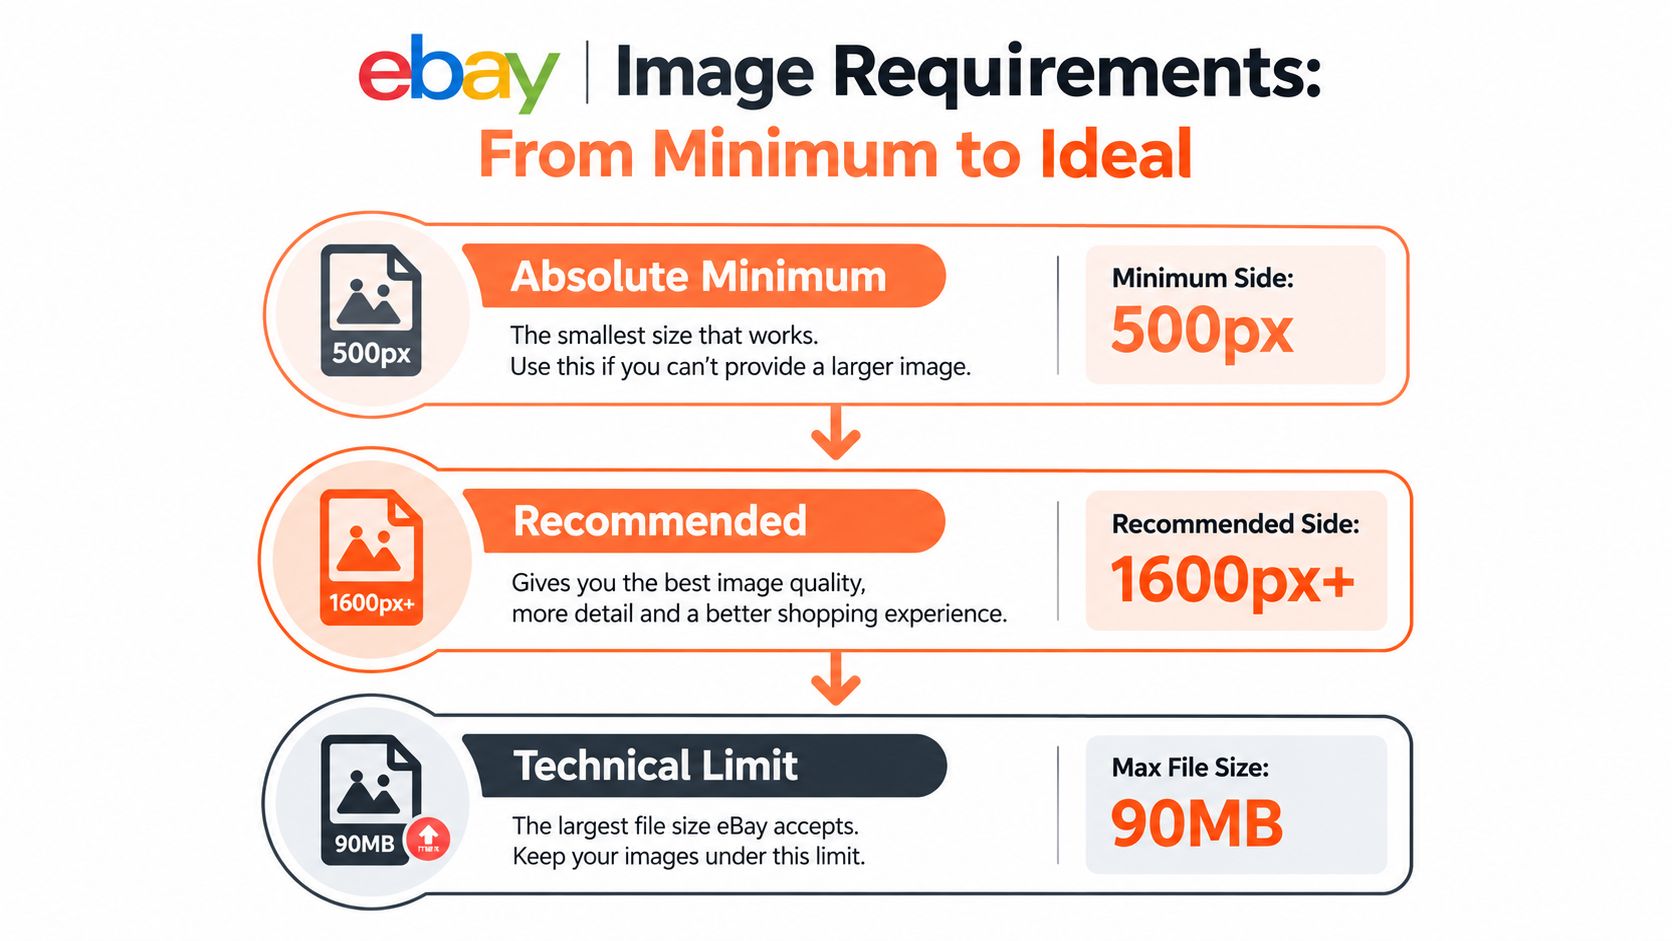
The minimum eBay listing photo size is 500 pixels on the longest side, but 1600 × 1600 pixels is the practical target for zoom-ready images. Most listings can use up to 24 images, each file is capped at 12 MB, and eBay accepts JPEG, PNG, GIF, TIFF, HEIC, and BMP files.
You're probably not preparing one photo. You're looking at a folder with hundreds of product images, mixed phone crops, old supplier files, tall fashion shots, and a few images that eBay will reject. The core task is to turn that inconsistent folder into a catalogue that looks deliberate on search pages, product galleries, and zoom views.
Introduction to eBay Listing Photo Size That Converts
A seller with hundreds of listings sees a problem during upload. One file is too small, another is a tall phone crop, and a third looks sharp in an editor but soft in the gallery. Editing one image is simple. Reworking a mixed folder across hundreds of SKUs consumes the day.
Set an export preset before building listings. For square products, 1600 × 1600 pixels gives you a consistent working canvas and leaves room for buyer zoom. Keep the 500 pixels on the longest side floor in mind when checking older or supplier-provided files, but do not build a catalogue around the minimum. The same preset should also control aspect ratio, background space, sharpening, and compression.
File size matters at batch scale. A high-resolution original can pass your visual check yet create upload friction, while aggressive compression can blur labels, stitching, or surface marks. Check the maximum file weight, supported formats, image count, and variation rules before exporting a large batch. These requirements are documented in eBay's official picture policy and developer image-media documentation, cited in detail in the next section.
Your baseline must also work across channels. Keep a clean master image, then create channel-ready copies for eBay, Amazon, Etsy, Shopify, and other marketplaces. A single crop may fill an eBay gallery well but cut off the product in another channel. Preserve the original composition so a later resize does not require another photo shoot.
Catalogue rule: Standardize source files before creating listings. Otherwise, every SKU becomes a separate image-editing project.
The Next Point Digital eBay guide also covers titles, item specifics, and shipping details. For image operations, use batch presets and review exceptions manually. The goal is a repeatable catalogue where products remain easy to inspect and files remain easy to maintain.
Understanding eBay Image Requirements and Specs
A catalogue manager may receive product photos from several suppliers, then prepare hundreds of listings for eBay and other marketplaces. The files can pass a visual check yet fail for different technical reasons. Separate the workflow into three buckets: acceptance, display quality, and upload limits. Each bucket answers a different question.
Start with acceptance
eBay requires at least one photo for a listing. That photo must be at least 500 pixels on the longest side, as stated in the eBay picture policy. A square image can meet that floor with equal width and height. A portrait image can qualify when its longest side reaches the minimum.
Use that minimum to catch old, small, or supplier-provided files. Do not use it as your catalogue production target. A file near the floor may look fine in a compact preview, then lose useful detail when a buyer enlarges it.
Set a working size for display quality
eBay recommends 1600 × 1600 pixels for image zoom. This gives buyers more room to inspect texture, condition, labels, stitching, ports, and small marks. The eBay seller-center photo tips provide the platform context for preparing listing images.
A square export is a practical catalogue standard, not a requirement for every product. It gives batches a consistent canvas and makes later channel exports easier. Leave controlled margins around each item. Handles, sleeves, shoe soles, and packaging should remain inside the frame.
Check upload limits before batch export
Pixel dimensions and file weight work together. eBay's listing guidance caps most listing images at 12 MB per file. A lightly compressed PNG can create unnecessary upload weight, while excessive compression can blur labels or surface details. For standard product photography, a carefully exported JPEG usually offers a workable balance.
Check the combined-dimension limit too. An 8000 × 8000 image reaches 16,000 pixels when its width and height are added, exceeding the 15,000-pixel constraint. An 800 × 800 image remains below it. A catalogue preset around 1600 × 1600 stays well clear of that failure point and gives browser-based resizing more predictable input.
eBay's listing tools support JPEG, PNG, GIF, TIFF, HEIC, and BMP, according to eBay's listing-tool guidance. Choose one format across a collection unless transparency or another workflow requires an exception. JPEG is the simpler default for most product-photo sets.
For context on seller workflows and listing operations, see how eBay works for sellers. A reliable process checks all three buckets before upload: acceptance, zoom-ready dimensions, and file limits.
How eBay Displays Your Photos Across Devices
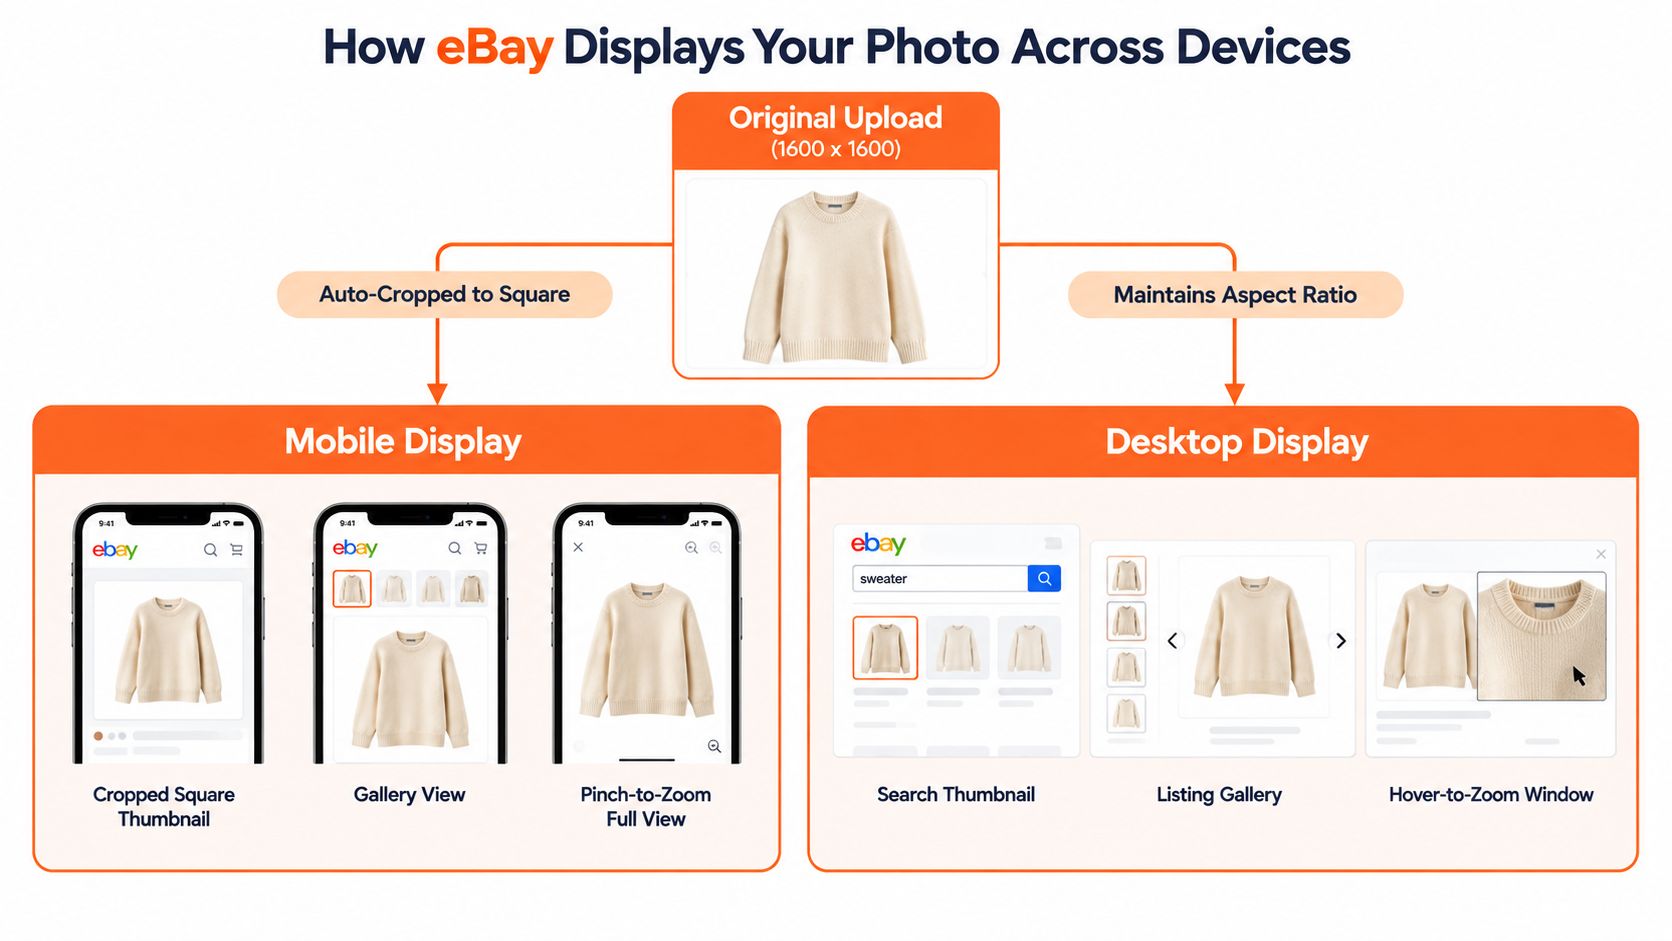
The same 1600-pixel file doesn't look identical everywhere. eBay may show it as a small search thumbnail, a gallery image, or an enlarged view. Your job is to prepare the original so the important part of the item survives each presentation.
Gallery and thumbnail behavior
A square product against a square canvas gives you predictable control. A centered coffee machine, handbag, or boxed collectible can remain fully visible in a compact thumbnail while retaining clear edges in the gallery. A tall dress photographed tightly in portrait orientation has less room to survive a constrained preview. The top or bottom may receive less attention, and the item can appear smaller beside square competitors.
That doesn't mean you should force every product into an aggressive square crop. A long coat, floor lamp, or skateboard needs its shape preserved. Instead, place the full item inside a square 1600 × 1600 canvas with controlled margins. The catalogue benefit is consistency. Buyers see similar framing from listing to listing, and you avoid rebuilding thumbnail crops after publication.
Mobile and desktop inspection
On mobile, buyers often see the main image in a compact gallery before opening it for closer inspection. On desktop, the image may sit beside the listing details and support a larger viewing area or hover interaction. The exact presentation depends on the page and device, but the source-file principle stays the same. Keep the subject sharp, centered, and large enough to identify without making the crop do the work.
Aspect ratio describes the relationship between width and height. A 1:1 image is square. A portrait image is taller than it is wide. A wide-format image is wider than it is tall. The aspect ratio definition guide is useful when your source folders contain mixed camera and supplier formats.
Don't confuse a larger original with a better listing
Uploading a file larger than eBay needs doesn't guarantee a better buyer view. The platform still processes images for display, and an oversized original can add upload time or trigger dimension failures. Extra resolution helps when your original is detailed and you need to crop carefully, but it won't restore texture that wasn't captured in the source.
Before processing a full catalogue, test one square item, one portrait item, and one horizontal item. Check the search preview, gallery framing, and enlarged detail on both mobile and desktop. If the product remains fully visible and the condition evidence stays readable, apply the same export logic to the collection.
eBay vs Amazon Etsy and Shopify Image Size Comparison
Cross-marketplace catalogues create a different problem. You don't want one master image for eBay, another for Amazon, and another for Etsy unless the platforms require different treatment. Build a high-quality master, then create channel-specific exports from that master.
eBay is flexible about background and accepts several common formats. Amazon is stricter about the main image background. Etsy puts more emphasis on the shortest side. Shopify gives store owners more control, so square catalogues are common, but the platform's maximum image dimensions still matter when you're generating exports.
| Marketplace | Minimum Dimensions | Recommended Dimensions | Background and Notes |
|---|---|---|---|
| eBay | 500 pixels on the longest side | 1600 × 1600 pixels when suitable | Use an accurate product image. Most listings allow up to 24 pictures, and files must stay within eBay's upload limits. |
| Amazon | Longest side at least 1600 pixels for zoom | 1600 pixels or more on the longest side | Main image background must be pure white, RGB 255,255,255. See the Amazon listing image size guide. |
| Etsy | 2000 pixels on the shortest side | At least 2000 pixels on the shortest side | The comparison guidance emphasizes enough resolution for the first image and flexible product presentation. |
| Shopify | Store workflow dependent | Square exports are common, up to 4472 × 4472 | Shopify gives you more control over presentation. Keep the product centred and use one consistent catalogue ratio. |
Choose a master that reduces rework
For a shared product catalogue, a master around 2000 pixels on the shortest side can accommodate Etsy's stated guidance while leaving room to create eBay's 1600 × 1600 export and an Amazon-compatible file. That isn't a requirement to upload the same file everywhere. It's a production choice that can reduce reshoots and repeated editing.
Shopify's workflow can support square images up to 4472 × 4472, so a square master is practical for many stores. Don't use that maximum just because it exists. A catalogue of huge files increases storage and processing work without automatically improving the buyer's view.
Separate visual rules from pixel rules
Amazon's pure white background requirement is a background rule, not a universal product-photo rule. Etsy's shortest-side guidance is a dimension rule, not a reason to crop every product square. eBay's 1600 × 1600 recommendation is a useful target, not a command to distort a tall product.
Doing this for a whole catalog?
MerchLoom runs background removal, upscaling and AI editing across every product photo you have — one prompt, whole batch. Try 2 batches free, no signup.
Try it freeKeep your source untouched. Store channel exports in clear folders such as ebay, amazon, etsy, and shopify. That makes it easier to revise one marketplace's background or crop without damaging the master set.
Common eBay Photo Size Mistakes to Avoid
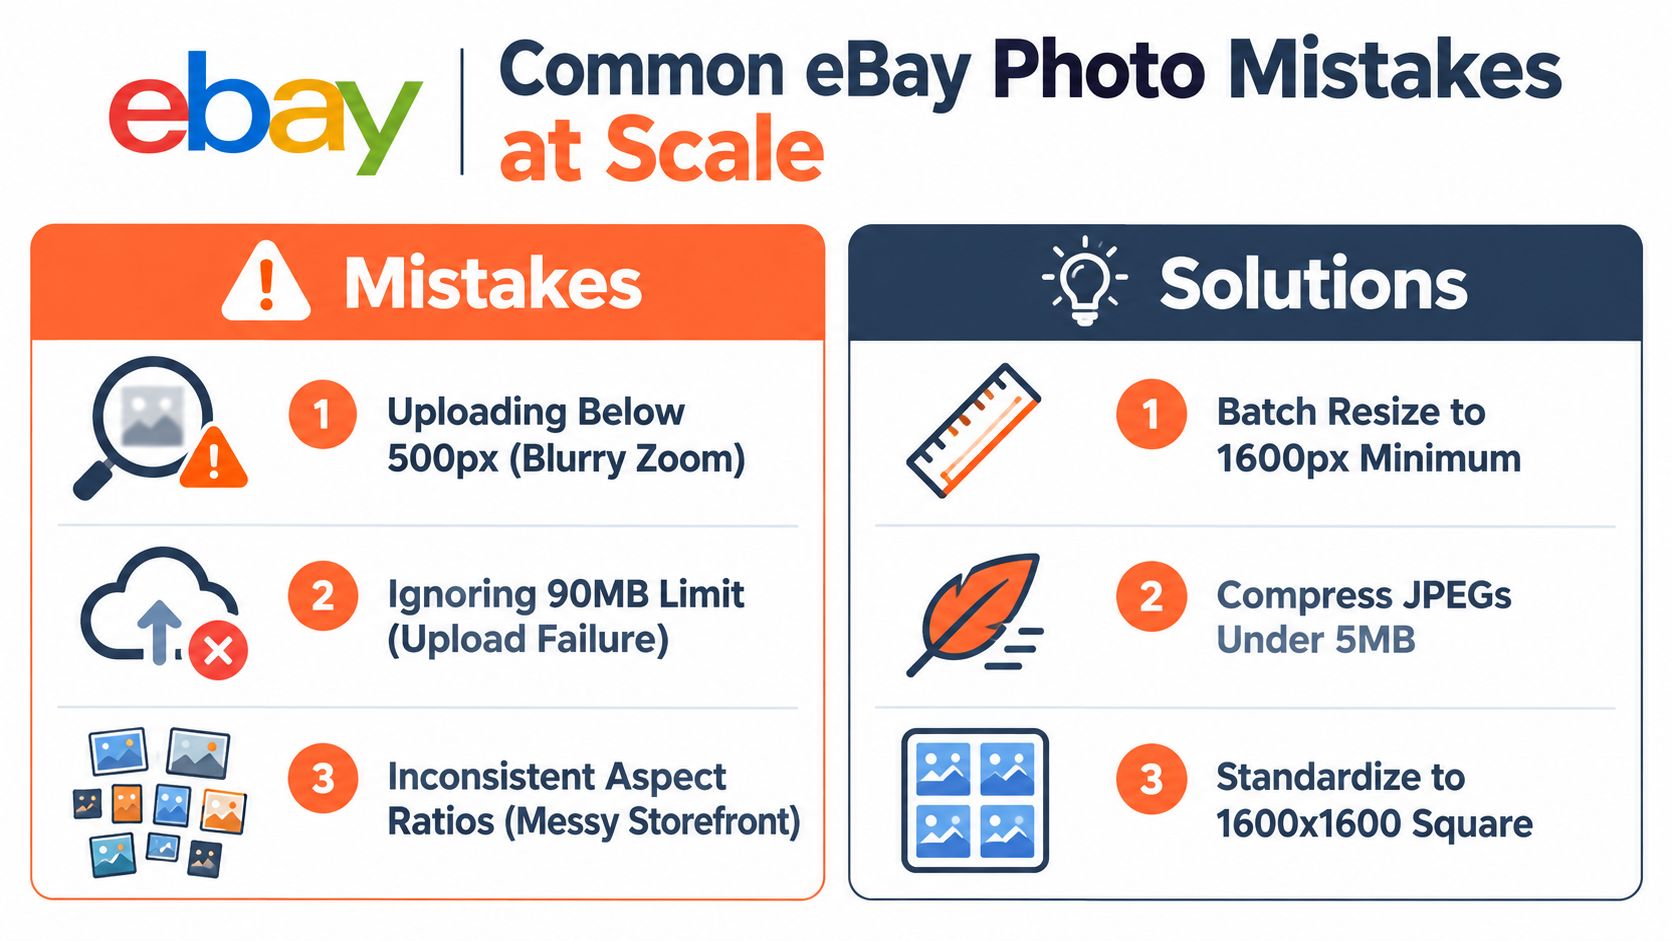
The most expensive image mistakes aren't dramatic. They're small inconsistencies repeated across hundreds of listings. One undersized file becomes a blurry zoom view. One oversized original becomes an upload failure. One supplier's portrait crop makes the storefront look disorganized beside your square product images.
Mistake one, treating 500 pixels as the goal
The 500-pixel minimum determines whether a photo can meet the basic policy threshold. It doesn't guarantee a useful inspection experience. Enlarging a small thumbnail to 1600 pixels only spreads existing pixels over a larger canvas. It won't recreate missing stitching, scratches, grain, or label detail.
If a source is small, inspect it before upscaling. Use the result for context only when it still represents the item accurately. Don't let a padded, sharpened file make a low-detail source look more precise than it is. The meaning of pixelation explains why those enlarged edges become visibly blocky.
Mistake two, ignoring both file and dimension limits
A file can fail because it's too large in megabytes or because its width and height together exceed eBay's documented dimension constraint. An 8000 × 8000 image is the clear example. Its combined dimensions reach 16,000 pixels, above the documented 15,000-pixel limit. The fix is to normalize dimensions before upload, rather than waiting for the listing tool to reject files one by one.
Mistake three, compressing until detail disappears
Compression saves space, but aggressive compression damages small text, fabric texture, reflective surfaces, and edge detail. A file can sit comfortably below the 12 MB cap and still be visually poor. Use a consistent JPEG export setting, inspect representative products at full size, and apply the same setting across the collection only after that review.
Mistake four, treating every eBay image as a listing photo
Your main gallery image, store logo, banner, and description images serve different placements. Applying the listing-photo export to all of them can produce awkward logos, oversized banners, or description images that don't fit the page.
Create separate presets for each asset type. Keep the product-gallery preset around the eBay working target, then define independent rules for branding and description content. That separation matters when a catalogue team refreshes product images but shouldn't alter the store identity assets.
Mistake five, using inconsistent crops
A catalogue with square hero images, tight portraits, and wide views may still be technically valid, but the storefront becomes harder to scan. Standardize the canvas where the product allows it. For unusual shapes, preserve the item and use controlled padding instead of cutting off important parts.
Practical test: Open a sample listing on a phone. If the item's identity, shape, and condition aren't obvious before zooming, change the crop or composition before processing the rest.
How to Optimize and Batch Resize eBay Photos at Scale
A reliable batch workflow follows the same order every time. Start with the source, normalize the canvas, choose the format, compress, inspect, and then upload. Changing the order for every product creates inconsistent output and makes errors difficult to trace.
1. Gather and sort the source photos
Create folders by SKU, product family, or listing ID. Keep the original files separate from processed exports. Mixed folders cause predictable catalogue errors, such as attaching the wrong colourway to a variation or using a detail photo as the main image.
Flag small originals before processing. Don't upscale everything automatically. A clean, large source can be resized down safely. A tiny or blurry source needs human judgement.
2. Normalize the canvas
For products that suit the format, resize and place the item on a 1600 × 1600 pixel canvas. Preserve the subject's proportions. Add controlled margins rather than stretching the product to fill every edge.
For tall or wide products, use a square canvas with enough padding to show the complete item. If a square export would hide important information, keep the original ratio for supporting images and check the live preview manually.
3. Select the file format
Use JPEG for most photographic product images. Use PNG when you need its specific image characteristics, such as a graphic or transparency workflow. eBay's accepted listing formats include JPEG, PNG, GIF, TIFF, HEIC, and BMP, but one consistent default is easier to manage across a large catalogue.
4. Compress after resizing
Resize first, then compress. There's no value in preserving a massive source file only to shrink it later. Keep each eBay file at or below 12 MB, and inspect close-ups of fine detail after export. A smaller internal target can make bulk uploading easier, but don't apply an unverified compression setting just to chase a file-size number.
5. Review before publication
Check the first image, one detail image, and one condition image from each product family. Compare the export with the original. Look for colour shifts, missing accessories, clipped edges, and text that became unreadable.
MerchLoom can run this kind of chained AI pipeline across a whole collection instead of processing one image at a time. You can try the first images with no account, and it uses pay-per-image credits that never expire. AI output still needs human review, and this kind of workflow isn't a full Photoshop replacement. It's a way to repeat background cleanup, reframing, resizing, and related image steps consistently across a batch.
A broader discussion of batch workflows for social media creators also illustrates the operational value of applying repeatable image steps to groups of files rather than opening every image separately.
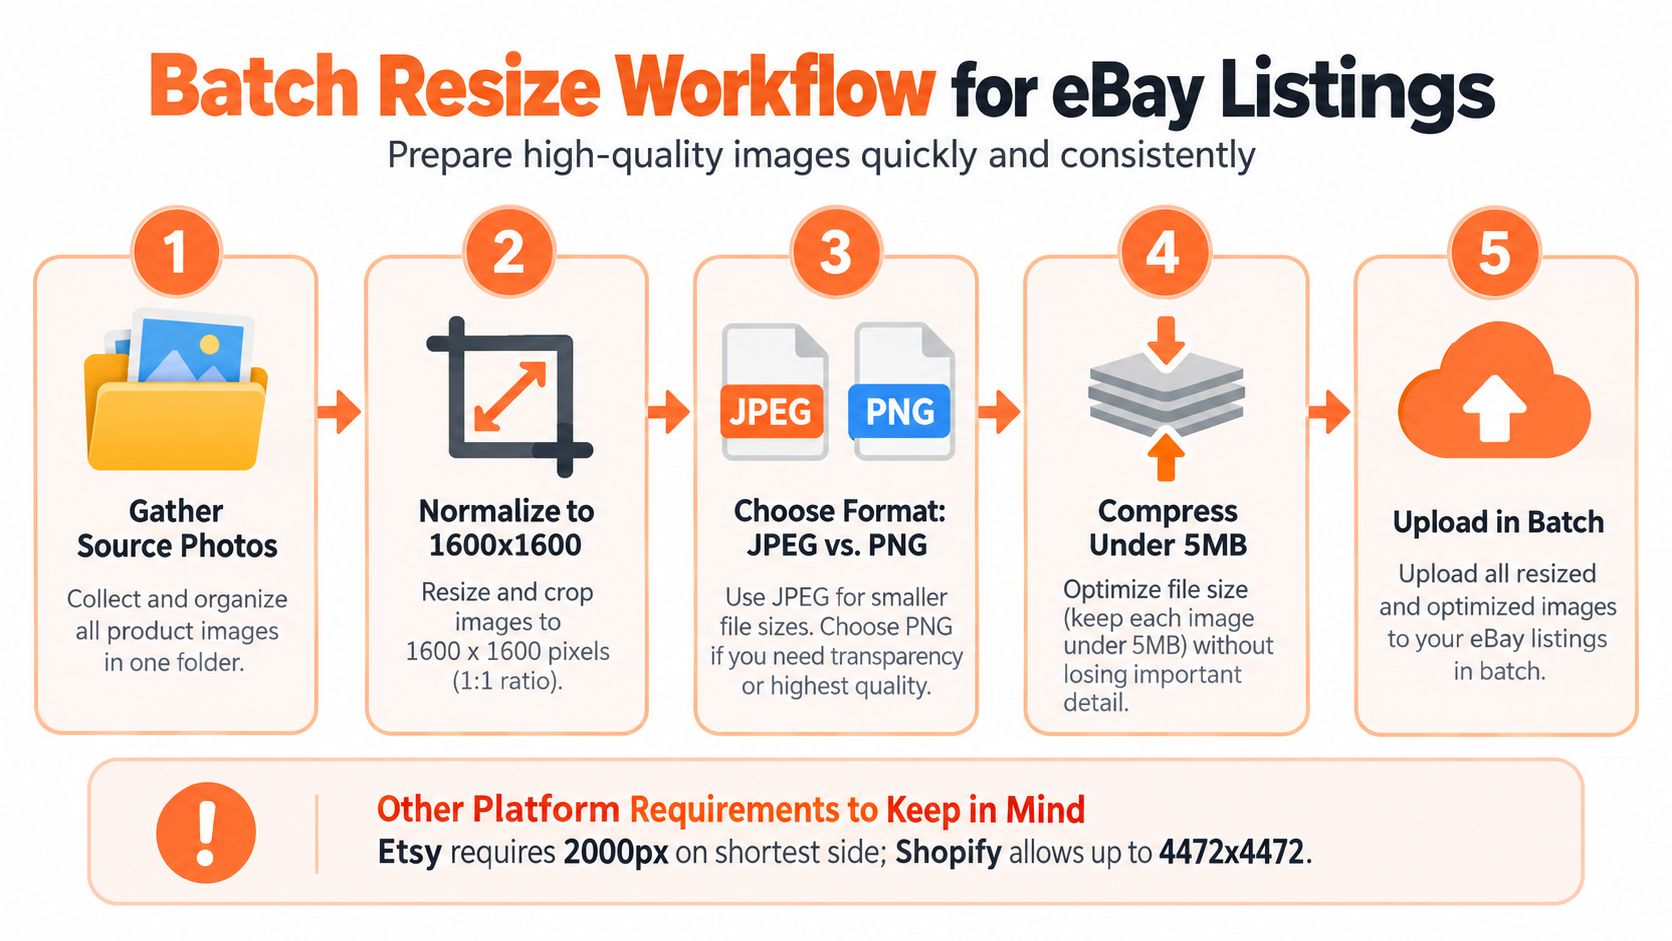
Use the bulk resize product images for ecommerce workflow when you need to apply one approved specification across product folders, then review exceptions manually.
Final Checklist for Perfect eBay Listing Photos
Run this checklist before you upload a catalogue batch:
- Canvas: Use 1600 × 1600 pixels for products that suit a square presentation. Preserve the original ratio when a square crop would hide important details.
- Minimum: Confirm that every listing has at least one image meeting eBay's 500-pixel longest-side minimum.
- Format: Use JPEG as the normal photo export, or another format accepted by eBay when the image requires it.
- File weight: Keep every image at or below 12 MB per file.
- Dimensions: Avoid oversized originals that could exceed eBay's combined height-and-width constraint.
- Gallery planning: Use the available image slots to answer buyer questions, including angles, labels, included parts, and actual condition evidence.
- Consistency: Apply the same crop, margin, background treatment, and export settings across each product family.
- Review: Open a test listing on mobile and desktop. Check the search thumbnail, gallery image, and zoom view before uploading the full batch.
MerchLoom can automate the repeated parts of this checklist across a collection through chained AI pipelines. It charges per image, and its credits never expire, but you should still approve the final files before publication.
Standardize one representative product from each category first. Once the dimensions, crop, format, and compression hold up on both devices, apply the preset to the rest of the catalogue and inspect the exceptions instead of editing every file from scratch.
Visit MerchLoom to run chained image workflows across your eBay catalogue, including resizing, reframing, background cleanup, and resolution preparation. Try the first images without an account, then use pay-per-image credits that never expire to process the rest while keeping human review in the publishing step.
Stop editing product photos one at a time
Upload your catalog or connect your store. Describe the result once. MerchLoom does the rest.
Try it free — no signup