
E Commerce Product Photography That Converts
Master e commerce product photography with batch-ready techniques, lighting, composition, marketplace specs, and AI workflows for consistent catalog images.
You've got a folder full of product photos, a spreadsheet of SKUs, and listings waiting on Amazon, Etsy, Shopify, eBay, or Poshmark. The first few images look fine. Then the crop shifts, white balance changes, filenames stop matching products, and you're editing the same background problem again and again.
Treat e commerce product photography as catalogue production, not a one-off creative task. Lock the shooting setup first, prepare clean master files, define platform exports, and run the same treatment across the collection. This guide gives you a repeatable pipeline that turns raw shoots into marketplace-ready images in one batch run.
What E Commerce Product Photography Really Means at Scale
A catalogue operator doesn't need one perfect hero image. They need 200 to 2,000 SKUs prepared this week, with every file attached to the correct product and every listing looking like it belongs to the same store. That changes the job completely.
E commerce product photography at scale is a production system. Each frame must meet platform rules, retain accurate color, use a predictable crop, and survive batch processing without manual repair. A product image can look attractive and still fail operationally if the filename is wrong, the item sits too close to the edge, or the background changes from one listing to the next.
The practical target is consistency across the full set:
- Fixed table position: Put the sweep and product mark in the same place for every item.
- Locked camera height: Keep the camera on a tripod. Don't adjust it between small and large products unless you record a separate setup.
- Identical white balance: Set it manually. Auto white balance can shift between frames and make a single collection look mismatched.
- Sequential naming: Use the SKU, color, angle, and variant in every filename.
- Uniform export size: Create channel-specific files from the same high-resolution master.
That structure matters because image quality has become a measurable commerce lever. A 2026 product photography statistics roundup reports that 75% of online shoppers rely on product photos when making purchasing decisions. The same source says high-resolution photos can convert 94% better than low-resolution images, while 360-degree product images can lift brand conversion rates by 22%. Those figures explain why inconsistent thumbnails and weak zoom views deserve operational attention, not just aesthetic criticism.
Catalogue rule: If a change can't be repeated across every SKU, it isn't part of the default workflow. Put it in an optional lifestyle or campaign pass.
Write the standards down before shooting. A short guide covering camera position, background, crop, color, filename structure, and export dimensions prevents individual decisions from spreading through the collection. This practical guide to product photography is useful when you're defining that baseline.
The Four Non-Negotiable Image Specs Every Listing Needs
Creative choices come after the technical floor. Every master needs a controlled background, framing, resolution, and file format before you add lifestyle scenes or promotional treatments.
Amazon's main image is the strictest common reference point. It needs a pure white background, RGB 255,255,255, with no props, logos, text, borders, or watermarks. Amazon's own guidance accepts JPEG, TIFF, PNG, and non-animated GIF files, with the longest side between 500 and 10,000 pixels. Its published product photo guidance also stresses the trade-off between file size, load speed, image quality, and zoom usability.
Etsy needs a different export decision. Images should be at least 2,000 pixels on the shortest side, while 2,000 × 2,000 px and 2,700 × 2,025 px are commonly cited recommendations in Etsy thumbnail guidance. Shopify commonly uses square product images and supports files up to 4,472 × 4,472 pixels, with 2,048 × 2,048 px often used as a practical target, as described in Shopify product image guidance.
Use one master and several controlled exports
Don't export a single generic JPEG and upload it everywhere. Keep a high-resolution master, then produce platform versions from that file. Amazon may need a white-background primary image, Etsy may benefit from a consistent square or near-square presentation, and Shopify may need a square collection-grid asset.
| Spec | Required value | Common mistake |
|---|---|---|
| Background | Amazon main image uses pure white RGB 255,255,255. Etsy can use a clean neutral background. Shopify can use a transparent PNG when the design needs it. | Removing the background but leaving gray edges, color spill, or a visible sweep line. |
| Framing | Keep the product centered with a repeatable safe zone. Amazon guidance requires the product to fill most of the frame, while marketplace crops must leave enough margin for thumbnails. | Cropping each SKU by eye, which makes products jump across collection grids. |
| Resolution | Retain a high-resolution master. Amazon accepts 500 to 10,000 px on the longest side, Etsy asks for at least 2,000 px on the shortest side, and Shopify supports up to 4,472 × 4,472 px. | Enlarging a small JPEG after editing and expecting usable detail. |
| File format | Use JPEG for standard opaque marketplace images. Use PNG when transparency is required. Keep the color workflow in sRGB and check embedded profiles. | Mixing color profiles or using PNG for every file, creating unnecessary file weight. |
For web delivery, pixel dimensions matter more than a printed-page DPI label. Keep the master at its full pixel dimensions, convert to sRGB, and compress the channel export only after the crop and retouching are approved. This prevents a later resize from forcing you to repeat the entire edit.
Lighting, Composition, and Camera Settings That Hold Up Across a Catalog
A catalogue setup should look slightly boring. That's a strength. The same light direction, camera position, and product placement make batch correction possible.
Start with a 45-degree two-light setup. Use one diffused key light and one fill light at half power. Mark the stands and table position so the shadow direction doesn't change between product groups. A single moved light can produce different edge highlights on glass, metal, glossy packaging, and black textiles.
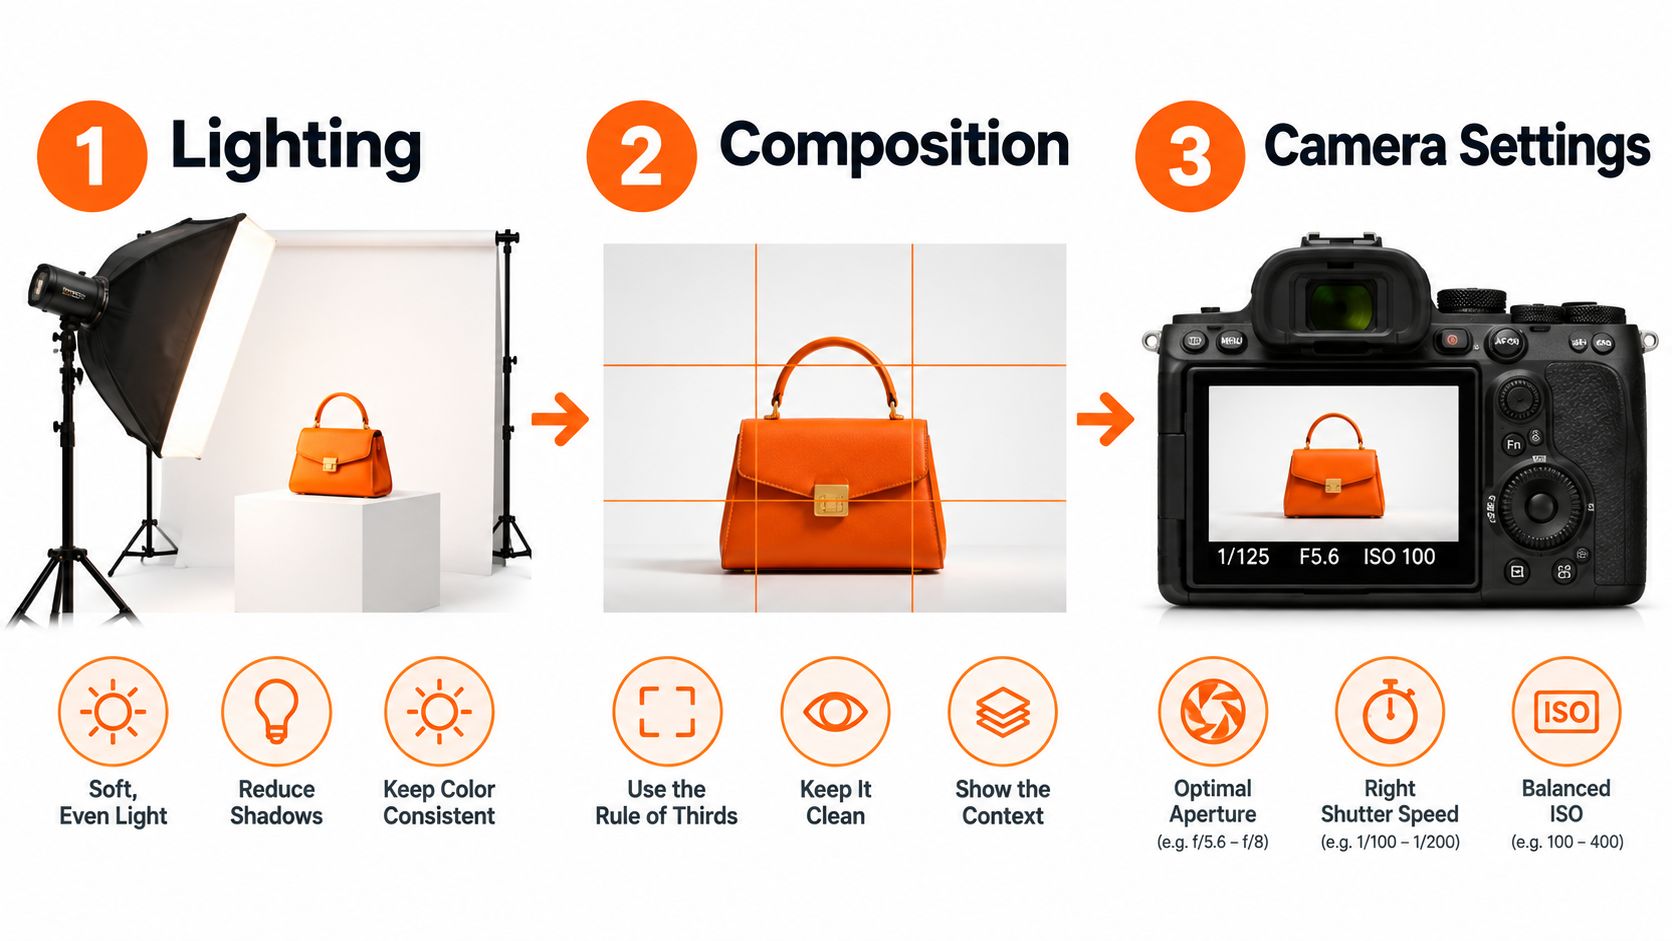
Set white balance manually at 5,500 K and photograph a gray card on the first frame. Lock that setting for the batch. Auto white balance may correct each item differently, which creates avoidable color work when you're processing a large collection.
Lock the camera before the first SKU
Use f/8, 1/125 second, and ISO 100 as a controlled starting point for a tabletop setup. Put the camera on a fixed tripod 24 inches from the table, then mark the table edge with tape. These settings aren't universal for every product, but they give you a repeatable baseline that you can test before committing to the full shoot.
Frame the product dead-center with 10% breathing room. Use a square crop for the standard catalogue frame, and keep the camera axis perpendicular to the product surface. This matters for boxes, books, framed goods, and tall packaging because a tilted camera introduces keystone distortion that becomes obvious when multiple listings sit side by side.
For a small workspace, review these budget-friendly video lighting setups for ideas on diffusers, positioning, and controlled illumination. The same principles apply to still product images, but avoid changing the arrangement between batches.
Here's the video reference for the setup:
Use product photography lighting guidance when documenting the setup for future shoots. Photograph a reference item at the start of each session, then compare the first and last frame before processing the full set. If the reference product has moved, changed color, or picked up a harder shadow, stop and correct the setup before creating more files.
Marketplace Image Specs Side by Side
A single master file can support several marketplaces, but the export decision changes by channel. Keep one high-resolution source, then generate controlled derivatives instead of resizing files manually for each listing.
The practical question is which channels can share an export. Etsy's 2,000 pixels on the shortest side requirement means a square 2,000 × 2,000 file can meet Etsy's minimum and fit Shopify's common square workflow. Amazon still needs a separate main-image treatment with a pure white RGB 255,255,255 background. This lets a catalog team maintain one shared square derivative for Etsy and Shopify, plus an Amazon-specific variant, rather than three unrelated files.
Use the table as an export framework, not as a replacement for each destination's current rules. Store the crop, background, and format instructions in the batch template so an AI workflow applies the same decision across hundreds of product images.
| Platform | Min pixels | Recommended pixels | Aspect ratio | File format | Background rule |
|---|---|---|---|---|---|
| Amazon | 500 px on the longest side accepted | Retain a high-resolution master within Amazon's 10,000 px longest-side limit | Square is practical for a standard catalogue set | JPEG, TIFF, PNG, or non-animated GIF | Main image requires pure white RGB 255,255,255 |
| Etsy | 2,000 px on the shortest side | 2,000 × 2,000 px or 2,700 × 2,025 px are commonly cited targets | Square or a fixed 4:3 crop | JPG or PNG | No pure-white requirement, but a clean background keeps listings consistent |
| Shopify | No universal minimum stated here | 2,048 × 2,048 px is a practical target, with support up to 4,472 × 4,472 px | Square 1:1 is common | JPG or PNG, with theme support varying | No platform-wide background rule |
| eBay | Use the current listing specification for the exact minimum | Create a channel export from the same high-resolution master | Match the listing template and keep the crop consistent | Use the formats accepted by the listing workflow | Follow the listing type's current image rules |
| Poshmark | Use the current listing specification for the exact minimum | Create a consistent portrait or 4:3 export based on your catalogue template | Use one orientation across the collection | Use the format accepted by the listing workflow | Keep the background clean and repeatable |
At catalog scale, consistency matters as much as resolution. Keep master dimensions stable, map each channel to a named export preset, and review a sample from every batch before publishing. Use Amazon listing image size guidance to document the Amazon variant separately from the shared store export.
Batch Prep Before You Touch AI
Doing this for a whole catalog?
MerchLoom runs background removal, upscaling and AI editing across every product photo you have — one prompt, whole batch. Try 2 batches free, no signup.
Try it freeAutomation won't fix disorganized inputs. If the filename doesn't identify the product, or if every item was shot under a different light, the processing stage just produces a larger set of inconsistent files.
Use a strict naming pattern such as:
SKU_color_angle_variant.jpg
For example, JKT204_black_front_main.jpg tells you more than IMG_4382.jpg. Keep the same vocabulary for angles, colors, and variants. Don't alternate between front, front-view, and main unless your downstream system knows they mean the same thing.
Stage each SKU on the same sweep-white tabletop. Tape corner markers onto the backdrop so its position stays fixed. Put a ruler in the first frame of each batch to verify scale, especially when you switch from small accessories to larger products. A shot list should identify the required front, back, detail, interior, and lifestyle frames before the camera starts.

Correct color before the pipeline
Run one ColorChecker pass whenever the lighting changes. Build a correction preset in Lightroom or Capture One, then apply it across the matching batch. Don't correct each item independently unless the product itself requires a documented exception.
Export 16-bit TIFF masters at the highest target resolution. Keep these files before JPEG compression, sharpening, or marketplace cropping. If you later change the background, generate a new channel export from the corrected master instead of trying to recover color from a compressed listing file.
A digital asset library also helps when your catalogue includes source photography, 3D renders, and alternate campaign versions. If you need a separate system to organize 3D files with Sculpty, use the same SKU vocabulary there as in your photo folders.
Your preparation checklist should include:
- File identity: Confirm every filename maps to one SKU and one angle.
- Physical staging: Keep the table, sweep, camera, and product markers fixed.
- Color reference: Capture a ColorChecker frame after every lighting change.
- Master creation: Store corrected 16-bit TIFFs before final compression.
- Batch grouping: Separate products by setup, material, and lighting condition.
The batch processing workflow overview is useful for deciding which files belong in the same run. Grouping matters because a single correction preset should apply to images made under the same conditions, not to an entire folder assembled without regard to lighting.
Running AI Batch Workflows Across a Whole Catalog
Once the masters are corrected, use AI for repeatable treatments rather than unpredictable cosmetic changes. A useful catalogue pipeline has three passes.
Pass one removes the background. Create a clean cutout and place it on pure white for Amazon's main image when required. Inspect difficult edges, including hair, transparent packaging, reflective metal, knitted fabric, and pale products against white. Background removal is not finished when the outside looks clean. Check for halos, missing handles, clipped corners, and shadows that were removed along with the product.
Pass two reframes the subject. Center each item inside the same safe zone and apply the same crop logic. The goal isn't to make every product occupy identical physical space. The goal is to make every frame follow the same visual rule, so a shopper moving through a grid doesn't see one product pressed against the top edge and the next floating near the bottom.
Pass three creates optional lifestyle scenes. Composite the approved cutout into templated room, shelf, wardrobe, or usage backplates. Keep this separate from the compliance image set. A lifestyle image can communicate context, but it shouldn't replace the clean view that proves what the customer will receive.
Chain the passes, then review exceptions
Run the passes across the full batch instead of opening each image individually. Consistent lighting direction, shadow weight, crop offset, and background treatment are much easier to maintain when the same workflow handles every file.
MerchLoom runs these steps as chained batch jobs and charges per image processed rather than through a flat subscription. You can try the first images with no account, and its credits never expire. It's still an AI workflow, not a full Photoshop replacement, so review cutouts and generated scenes before they reach a listing.
For customer-facing proof or social content, a separate workflow can highlight reviews with AI, but keep that task separate from the product-image pipeline. Mixing review graphics with catalogue masters makes file tracking harder and creates the risk of uploading a promotional asset where a compliant product view belongs.
Use AI batch image editing guidance to define the order of operations. Background removal, reframing, resizing, and scene generation should each have a clear input and output folder. That way, a failed scene generation doesn't force you to repeat the clean cutout and marketplace crop.
Putting It All Together and Reviewing the Output
The complete workflow is straightforward once each stage has a defined handoff:
- Stage products: Place every item on the marked sweep table and verify the shot list.
- Shoot tethered: Keep the camera, lights, white balance, exposure, and product position controlled.
- Ingest RAW files: Rename them using the SKU, color, angle, and variant pattern.
- Apply the four specs: Correct color, remove distractions, set the crop, and retain the high-resolution master.
- Run the batch workflow: Remove backgrounds, reframe subjects, and create optional lifestyle versions.
- Export per marketplace: Generate the dimensions, format, color space, and background required for each channel.
- Review before publishing: Check a sample from every product group and inspect every exception.
The failures change as the catalogue grows. Mixed lighting creates color drift. Poor background removal leaves edge halos around reflective or fuzzy products. Inconsistent margins break the rhythm of collection grids. Wrong filenames attach the right image to the wrong listing, which is a catalogue error rather than a visual one.

Use a short approval rubric
Review the output in groups, not randomly. Compare products shot under the same setup side by side, then check the first and last file in each batch for drift.
Review rule: Approve the workflow only after the weakest edge, crop, and color example passes. A process that works on the easy products isn't ready for the full catalogue.
Your final pre-publish checklist should confirm:
- Resolution: The export meets the destination's pixel requirement.
- Marketplace dimensions: The crop and aspect ratio match the channel template.
- Color profile: The file is in sRGB and doesn't show an unexpected profile conversion.
- Background: Amazon main images use pure white RGB 255,255,255 where required.
- Product accuracy: The item, variant, color, and angle match the filename and listing.
- Edge quality: No halos, clipped details, missing parts, or artificial shadows.
- Alt text: Describe the actual product and its useful visible features.
- File weight: Compress the final export without damaging zoom detail or texture.
MerchLoom's pay-per-image credit model lets you process the images you need instead of committing to a subscription, and credits don't expire. Treat approval as part of the workflow, not an optional final glance. The batch can save time, but a human still needs to catch inaccurate product details and AI-generated artifacts.
MerchLoom lets you import product photos from your existing storage or commerce workflow, chain background removal, reframing, color correction, resizing, and lifestyle generation across a whole collection, then review the results before publishing. Try your first images without an account and visit MerchLoom to prepare your next catalogue batch with pay-per-image credits that never expire.
Stop editing product photos one at a time
Upload your catalog or connect your store. Describe the result once. MerchLoom does the rest.
Try it free — no signup