
Camera Product Photography for E-Commerce Catalogs
Master camera product photography at catalog scale. Learn gear choices, lighting setups, camera settings, and AI batch workflows
You've finished photographing a few products, then the workload appears. The camera files need consistent crops, clean backgrounds, correct color, marketplace exports, and names that still make sense after several hundred uploads. A setup that works for one hero image can become a bottleneck across a full catalog.
Start by fixing the shooting position before you adjust the camera. Mark the tripod legs, product position, and light stands with tape. Use one master framing for the product category, then build every later decision around a simple question: can this be repeated across the entire catalog without guesswork?
Why Catalog Scale Changes Everything About Product Photography
Shooting one item for a social post gives you room to improvise. Shooting two hundred products for an online store demands a production system. A creative setup may produce one impressive frame, but it can fail when products arrive in different sizes, materials, colors, and packaging formats.
The commercial importance is clear. 75% of online shoppers say they rely on product photos when making purchase decisions, and 9 out of 10 consider high-quality photos one of the most important buying factors, according to industry product photography statistics. The same source reports that high-resolution product images can produce a 94% higher conversion rate than low-resolution photos. Treat those figures as a reason to protect image quality from capture through export, not as permission to chase one perfect photograph.
Catalog photography has four priorities:
- Consistency: Products should share the same camera height, scale, background treatment, and color balance.
- Repeatability: A new SKU should fit the established workflow without forcing you to redesign the set.
- Inspection: Buyers need enough views to understand shape, texture, scale, and packaging.
- Throughput: Every manual step multiplied across hundreds of files becomes a serious operating cost.
A clean system also helps shoppers compare products. For example, a furniture catalog needs stable camera height and perspective so buyers can compare sofa proportions rather than compare different photographic angles. If you're evaluating how large furniture categories are presented, you can browse Lott's Furniture sofas to see why consistent product context matters for larger items.
Production rule: Don't optimize the first image. Optimize the process that produces the next five hundred.
Create a short visual standard before you shoot. Define the lens, camera distance, product placement, background, lighting direction, white balance, file naming pattern, and export dimensions. Keep that standard with the catalog, not in your memory. A practical overview of the broader discipline is available in what product photography involves, but the working principle is simple: every decision must survive repetition.
Camera and Lens Choices for Repeatable Results
A camera doesn't need to be expensive to produce usable catalog images. It needs manual controls, dependable autofocus, a stable mount, and a lens that lets you keep the same perspective from one SKU to the next.
A mid-range mirrorless camera is usually the most practical workhorse. It gives you RAW capture, a clear live view, interchangeable lenses, and enough control for different product sizes. An entry mirrorless body can work when the catalog is small or the products are forgiving. A full-frame body makes more sense when you need greater control over depth of field, low-light performance, or large physical products, but it won't fix poor lighting or inconsistent placement.
The lens choice affects production more than many sellers expect. A 50mm prime is useful for general tabletop products and forces a stable working distance. An 85mm prime gives a more compressed perspective for apparel, accessories, and medium-sized goods. A 100mm macro lens is appropriate for jewelry, watches, small electronics, and detailed surfaces. For furniture, a wider lens may be necessary, but avoid going so wide that edges visibly stretch.
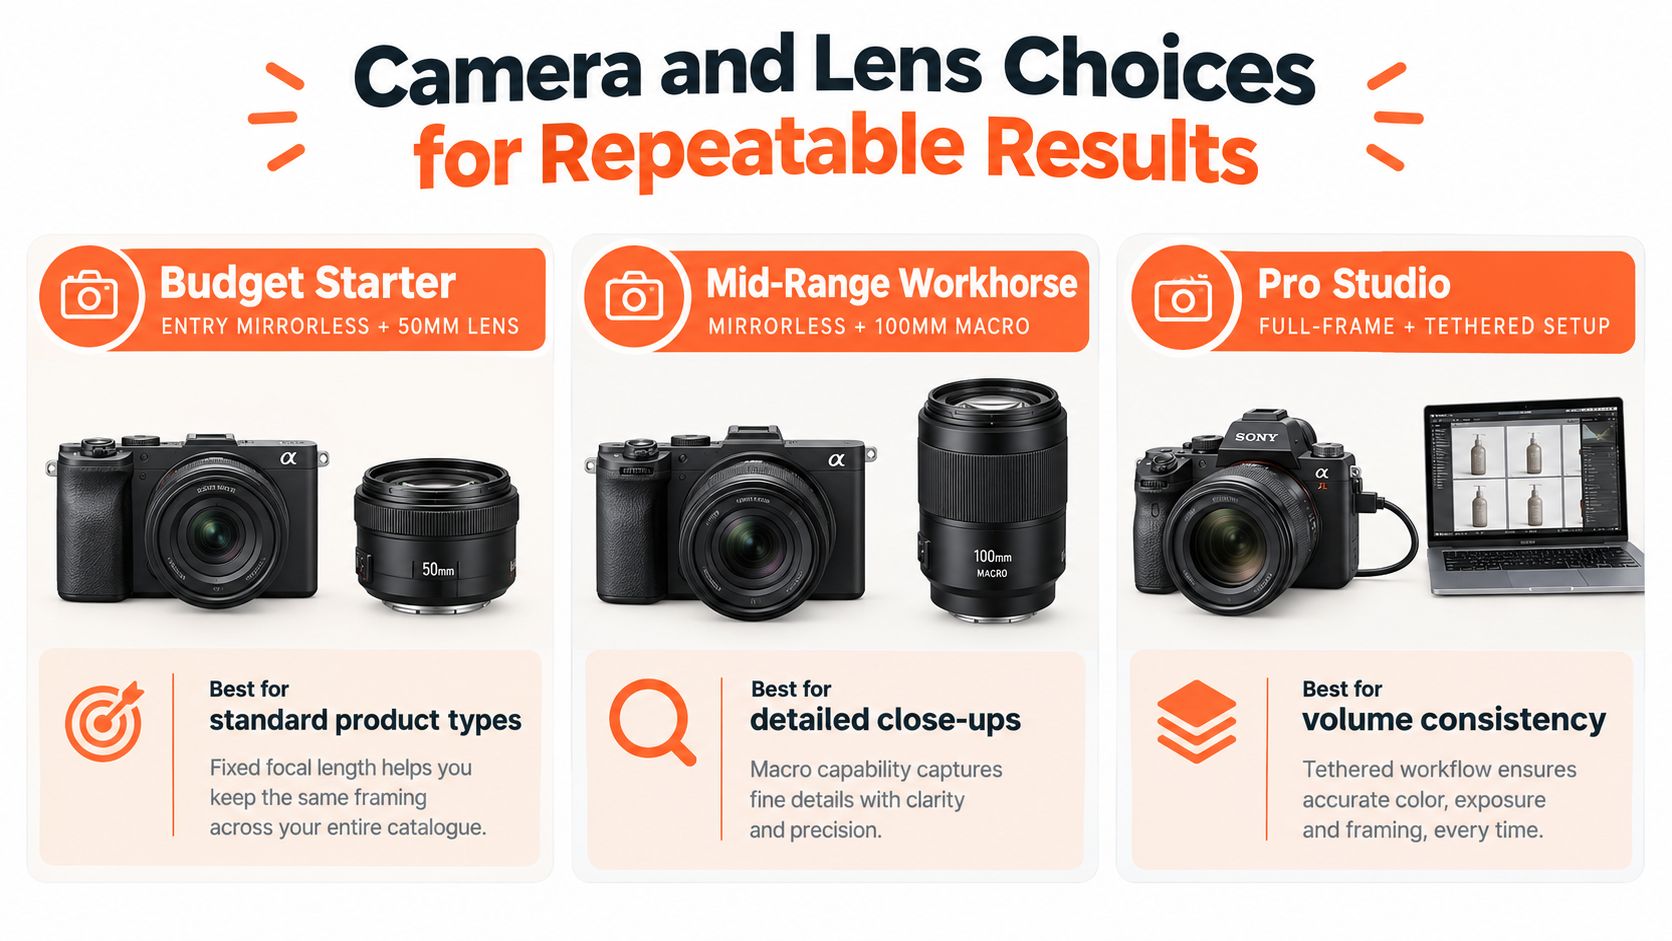
Choose the setup by workload
| Setup | Practical choice | Best fit | Trade-off |
|---|---|---|---|
| Budget starter | Entry mirrorless with a 50mm lens | Small accessories, home goods, simple apparel | Less flexibility for difficult materials and very large products |
| Mid-range workhorse | Mirrorless body with a 100mm macro lens | Detail-heavy products, cosmetics, jewelry, electronics | The working distance can be restrictive in a small room |
| Professional studio | Full-frame body with tethered capture | Large catalogs, controlled studio production, demanding materials | Higher cost and more setup discipline |
Megapixel count matters less than clean exposure, dynamic range, and sharp focus. A very large file that's soft or badly lit won't help a marketplace listing. Tethering support matters because it lets you inspect focus, glare, dust, and framing on a larger screen while the set is still assembled. Focus bracketing can help with deep products, but it adds a processing step and needs a consistent merge workflow.
A fixed prime lens often beats an expensive zoom for catalog consistency. A zoom is convenient, especially for furniture, but the framing can drift from one session to another. If you use one, mark the focal length and camera position. The camera product photography viewing guide can support planning, but the main equipment decision is operational: select the smallest setup that gives you reliable focus and repeatable perspective.
Lighting Setups You Can Lock In and Repeat
Soft, controlled light is more useful than dramatic light for most catalog images. Buyers need to see the product clearly, and marketplaces need files that remain consistent across a listing sequence. High contrast may suit an advertisement, but it creates more retouching work when repeated across an entire collection.
Natural light is the lowest-cost starting point, but it must be controlled. Place the shooting table beside a window that receives indirect light. Hang diffusion material between the window and the product. A white foam board opposite the window fills the darker side. Mark the table, board, and camera positions, then shoot during a stable part of the day. If the sunlight changes sharply, the setup will drift.
A continuous LED setup is better for high-volume work. Use one large diffused panel as the key light, positioned to one side and slightly forward of the product. Place a white reflector on the opposite side. Keep the light power and color temperature fixed for the session. Do not switch between daylight and mixed household lighting. The repeatable product photography lighting workflow is built around the same principle, fixed conditions first, adjustments only when the product requires them.
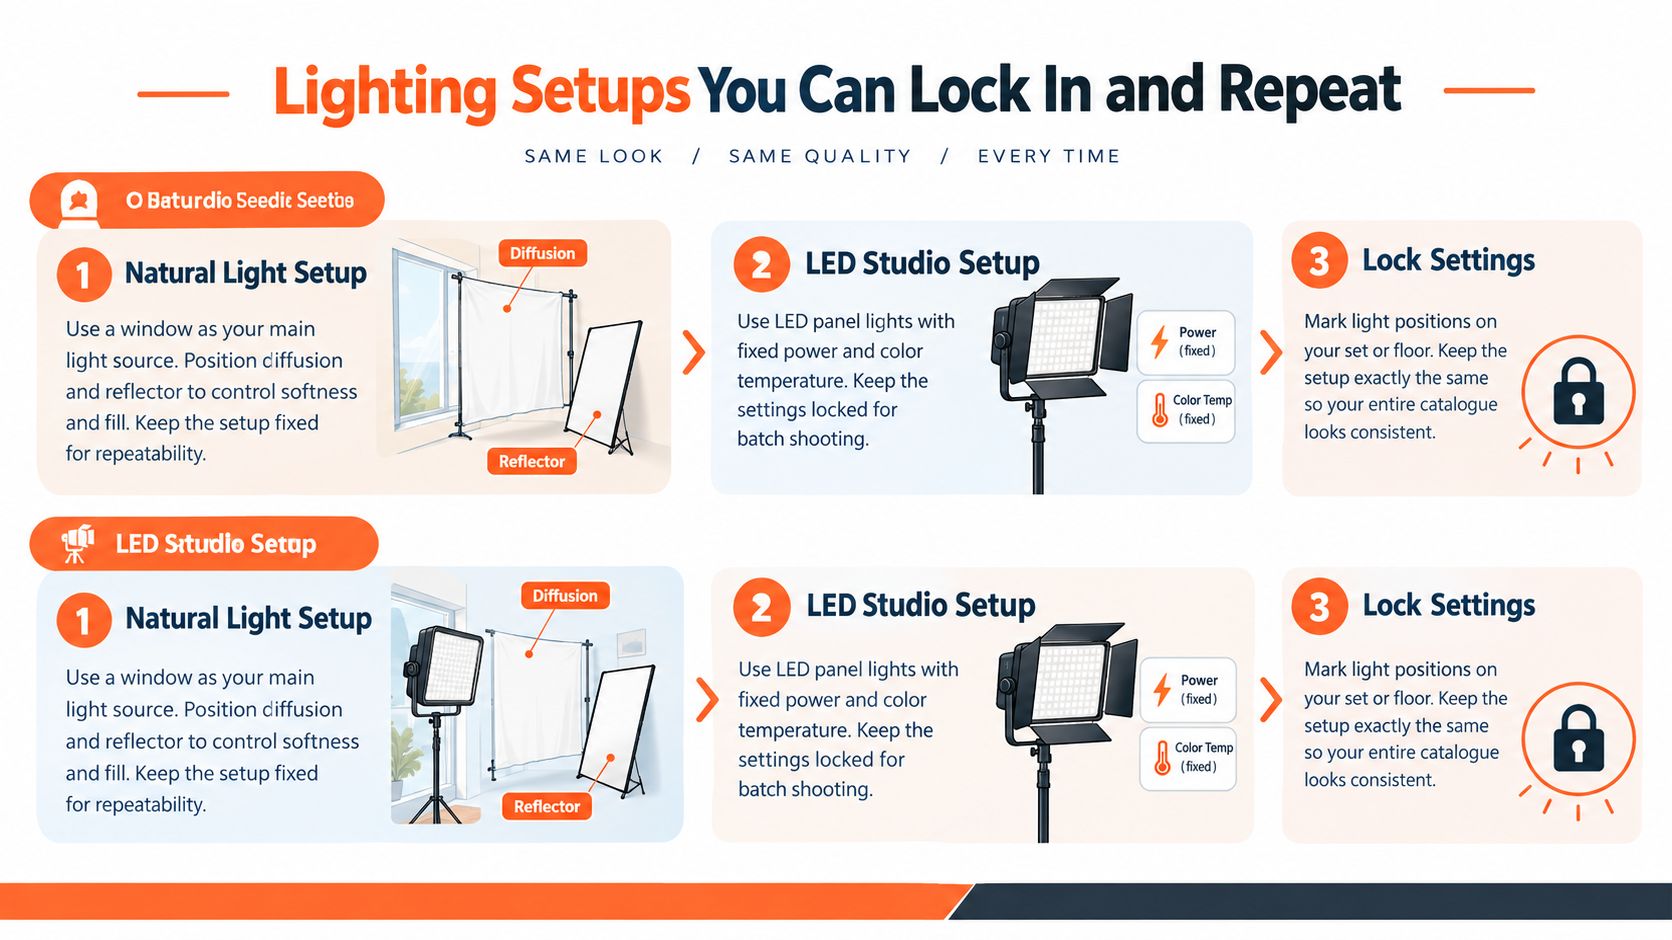
Lock the physical arrangement
Use tape to mark:
- Camera feet: Keep height, distance, and angle stable.
- Product center: Place the same category in the same zone of the sweep.
- Light stands: Record their distance and height.
- Reflectors: Mark the bottom edge and angle.
- Background sweep: Keep the visible curve and horizon treatment consistent.
Reflective products need a different approach. Glass and metal reflect the entire room, not just the lamp. Move large white cards close to the product to create clean reflections, and use black cards only where you need a controlled dark edge. Diffusion softens hotspots. Direct flash usually creates a bright spot that must be repaired in every image.
Fix problems before they multiply
Uneven shadows usually mean the fill side is too weak or too far away. Move the white reflector closer before increasing light power.
Color shifts come from mixed light sources or changing white balance. Turn off nearby room lights, set a fixed white balance, and photograph a gray card at the start of each session.
Harsh highlights appear when a small source points directly at a shiny surface. Increase the apparent size of the light with diffusion and bring white cards into the product's reflections.
Use controlled lighting for hero images and functional detail views. Lifestyle scenes can be warmer, but keep the product color accurate and maintain a clear relationship between the product and its environment.
Camera Settings for Different Product Types
Start with manual exposure. Automatic modes may change brightness between a white product and a black product, which creates visible inconsistency across a category page. Put the camera on a tripod, use a remote trigger or tethered capture, and keep the settings fixed until the lighting or product category changes.
These are starting points, not universal rules. Adjust shutter speed to match the light and tripod stability, but keep ISO low whenever the product and setup allow it.
Doing this for a whole catalog?
MerchLoom runs background removal, upscaling and AI editing across every product photo you have — one prompt, whole batch.
Try MerchLoomStarting Camera Settings by Product Type
| Product Type | Aperture | ISO | Shutter Speed | Notes |
|---|---|---|---|---|
| Jewelry and small reflective goods | f/8 | 100 | 1/125 sec | Use a macro lens, diffusion, and careful reflector placement |
| Apparel on a mannequin | f/5.6 | 200 | 1/125 sec | Keep the garment plane parallel to the camera |
| Cosmetics and small packaging | f/8 | 100 | 1/125 sec | Check label sharpness and glass reflections |
| Dark matte products | f/8 | 100 | 1/125 sec | Start with +0.7 exposure compensation and verify the histogram |
| Furniture and large home goods | f/8 | 100 | 1/60 sec | Use a stable tripod and check edge distortion |
| Flat artwork or documents | f/8 | 100 | 1/125 sec | Keep the sensor parallel to the surface |
The aperture controls depth of field. A product photographed at f/2.8 may have an attractive background, but important edges can fall out of focus. That portrait habit often harms listings. Use a narrower aperture when the product has depth, and consider focus bracketing for items that still can't fit within one focus plane.
Shoot RAW when your camera supports it. RAW files take more storage, but they preserve adjustment flexibility for white balance, exposure, and highlights. Keep the original files untouched, then create working copies for retouching and export.
Set a custom white balance with a gray card under the actual shooting lights. Repeat the reference capture whenever you change the setup. Use a single autofocus point or a consistent focus area, and confirm that the camera isn't selecting the background or a label edge instead of the product surface.
Building a Tethered Batch Shooting Workflow
Tethering turns the laptop into an inspection station. Connect the camera with the supported cable, open compatible capture software, and set live view so the product occupies a consistent part of the frame. The benefit isn't convenience alone. You catch soft focus, glare, dust, and crooked labels before those errors spread through a batch.
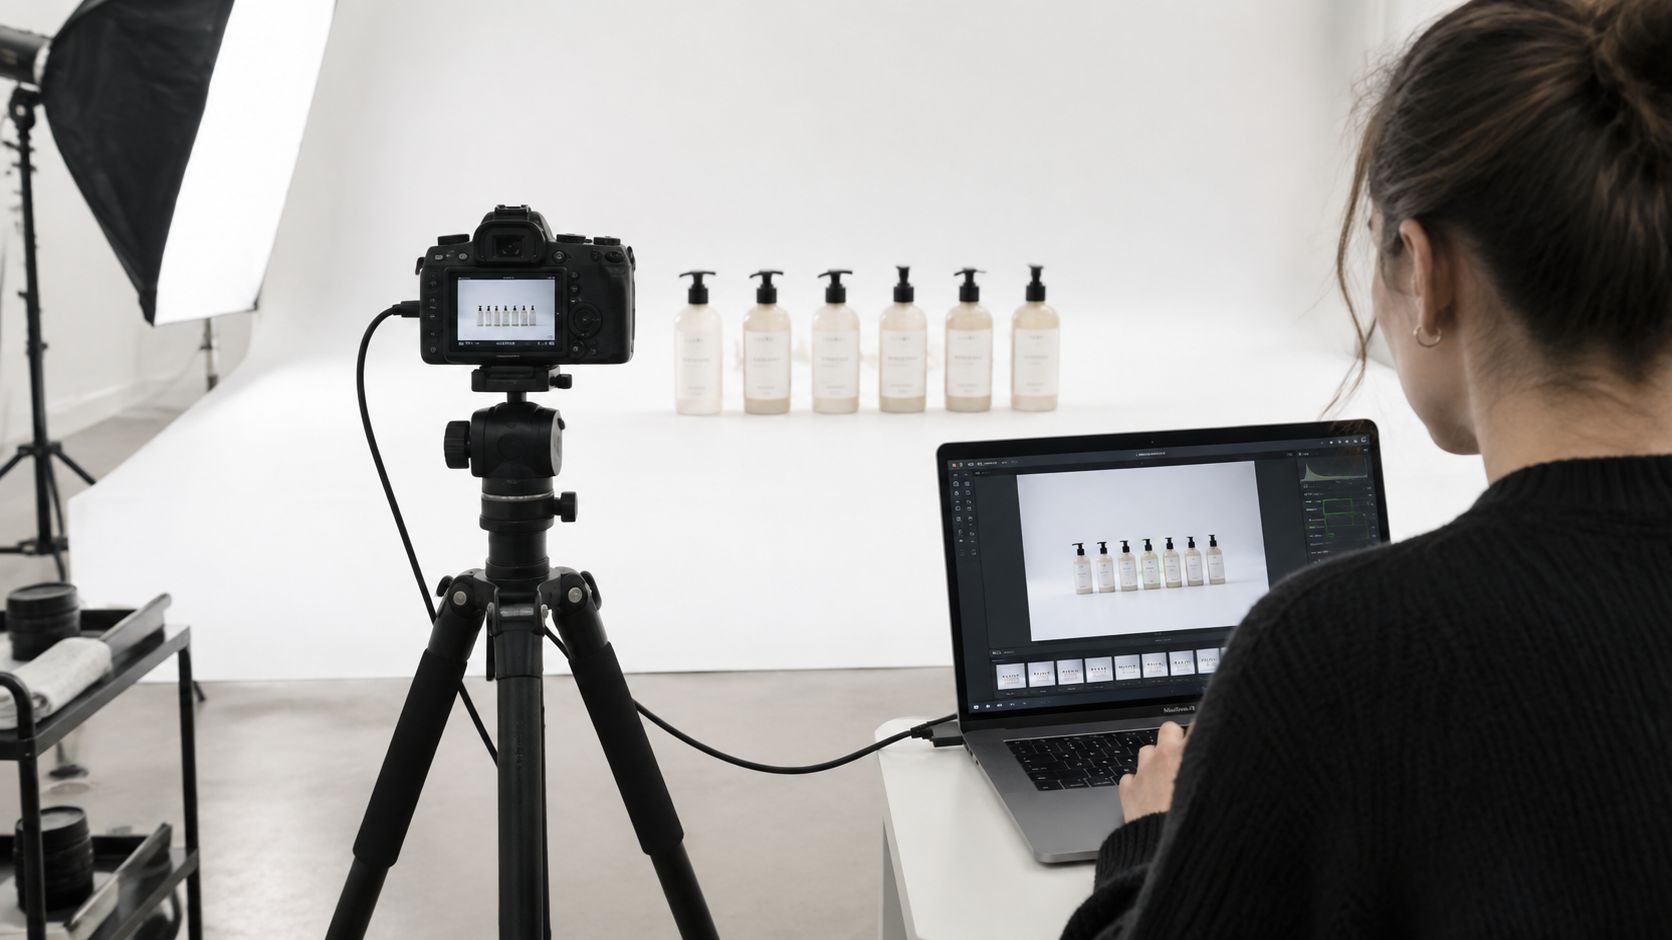
Start each session with a reference product. Use an item you've already approved, photograph it under the current settings, and compare it with the stored reference image. If the white balance, framing, shadow density, or exposure has shifted, correct the set before shooting new inventory.
Use a file structure that survives the catalog
A workable pattern might be:
- SKU folder: One folder for each product.
- View names:
hero,front,side,detail,scale,lifestyle, andpackaging. - Originals: Camera RAW files remain separate from edited outputs.
- Masters: Retouched high-resolution files use a stable naming pattern.
- Exports: Marketplace-specific versions sit in clearly labeled subfolders.
Don't use camera-generated names as your final system. A filename such as SKU123_front_master.tif is easier to trace than an anonymous sequence after editing, review, and upload.
For most catalogs, photograph all required views of one product before moving to the next. That keeps the product, props, and cleaning supplies together. A category with many nearly identical items may benefit from shooting one angle across all products, especially when the camera and lighting stay untouched. The trade-off is handling and recollection. Choose the sequence that minimizes product swaps without weakening quality checks.
Take short breaks during long sessions. Fatigue causes missed dust, inconsistent spacing, and forgotten views. Keep a printed shot list at the station, and mark each SKU only after its images pass the first inspection.
Review the complete tethered workflow through this practical demonstration:
Export Requirements and AI Batch Processing
The camera master should be large enough to support every channel you sell on. For a multi-market catalog, a square master is often the simplest base because it can be adapted without repeated recropping. Shopify allows product images up to 4472×4472 pixels, with 2048×2048 pixels commonly used as a practical square target, as outlined in Shopify product image size guidance.
Amazon has stricter rules for the main image. It must use a pure white background with RGB 255,255,255. Amazon says images should be at least 1,000 pixels on either the height or width, with 1600 pixels or more recommended for zoom behavior, according to its official seller image guidance. Build the master to meet the white background and zoom threshold before generating marketplace copies.
Etsy's listing guidance calls for images at least 2000 pixels on the shortest side, and its shop presentation is commonly square. A square-first master therefore reduces repeated crops when the same catalog feeds several channels. Keep the original RAW file, a high-resolution retouched master, and platform exports as separate stages.
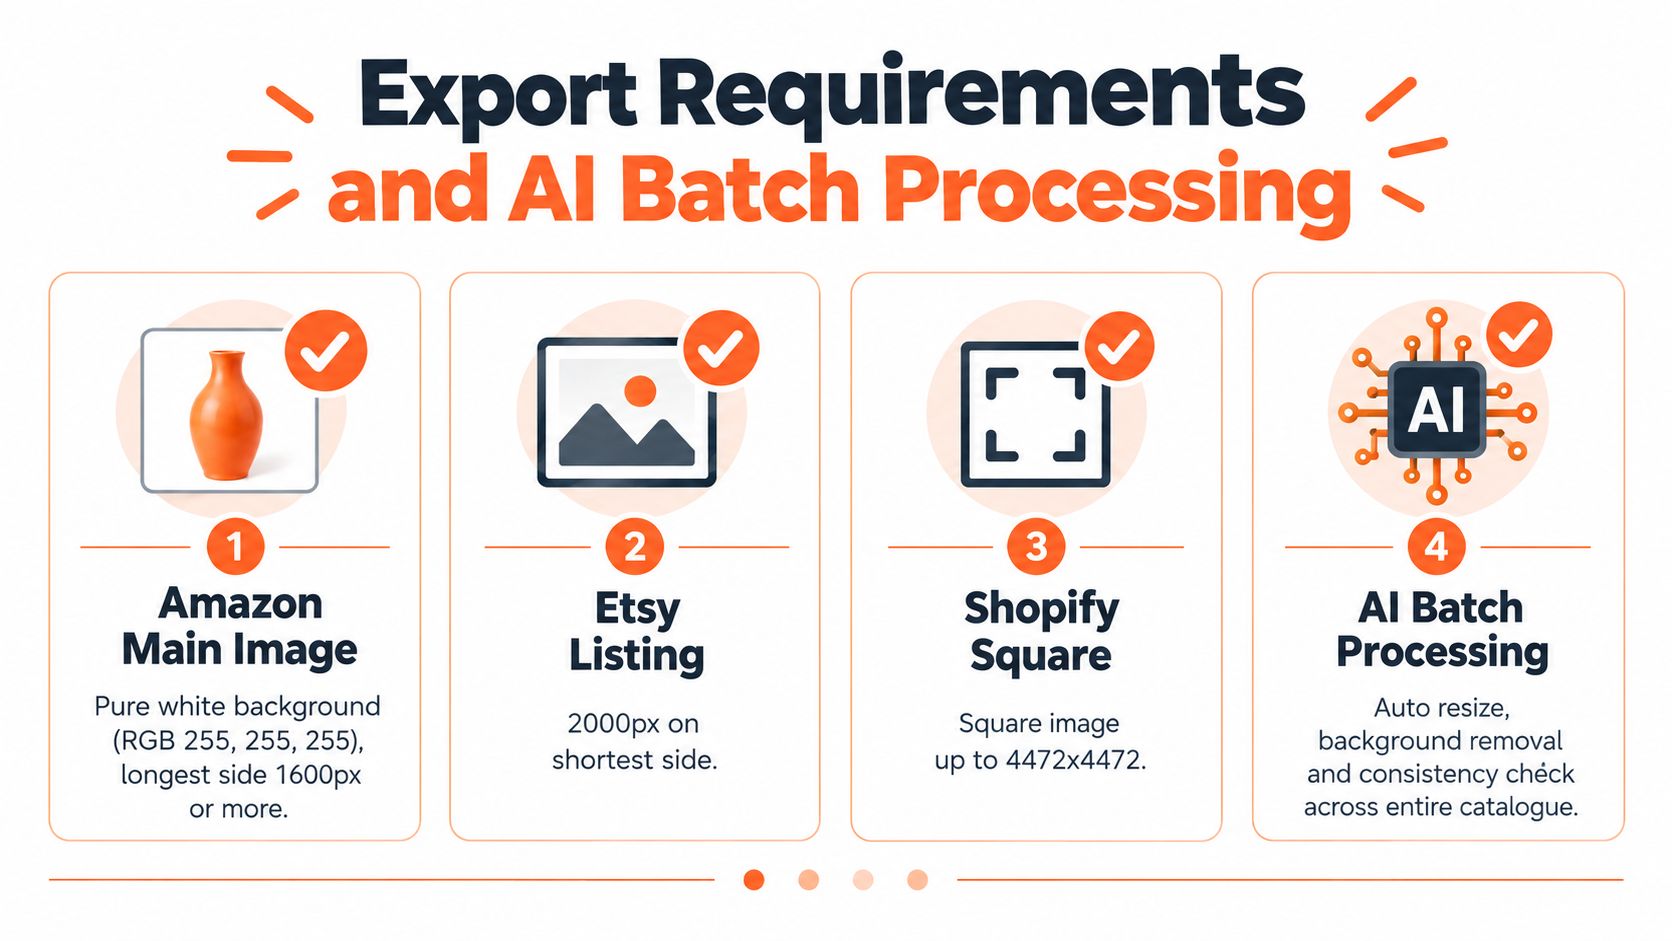
Chain repetitive operations
A useful batch pipeline can run in a fixed order:
- Inspect the source: Reject blurred, damaged, or visibly altered product images.
- Remove the background: Use a clear outline, strong edge contrast, high-resolution source, and controlled shadows.
- Correct color and exposure: Apply a consistent adjustment, then review products with unusual materials.
- Reframe the canvas: Create square masters and platform-specific crops.
- Generate alternate scenes: Produce lifestyle or advertising versions only after the product cutout is approved.
- Export and review: Check dimensions, background color, file names, and product integrity.
Background removal works best when the subject outline is clear and lighting is controlled. Dim light, overexposure, and strong shadows make edge detection less reliable. For difficult objects, a freemask workflow can use a lit product image and a separate back-lit mask image to create more precise separation, as described in this background-removal workflow.
MerchLoom fits this type of operation by chaining AI steps across a collection instead of editing one image at a time. You can use it for background removal, color correction, resizing, reframing, and scene generation, then review the output before publishing. The AI batch image editing workflow is useful when the same operations must run across hundreds or thousands of product photos. The first images can be tried with no account. It uses pay-per-image credits, and those credits never expire. AI output still needs human review, especially around thin edges, reflective products, labels, hands, and generated scenes.
Quality Control and Common Catalog Problems
A catalog can look acceptable image by image and still feel careless when viewed as a collection. Review contact sheets or category grids, not only individual files. The repeated patterns become obvious there: one product sits lower, one background is gray, one label is soft, or one batch has a cooler color cast.
Use a pre-upload check for every completed group:
- Color: Compare white balance against the session reference and a physical product.
- Focus: Inspect labels, edges, seams, and small details at full size.
- Exposure: Check white products for clipped highlights and dark products for lost texture.
- Framing: Confirm the product occupies a consistent area and sits on the same visual baseline.
- Background: Look for gray corners, halos, leftover shadows, and transparent-edge artifacts.
- Completeness: Confirm every required view exists for every SKU.
- Naming: Match each file to the correct product and view before upload.
Reshoot when focus is wrong, the product color is inaccurate, reflections hide important features, or the camera angle changes the product's shape. Fix in post when the issue is a small dust mark, minor background cleanup, or a modest exposure adjustment. Don't use editing to rescue a bad source image across a large batch.
Keep approved reference images by category. Add the camera, lens, lighting arrangement, white balance, framing, and export profile to the record. When a new season arrives, recreate the reference before shooting, rather than trusting memory.
For more involved cleanup, use a documented e-commerce product photo editing workflow. Keep the process in-house when the products are straightforward and the volume is manageable. Bring in professional help when materials require complex reflections, the catalog has strict brand standards, or shooting time is taking attention away from inventory, customer service, and sales operations.
Use MerchLoom to run chained AI pipelines across your camera-captured catalog, including background removal, resizing, color correction, and lifestyle scene preparation, instead of processing one image at a time. Try the first images without an account, then visit MerchLoom to process images pay per image with credits that never expire, while keeping human review in the workflow.
Stop editing product photos one at a time
Upload your catalog or connect your store. Describe the result once. MerchLoom does the rest.
Try MerchLoom