
Ecommerce Product Photo Editing at Scale
A practical guide to ecommerce product photo editing at scale, covering batch cleanup, marketplace formats, automation, QA, and costs.
You've got a new product drop, a launch date on the calendar, and a folder full of photos that don't look like they came from the same store. One phone image is dark, another has a gray background, a third is cropped too tightly, and a fourth shows the product at a different scale. Multiply that problem across 200 images, and editing one file at a time becomes the workday.
Start with a catalog rule, not an editing tool. Decide what every image must look like, protect the original files, group similar products, and process the collection through the same sequence. Keep human review for product edges, color, text, and hero images. That approach turns ecommerce product photo editing into a repeatable production task instead of a long series of improvised fixes.
Why Product Photo Editing Breaks at Scale
A seller opening a 200-image catalog often assumes the problem is speed. The problem is inconsistency. If every photo receives a separate decision about background tone, crop, exposure, and sharpening, the catalog develops its own visual errors. A freelancer may produce attractive individual images while still failing to make the collection look unified.
Product imagery has a direct commercial effect. One compiled industry analysis reports that high-resolution product photos convert about 94% better than low-resolution photos, while Shopify-cited data places professional photos at roughly a 33% higher conversion rate than low-quality images. The same analysis reports that 67% of consumers consider product image quality very important, and 56% wouldn't buy from a site with poor product photos. These figures are summarized in ecommerce product photography statistics, and they explain why editing belongs in catalog operations, not at the bottom of a launch checklist.
The one-off editing trap
One-off work feels precise because you can concentrate on a single file. It fails when the next product line arrives. You have to remember which background tone you used, how much margin you left, whether the crop was centered, and which export size each channel needed.
A scalable workflow defines those decisions once:
- Preparation: Name files, protect masters, group product types, and reject unusable source photos.
- Processing: Apply background, color, sharpening, upscaling, and framing presets in a fixed order.
- Marketplace output: Export channel-specific versions from one approved master.
- Quality control: Review samples and every flagged or hero image before publishing.
Practical rule: Automation should make the same decision repeatedly. It shouldn't make an unreviewed decision repeatedly.
Multi-image listings make the operating model more important. Industry reporting summarized by ecommerce product image statistics found that listings with 7 or more images convert at about 2.4 times the rate of single-image listings. The work is no longer just retouching a hero photo. You need a consistent set of angles, detail crops, lifestyle scenes, and context images that help shoppers judge the product.
That's why batch processing is a workflow decision before it's a software decision. The batch processing approach gives you a way to define the rules once, apply them to a collection, pause exceptions for review, and preserve a record of what happened. The next collection should use the same structure, with changes made deliberately rather than rediscovered file by file.
Prepare a Catalog for Batch Editing
Batch editing amplifies whatever you give it. Clean, consistent source files produce useful output. Mixed files with unclear names and missing views produce a larger folder of inconsistent images. Preparation is where you remove that risk.
Lock the source files first
Create a read-only Masters folder before processing anything. Keep camera originals and supplied product photos there. Work from copies or imported references, and set the workflow so processed files can never overwrite the upstream source.
Use a stable naming convention tied to the catalog record. A practical pattern is:
product_sku_variant_view
For example, mug_482_blue_front is easier to trace than IMG_7382. Add a consistent suffix for output versions, such as _amazon_main, _etsy_lifestyle, or _shopify_square. The SKU should remain unchanged across every channel, so a correction can be traced back to the product record.
Group the catalog by visual behavior, not only by department. Apparel, ceramics, electronics, and packaged goods need different edge, reflection, texture, and framing decisions. A ceramic mug can usually use a hard, clean contour. A transparent bottle may need manual masking around highlights. Furry goods and hair-based products often need detailed edge cleanup even when automated background removal handles most standard products well. Guidance from ecommerce product photography best practices covers these category differences and recommends keeping the product around 80% to 90% of the frame.
Write a one-page visual standard
Don't store your rules in memory. Write them down and include:
- Background: Pure white at RGB 255,255,255 for the main image where the marketplace requires it.
- Framing: A consistent square canvas, centered product, and a target product area. An 85% product area is a useful working target when your category allows it.
- Color: One reference swatch or approved sample image for the product group.
- Shadow: Whether the main image uses no visible shadow, a soft contact shadow, or a defined studio shadow.
- Resolution: The minimum required by each sales channel, checked before processing.
- Output: JPEG or PNG based on the asset's needs, with a master file retained for future exports.
Reject obvious failures before the batch begins. Extreme blur, missing product angles, unreadable packaging, and files below the relevant marketplace minimum shouldn't enter the normal pipeline. Confirm that you have the right to use supplied images and that required model releases are available for people shown in contextual assets.
Your product image library management process should record the original, the approved master, each marketplace variant, and the review status. That structure prevents a corrected image from being confused with an old export.
Run the Core Editing Workflow
Process one representative item from each product group before sending the entire folder through the pipeline. Use the sample to identify failures early. A black device, a reflective bottle, a knitted sweater, and a printed box won't respond to the same automated settings.
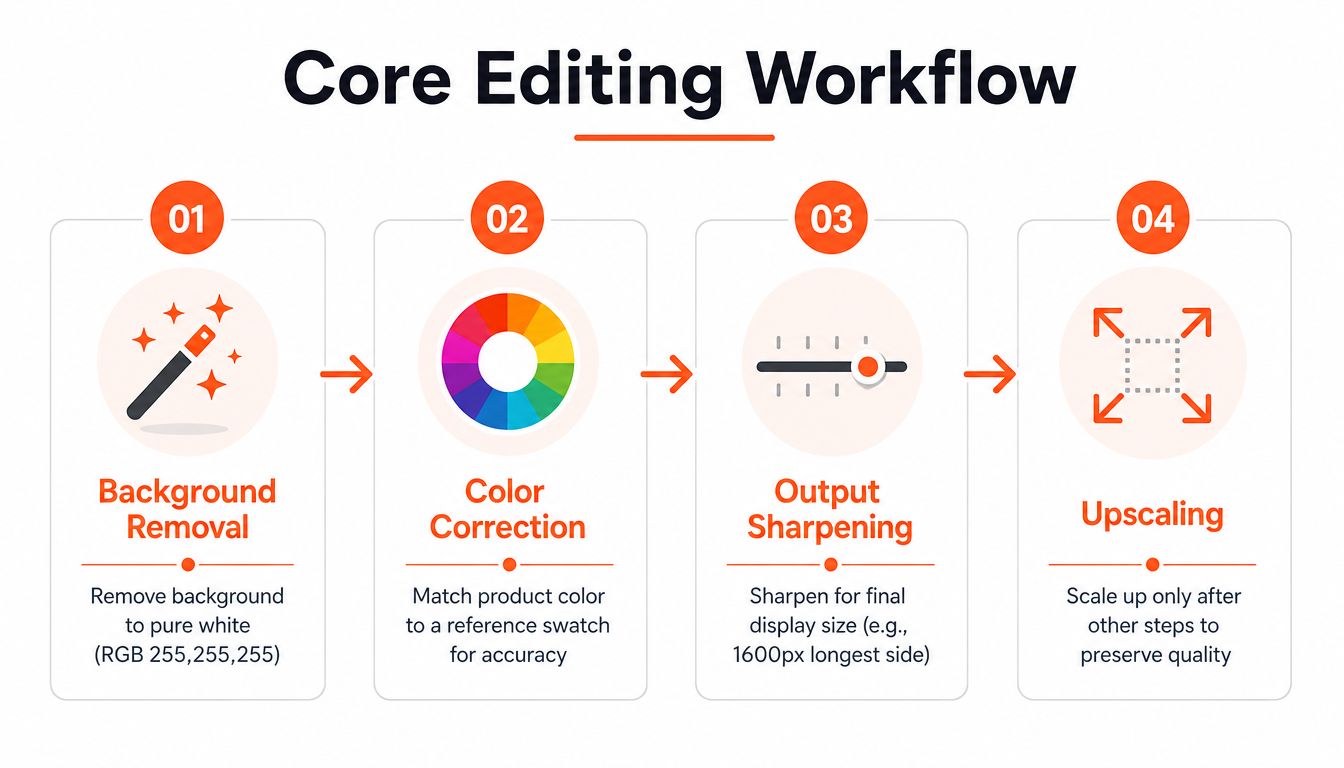
Start with the product boundary
Remove the background first. For Amazon main images, the result must be pure white, RGB 255,255,255, and the product must remain intact at the edges. Hard-edged items such as boxes, books, and many electronics usually pass automated masking with little intervention.
Flag transparent packaging, glass, chrome, mirrors, glossy black surfaces, fur, fringe, and hair for human review. An automated mask can erase a translucent edge, cut into a reflection, or leave a pale halo. Zoom into handles, corners, logos, fine fibers, and product openings before approving the result.
Correct color against a shared reference
Don't let each image choose its own white balance. That can make a white shirt look blue in one view and yellow in another. Use one approved reference swatch or master image for the product group, then apply the same correction logic across the set.
Check color where customers make decisions. Review fabric, painted surfaces, food packaging, cosmetics, and printed labels at a useful zoom. If the edited image changes the perceived shade, return it to the pipeline rather than fixing it manually in a separate folder.
Resize, sharpen, and reframe in order
Upscale only when the source is close to the required output. Upscaling can improve usable detail, but it can't rescue a soft original or reconstruct missing lettering. Run background removal before heavier processing when the workflow supports it, so you aren't enlarging unwanted background pixels.
Apply moderate output sharpening after downscaling. Marketplace images commonly use sizes such as 1,000 px or 500 px, and a light final sharpen can restore edge definition after resizing. Over-sharpening creates bright halos around the product, which makes a clean image look artificial.
Reframe the approved product onto a consistent canvas. Keep the product centered, preserve the intended margin, and maintain the same visual scale across the group. A tall bottle, a small accessory, and a flat garment may need different category presets, but every item inside the same preset should follow the same alignment rule.
A useful companion resource on boost sales with product photography can help connect image decisions with listing performance. For the processing sequence itself, use a batch product photo editing workflow with a review gate after masking, color correction, and final reframing.
Use this video as a practical reference for the production process, then compare its recommendations with your own marketplace rules.
Format Images for Each Marketplace
Doing this for a whole catalog?
MerchLoom runs background removal, upscaling and AI editing across every product photo you have — one prompt, whole batch. Try 2 batches free, no signup.
Try it freeKeep one approved master edit per SKU. Export marketplace variants from that master instead of editing the same product separately for Amazon, Etsy, Shopify, eBay, WooCommerce, Poshmark, or Depop. Separate exports let you satisfy one channel's composition rules without removing useful lifestyle or contextual images from another.
Use this table as the baseline for the three channels with the clearest requirements in this workflow.
| Requirement | Amazon | Etsy | Shopify |
|---|---|---|---|
| Main background | Pure white, RGB 255,255,255 | Lifestyle scenes are allowed, subject to listing presentation | No general white-background rule |
| Resolution target | 1600 px or more on the longest side for zoom | At least 2000 px on the shortest side | Square product target of 2048 x 2048 px |
| Maximum or accepted image size | Use the marketplace-specific approved export preset | Files can be up to 20MB | Accepts images up to 4472 x 4472 px |
| Working canvas | Use a square main-image preset where appropriate | Use a square listing preset when the product suits it | Use a 1:1 master for catalog consistency |
| Variant approach | Main image plus supporting views | Main, detail, and lifestyle views | Product master plus display variants |
Amazon's main image needs particular attention. Check the background numerically, not by visual approximation. Amazon uses 1600 px on the longest side as the zoom threshold, so an image below that loses zoom behavior. The Amazon listing image size guide is useful when you build a dedicated export preset, but verify the current marketplace instructions before a large upload.
Etsy's minimum of 2000 px on the shortest side, as described in Etsy image resizing guidance, means a tall image needs enough height and width to avoid a soft zoom experience. Shopify accepts up to 4472 x 4472 px and recommends 2048 x 2048 px for square product photos, according to Shopify image standardization guidance.
Create folders such as Amazon, Etsy, and Shopify inside each SKU's output directory. Keep filenames traceable, preserve extensions, and never let an Amazon white-background export replace an Etsy lifestyle variant.
Build a Repeatable Automation Pipeline
A useful automation pipeline is a chain with gates. It isn't a button that approves every file without inspection. The sequence should be reusable by another operator, or by you several months later, without relying on memory.
Define the pipeline once
Connect the source folder, cloud storage, or commerce catalog without changing the master files. Then create presets for:
- Background removal and white-background replacement.
- Group-level color correction.
- Reframing and centering.
- Output resizing and sharpening.
- Marketplace-specific export.
- Review, approval, retry, and delivery.
Name each preset by product group and destination. Ceramics_White_Main_Amazon is clearer than Preset 4. Save the reference swatch, target canvas, margin rule, output format, and review conditions with the preset.
A live review queue should pause images that contain uncertain edges, low resolution, unusual transparency, or failed conversions. The operator should be able to compare the processed image with the source and either approve it, adjust the input, or send it back to a defined step.
Make failure visible
Silent failures damage catalogs because they look like completed work. Track every file as one of four states: processing, needs review, approved, or failed. A failed JPEG conversion needs an explicit retry path. A rejected mask needs to return to background removal or manual cleanup, not disappear into a separate desktop folder.
MerchLoom is one option for running batch product photo editing through chained AI pipelines. The first images can be tried with no account, and processing is pay-per-image with credits that never expire. Credits can map directly to the number of images entering a workflow, but retries and additional variants still need to be counted before you start the run.
The AI image workflow automation guide is relevant when you connect source imports, processing steps, review queues, and outputs into one repeatable operation. Keep the human approval gate in the pipeline. AI can remove a background, correct a frame, or upscale a file, but it doesn't know whether a logo is accurate, a garment color is truthful, or a marketplace policy allows the final composition.
Control Cost Without Sacrificing Quality
Cost control comes from processing order and reuse. It doesn't come from choosing the cheapest action for every image, because rework can consume more time and paid credits than the original edit.
Run background removal before upscaling. There's no reason to enlarge unwanted pixels or sharpen a background that will be discarded. Then resize to the smallest approved marketplace target instead of exporting every asset at the largest available canvas.
Five levers that compound
- Upscale later: Remove the background and complete the main corrections before enlarging the approved product.
- Batch in groups: Process similar products together so one lighting and framing preset serves the full group.
- Optimize formats: Use JPEG for ordinary photographic assets when it meets the channel's needs, and reserve larger formats for files that require them.
- Automate repetitive tasks: Use presets for centering, resizing, naming, and export rather than repeating those clicks.
- Audit sample output: Review a representative sample from every batch before releasing the whole folder.
Treat paid credits as a production budget. Record how many images entered the workflow, how many needed retries, and how many variants were exported. A failed conversion should be easy to identify, so you can distinguish a true processing cost from a preventable input problem.
Reuse the approved master across channels. A 200-image job can become roughly 600 export-ready assets when each SKU receives an Amazon, Etsy, and Shopify variant, without requiring three separate editing passes. The processing spend stays tied to the source work, while exports serve different listing contexts.
Track a monthly cost per SKU benchmark from your own records. Divide editing, retry, and review costs by the number of SKUs published, then compare that figure with the time you spend handling the same work manually. This gives you a useful internal measure without pretending every catalog has the same product complexity.
Complete Quality Assurance Before Publishing
Quality assurance needs two gates. The first checks the files before upload. The second checks what shoppers see after the marketplace processes the files.
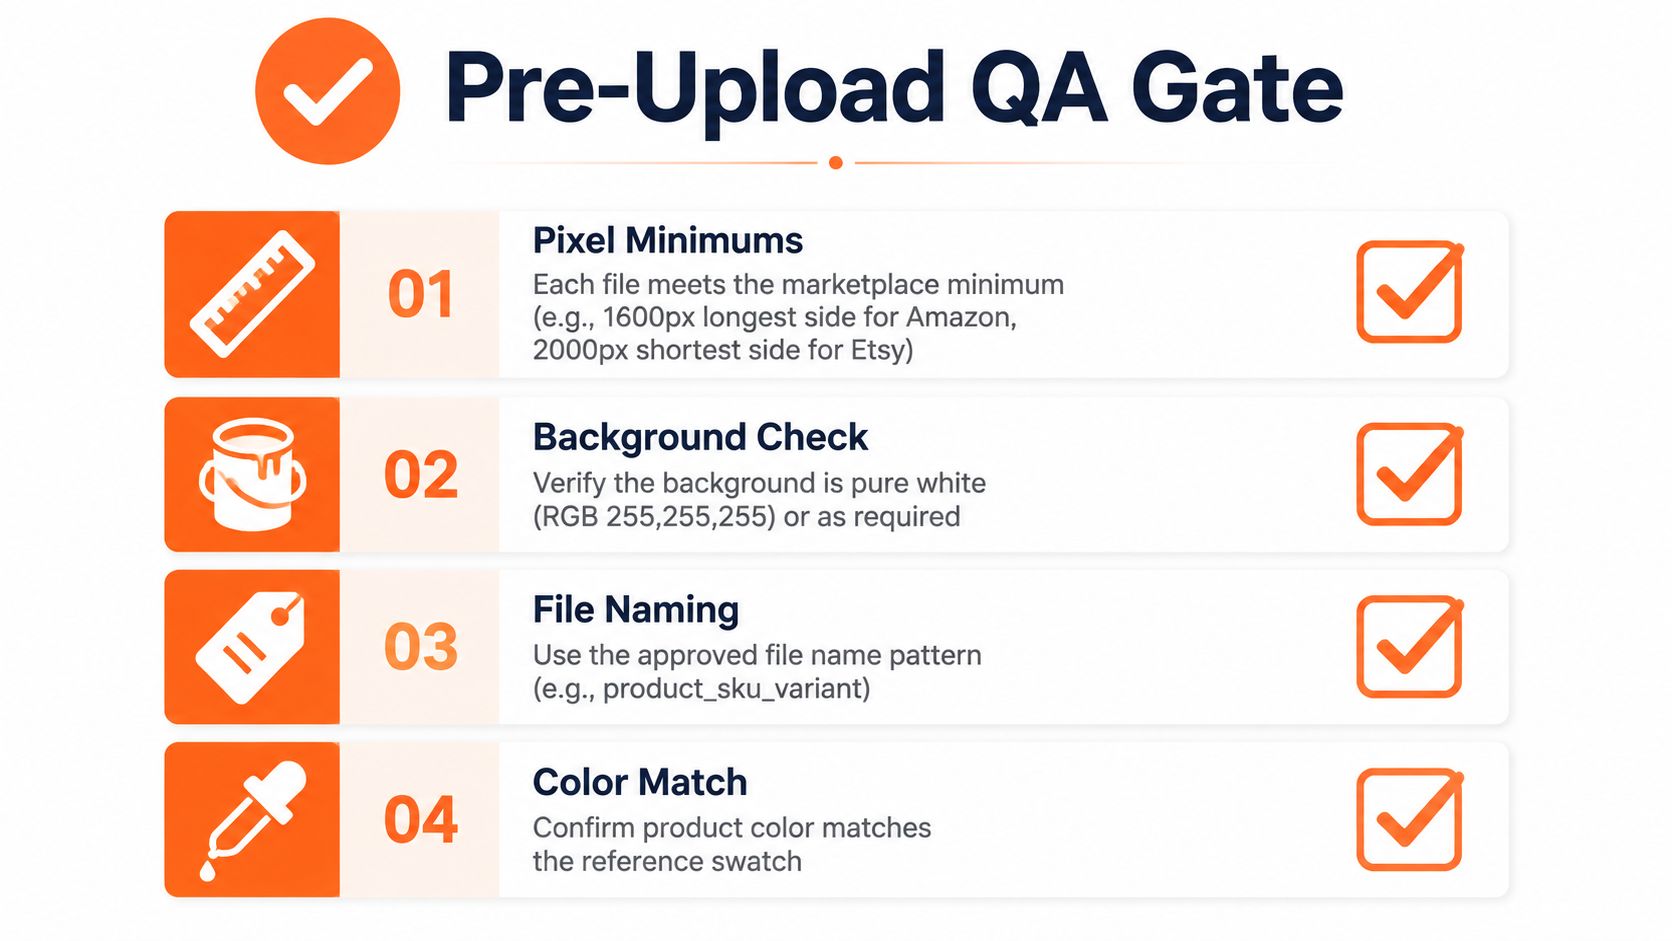
Use the pre-upload gate
Check every file against the product record and destination folder:
- Pixel minimums: Confirm the file meets the channel rule, including Amazon's 1600 px longest side zoom threshold and Etsy's 2000 px shortest side requirement.
- Background: Sample the main-image corners and verify pure white RGB 255,255,255 where required.
- File naming: Match the approved pattern, such as
product_sku_variant_view, and preserve the extension. - Color: Compare the product with the reference swatch and inspect labels, fabric, coatings, and printed details.
Review every hero image manually. For supporting images, sample five to ten images from each batch and include at least one file from each product type. If the sample reveals a repeated error, stop the batch and reroute the affected files through the editing pipeline.
Check the published listing
After upload, open the live listing rather than trusting the upload confirmation. Verify that the intended main image appears first, thumbnails aren't unexpectedly cropped, zoom doesn't reveal halos, and the product color looks consistent beside nearby search results.
Check contextual variants for truth. AI-generated scenes must not add items, change product geometry, alter a label, or imply an included accessory that isn't in the order. Marketplace rules can also change, so keep a record of the source image, transformation, approval, and destination.
For an extra review layer, AI-powered image scoring for online sellers can help organize image evaluation, but scoring doesn't replace human judgment. A score may flag composition or quality. It can't confirm that a transparent edge is accurate or that a product claim remains truthful.
MerchLoom can run the approved workflow across a collection and return results for review, but you still need to inspect flagged images and sampled outputs before publishing.
Roll out the system in a controlled order:
- Lock the visual and marketplace standards.
- Process one product line.
- Audit the live listings.
- Correct the presets and rules.
- Apply the same QA gates across the remaining catalog.
MerchLoom lets you import hundreds of product photos, run chained AI pipelines for background removal, color correction, reframing, upscaling, and marketplace exports, then review results before approval. The first images can be tried with no account, and the service is pay-per-image with credits that never expire, so visit MerchLoom and test the workflow on one product collection before processing the full catalog.
Stop editing product photos one at a time
Upload your catalog or connect your store. Describe the result once. MerchLoom does the rest.
Try it free — no signup