
AI Product Photo Editor: A Catalog-Scale Guide
Use an AI product photo editor to batch-process hundreds of product photos for Amazon, Etsy, and Shopify. Learn the workflow, cost tips, and QC practices that
You've got hundreds of product photos sitting in folders, Shopify media, cloud storage, or marketplace drafts. Some need background removal. Others need cleaner lighting, a square crop, a larger export, or a completely different treatment. Editing one image at a time makes the catalog drift: product framing changes, whites look slightly different, shadows disappear, and filenames stop matching the listings.
Start by choosing one representative image from each product type. Build the workflow around those samples before processing the full collection. A reliable AI product photo editor workflow is less about making one hero image look impressive and more about repeating the same decisions across every SKU, with a human review step for the images AI handles poorly.
Getting Your Product Photos Ready for Batch Editing
A batch edit usually fails before the editor opens. The source library contains duplicate files, unclear filenames, mixed product angles, and images from different shoots. If you upload that collection without sorting it, the system can't know which image is the primary listing photo, which is a detail shot, and which one belongs to a lifestyle set.
Start with a folder structure that follows your store, not the order in which photos were taken. Use a top-level folder for each marketplace or product department, then create SKU folders underneath. Keep the original files separate from processed outputs so you can return to the source when an edit damages a label, edge, or texture.
Build a naming system tied to the SKU
A useful filename tells you what the image is without opening it. Use the SKU first, followed by the image role and view, such as SKU123_hero_front, SKU123_detail_label, or SKU123_lifestyle_01. Keep the same pattern for every product, including variants.
Sort images into practical groups:
- Hero images: The main product view used for the listing thumbnail and primary product page image.
- Secondary views: Back, side, open, folded, or detail views that show important product features.
- Lifestyle images: Products placed in rooms, worn by a model, or shown in use.
- Exception files: Low-resolution images, transparent packaging, reflective surfaces, visible text, and unusual angles that need closer review.
This separation matters because a pure white marketplace hero image and a contextual lifestyle image shouldn't share the same background or crop preset. A seller preparing a furniture collection may want centered square catalog images for Shopify, while the same product needs room scenes for advertising. The source folders should make that distinction obvious.
Inspect the source before processing
Open a sample from every category and check the product itself, not just the background. Look for missing edges, color casts, glare, wrinkled fabric, unreadable packaging text, and objects that touch the frame. AI can clean a poor source, but it can't reliably reconstruct information that was never captured.
Your lighting setup also affects every downstream result. If you need to reshoot a subset, use a repeatable arrangement and record the camera distance, product orientation, and light placement. The product photography lighting guide is useful when your catalog contains inconsistent shadows or color between batches.
Keep a simple source register with the SKU, original filename, image role, required marketplace outputs, and review status. If you also resize images for different channels, a dedicated Robosize AI sizing platform can help clarify the sizing stage before you send files through the main editing pipeline. The important point is traceability. Every processed file should lead back to a source and a listing.
Choosing the Right Edit Order for Each Marketplace
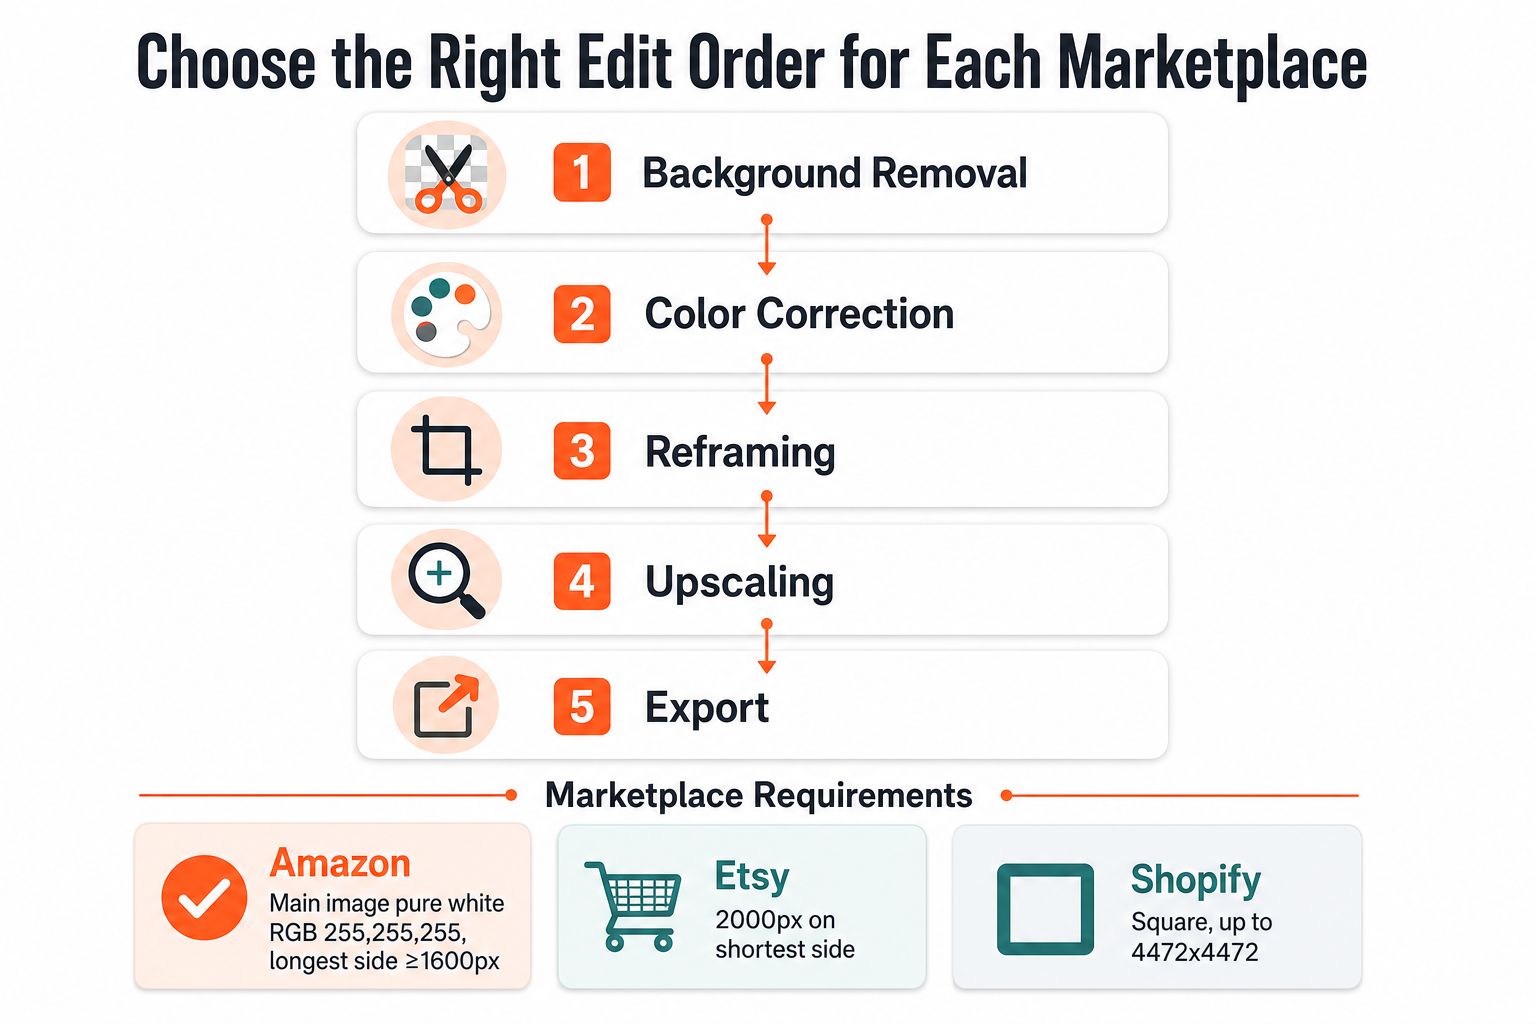
The order of operations affects both quality and processing cost. Start with the product boundary, then correct the image, set the composition, enlarge only when needed, and export to a fixed marketplace preset. Upscaling first can enlarge background pixels and defects that you later remove.
Use one sequence, then branch by channel
A dependable base sequence looks like this:
- Remove the background. Preserve the product edge, fine straps, bottle caps, hair, stitching, and transparent areas where possible.
- Correct color and lighting. Match the output to a trusted reference, especially for clothing, cosmetics, paint, and other shade-sensitive items.
- Reframe the canvas. Set the product position, margin, aspect ratio, and crop rules before resizing.
- Upscale only when necessary. Use the cleaned and reframed file as the input, not the untouched source.
- Export by marketplace. Apply the correct dimensions, file format, naming convention, and background rule.
Amazon's main product image must use a pure white background, RGB 255, 255, 255, and the longest side should be at least 1600 pixels for zoom support, according to Amazon product image requirements. Create one Amazon preset and apply it to every primary image. Don't rely on manually selecting white for each file, because near-white backgrounds can vary across a large batch.
Etsy listing photos need at least 2000 pixels on the shortest side, and square framing is commonly recommended for consistent display across the shop and marketplace surfaces, as explained in this Etsy image size guide. Shopify accepts images up to 4472 × 4472 pixels, while square 2048 × 2048 images are commonly recommended for uniform product catalogs, according to this Shopify product image size guide.
| Channel | Working preset |
|---|---|
| Amazon | Pure white RGB 255, 255, 255, longest side at least 1600 pixels |
| Etsy | At least 2000 pixels on the shortest side, square framing commonly used |
| Shopify | Square 1:1 framing, commonly around 2048 × 2048, with uploads accepted up to 4472 × 4472 |
Save these as named presets instead of changing settings inside each job. For more detail on Amazon-specific decisions, keep the Amazon product image workflow beside your export checklist.
Running Batch Edits Across Your Entire Catalog
Once the source library is clean, stop treating the editor like a desktop retouching application. A catalog workflow should accept a collection, apply a defined chain of operations, and return outputs that remain connected to the original SKU.
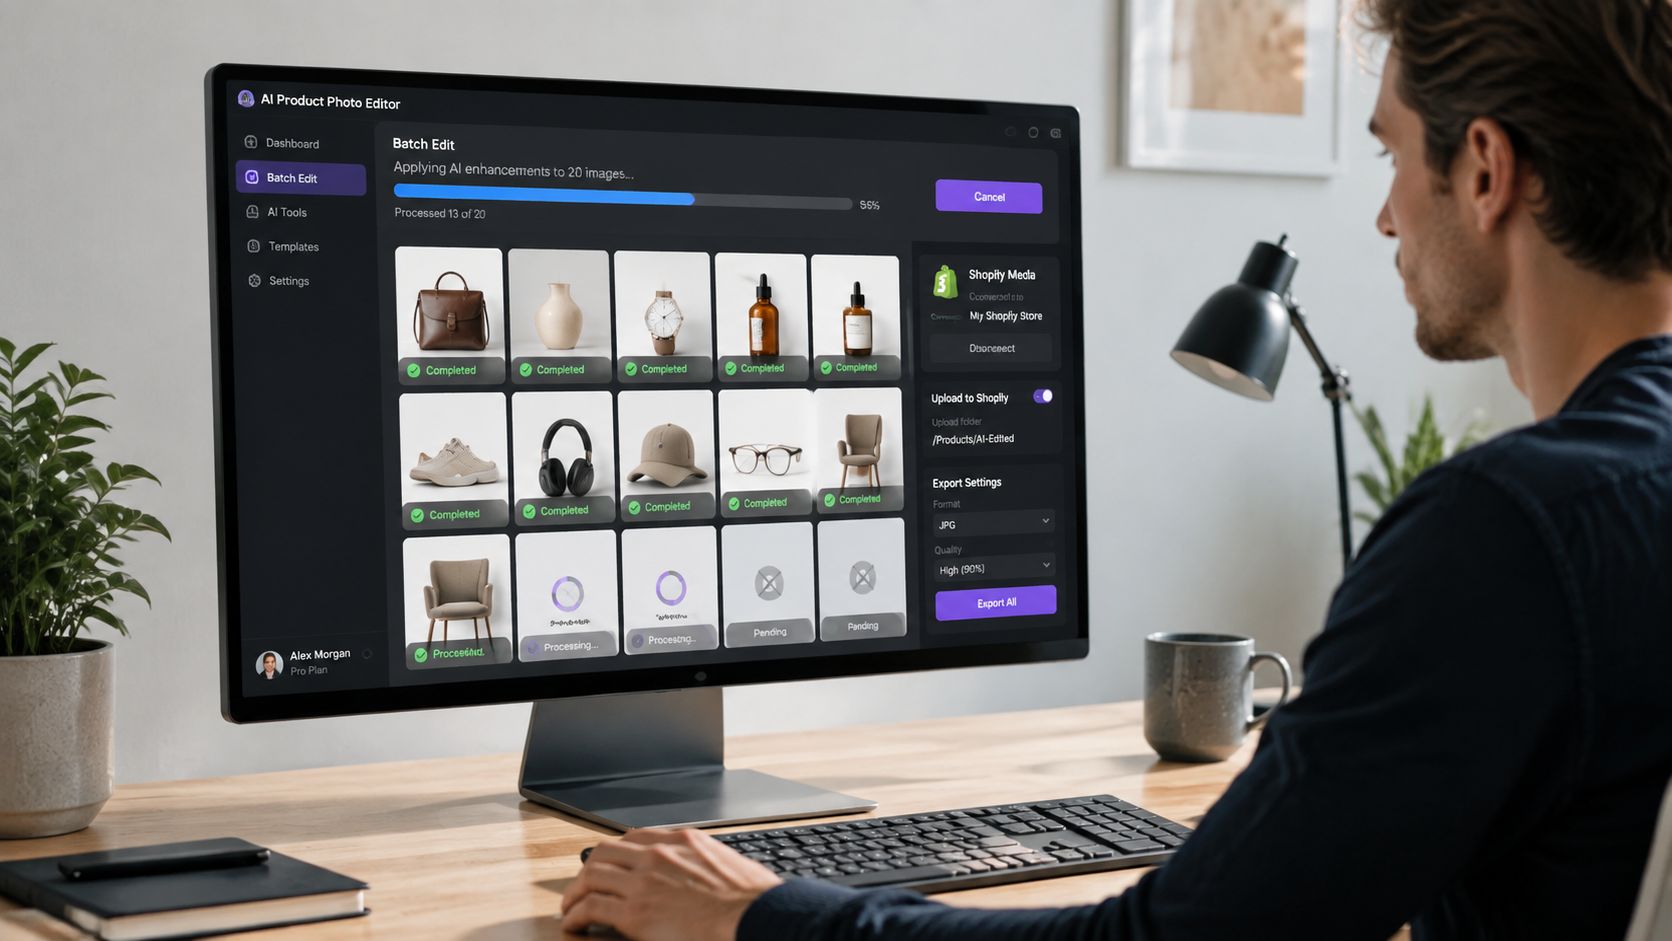
Bring images from the systems you already use, such as cloud storage, a Shopify media library, WooCommerce uploads, a CDN, or object storage. Then describe the job in plain language, but make the instructions operational: remove the background, preserve the product dimensions, center the item, use a neutral shadow, create a square output, and keep the SKU in the filename.
Test the pipeline before committing the catalog
Don't begin with every file. Choose a small sample that includes a clean hard good, a product with fine edges, a reflective package, a textile, and a product with visible text. Review those outputs at normal listing size and at close zoom.
Check five things before expanding the job:
- Product fidelity: The shape, parts, logos, labels, and included accessories match the source.
- Composition: The product occupies a similar amount of space and sits at the same visual height.
- Background treatment: White means white for the marketplace preset, while lifestyle scenes need the same tone and horizon treatment.
- Color: The output doesn't shift the product toward a warmer, cooler, darker, or brighter shade.
- File traceability: The output name and location still map to the correct SKU.
A benchmark that tested 312 product images across 6 AI image models and 5 product categories scored subject fidelity, color accuracy, text rendering, and editability. Flux Pro 1.1 and Midjourney v6.1 tied for the highest subject-fidelity result at 8.7/10, followed by DALL-E 3 at 8.2 and Stable Diffusion XL at 6.8, as reported in the ecommerce AI image benchmark. The practical lesson isn't to choose a model from a leaderboard. It's to test the same representative files with your own product categories.
The benchmark recommends starting with one clean reference image at 2000 × 2000 pixels or higher, generating 3 to 5 variants in parallel, and expecting the third or fourth output to perform best on average before background removal, color correction, and marketplace export. Treat that as a testing method, not a guarantee. For catalog work, fewer repeatable variants are often more useful than unlimited creative options.
Working rule: Approve the pipeline on difficult products first. Clean images rarely reveal the failure modes that will slow down the full run.
MerchLoom can run chained AI pipelines across a whole collection instead of editing one image at a time. The first images can be tried with no account, and the service uses pay-per-image pricing with credits that never expire. It can also reuse processed images as inputs, which is useful when you create seasonal variants or update a listing without re-uploading the original files. The batch processing workflow gives you a useful model for separating ingestion, processing, review, and export.
Review the output stream while the run is active. If one category is failing, don't restart the entire catalog. Isolate that subset, adjust the instruction or preset, and run the refined version against the affected files. Preserve the earlier output so you can compare versions rather than paying for the same experiment repeatedly.
Doing this for a whole catalog?
MerchLoom runs background removal, upscaling and AI editing across every product photo you have — one prompt, whole batch. Try 2 batches free, no signup.
Try it freeAfter the batch finishes, connect each approved output to the correct listing. A processed image is not finished until the SKU, variant, channel, and image role are clear.
Quality Control Systems That Save Time Instead of Wasting It
A batch can be technically complete and still be commercially unsafe. AI may leave a gray cast in one background, create a heavier shadow on another, or trim a product closer to the edge than the rest of the collection. Those differences are easy to miss when reviewing files individually, but obvious when buyers compare products in a grid.
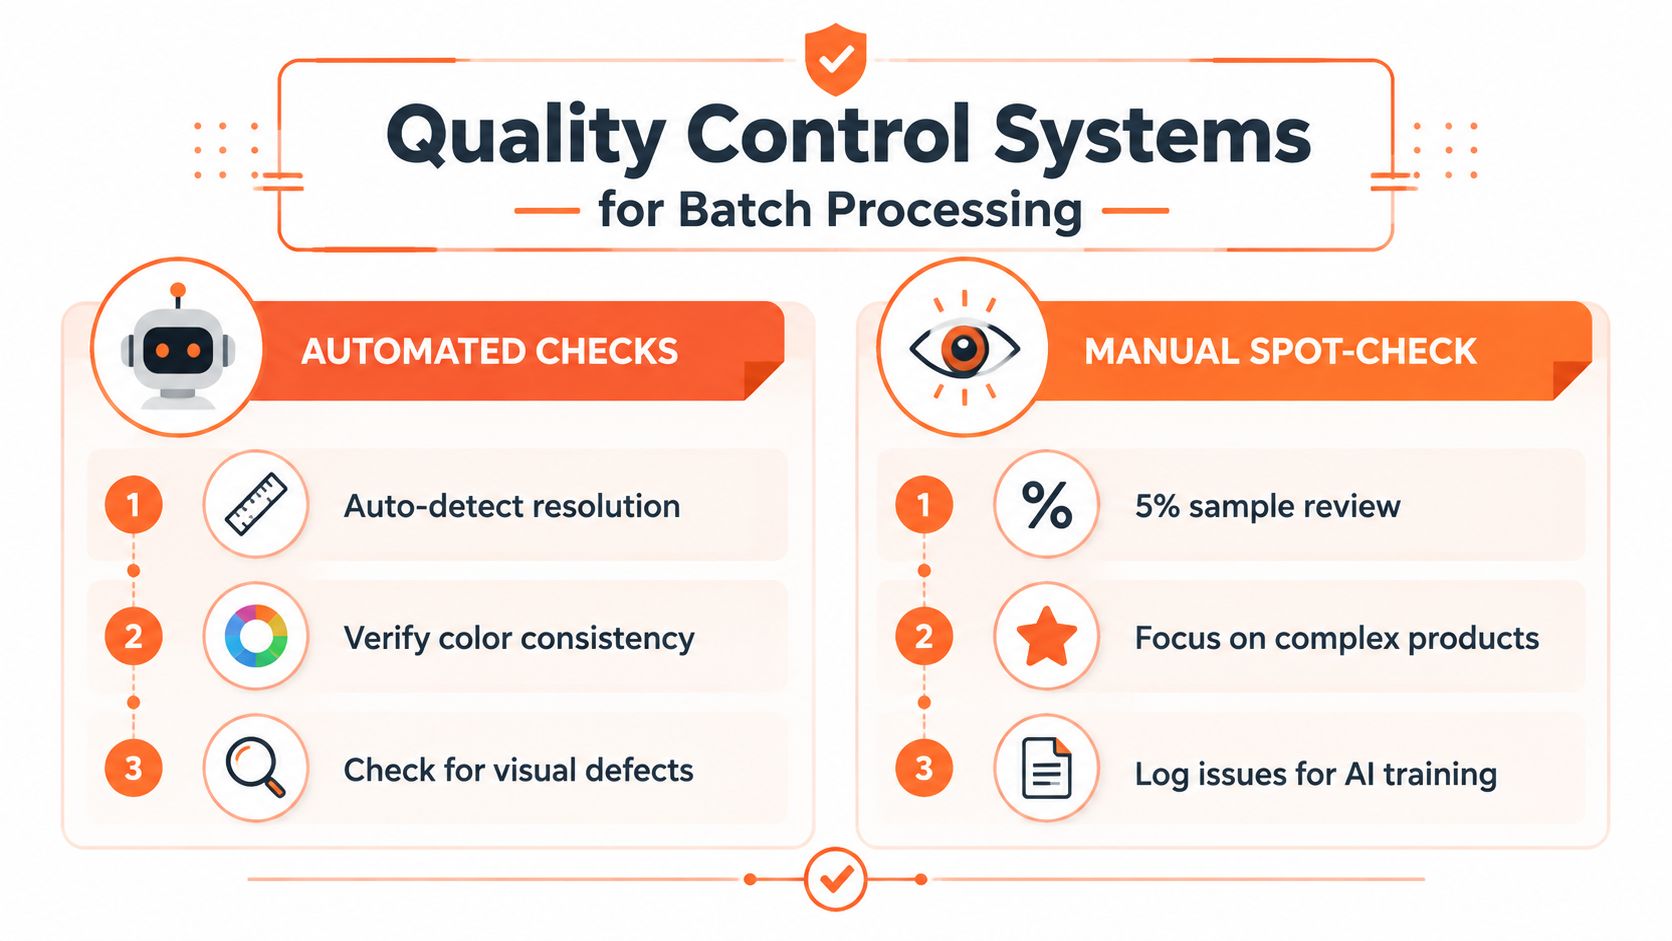
Use automation for measurable checks and reserve human attention for judgment. A useful scorecard compares each output with a master reference from the same product line. Track framing alignment, background tone, color accuracy, edge quality, resolution, and text legibility.
Separate routine checks from risk checks
Automated checks should catch files that clearly fail the brief:
- Resolution: Confirm that the output meets the selected marketplace preset.
- Canvas and framing: Detect the wrong aspect ratio, excessive empty space, or a product that sits outside the expected alignment.
- Background: Check whether the hero preset uses the required pure white background and whether transparent or gray pixels remain around the edge.
- File identity: Match the filename, SKU, variant, and image role against the source register.
Manual spot-checking should focus on the files most likely to mislead buyers. Review every tenth image during a large run, then review every flagged exception and every category known to be difficult. The independent ecommerce case study that used this process also described spot-checking every tenth image after enhancement, while prioritizing the weakest images first.
That case study reported a 23% conversion-rate improvement across the catalog over 90 days and a 31% reduction in returns marked “item not as described”, with the results linked to batch AI photo editing case-study methodology. Treat those figures as a reported case result, not a promise for your store. The useful operational detail is the sequence: export SKU-level conversion data, score primary images, prioritize the bottom 30%, allow about 90 seconds per image including QA, and refine the full set after the weakest images are addressed.
Give difficult products a separate queue
Category matters more than most editor tutorials admit. Hard goods with clean geometry generally provide easier inputs. Fashion, textiles, food, reflective materials, and transparent packaging can expose problems in drape, texture, highlights, color, and edges.
Leather grain, metallic finishes, fabric weaves, and translucent containers deserve close inspection. Industry commentary on ecommerce product photography and editing notes that AI outputs can vary across batches and that human editors remain necessary for refinement and verification. Another review of AI photo editing for ecommerce categories describes stronger performance on clean hard goods and more frequent errors in fashion, textiles, and food.
Keep a rejection log. Record the SKU, failure type, corrected action, and approved reference. That log becomes a practical rulebook for the next run. Use product image library management to keep source files, versions, approvals, and channel exports from becoming separate, untraceable collections.
Cutting Costs Without Sacrificing Image Quality
The biggest processing waste usually comes from doing expensive work too early. If you upscale a large image and then remove its background, you've spent processing effort on pixels that won't appear in the final file.
Remove the background before upscaling. The workflow described for catalog processing says that shrinking the image before the expensive upscaling step can save up to 87%, as explained in the provided MerchLoom workflow data. The exact saving depends on the source files and pipeline, so use it as an ordering principle rather than a guaranteed result.
Put cheap decisions before expensive ones
A cost-aware pipeline can follow this order:
- Reject unusable sources. Don't process files with missing product parts, severe blur, or incorrect SKU assignment.
- Remove the background. Keep only the product area that matters.
- Apply basic color and lighting corrections. Fix obvious casts before you create variants.
- Reframe and crop. Set the channel ratio and product position.
- Upscale selected outputs. Enlarge files that pass the earlier checks.
- Export once per channel. Avoid creating several nearly identical files because the preset wasn't fixed in advance.
Group visually similar SKUs before processing. A collection of ceramic mugs may share one crop, background, and shadow treatment. A collection of handbags may need a different edge and shadow rule. Grouping lets you reuse a tested preset without forcing a fashion workflow onto hard goods.
Don't re-edit files because the catalog is being refreshed. Compare the existing output with the current requirement list first. If the image already has the correct background, ratio, resolution, and product fidelity, keep it. Store intermediate results so a change to the final crop doesn't require background removal and color correction again.
Measure cost against catalog outcomes
Cost control isn't the same as choosing the cheapest editor. A failed image can create more work through manual correction, listing delays, or customer returns. The case study cited above connected consistent editing with reported conversion and return-rate changes, but your store should track its own product-page performance and return reasons before deciding which workflow earns another run.
For a broader framework on boosting ROI with automation tips, focus on repeatability, not novelty. Define which transformations are required, which are optional, and which are prohibited for each category. Lifestyle backgrounds may be useful for ads, but a clean, accurate source image remains more important for a listing where buyers need to inspect the actual product.
Version your workflows. Name them by channel and purpose, such as shopify_square_clean_v2 or amazon_white_hero_v1. When a subset fails, duplicate the workflow, change one decision, and process only the affected group. This makes the result easier to audit and prevents a small correction from triggering a full catalog rerun.
For file-weight decisions after editing, use the image file size reduction workflow without changing the product's visible dimensions or introducing compression artifacts.
Integrating Batch Image Editing Into Your Existing Workflow
A catalog editor should fit between your source library and your listings, not become another isolated inbox. Connect the image source you already maintain, preserve the SKU in every filename, and send approved outputs to the media location used by Shopify, WooCommerce, Amazon, Etsy, eBay, Poshmark, or Depop.
Keep separate presets for primary images, secondary views, lifestyle scenes, and advertising assets. The primary image should preserve product truth. A lifestyle variation can add context, but it shouldn't change the product's color, shape, included parts, or apparent size.
Traditional photography still has a place for fashion, textiles, food, reflective materials, and transparent packaging. AI can assist with background cleanup, reframing, resizing, and contextual mockups, but texture-critical products need original photography or human review. A hybrid workflow is usually safer than asking one pipeline to generate every asset.
Set a routine that your store can maintain:
- Preset exports: Define channel-specific dimensions, ratios, background rules, and filenames.
- Spot-check cadence: Review a sample during every batch, plus all flagged and texture-sensitive products.
- Refresh schedule: Reprocess the catalog when the brand style or marketplace requirements change, not after every minor listing edit.
- Performance tracking: Compare conversion behavior and “item not as described” returns against the image changes, while keeping other listing changes visible in your notes.
MerchLoom is one way to run these chained pipelines across full collections instead of one image at a time. It offers pay-per-image processing, credits that never expire, and the option to try initial images without an account. It should still sit inside a review process, not replace one.
Use MerchLoom to import your existing product images, run repeatable AI editing pipelines across a collection, and review outputs as they arrive. Start with a representative sample, set your marketplace presets, and expand the workflow only after the difficult SKUs pass quality control.
Stop editing product photos one at a time
Upload your catalog or connect your store. Describe the result once. MerchLoom does the rest.
Try it free — no signup