
AI Image Editing from Google Drive a How-To for E-commerce
Learn to streamline your AI image editing from Google Drive. A step-by-step guide for e-commerce sellers to batch-process product photos for any marketplace.
Your product shoot is done, the photographer has dropped everything into Google Drive, and now the hard part starts. One folder turns into subfolders. Raw angles, variant shots, detail crops, packaging images, and a few files nobody named properly. Then the listing deadlines show up. Amazon wants a clean main image, Shopify needs square crops, Etsy prefers larger presentation images, and your team still has to keep the catalogue visually consistent.
That's where AI image editing from Google Drive sounds easier than it usually is. Google's own tools are now useful for single-image edits. You can pull images from Drive into Gemini, remove an object, generate a variation, or send the edited file back to Drive. For one photo, that's convenient. For a folder with hundreds of images, it quickly becomes a production problem.
Most sellers don't need one clever edit. They need a repeatable workflow that turns an existing Drive library into marketplace-ready assets without losing control of naming, review, and export.
The Reality of Managing Product Photos in Google Drive
A typical catalogue job starts with a shared Drive folder and a deadline that's already too close. The folder might contain front views, side angles, scale shots, packaging, and a few reference images from the previous season. Nothing is technically broken. The problem is that the files aren't ready for sale yet.
Google has moved a long way here. Google Photos and Gemini now support AI-powered image editing such as Magic Eraser, Unblur, and direct object edits on Google Drive-stored images, with edited outputs saved back to Drive as part of the March 2026 Workspace updates for eligible subscribers and regions, as described on Google Workspace image tools. That matters because it removes some of the old friction. You no longer need to download every image just to test a cleanup edit.
What slows teams down is scale. A DigitalTrends report on Google Photos AI editing expansion says a 2025 CA-focused survey found 82% of Sacramento-area e-commerce sellers waste 3–5 hours weekly on manual download and re-upload workflows because native Google AI tools only support one-by-one edits and offer no automated batch processing from Drive.
Where native Google tools help
For casual use, the setup is good enough:
- Single-image fixes: Remove a distracting prop, tidy a background object, or create a stylised variation from one source image.
- Fast collaboration: Keep the edited file inside Drive so a merchandiser, photographer, or designer can review it without another handoff.
- Low technical barrier: Non-technical staff can describe the change in plain language instead of learning desktop editing software.
Where the process breaks down
Catalogue work asks for something else:
- Consistency across batches: Every SKU in a collection needs the same treatment.
- Multiple outputs per source image: One original may need a white-background marketplace version, a square store image, and a lifestyle variation.
- Review at operational speed: Teams need to spot issues early, not after the full run.
Operational rule: If your team is editing by file instead of by folder, the process won't stay efficient once the catalogue grows.
This is usually the point where teams start caring more about asset management than AI novelty. A useful primer is The AI CMO's guide to MAM success, because the primary bottleneck often isn't image generation. It's library control, versioning, and handoff discipline.
If your team is trying to stop the one-by-one cycle, practical approaches to e-commerce image automation are closer to the day-to-day problem than generic AI demos.
Connecting Your Google Drive Image Library for Batch Processing
The first job isn't editing. It's getting the right image set into a workflow without creating another copy problem.
When teams use Google Drive as the source of truth, the cleanest setup is to connect the Drive library directly to the processing layer, select the relevant folders, and keep the original files untouched. That avoids the familiar mess of local downloads, duplicate upload folders, and mystery “final-final-v2” files.
Start with the folder structure you already have
Use the folders from the shoot as your intake point. In practice, that means selecting a collection like:
- Seasonal range folders such as Spring Launch or Holiday Gift Sets.
- Product-line folders such as mugs, candles, or denim jackets.
- Variant folders where colour or size references already exist in the file names.
This works better than dragging random files into a temporary editor. The folder names usually carry enough context for downstream review, and they help when you need to split one processing run from another.

Keep originals separate from outputs
A good rule is simple. Never overwrite the source shoot folder. Import from one Drive folder, process the batch, and save outputs to a different destination folder with a naming convention your team will recognise immediately.
A practical pattern looks like this:
| Drive folder type | Purpose |
|---|---|
| Raw shoot | Original files from the photographer |
| Selected batch | The subset approved for processing |
| Marketplace output | Finished images for listing upload |
| Archive | Older exports you don't want mixed into current work |
That structure matters more than people think. Once outputs come back from AI editing, you need a clear split between originals, reviewed versions, and platform-ready assets.
What a connected workflow should do
The right setup should let you:
- Browse Drive inside the workflow tool: You should see folders and images without rebuilding the library manually.
- Select full folders or filtered subsets: Batch work starts with sets, not individual files.
- Leave source files in place: The process should reference the images, not force a destructive move.
- Return results back to Drive: Review is much easier when edited files land where the team already works.
For teams moving beyond ad hoc edits, a solid reference point is AI image workflow automation, especially if your current process still depends on repeated export and upload steps.
Building Your Custom AI Editing Workflow
Once the images are connected, the power lies in defining the sequence. Good catalogue processing doesn't rely on a single prompt. It uses a repeatable chain of edits that applies the same rules to every image in the batch.
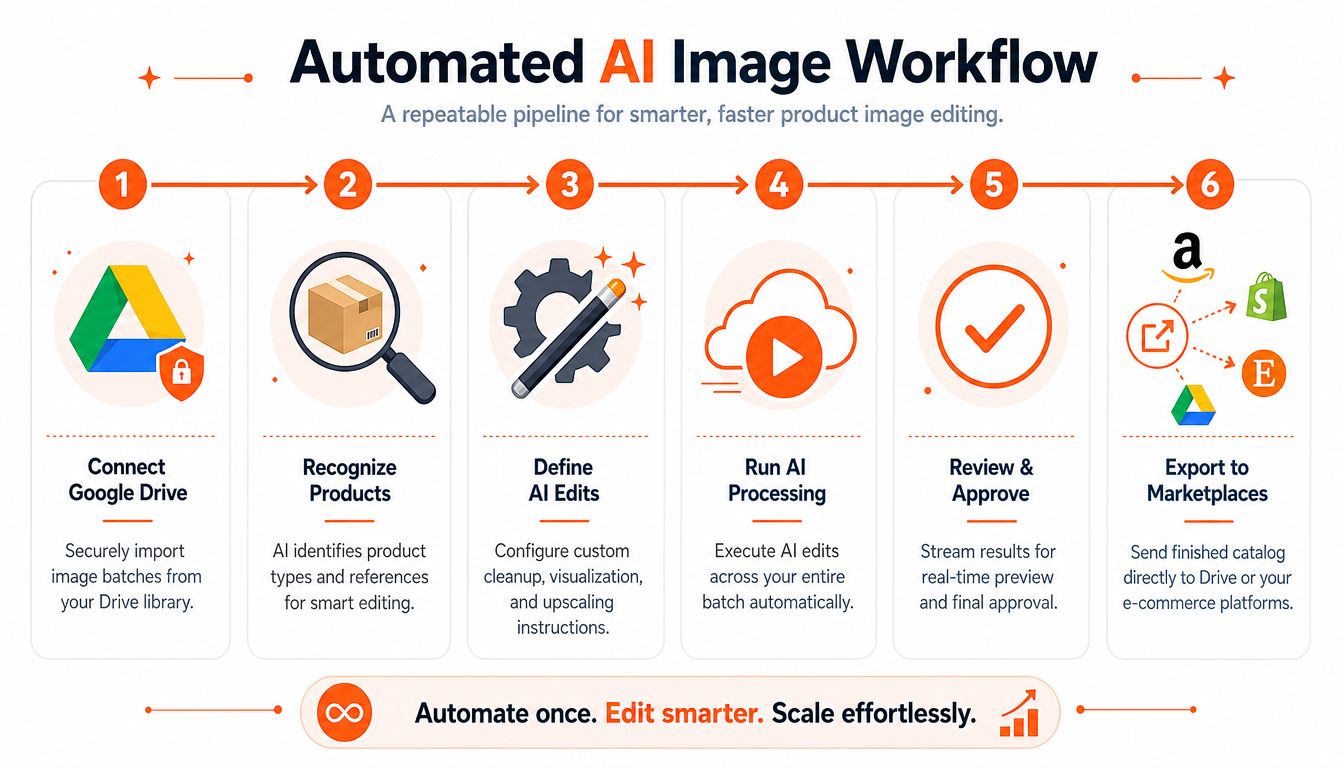
A Wizcommerce explanation of batch image processing defines it clearly. Batch image processing works by applying a predefined set of rules across hundreds of images simultaneously, which can reduce manual effort by up to 90% for large B2B e-commerce catalogues while ensuring visual consistency.
A practical pipeline for product listings
For most online sellers, a useful first workflow looks like this:
Clean the image
Remove distractions from the frame. This can include dust, props left from the shoot, support stands, or minor background inconsistencies.Remove or replace the background
For Amazon-style main images, that usually means a plain white background. For brand store use, it may mean a neutral studio backdrop or a generated lifestyle scene.Reframe for platform format
Shopify often needs square presentation. Amazon may need a different crop depending on the image role. Etsy listings usually benefit from larger, clearer compositions.Upscale the approved output
Upscaling belongs near the end. If you upscale before cleanup and reframing, you spend processing effort on pixels you may throw away later.Generate alternate versions
One source image can become a marketplace main image, a collection tile, and a richer brand visual.
Why chained steps beat one-off prompts
One-off prompts work when you're experimenting. They break when you're managing a catalogue.
A chained workflow creates discipline:
- The same edit order applies to every image
- Outputs stay consistent across a collection
- Review gets faster because you know what the pipeline should produce
If one candle jar gets a softer crop and another gets a tighter crop for no reason, customers notice the inconsistency even if they can't describe it.
That's also why specialists still keep standalone tools in mind for edge cases. If you're testing isolated subject extraction before committing to a broader pipeline, background removal for creators is the kind of focused utility worth comparing against your batch workflow.
Add product awareness, not just edits
The smarter setup doesn't just process images blindly. It recognises product references, variants, and image roles before applying edits. That's especially useful when one Drive folder contains both hero shots and detail shots, or when different products need different prompts.
In a dedicated workflow layer, this usually means the system can import batches from Drive, recognise products and references, generate AI edit instructions, run cleanup, visualisation, and upscaling, then stream results back for review. That's a more practical model for catalogue work than treating every image like an isolated creative task.
For teams building this kind of repeatable production flow, AI batch image editing is the relevant operating model. The value isn't the edit itself. It's the fact that the same instructions can run cleanly across the whole collection.
Previewing and Refining AI Edits in Real Time
Configuration is only half the job. The other half is what happens when the first processed images start coming back.
Doing this for a whole catalog?
MerchLoom runs background removal, upscaling and AI editing across every product photo you have — one prompt, whole batch. Try 2 batches free, no signup.
Try it free
This process enables experienced teams to save time. They don't wait for the full batch to finish before checking quality. They review the first results, look for repeatable mistakes, pause if needed, adjust the workflow, and continue. That's much better than discovering at the end that every reflective bottle picked up a bad edge cutout or every folded garment was cropped too aggressively.
What to check in the first streamed results
The early review pass should focus on patterns, not perfection.
- Subject edges: Hair, fabric fibres, transparent packaging, and glossy reflections reveal segmentation issues quickly.
- Crop behaviour: Check whether the framing leaves enough margin for marketplace thumbnails and zoom.
- Colour stability: Make sure the edited output still matches the physical product closely enough for listing use.
- Prompt drift: If the system starts interpreting “clean background” as “restyle the entire shot”, tighten the instruction.
A batch workflow that streams results for review has a real operational advantage. You can correct the process mid-run instead of restarting from scratch.
The resolution trap many teams miss
Resolution is one of the biggest practical issues in AI image editing from Google Drive. A Workalizer analysis of Gemini image resolution limits notes that when using Google's Nano Banana model, images over 2048px are downscaled to 2K for AI Plus and Pro tiers, and 47% of first-time users fail to request the higher 2K resolution over the 1K default.
That matters in catalogue work because a listing image may look acceptable at a glance but still feel soft in zoomed marketplace views. If your team assumes the system will preserve the original high-resolution file automatically, you can end up approving outputs that are technically clean but commercially weaker.
Practical check: Before running a large batch, verify the output setting on a small sample and inspect the result at marketplace zoom, not just in a thumbnail grid.
Refine without breaking the batch
The best review process is incremental:
| Stage | What to do |
|---|---|
| First few outputs | Check segmentation, crop, and resolution |
| Early adjustment | Tighten prompts or change output settings |
| Mid-batch review | Confirm the fix holds across different products |
| Final approval | Export only the versions that meet listing standards |
If your batch includes staged product scenes as well as clean packshots, the review criteria should differ by output type. Lifestyle images can tolerate more creative interpretation. Main marketplace images usually can't. Teams working on contextual product visuals often benefit from examples of AI product staging, because the review standard for a staged image isn't the same as the standard for a compliance-driven white-background listing photo.
Exporting Your Finished Catalog Back to Drive and Marketplaces
A batch isn't finished when the images look good. It's finished when the files land in the right place with the right structure for upload.
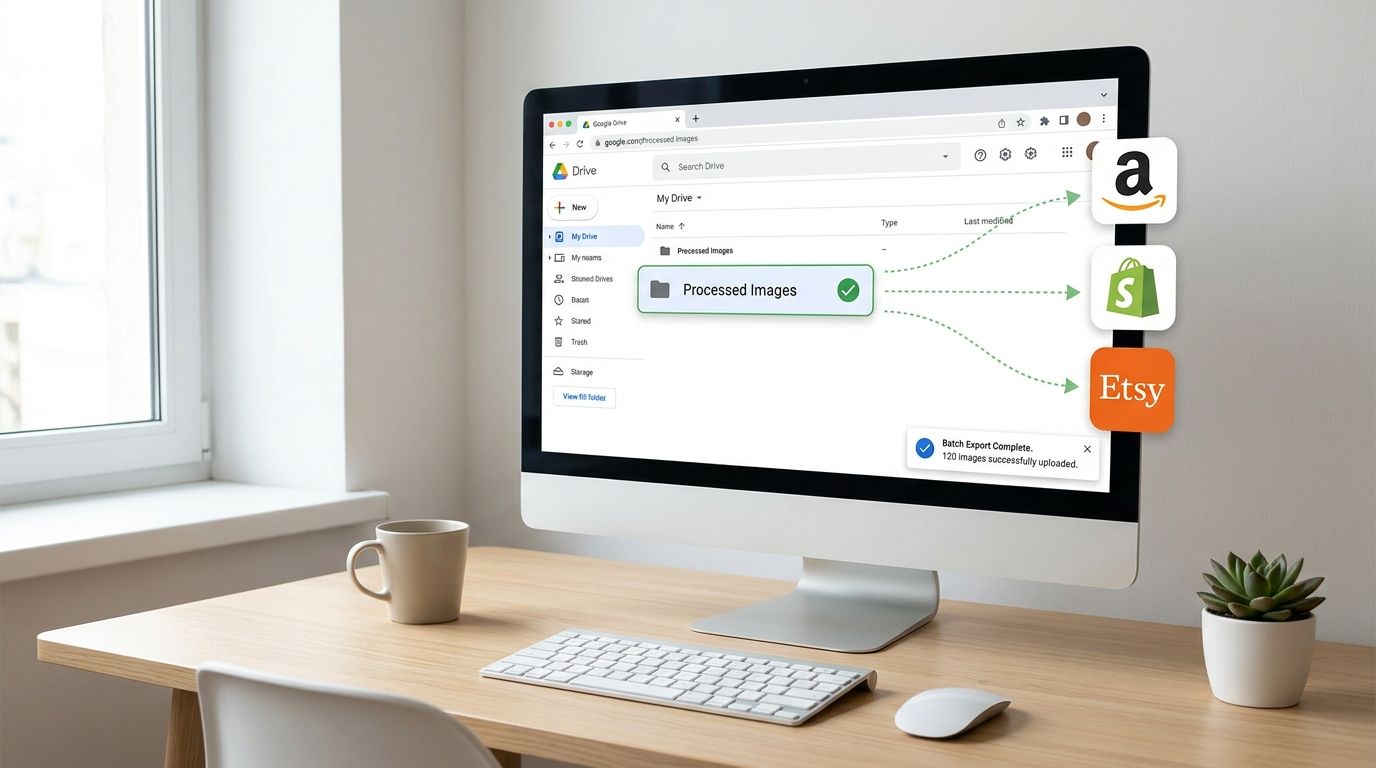
The cleanest handoff is to save the processed assets into a separate Google Drive folder for each destination. That keeps your originals untouched and gives merchandising, marketplace, and ad teams a clear handoff point. Folder names like “Ready for Shopify”, “Amazon Main Images”, or “Etsy 2000px” may feel simple, but they cut a lot of confusion later.
Send outputs back to Drive with intent
Don't treat export as an afterthought. Decide in advance:
- Which files are approved for listing
- Which variants belong in separate folders
- Which naming pattern maps cleanly to your SKU structure
- Which outputs are for marketplace use versus creative use
Here, catalogue discipline pays off. A tidy export folder can move straight into listing operations. A mixed folder usually creates one more manual sorting step.
Shopify bulk import from Google Drive
For Shopify, there's a practical route if your files live in Drive. A Shopify Community explanation of Google Drive image imports notes that to bulk import images from Google Drive to Shopify, sellers must first convert each shared Drive link into a direct download URL and then compile these URLs into a CSV file for the product import tool.
In plain terms, the process works like this:
- Export finished files to a dedicated Drive folder
- Generate shareable links for those files
- Convert each share link into a direct download URL
- Place those URLs into the product CSV used for bulk import
- Run the Shopify import and verify image mapping
That method isn't glamorous, but it closes the loop from shoot folder to live catalogue without downloading every final image locally.
Marketplace work gets easier when export folders mirror the upload method. If Shopify needs CSV-ready image URLs, build the export set around that requirement from the start.
For sellers trying to improve click-through and listing quality after export, improve Google Shopping sales is a useful companion read because image readiness only matters if it also supports feed performance and listing quality.
If Amazon is one of your destinations, keep its image rules separate from your store imagery. A reference like Amazon product image requirements helps avoid mixing compliant main images with more flexible brand content.
Troubleshooting and Best Practices for Large Catalogs
Large catalogues expose every weak point in the workflow. The mistakes aren't usually dramatic. They're repetitive. A soft crop repeated across a hundred SKUs. A variant folder that mixes red and burgundy. A background removal pass that works on cardboard boxes but struggles on faux fur slippers.
That's why scaling AI image editing from Google Drive depends as much on file discipline as model quality.
Know which images are likely to fail
Some product categories are easy. Others need extra review.
An EdTech Innovation Hub report on Google Pics and Docs Live says Google Pics' batch background removal success rate for complex textures like fur drops to 68%, and it strips original file metadata from Drive, which disrupts EXIF-based inventory tracking for CA e-commerce sellers.
That should change how you batch. Don't mix easy and difficult image types in the same approval logic. If the folder includes glassware, lace, reflective packaging, and furry textiles, separate them into review groups with different expectations.
Organise Drive like an operations system
A large Drive library needs predictable structure. The simplest version is often the best:
- By product line: Keep mugs, bedding, footwear, and accessories in distinct top-level folders.
- By variant: Use subfolders for colour or material differences when the visual distinction matters.
- By image role: Separate hero images, detail shots, packaging, and reference imagery.
- By status: Raw, selected, processed, approved, and exported should never sit in one mixed folder.
This makes batch selection cleaner and reduces prompt confusion. A folder full of front-facing hero images can usually run through one workflow. A folder mixed with close-up stitching shots and boxed products usually can't.
Plan around metadata loss
Metadata sounds boring until it breaks a downstream system. If your inventory or DAM process relies on EXIF or file-level metadata for product differentiation, stripping that information during editing can create a matching problem later.
The practical answer is to avoid relying on the edited image file alone as the source of truth. Keep product mapping in file names, folder structure, or a separate catalogue sheet that survives export. If your team needs to reconnect images to variants later, naming discipline matters more than people expect.
Use a review strategy that fits the batch
Not every batch deserves the same QA effort.
| Batch type | Review approach |
|---|---|
| Clean studio packshots | Spot-check early outputs, then sample by product type |
| Texture-heavy items | Review more aggressively and expect manual corrections |
| Variant collections | Check naming and colour consistency before approving |
| Marketplace mains | Validate crop, background, and compliance image by image |
A scalable workflow doesn't mean zero manual review. It means the team spends review time where failure is most likely.
One more practical point. Google Cloud Vision AI offers workflow building blocks around image analysis and batch product recognition, including a free allowance of 1,000 billable units of visual AI features per month and model structures such as Product recognisers linked to Catalog and ProductRecognitionIndex in Cloud Storage, according to Google Cloud Vision AI documentation and Google Cloud batch product recognition docs. That's useful context if your operation is trying to identify products and variants automatically before editing. It doesn't remove the need for review, but it can make the handoff from storage to processing more structured.
For most sellers, the reliable pattern is straightforward. Keep the Drive library organised, split hard image types into their own batches, review the first outputs early, and export only from approved folders. AI can remove a lot of repetitive work. It won't fix a messy catalogue on its own.
If you're trying to turn Google Drive folders into listing-ready images without editing one file at a time, MerchLoom is built for that catalogue-scale workflow. It can import image batches from Drive, recognise products and references, generate AI edit instructions, run chained cleanup and visualisation steps, and stream results back for review so your team can move from raw shoot folders to marketplace-ready exports with less manual repetition.
Stop editing product photos one at a time
Upload your catalog or connect your store. Describe the result once. MerchLoom does the rest.
Try it free — no signup