
How to Remove Picture Background in PowerPoint: 2026 Guide
Learn how to remove picture background in powerpoint using built-in tools. Discover when to use AI batch editing for e-commerce images in 2026.
You're probably in one of two situations. You need to clean up a single product photo fast, or you've just realised that doing this one image at a time inside PowerPoint is going to become a problem very quickly.
PowerPoint can remove image backgrounds. It's been able to do that for a long time, and for simple product shots it's often good enough. If the item is photographed against a plain backdrop, you can usually get a usable cutout without opening Photoshop or another editor.
Where sellers get stuck is scale. A quick fix for one slide, one sales deck, or one social post isn't the same thing as preparing a whole catalogue for Amazon, Shopify, Etsy, and ads. That's the line I'd want a new team member to understand early, because it saves a lot of wasted effort.
Quick Background Removal for Simple Product Photos
If you want the fastest answer to how to remove picture background in PowerPoint, start with the two built-in options that have been around across product generations: Set Transparent Colour and Remove Background. Microsoft confirms both methods still exist, with some UI differences between Microsoft 365 and one-time purchase Office versions, which is useful because it means the workflow hasn't disappeared, it has just shifted depending on version and interface (Microsoft Q&A on PowerPoint background removal changes).
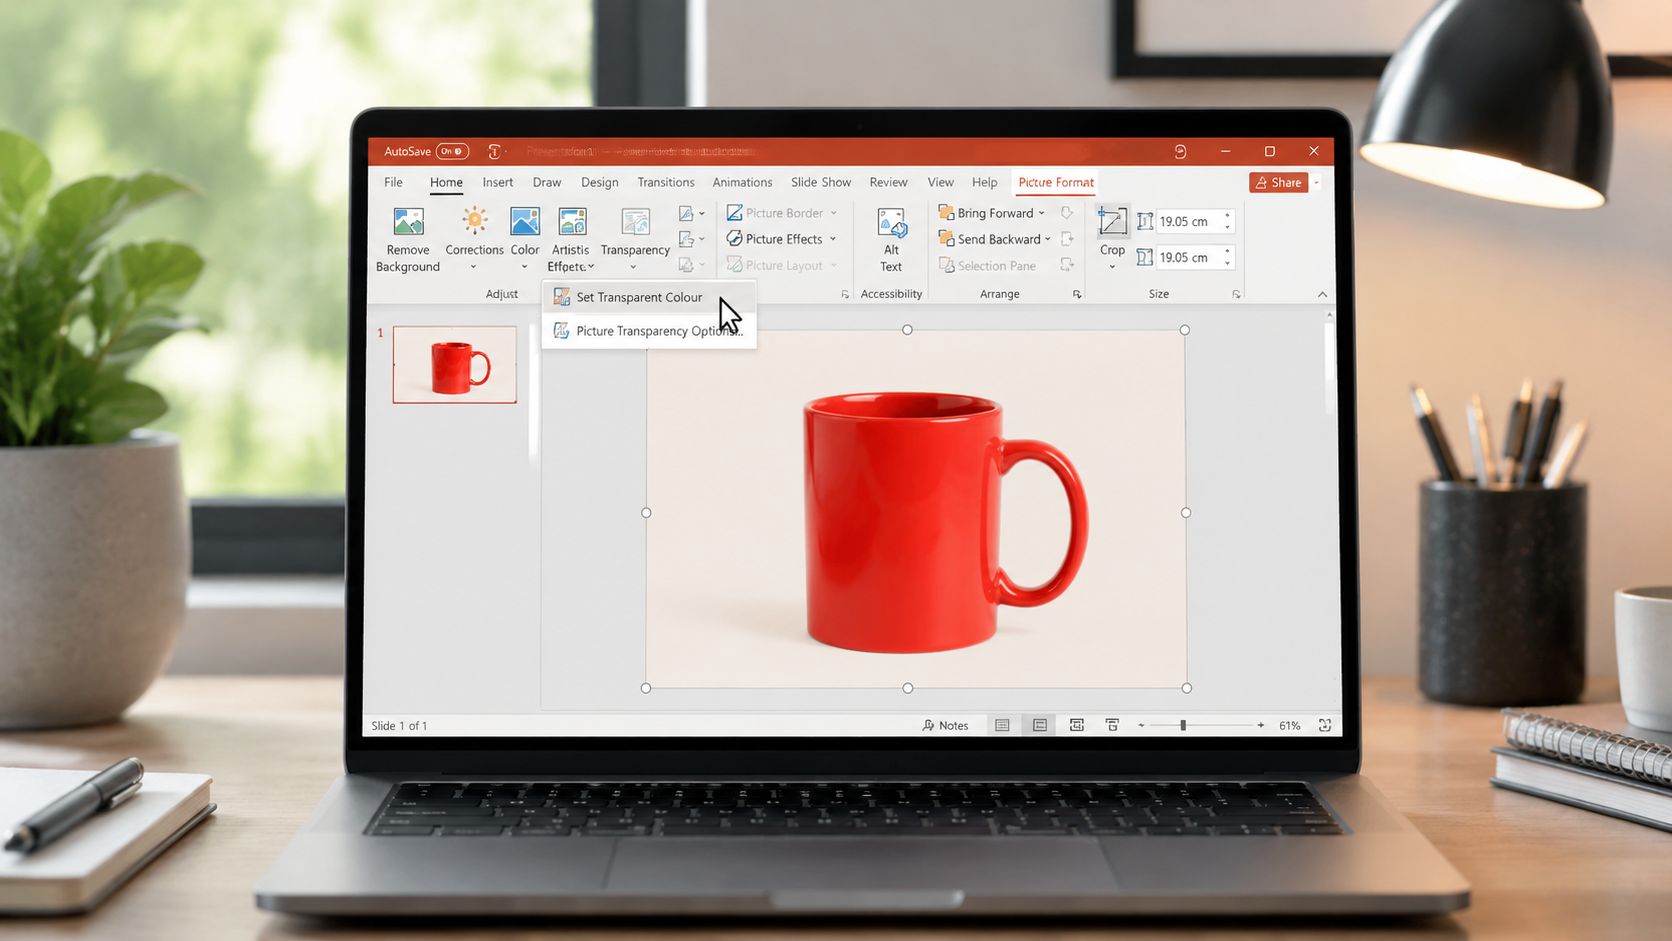
Use Set Transparent Colour for plain backgrounds
This is the quickest method when the background is one flat colour, usually white.
- Insert the picture into your slide.
- Click the image.
- Go to Picture Format.
- Choose Colour.
- Select Set Transparent Colour.
- Click the background colour you want to remove.
That's it. For logos, icons, and basic product shots on a clean white background, this can work well.
The trade-off is blunt. PowerPoint removes that selected colour wherever it appears in the image. If your product contains the same white or light grey as the background, those parts can disappear too. That makes this method risky for packaging, apparel, or products with highlights.
Use Remove Background for better control
If the background isn't a single solid colour, use Picture Format > Remove Background instead.
PowerPoint will usually place a coloured mask over the area it thinks should be removed. From there, you can adjust the selection and keep the subject. This method is more flexible than Set Transparent Colour because it works like a simple masking tool rather than a single-colour delete.
A few practical habits make it work better:
- Crop first: Trim empty space around the product before removing the background.
- Tighten the selection box: Give PowerPoint a clearer idea of what the subject is.
- Start with simple images: Bottles, boxes, shoes, and gadgets on plain backdrops tend to behave better than fuzzy textiles or jewellery.
Practical rule: If the image is for an internal deck, a draft listing, or a quick mock-up, “good enough” is often actually good enough.
For casual users, these tools solve the problem. For sellers, they're a useful stopgap. If you've used similar quick editors before, the limitations will feel familiar, much like the workflows discussed in this guide to Canva background removal.
When the fast method is enough
Use PowerPoint's quick tools when you need:
- A single product image: One hero shot for a presentation or pitch.
- A rough transparent cutout: Something to test on a banner or flyer.
- A quick social asset: Not your final catalogue master file.
Don't rely on it when the photo has shadows, texture, transparent packaging, soft edges, or lots of similar colours between product and background. That's where manual cleanup starts.
Advanced Manual Techniques for Complex Images
The easy jobs end when the product edge stops being obvious. Knitwear, plants, jewellery chains, glassware, and anything with thin details usually need manual refinement.

Clean up the mask with Mark Areas tools
After you choose Remove Background, PowerPoint lets you refine the result with Mark Areas to Keep and Mark Areas to Remove, making a decent automatic cutout usable.
Use Mark Areas to Keep when the tool removes part of the product by mistake. Use Mark Areas to Remove when bits of the old background remain around the edge.
The best way to do this is slowly and in small strokes:
- Zoom in close: Fine details are hard to fix at normal view.
- Click in short strokes: Long scribbles confuse the mask.
- Work around problem edges first: Handles, corners, chains, leaves, fur, and frayed fabric.
- Recheck the whole image before saving: Small background fragments often hide in shadows.
The first automatic result is rarely the final result on a difficult product photo.
Many people underestimate the labour. One image can be manageable. A folder full of images with similar edge problems becomes repetitive very quickly.
A workaround for stubborn shapes
If the automatic mask keeps failing, a shape-based workaround can help. Draw a shape over the product, edit the points, and use it as a rough manual mask. It's not elegant, but for rigid items such as books, boxes, bottles, or simple home goods, it can produce cleaner outlines than repeated background-removal attempts.
That method falls apart on organic edges. You can fake a clean cut around a ceramic mug. You can't realistically hand-trace a fluffy sweater and expect consistent results across a whole range.
A good companion reference if you're comparing this with heavier desktop editing is this walkthrough on removing a white background in Photoshop. It highlights the same basic reality: the more detailed the edge, the more manual judgement matters.
Here's a quick visual of the standard PowerPoint process in action:
What works and what doesn't
Usually workable inside PowerPoint
- Hard-edge products: boxes, cookware, electronics, books
- Simple contrast: dark item on light backdrop, or the reverse
- Clean photography: minimal shadows and no busy background
Usually frustrating inside PowerPoint
- Hair-like edges: fibres, fur, tassels, fringe
- Reflective items: glass, chrome, glossy packaging
- Low contrast: beige product on beige set, grey on grey
- Semi-transparent material: plastic wrap, sheer fabric, translucent bottles
If you're teaching a junior team member, this is the point to be direct. PowerPoint can rescue a complex image, but it won't do it quickly, and it won't do it consistently across a catalogue.
Comparing PowerPoint Background Removal Methods
Not every image deserves the same workflow. The right method depends on the background, the product edge, and whether you're solving one image or trying to keep a catalogue organised.
PowerPoint Background Removal Method Comparison
| Method | Best For | Speed | Precision | Catalogue Viability |
|---|---|---|---|---|
| Set Transparent Colour | Logos, icons, products on one flat background colour | Fastest | Low to moderate | Poor |
| Remove Background tool | Product photos with visible subject separation | Moderate | Moderate, improves with manual cleanup | Limited |
| Shape masking | Rigid objects with simple outlines | Slow | Moderate on hard edges | Very poor |
How to choose without wasting time
If the image has a pure white or single-colour backdrop, try Set Transparent Colour first. It's the fastest test. If it breaks the product itself, abandon it immediately and move on.
If the item has a normal photo background but still stands out clearly, use Remove Background. This is the best general-purpose option in PowerPoint because it gives you a first pass plus manual correction. For many one-off seller tasks, that's enough.
Use shape masking only when the object is geometrically simple and the standard tool keeps making bad guesses. It's more of a workaround than a proper production method.
Decision shortcut: Choose the method based on edge complexity, not on what looks easiest in the ribbon.
For sellers comparing PowerPoint with more design-oriented tools, this guide on how to remove background in Illustrator is useful because it shows what more precise path-based workflows look like. That contrast makes PowerPoint's role clearer. It's a practical convenience tool, not a catalogue production environment.
The catalogue question matters most
The missing column in most tutorials is repeatability. A method can be acceptable for one image and still be wrong for operations.
Doing this for a whole catalog?
MerchLoom runs background removal, upscaling and AI editing across every product photo you have — one prompt, whole batch.
Try MerchLoomThat's why I look at PowerPoint this way:
- Good for quick edits
- Acceptable for occasional listing fixes
- Weak for standardising many SKU images
- Poor for reusable production workflows
If you're editing sporadically, it's fine. If you're building a repeatable listing pipeline, the decision changes.
Refining and Exporting Images for Marketplaces
Removing the background is only half the job. The critical next step is whether the exported file works cleanly across marketplaces, storefronts, ad creatives, and internal design handoff.
Refine the edge before export
In PowerPoint Online, selecting Remove Background sends the image to Microsoft's AI service and returns a result in seconds, which is useful for speed. But even there, background removal often still needs manual cleanup, which shows why it isn't a one-click catalogue solution for sellers handling lots of product images (PowerPoint background removal guide from PPT Productivity).
That matters because marketplaces punish sloppy edges visually, even when they don't reject the file technically. A faint fringe, a missing corner, or leftover shadow residue can make a product look low quality.
Before export, check these details:
- Corners and handles: These are common failure points.
- Light halos: They show up when the old background was pale.
- Shadow remnants: Decide whether they help realism or just look messy.
- Fine elements: Chains, straps, leaves, cords, and stitching need a second look.
If the cutout is jagged, minor softening can help, but don't overdo it. Too much edge softness makes products look blurry and detached.
Export as PNG, not JPG
This is the non-negotiable step. After background removal, right-click the image, choose Save as Picture, and save it as a PNG file.
PNG preserves transparency. JPG does not. If you save the file as JPG, the transparent area will be filled, which defeats the point of doing the cleanup in the first place.
That transparent PNG gives you flexibility. You can place the same product on a plain marketplace background, a branded Shopify layout, or a promotional creative without cutting it out again.
If you're preparing listings, it helps to review platform rules before export. This reference on Amazon product image size requirements is a practical starting point because background removal and canvas sizing usually need to be handled together.
Think beyond one platform
A transparent file is useful because each channel wants something slightly different. Amazon often needs a clean marketplace-ready look. Shopify may need square presentation and branded consistency. Etsy sellers often care more about how the product sits inside a styled listing image.
For teams also producing ad creatives, the visual standards for marketplace listings and campaign assets often overlap. A useful supporting resource is this overview of social media images for Amazon and Walmart, especially when you're adapting a single cutout into multiple downstream formats.
The practical takeaway is simple. Don't finish at “background removed.” Finish at “exported in the right format, clean enough to reuse anywhere.”
When PowerPoint Is Not Enough for Your Catalogue
PowerPoint is fine until volume shows up.
Most guidance on PowerPoint background removal treats the task as a single-image edit. Microsoft's own support flow is built around selecting one picture and manually refining it, which misses the primary e-commerce problem: keeping a large SKU catalogue consistent when every image needs similar treatment (Microsoft support on removing the background of a picture in Office).
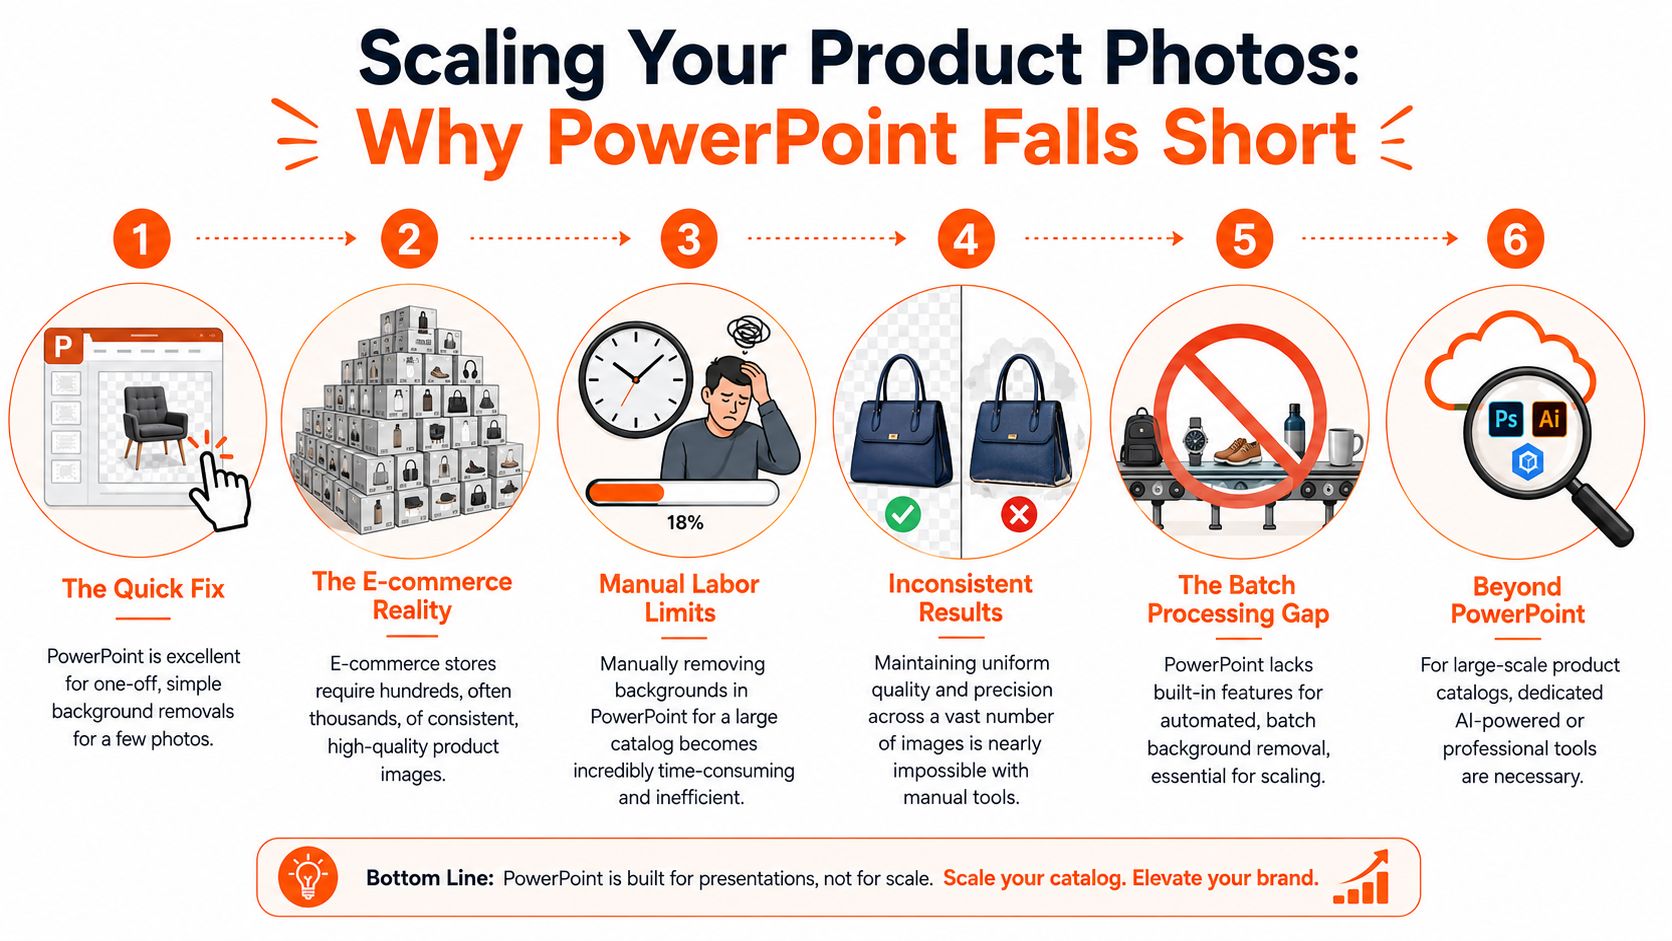
Where manual editing breaks down
The problem isn't whether PowerPoint can remove a background. It can. The problem is what happens when you need the same standard applied across a whole collection.
A few issues show up immediately:
- Every file needs attention: Open image, select tool, refine edge, export, repeat.
- Results drift between operators: One person keeps a natural shadow, another removes it.
- Naming and export become messy: Transparent PNGs, resized versions, and revised files spread across folders.
- Rework is common: If marketplace requirements change, the process starts again.
A single image invites patience. A catalogue exposes inconsistency.
The hidden cost is variation
In e-commerce operations, inconsistency causes more trouble than a merely average image. One product with a slightly rough edge might pass unnoticed. A whole category page with mixed cutout quality looks disorganised.
That's what PowerPoint isn't built for. It doesn't give you a batch-native way to apply the same logic across hundreds of files. It doesn't function like a repeatable production line. It functions like an office app with useful image editing attached.
When you have to remember your own process each time, you don't have a workflow. You have a habit.
That distinction matters for sellers managing seasonal launches, marketplace expansion, or supplier refreshes. The larger the image library gets, the more important standardisation becomes.
The tipping point
You don't need to wait until operations become chaotic to move on from manual editing. The tipping point usually arrives when one of these becomes true:
- You're processing collections, not isolated images
- Different channels need different output versions
- More than one person touches product visuals
- You need the same edit logic reused later
At that point, PowerPoint becomes a bottleneck. It still has value for quick internal tasks, but it stops being the right tool for production catalogue work.
The Professional Workflow with Batch AI Removal
Once image cleanup becomes operational, the right question changes from “How do I remove this background?” to “How do I run the same image workflow across my whole catalogue without babysitting every file?”
That's where batch AI tools make sense. Instead of opening one product shot at a time, you bring in a collection from the storage or commerce system you already use, define the output you need, and run the process across the set.

What a scalable workflow looks like
A proper batch workflow usually follows a sequence such as:
- Remove background from the full image set.
- Reframe or resize for channel-specific layouts.
- Apply consistent output rules across the batch.
- Export versions for listings, ads, or storefront use.
That sequencing matters. In professional operations, teams often save time and reduce rework by deciding the order of edits up front instead of improvising per image.
If you're comparing tooling options, this article on an AI photo background changer is a useful reference point because it reflects the broader shift away from one-file-at-a-time editing and toward automated image cleanup.
Why sellers move beyond office tools
Batch systems solve different problems than PowerPoint:
- Consistency: The same rule set applies across the collection.
- Throughput: You don't need to open and export each file manually.
- Reuse: Once a workflow works, you can run it again on the next collection.
- Multi-platform preparation: One source set can feed marketplace, storefront, and campaign outputs.
That's a very different operating model from “click image, fix mask, save PNG, repeat.”
For sellers dealing with growing catalogues, this is the more useful way to think about image editing. It's not about finding a fancier cutout button. It's about replacing repetitive manual handling with a repeatable system. If you want a deeper look at how these systems are structured, this guide to AI batch image editing explains the logic well.
PowerPoint still has a place. It's handy for one-offs, quick tests, and internal presentation work. But once product imagery becomes a pipeline instead of a task, batch AI removal is the professional answer.
If you've outgrown one-by-one editing in PowerPoint, MerchLoom is built for the next step. It lets you run repeatable AI image workflows across full product collections, so you can remove backgrounds, resize for marketplaces, and keep catalogue output consistent without rebuilding the process every time.
Stop editing product photos one at a time
Upload your catalog or connect your store. Describe the result once. MerchLoom does the rest.
Try MerchLoom