
How to Extend Background in Photoshop for Product Photos
Learn how to extend background in Photoshop using Content-Aware Fill, Generative Fill, canvas resize, and clone stamp for consistent e-commerce listings.
You're staring at 200 product photos that don't match the listing rules. One needs a pure white Amazon main image at RGB 255,255,255 with the longest side 1600px or more, another needs an Etsy-ready file with the shortest side 2000px, and your Shopify set wants a clean square crop up to 4472x4472. That's not a design problem. It's a catalog problem, and the first move is to set the output spec before you open Photoshop.
Set the Catalog Goal Before You Touch Photoshop
A product shot that has to meet Amazon main image rules, an Etsy crop, and a Shopify tile does not want the same treatment. Set the output spec first, or you end up fixing the same file three different ways after the fact.
Write one line for each SKU batch before you open Photoshop. Put the target ratio, the needed size, and the background color in that line. For marketplace listings, that might mean a square frame, pure white for Amazon, and a wider version for social placements. One clear spec keeps the work consistent across a whole run instead of making the first image look right and letting the rest drift.
The method matters less than the target. Adobe added Generative Fill to Photoshop in the May 2023 release, which moved background extension from a manual edit to a prompt-driven tool inside the app (Adobe Generative Fill release context). Before that, sellers relied on Canvas Size and Content-Aware Fill as the repeatable route, and that still holds up when you need strict control across batches (manual extension workflow, traditional Photoshop workflow).

Practical rule: if you can't write the target spec in one sentence, you're not ready to batch 200 images.
For catalog planning, I keep the rules plain. Amazon gets a pure white canvas, Etsy gets a resolution-first check, and Shopify gets a square template unless the product itself needs another ratio. That is the difference between a one-off fix and a process that stays stable across a full catalog.
If the image spec has to match the listing copy, keep the visual brief next to the written brief. A set of product description templates for e-commerce helps keep tone and positioning aligned across the same SKU family. For file structure, use this product image library management workflow, because naming, folders, and output versions become part of the background-extension job once the catalog grows.
Extend With Content-Aware Fill the Catalog Way
A plain non-AI workflow still wins when you need the same result across a catalog, not just a single polished image. Open the file, add room with Image > Canvas Size or the Crop tool, then select the empty area and run Edit > Fill > Content-Aware. That old Photoshop path is still practical when you need the same canvas move repeated across many SKUs, and this non-AI workflow in Photoshop lays out the basic sequence clearly.
Run the edit in the same order every time
Start with the sizing step. Create the extra space with the canvas, then select the new area with the Magic Wand or Rectangular Marquee, then fill it with Content-Aware. A small overlap with the original background usually helps the fill blend better, and that matters more when you are pushing the same product through multiple exports, because small differences get obvious fast.
Keep the order fixed from file to file. If one image gets a wider canvas, a looser edge, or a different selection shape, the margin starts to wander. On a storefront grid, that reads like sloppy formatting, not a creative choice.
Keep the settings and the margin fixed
Save the same fill behavior for every batch. The goal is a repeatable result that holds subject placement and empty space from SKU to SKU, especially if you are preparing marketplace thumbnails or comparison grids. If the crop ratio and border treatment stay stable, the catalog looks controlled instead of patched together.
Keep the selection tight around the product and slightly into the original background. Too much empty space gives the fill more room to invent clutter.
For sellers who want a tighter reference for the menu path and the control points, this Content-Aware Fill Photoshop guide is useful. The method itself is simple. The part that keeps it working at catalog scale is using the same canvas width, the same selection shape, and the same export size across the whole run. If your source images already need cleanup before extension, it also helps to optimize AI photos for dropshipping so the fill has less noise to fight.
Extend With Generative Fill Using Reusable Prompts
Generative Fill is now part of a normal Photoshop workflow, and sellers use it for background extension because it fits the same batch process as the rest of a catalog job. The practical move is straightforward. Extend the canvas, select the empty area with the Lasso or Rectangular Marquee, open the Contextual Task Bar, choose Generative Fill, and use a prompt like “clean white background” or “remove” (Generative Fill workflow).
Build one prompt library, not a fresh prompt per image
If you rewrite the prompt for every SKU, the output drifts. Keep one prompt set for each catalog lane, then reuse it. A white backdrop prompt for Amazon should stay separate from a textured lifestyle prompt for Instagram, but each lane needs to be standardized so the instruction does not wobble from one file to the next.
That matters even more when lighting shifts between shoots. One batch may come from a brighter setup, another from softer light, and the AI fill can change tone if the instruction changes with it. Reference swatches in your prompt notes help keep the look anchored, because the prompt is part of the production system, not a one-off instruction. For tighter wording that holds up across product sets, these AI image prompt notes are useful.
Use the prompt to keep framing consistent
The main advantage is that the prompt lives inside the same Photoshop workflow you already use. If your catalog needs square framing for marketplace tiles, extend to the same ratio every time and reuse the same wording for background treatment. That keeps product placement and empty space more consistent across a whole collection.
It also helps when you are trying to keep export behavior stable across Amazon, Etsy, and Shopify. If the canvas size, selection shape, and fill language stay fixed, you get fewer surprises from file to file. That is the part that matters at scale, because one off-center result is a nuisance, but fifty of them turn into a cleanup pass.
For broader workflow planning, optimize AI photos for dropshipping is a useful reference if you are comparing how prompt-based editing fits into product pipelines.
Pick the Right Method for Plain, Textured, and Scene Backgrounds
The mistake most sellers make is using the same fix everywhere. That works on a flat studio sweep and falls apart on wood grain, fabric, or a room scene. A catalog needs method-matching, not tool loyalty.
Use the scene type to decide
| Background extension method by scene type | Best method | Why |
|---|---|---|
| Plain studio backdrop | Content-Aware Fill or Generative Fill | Simple surfaces tolerate either method and usually need only light cleanup |
| Seamless sweep with subtle gradient | Generative Fill, then manual cleanup if needed | It handles soft tonal transitions well when lighting matches |
| Textured wood, fabric, or repeating pattern | Manual clone stamp, sometimes with masking | AI fill often invents repeats or warps texture structure |
| Interior room or outdoor scene | Reshoot or careful Generative Fill | Complex perspective is where extension often starts looking fake |
Plain backdrops are easy. If the surface is flat and the subject is far from the edge, either fill method can get you there fast. The output usually only needs a quick edge check before export.
Textured surfaces are the problem. Wood planks, woven cloth, tile, and patterned paper all expose fake repeats fast. In those cases, a Clone Stamp with low flow is often safer than AI fill, because you can guide the texture instead of asking the software to invent it.
Doing this for a whole catalog?
MerchLoom runs background removal, upscaling and AI editing across every product photo you have — one prompt, whole batch. Try 2 batches free, no signup.
Try it freePractical rule: if your eye can follow the pattern, the pattern can betray the edit.
Scene backgrounds are even harsher. Once you're extending an interior wall, a doorway, a window line, or an outdoor horizon, the background starts carrying perspective. That's where many extensions belong in the “don't force it” category. Sometimes the better move is a reshoot with more room on either side, especially if the product edge sits too close to the frame.
Some teams also use inspection workflows to catch these failures before they go live. The category is described well by AI image inspection categories, especially when you're trying to separate a clean edit from one that only looked fine at thumbnail size. That's the right way to think about it, method first, then cleanup, not the other way around.
When Photoshop Alone Stops Being Enough at Catalog Scale
Photoshop can do the edit. It cannot remove the repetition burden from you. When you are opening 200 or 2,000 photos, running the same extension logic one file at a time starts eating the day, and the first image usually looks cleaner than the last because attention drops.
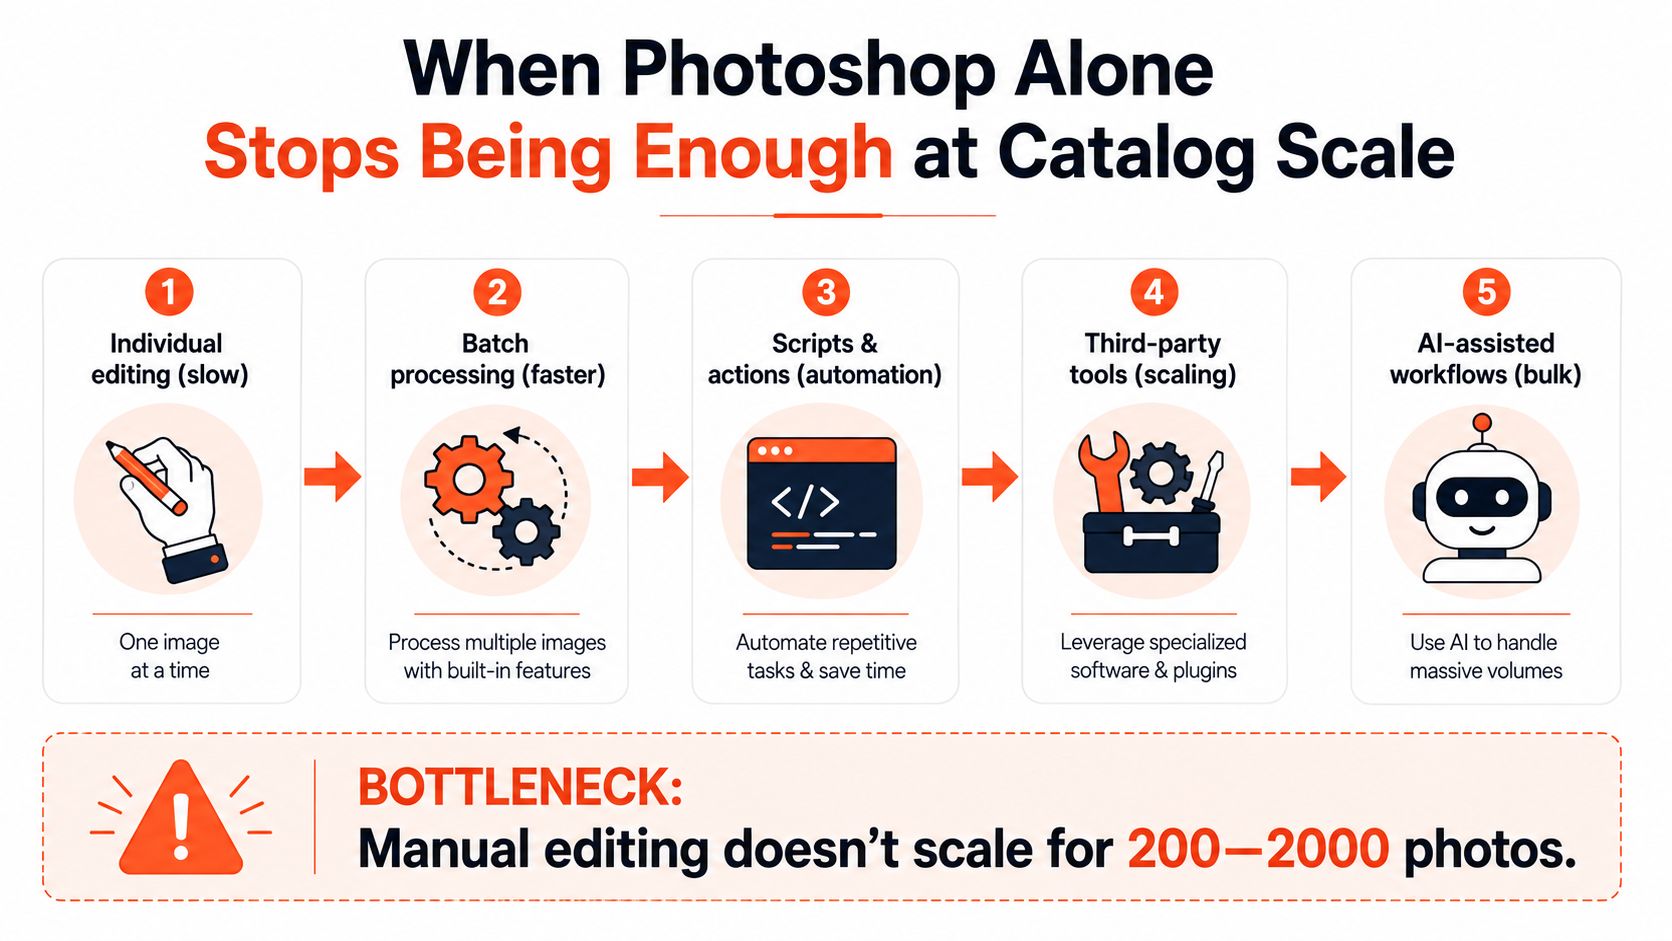
The bottleneck is repeatability, not skill
A seller can be very good at manual extension and still lose hours on routine work. Every image still needs to be opened, checked, extended, reviewed, and exported. Then the next file starts from zero. That is acceptable for a handful of hero images, but it becomes a drag when the catalog needs the same margin, same ratio, and same background treatment across a full product family.
Batch image workflow platforms exist for that reason. They absorb chained work like background extension, margin standardization, color matching, and export sizing so you are not repeating the same Photoshop steps hundreds of times. I am talking about the workflow category, not a magic button. The value is in the pipeline, not in pretending review is optional.
Use automation where the pattern is obvious
Tools like MerchLoom fit naturally for this task, and the fit is stronger when you are trying to standardize a catalog instead of polishing one-off assets. They run AI image workflows across full batches, which shifts the work from one image at a time to a collection-level pipeline. If you are deciding whether to use a dedicated workflow for this kind of job, product image background AI is a useful reference point for how the category is framed in practice. Initial images can be tried with no account, and pricing is pay-per-image with credits that never expire, which makes it easier to test a catalog workflow without a long-term commitment.
The important part is still human review. AI can standardize a batch, but someone still needs to spot the image that drifted, warped, or clipped the product edge. For sellers who live in spreadsheets and upload queues, that review step is the difference between automation and cleanup debt.
If the same action has to be done 500 times, the tool needs to be judged on drift, not just on one clean sample.
Some teams also use inspection workflows to catch these failures before they go live. The category is described well by AI image inspection categories, especially when you are trying to separate a clean edit from one that only looked fine at thumbnail size. That is the right way to think about it, method first, then cleanup, not the other way around.
Fix the Three Artifacts That Break a Catalog
The same three defects show up over and over in product batches. They're not rare, and they're not random. They come from the scene, the method, and the amount of manual attention left in the file.
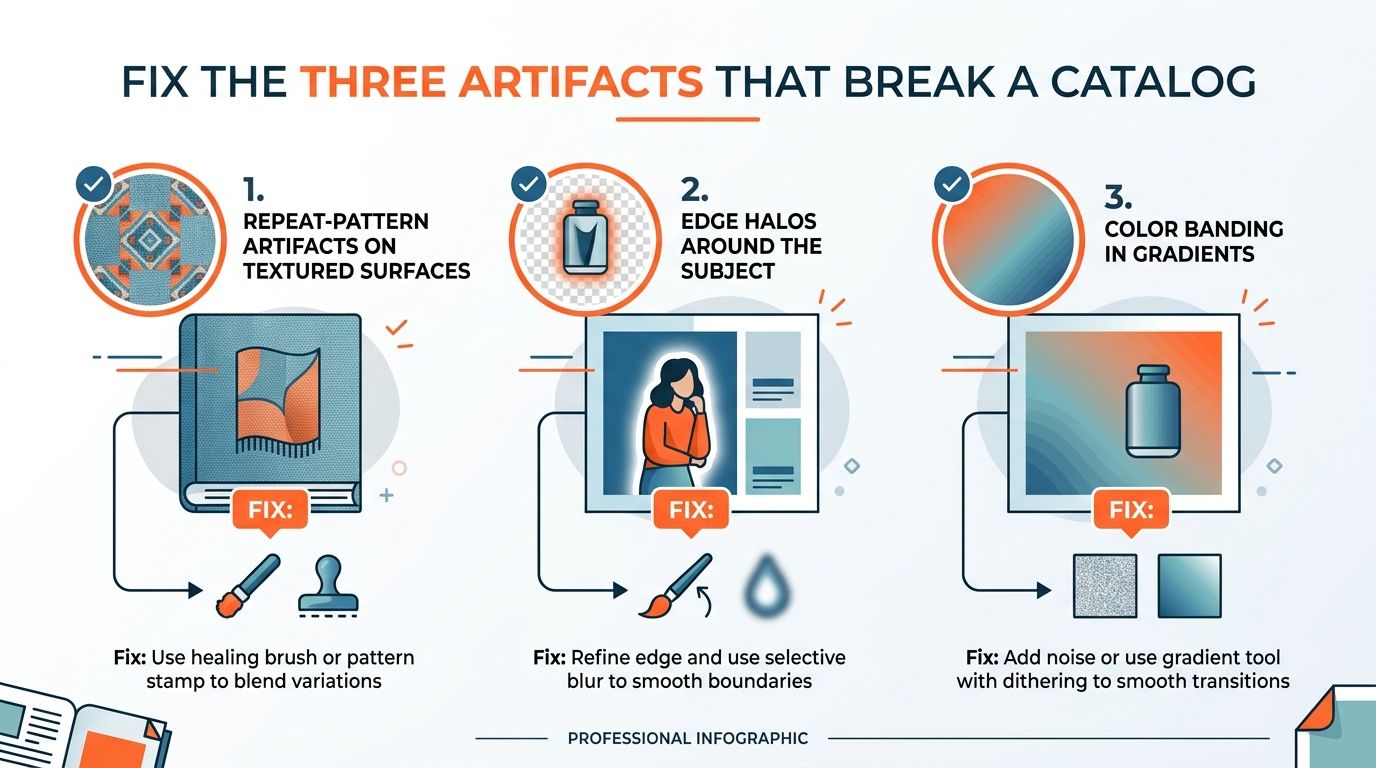
Repeat pattern on textures
Wood, fabric, and textured paper are where AI fill gets exposed fastest. If the extension starts echoing the same grain or weave in a way the eye can track, switch to Clone Stamp at low flow and paint the texture direction yourself. If you need more control, use frequency separation so the texture work stays separate from the tone.
Halos around the subject
Content-Aware Fill can leave a ghost edge where the product meets the new background. Protect the subject with masking before the fill, then trim the result with a layer mask rather than trying to erase the halo after the fact. That keeps the edge cleaner and saves you from damaging the object outline.
Color drift between old and new background
The original background and the extended area can look like two different shots, especially on smooth backdrops. Sample both with the Eyedropper, then use a Curves adjustment on the new layer until the luminance matches the original area closely. If the transition is in a gradient, keep the correction local instead of pushing the whole file.
For a deeper look at how compression can exaggerate these problems after export, this JPEG compression artifact guide is a useful companion reference. Once the file has color drift or halo artifacts, JPEG can make them easier to notice, not easier to hide.
QC Checklist and One Way to Run This at Scale
Before an image goes live, check the margin against the platform spec first. Then sample three background pixels, especially on Amazon, to confirm the white is RGB 255,255,255 where it needs to be. After that, zoom to 100% and inspect the edge where the product meets the new background.
The export check matters too. Amazon main images need that pure white treatment and a longest side of 1600px or more, Etsy wants the shortest side 2000px, and Shopify works well with a square file up to 4472x4472 when that fits the catalog plan. If one SKU breaks the pattern, it usually means the whole batch needs the same correction, not just the one file.
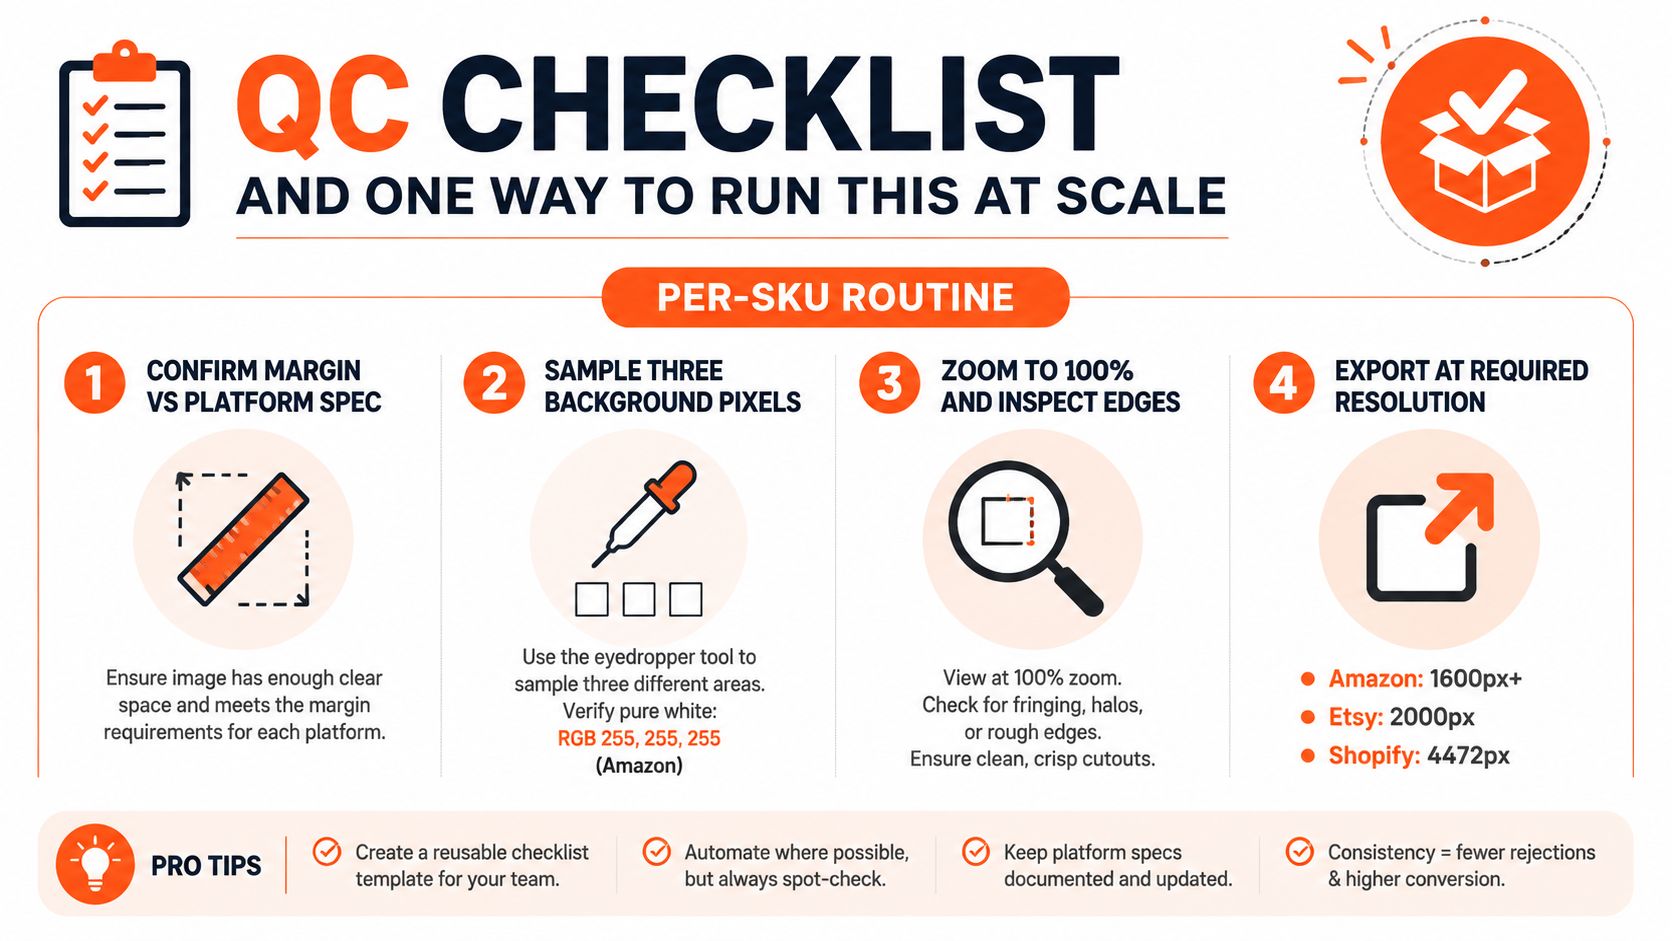
A short per-SKU routine
- Confirm the margin: Match the canvas and empty space to the platform spec before export.
- Check the background sample: Use the eyedropper on three spots and verify the tone, especially for Amazon white.
- Inspect at 100%: Look for halos, repeats, and edge clipping.
- Export at the required size: Keep the delivery file aligned to the platform target, not to whatever looked good on screen.
If you want to run that same logic across a whole catalog without opening every file by hand, MerchLoom is built to chain the background extension, margin standardization, color matching, and export steps through AI pipelines. You can try the first images with no account, and the pricing stays simple with pay-per-image credits that never expire. It doesn't replace Photoshop for sellers who want full manual control, but it does give you a way to process batches without repeating the same edit from scratch every time.
If you're ready to stop fixing the same product-photo problems one file at a time, try MerchLoom and run a small batch through the exact workflow you use for catalog images. It's a practical way to extend backgrounds, standardize margins, and review output before you push it live across Amazon, Etsy, or Shopify.
Stop editing product photos one at a time
Upload your catalog or connect your store. Describe the result once. MerchLoom does the rest.
Try it free — no signup