
Shopify Bulk Upload Product Images: A Practical Guide
Shopify bulk upload product images at catalogue scale with CSV, admin, API, and apps. Includes exact size limits, troubleshooting, and validation tips.
You have 800 new SKUs, the photographer has delivered the files, and the same product images need to appear on Shopify, Amazon, and Etsy before Friday. The editing isn't the hard part. Repeating the same preparation, naming, resizing, mapping, uploading, and checking across a catalogue is where the hours disappear.
Start by putting every source image at a stable, publicly accessible URL. Shopify's native CSV workflow doesn't upload image binaries. It reads text, retrieves each image from its URL, and attaches it to the product identified by its handle. A green import message still doesn't prove that the images arrived. That distinction drives the entire workflow described below. For a useful explanation of processing work in batches, see batch processing for e-commerce workflows.
Why Bulk Image Uploads Break at Scale
A single product upload can hide weak processes. You notice a missing image immediately and fix it by hand. With hundreds of products, the same weakness becomes a mapping problem. One renamed file, one private folder, or one broken URL can leave an entire group of products without media while the catalogue import itself appears successful.
Shopify's CSV method assumes the image already exists online. The URL must be direct, public, stable, and reachable by Shopify. A link that works in your browser while you are logged into cloud storage isn't necessarily accessible to Shopify. A temporary download link can also expire between preparation and import.
The repeated loop is the real workload
Treat the catalogue as a data set, not a pile of pictures. Each image needs a product identifier, a position, a variant relationship where relevant, a valid URL, and a platform-appropriate export. If those fields aren't generated together, you end up repairing products one at a time.
The common failure sequence looks like this:
- Files are renamed late: The filename no longer matches the SKU or handle used in the CSV.
- URLs are copied without testing: The address redirects, requires authentication, contains unsafe characters, or serves an unexpected file.
- Rows are flattened incorrectly: Multiple images attach to the wrong product or appear in the wrong order.
- The import is trusted too early: The CSV receives a success message, but Shopify has omitted image entries.
Operational rule: A successful product import confirms that Shopify processed catalogue data. It doesn't confirm that every referenced image was retrieved and attached.
The right question isn't “Did the CSV upload?” It is “Did every expected image arrive at the correct product position?” That requires a manifest before import and a comparison after import. Without those records, a missing gallery image is discovered by browsing the storefront, often after customers have already seen an incomplete listing.
Setting Up the CSV Image Import the Right Way
A 5,000-SKU migration can show a green import result while leaving part of the catalogue without images. A Shopify product CSV contains image references, not image files, so every image must be available at a public URL that Shopify can request. Shopify's product CSV documentation describes this URL-based structure, including repeated product handles for multiple images.
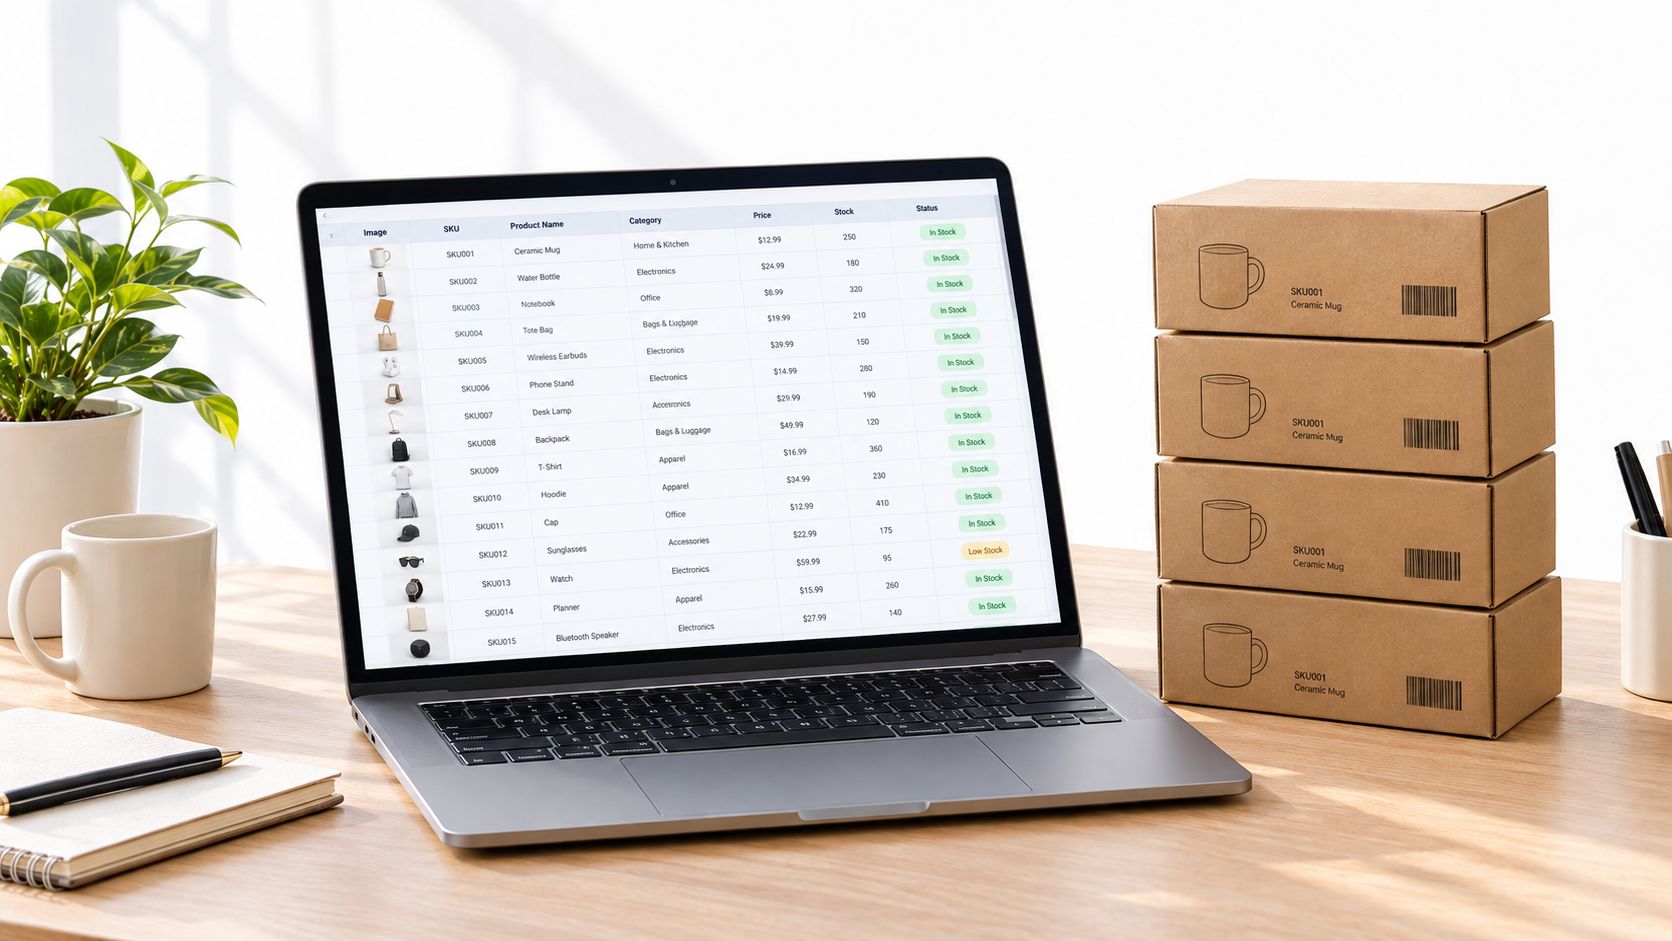
Stage files in object storage or on a CDN. Links copied from a desktop folder, private drive, or temporary transfer page are poor import dependencies. Request each URL without an authenticated session, confirm that it returns an image, and store the final address in an asset manifest. Shopify retrieves the file during import, so a stable URL matters more than the image's presence in your local CSV workflow.
Build rows around the product handle
The Handle identifies the product that receives an image. For a gallery, repeat the same handle on one row per image and place each address in Image Src. Keep position in the source data, even though the CSV does not provide a separate position field.
Use Variant Image when a specific variant needs its own image, such as a red shirt or a particular furniture finish. The relationship must be explicit. A filename such as red-front.jpg does not identify the correct variant unless the row does so.
Some catalogue systems use a metafield pattern such as image[secondary] for extra image slots. Treat that as an export-layer convention, not as a replacement for checking Shopify's accepted CSV fields. Generate rows from a structured manifest so the filename, handle, variant, URL, and position remain connected.
A useful export check is:
- Match the SKU to the Shopify handle. Reject unmatched records instead of guessing.
- Assign the source position. Keep front, back, detail, and lifestyle images in a predictable order.
- Write the public URL. Check the response, MIME type, dimensions, and accessibility before export.
- Repeat the handle for each image row. Keep each gallery entry independently traceable.
- Compare expected and generated image counts. Resolve differences before import.
For larger libraries, product image library management helps clarify the relationship between the file library and the product catalogue. They are connected records, not one data set.
The CSV itself cannot exceed 15 MB, according to Shopify's import guidance. That limit applies to the text file, not to the image bytes hosted at its referenced URLs. Keep image payloads in object storage or on a CDN, and keep the CSV focused on product fields and media references.
Watch how the manifest, CSV rows, and post-import check connect in one workflow:
Uploading Through Shopify Admin Without a CSV
The Shopify admin is practical when you have a modest batch and need a visual workflow. Go to Content, open Files, choose the upload action, and select the prepared image set. Shopify caps one file-picker upload action at 200 files, so a larger set must be split into batches. That limit applies to the selection action, not to the total number of files your store can hold.
Uploading a file to Shopify Files doesn't automatically attach it to a product. Files is a repository. Product media is an assignment. After uploading, you still need to open the product, add the media, and put images in the intended order. For a small collection, you can drag a selection from Files onto a product page or use an image for a collection cover. That interaction is convenient, but it still requires a human to know which files belong to which product.
Check the file before you select it
Shopify's product-media guidance lists PNG and JPEG as preferred formats. Relevant product-media workflows can also accept TIFF, BMP, GIF, SVG, HEIC, and WebP, although Shopify may convert some formats during upload. Product and collection images can be up to 5,000 × 5,000 pixels, or 25 megapixels, and each file must be smaller than 20 MB. These requirements are documented in Shopify's product media specifications and merchant product media guidance.
For a repeatable admin batch, create an export folder that contains only valid files. Normalize formats first. Resize oversized images before opening the file picker. Keep a separate rejected folder with the reason for each failure, such as “over 20 MB,” “unsupported format,” or “dimensions exceed limit.”
The admin route works well when the image count is low enough for someone to attach and review each product. It becomes a poor fit once the work depends on repeated selection and matching. If you upload 200 files into Files and still have to identify every destination product manually, you've moved the storage step into Shopify without solving the catalogue mapping step.
Image Specs for Shopify, Amazon, and Etsy Side by Side
A source image prepared for one marketplace often needs a different export for another. Shopify can use a square product image, Amazon needs a controlled main-image presentation, and Etsy has its own size and first-image guidance. Exporting one universal file usually creates avoidable compromises.
| Platform | Max dimensions | Accepted formats | Main image rule |
|---|---|---|---|
| Shopify | Up to 4,472 × 4,472 px for API media pipelines | JPEG, PNG, WEBP, HEIC, GIF in the developer media workflow | Square export is practical for consistent catalogue presentation |
| Amazon | No maximum stated in the verified requirements here | Use the marketplace's accepted listing workflow | Pure white RGB 255,255,255, complete product once, product occupying 85% of the image, longest side 1,600 px or more |
| Etsy | No maximum stated in the verified requirements here | JPG, GIF, PNG | Width and height at least 2,000 px, first image at least 635 px wide, horizontal or square orientation |
Doing this for a whole catalog?
MerchLoom runs background removal, upscaling and AI editing across every product photo you have — one prompt, whole batch.
Try MerchLoomShopify's developer media specification sets the API validation ceiling at 4,472 × 4,472 pixels, or 20 megapixels. That differs from the merchant upload guidance, which lists a 5,000 × 5,000 pixel and 25-megapixel ceiling for product and collection images. If one pipeline serves both admin and API uploads, enforce the stricter API threshold for the shared export.
Amazon's main image needs more than a resize. It needs background processing, product framing, scale control, and color validation. A white-looking background can still fail a strict RGB check if it contains shadows, gray edges, or a warm cast. The product must remain complete and visible while occupying the required share of the frame.
Etsy's minimum dimensions affect the source export, while the first-image orientation affects the crop. Prepare the listing cover separately from later detail images. Sellers who track marketplace demand may also find Etsy trends for POD sellers useful when deciding which product angles and presentation styles deserve priority, but trends don't replace the platform's file requirements.
A Shopify product image size guide can sit beside your export presets. The practical setup is one source collection, then separate outputs for Shopify square media, Amazon white-background main images, and Etsy listing images. That preserves the original while avoiding repeated manual resizing.
Using the GraphQL Admin API for Real Catalogue Scale
A CSV can show a successful import while dropping image files without warning. At a few hundred products, checking those omissions manually becomes unreliable. For larger catalogues, the GraphQL Admin API provides separate control over file transfer, product association, media processing, and reconciliation. Shopify's current workflow uses GraphQL rather than the deprecated REST product-image endpoint.
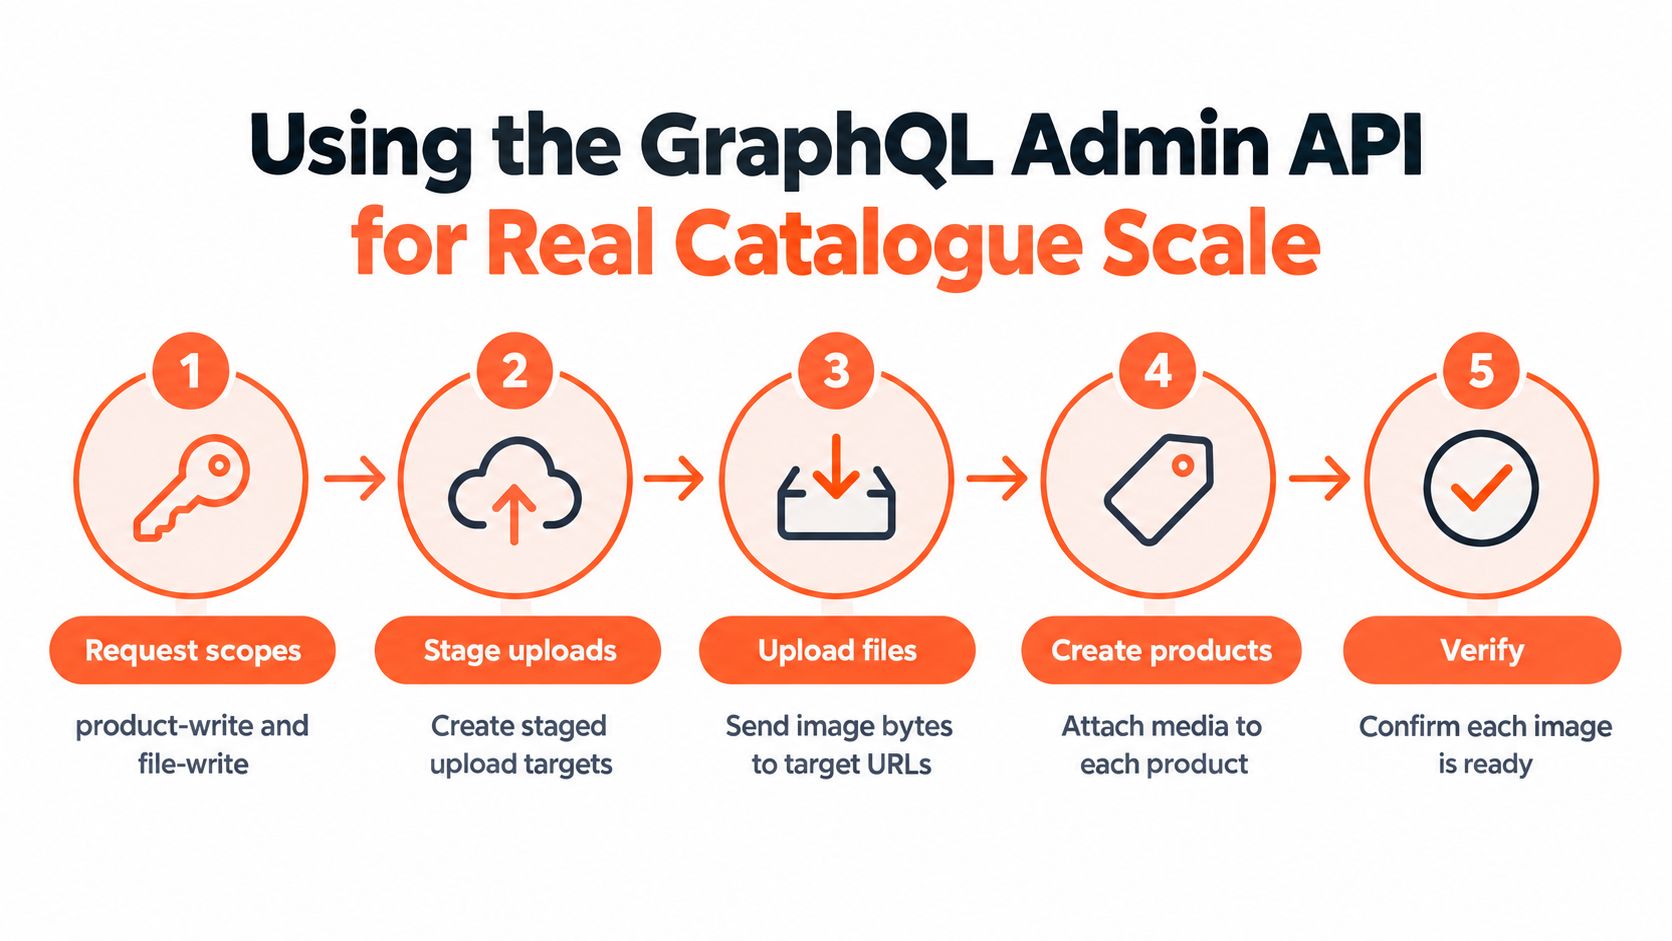
Request the scopes the app needs, including product-write and file-write permissions. Use fileCreate when an image is available at an accessible URL. Use stagedUploadsCreate for files held on your server or larger uploads, send each file to its staged target, then associate the returned file identifier with the product. Shopify's GraphQL product media documentation covers this media flow.
Build around asynchronous processing
An upload acknowledgment confirms request acceptance, not display readiness. Shopify processes media asynchronously and generates responsive sizes after storage. Your worker should therefore poll each media object's status, record failures, and expose the image only after processing reaches a ready state.
A reliable job sequence is:
- Confirm scopes. Check product-write and file-write access before starting the catalogue job.
- Create or stage the file. Select
fileCreatefor accessible URLs andstagedUploadsCreatefor server-held files. - Associate the file ID. Attach the resulting media reference to the correct product.
- Poll processing. Wait for readiness and capture any processing error.
- Reconcile against the manifest. Compare completed media with every expected source item, so a green job cannot conceal missing images.
For API media, accept JPEG, PNG, WEBP, HEIC, and GIF. Apply the 20 MB file limit and the 20-megapixel maximum, represented by 4,472 × 4,472 pixels. Merchant help documentation has a separate 25-megapixel ceiling, so the stricter API value should govern shared exports. That prevents an image from passing an admin check and failing later in the API pipeline.
Use batches, exponential backoff, and an error log for each media item. A timeout on one file should not restart the entire product collection. Store the product ID, source URL, file ID, processing status, error message, and attempt count. Products can contain up to 250 media items, so validate that limit before association.
For application configuration context, see the YipSMS guide to API key setup. If source files need transformation before upload, AI image editing from Shopify describes a relevant image-processing workflow.
Preflight and Post-Import Validation
A catalogue can show a completed Shopify import while images are missing. Shopify states that a CSV import may finish successfully even when files in the Image Src or Variant Image columns are skipped, without identifying every omission. At catalogue scale, the import status confirms transport, not completeness.
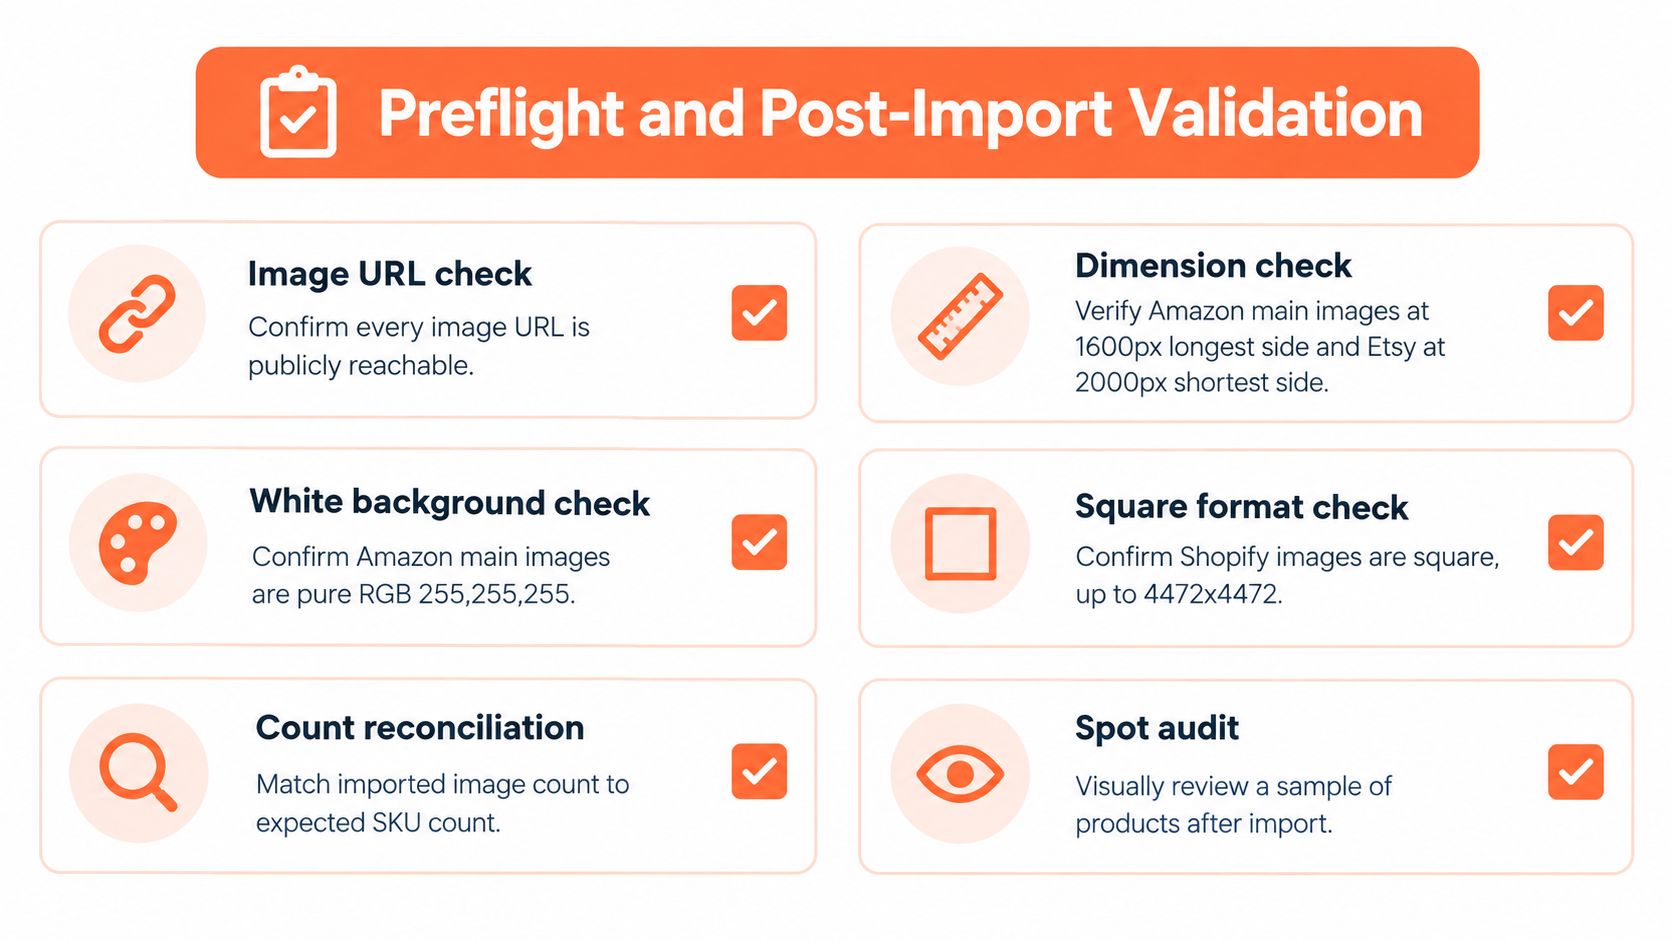
The cause may sit anywhere between the CSV and the source file. The URL might require authentication, the host might block Shopify's request, special characters might disrupt retrieval, or the file might fail format, dimension, or size checks. The product row can remain intact while its image disappears.
Build a manifest before creating the final CSV. It should record:
- SKU and handle: The product identity used for mapping.
- Variant: The variant identifier for variant-specific images.
- Image position: The intended gallery order or image role.
- URL status: Whether the direct URL responds without authentication.
- MIME type: The content type returned by the host.
- Dimensions: Width and height before import.
- Checksum: A fingerprint for detecting duplicate or changed assets.
Run these checks against the source records first. Reject failed URLs, unexpected content types, inaccessible hosts, unsupported dimensions, and missing handles. Correct the source record, regenerate the row, and rerun validation. Manual CSV edits after that point sever the link between the manifest and the submitted file.
For large catalogues, make the manifest the reconciliation key. After import, retrieve each product's media and compare the expected count, gallery order, variant association, and file identity where Shopify exposes enough information. A visual spot check can catch an obviously wrong image, but it cannot replace record-level comparison.
Oversized files should be reduced before URL testing. Follow this workflow for reducing image file size, then validate the resulting URLs. Fixing skipped files after import only creates another upload cycle.
A green import is a transport signal. The manifest is the completeness signal.
Naming, Sizing, and Mapping the Whole Catalogue
A catalogue stays manageable when the filename, product identity, image role, and marketplace export can be derived from the same record. Use names that survive a CDN move and remain readable outside your original folder structure. A pattern such as SKU-angle-position, with a controlled separator and file extension, is easier to audit than camera-generated names.
Keep the product SKU or internal asset ID stable. Store the Shopify handle separately because a handle can change when a product is edited, while the source asset identity should remain constant. Add an explicit role such as front, back, detail, or lifestyle, then assign the marketplace-specific output from that role.
Use one source, several controlled outputs
Your batch export should produce separate presets:
- Shopify: Square product media, staying within the API-safe 4,472 × 4,472 pixel ceiling documented in Shopify's developer specification.
- Amazon: Main image with pure RGB 255,255,255 background, the complete product, 85% product occupancy, and a longest side of 1,600 pixels or more.
- Etsy: JPG, GIF, or PNG, with width and height of at least 2,000 pixels, plus a horizontal or square first image that is at least 635 pixels wide.
Those exports should come from the same approved source record, not from three manually edited folders. This makes it possible to regenerate a marketplace file when a platform rejects it without changing the original or losing the product mapping.
MerchLoom can run chained AI pipelines across a whole collection instead of processing one image at a time. A chain can remove a background, resize the image, replace the background, and reframe the output for a marketplace. The first images can be tried with no account. It uses pay-per-image credits that never expire. AI output still needs human review, and this isn't a full Photoshop replacement. It is a way to apply repeatable transformations across a catalogue while preserving a review step.
Never trust an import status. Always trust a manifest.
MerchLoom lets you prepare Shopify, Amazon, and Etsy image variants through chained batch workflows, then review the results before upload. Try the first images without an account and use the pay-per-image credit model for the collection you need to process. Visit MerchLoom to start building the workflow around your catalogue manifest.
Stop editing product photos one at a time
Upload your catalog or connect your store. Describe the result once. MerchLoom does the rest.
Try MerchLoom