
Is PNG or JPEG Better for Product Photos? a Practical Guide
Is PNG or JPEG better for e-commerce product photos? Compare file size, quality, transparency, and platform rules to pick the right format for your catalog.
You've got a folder full of product photos, a listing deadline, and the same decision waiting on every batch: export as PNG or JPEG? With hundreds of SKUs across Amazon, Etsy, Shopify, eBay, WooCommerce, Poshmark, or Depop, the format choice needs to be a repeatable rule, not a debate you reopen for every file.
Use JPEG for opaque product photography and PNG for transparent cutouts, logos, and graphics with sharp edges or text. Keep a high-quality master, finish edits before exporting, and check each marketplace's image requirements before you run the whole catalogue.
The Two-Image Question Behind Every Product Listing
The practical question isn't which format wins in theory. It's which one gives you the right image on the right channel without adding unnecessary file weight or rework across the catalogue.
For clothing on a model, furniture in a room, or a lifestyle scene with no transparency, choose JPEG for delivery. For a product cutout that needs a transparent background, a logo, or packaging artwork with crisp lettering, choose PNG. That split works for a catalogue because it ties the format to what the image contains, not to a store-wide preference for one file extension.
A clean workflow starts by sorting assets into two groups: photographs and graphics or transparent images. Apply the same export rule to each group, then check the platform requirements before uploading. That keeps the photos consistent without forcing every type of asset into the same format.
For sellers building model imagery from garment photos, a resource on AI model outfit e-commerce can help frame how lifestyle imagery fits into a product catalogue. The format choice still comes down to the result: opaque, photographic scenes generally suit JPEG, while assets that need transparent pixels or exact graphic edges call for PNG.
Working rule: Export photographs as JPEG, keep transparency and graphics as PNG, and preserve the master before making delivery files.
How PNG and JPEG Actually Differ for Product Images
A catalogue export rule should account for image content, upload requirements, and the cost of processing files again. JPEG suits continuous-tone imagery, where colors and tones change gradually across photos of clothing, furniture, people, and lifestyle scenes. Its lossy compression removes some visual information, prioritizing changes viewers are less likely to notice.
A Stanford computer-science overview says JPEG's baseline algorithm can reduce continuous-tone images to less than 10% of their original size without visible degradation under suitable conditions (Stanford's JPEG overview). Actual output depends on dimensions, image content, and the quality setting. For a large catalogue, consistent JPEG exports can make photo storage and uploads easier to manage.
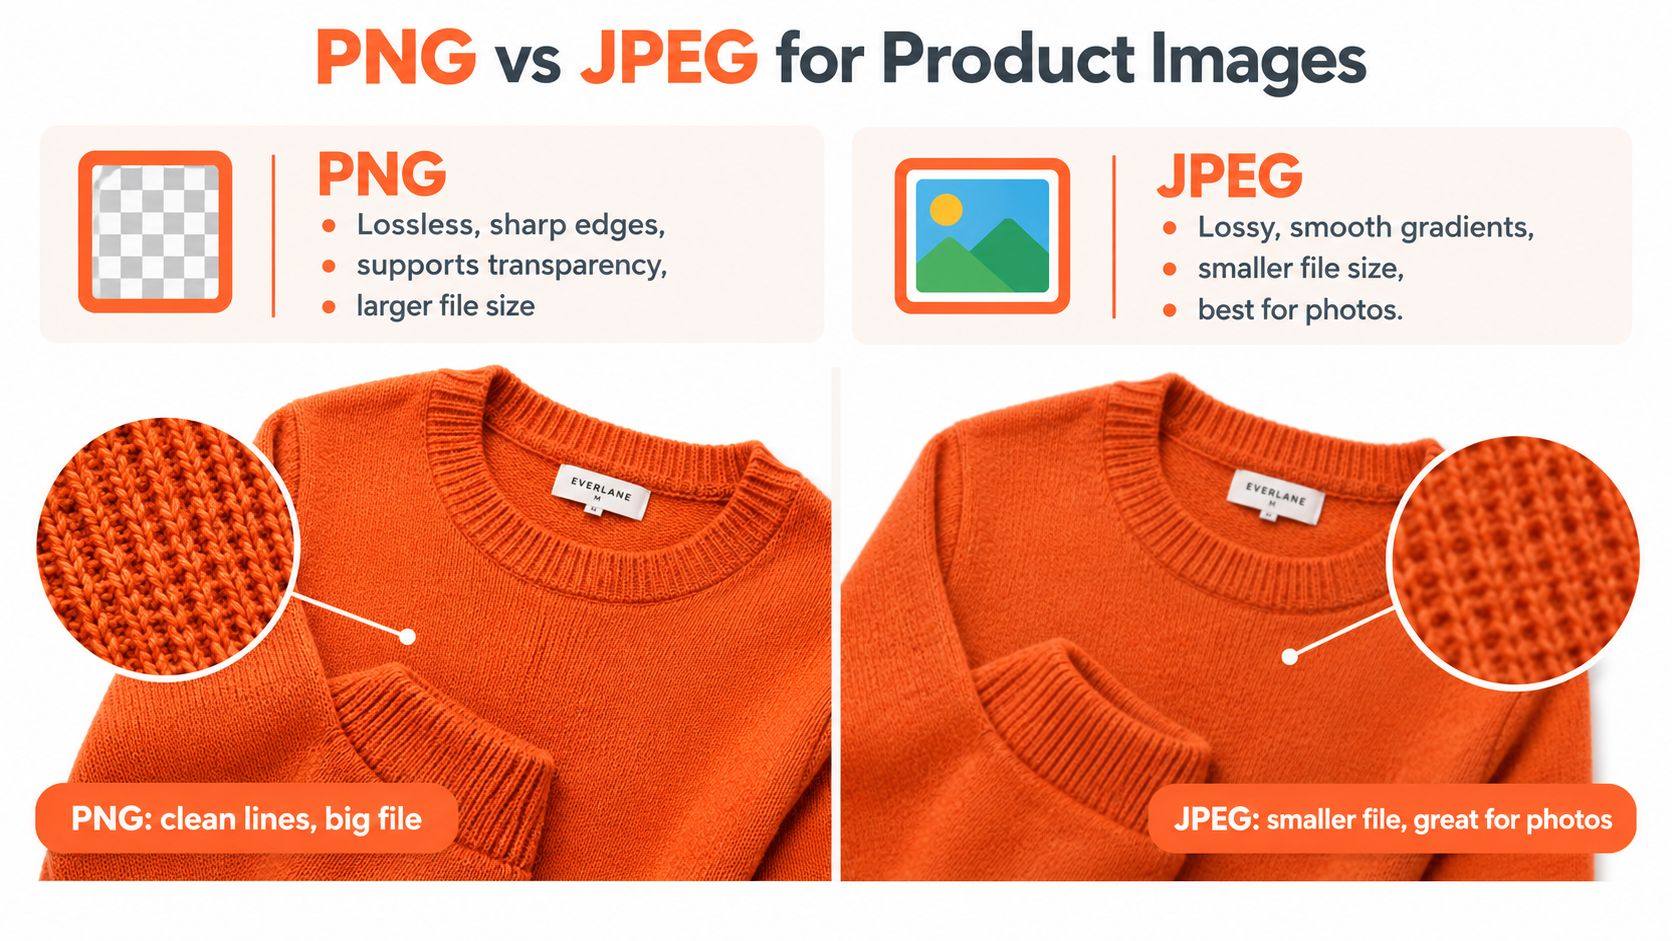
PNG preserves pixel data without lossy compression, as described in the W3C's PNG rationale. It also supports an alpha channel, so pixels can be transparent instead of filling a rectangular background. Choose it for cutouts, crisp graphic edges, or lettering that could look softened or acquire artifacts in a JPEG. Choose JPEG for realistic photos where the extra pixel precision of PNG does not improve the listing image.
What the difference looks like in a listing
JPEG artifacts become more visible around sharp edges and text, especially after repeated opening and resaving. Keep a clean master and avoid using a previously compressed JPEG as the source for another export. This guide to JPEG compression artifacts explains the defects to watch for.
HTTP Archive measured JPEG at 60% of image requests and 65% of image bytes in its 2019 dataset, compared with PNG at 28% for both measures (HTTP Archive 2019 Almanac). In its 2022 dataset, HTTP Archive recorded JPEG at 40.3% of web images and PNG at 28.2% (HTTP Archive 2022 Almanac). These web-wide figures do not replace a channel's upload rules. They show the formats' common roles: JPEG for photos, PNG for graphics and transparency. At catalogue scale, choosing the right source format also reduces avoidable recompression during batch exports.
Quality Versus File Size in Real Catalog Numbers
Export a catalogue of opaque product photos as PNG, and every upload carries extra weight through storage, transfer, and batch processing. Make JPEG the delivery default where the platform accepts it. Reserve larger files for assets that need them.
Contentful compares the same photograph saved as a JPEG at about 80% quality, roughly 200 KB, with a PNG at about 1.5 MB, around seven times larger with no perceptible on-screen quality improvement (Contentful's image-format guide). That is a useful reference for ordinary product photography, not a universal export setting. Check your own photos at their intended display size before applying a compression setting across the catalogue. Fine product detail still needs to survive the export.
Judge the delivered image, not just the local file.
A heavier photo increases the data a storefront must deliver, but file size alone does not establish a page-load time or rendering cost. Browsers, storefront processing, and delivery conditions also matter. For Amazon, Shopify, and Etsy workflows, check the uploaded result as well as the export: platform processing can change the image customers see. Sending a larger PNG does not guarantee a better final photograph.
JPEG vs PNG at a Glance for Product Photos
| Attribute | JPEG | PNG |
|---|---|---|
| Best fit | Opaque product photography | Transparency, text, logos, and crisp graphics |
| Compression | Lossy | Lossless |
| Transparency | Not supported | Supported through an alpha channel |
| Photo file size | Usually smaller | Can be substantially larger for photographs |
| Repeated editing | Re-exporting can reduce quality | Pixel data is preserved when saved |
Pay the PNG file-size cost when it serves the asset: a cutout for different backgrounds or a logo with clean edges. For opaque photos, choose the smallest export that preserves visible product detail and meets the destination's requirements. Apply that decision by asset type across the batch, rather than converting everything to one format. The guide to reducing image file size covers ways to trim heavy files without treating every image alike.
Platform Rules That Force the Format Choice
A catalogue headed to Amazon, Etsy, and Shopify needs platform-specific export presets. Set those before batch processing so background fixes and dimension changes happen at export, rather than through repeated edits to delivery JPEGs.
Amazon
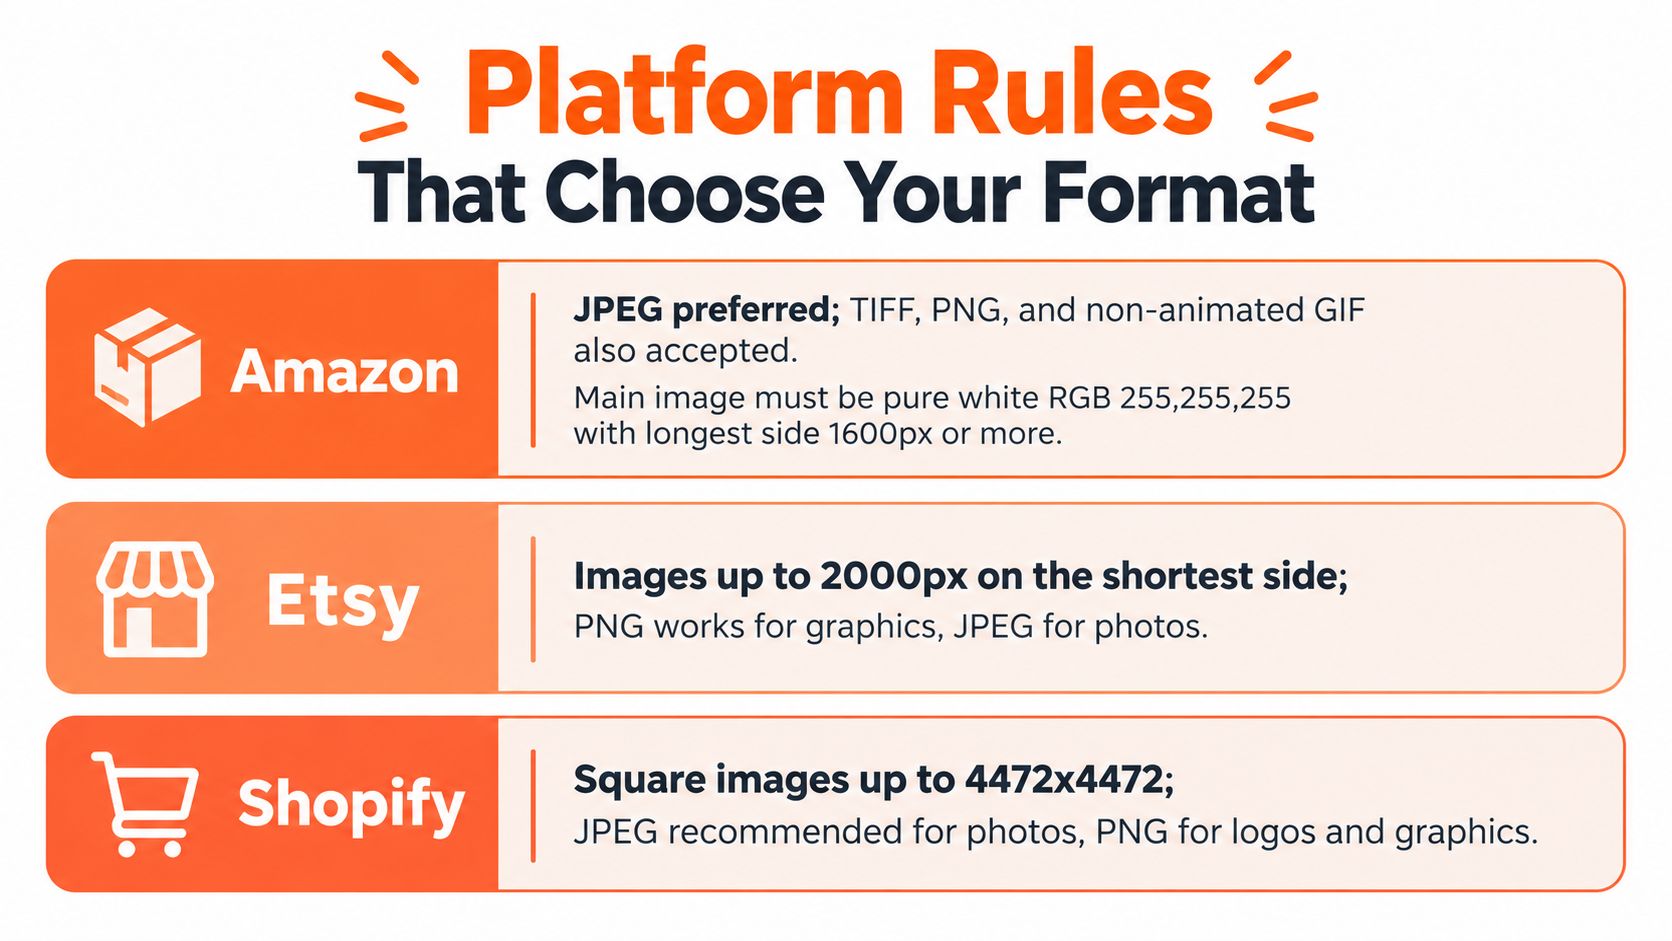
Amazon lists JPEG as its preferred format while accepting TIFF, PNG, and non-animated GIF; its main image requires a pure white background at RGB 255, 255, 255, a longest side between 500 and 10,000 pixels, and at least 1,000 pixels is recommended for zoom (Amazon's image requirements).
Make JPEG the Amazon delivery preset for opaque product photos. Validate background values numerically before running the batch. Keep an editable master and generate replacements from that file, rather than recompressing an existing JPEG whenever a listing needs changes. Use Amazon listing image specs as a plain-language checklist for upload preparation.
Etsy
Build background flattening into the Etsy export preset.
Etsy accepts JPG, GIF, and PNG but doesn't support transparent PNG files or animated GIFs; its recommended photo dimensions are at least 2,000 pixels wide and high, while the first image needs 635 pixels in both dimensions to avoid lower search placement (Etsy's listing photo requirements).
Flatten cutouts against the intended background before exporting JPEG. Size the batch to meet the recommendation in both dimensions, rather than checking only the long edge. Verify the first-image minimum in the listing editor, and review the crop before publishing.
Shopify
Shopify accepts PNG, JPEG, WEBP, HEIC, GIF, and other product media formats; its documentation specifies limits of 20 MB and 4,472 by 4,472 pixels, or 20 megapixels, recommends 2,048 by 2,048 pixels, and describes responsive image sizes (Shopify's product media documentation).
Keep separate Shopify presets for photographic JPEGs and PNGs that need transparency or crisp graphics. Use a consistent square canvas where it suits the product, and check file weight and dimensions before uploading the catalogue. The guide to Shopify product image size covers dimension choices for that preset.
Matching Format to Image Type Across Your Catalog
Don't assign a format based only on the SKU or marketplace. Match it to the asset. A clothing photo, a transparent handbag cutout, and a size chart may all belong to one listing, but they don't have the same format needs.
Use JPEG for photographic scenes
Doing this for a whole catalog?
MerchLoom runs background removal, upscaling and AI editing across every product photo you have — one prompt, whole batch.
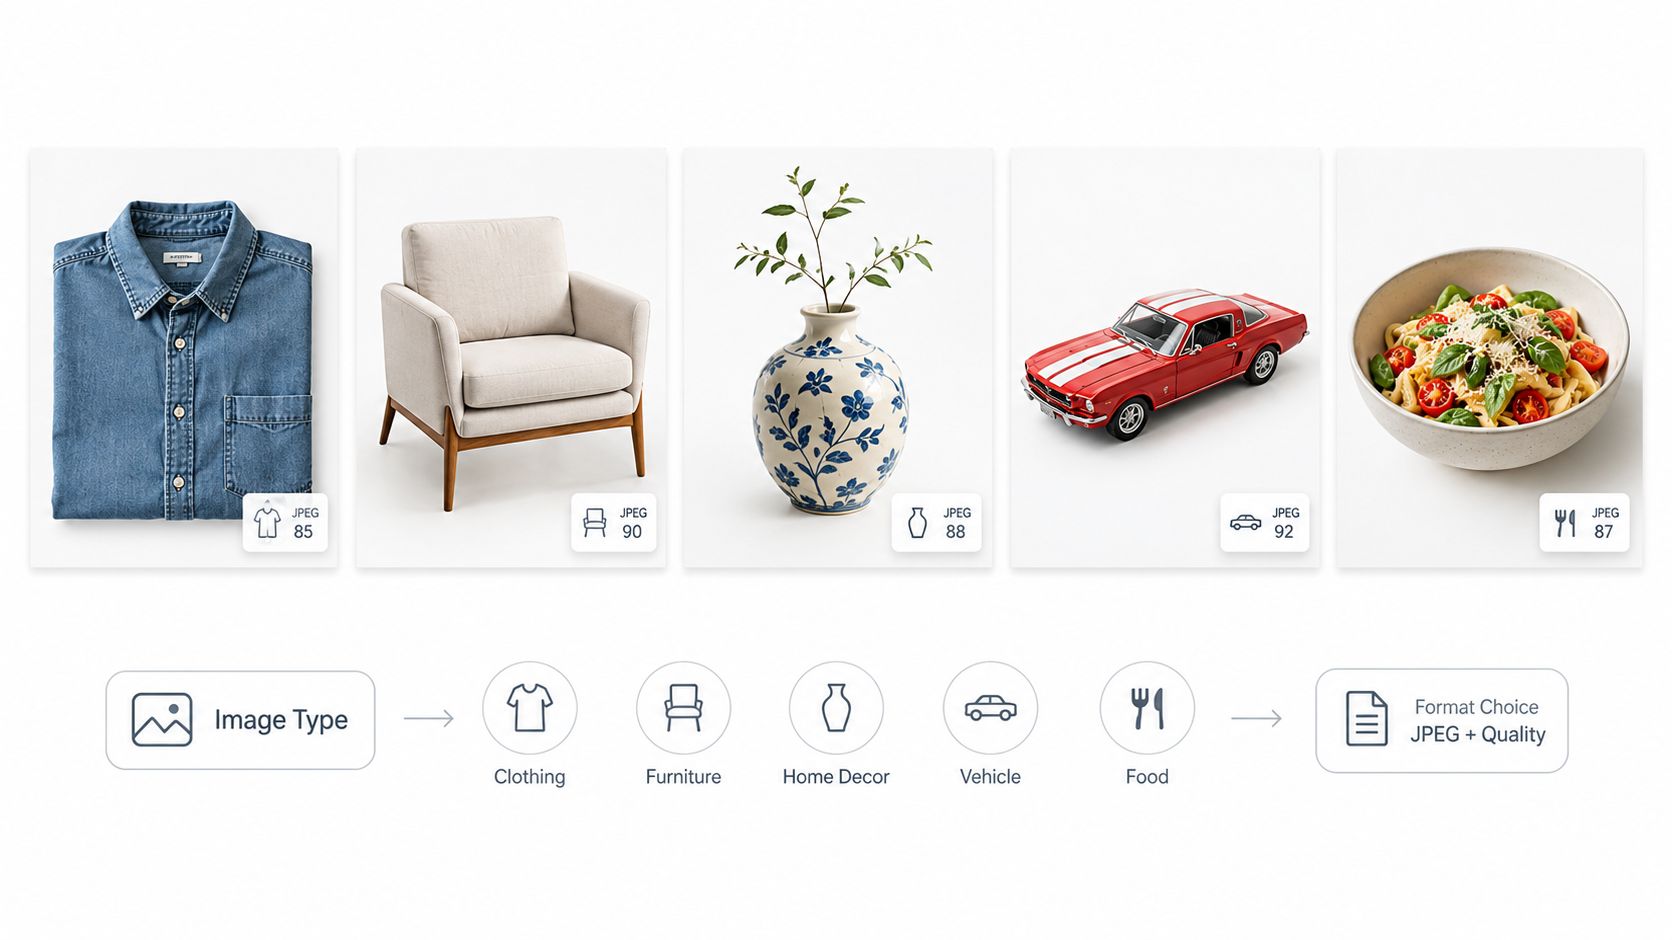
Try MerchLoomClothing on a model, furniture in a room, home decor, vehicles, and food scenes contain gradual changes in tone and color. For these opaque images, export JPEG at about 80–85% quality, then inspect the image at its actual listing size. That range is a practical starting point, not a promise that every picture will look identical at the same setting.
Use the same export rule for comparable photos across the catalogue. If one batch has a different crop or quality setting, the listing grid can look uneven even when every file is technically acceptable. For broader planning on product photos for ecommerce, consider how each crop and background fits the whole product collection.
Keep PNG for transparency and crisp detail
Choose PNG for transparent product cutouts, logos, badges, icons, packaging artwork, screenshots, diagrams, and typography-heavy graphics. Its lossless compression preserves the stored pixel values, and its alpha channel keeps transparency available for compositing.
JPEG can create halos or soften edges around text and thin outlines. It also can't preserve transparency. If you remove a background or mask an object, keep the result as PNG while you continue editing.
Keep the master separate from the marketplace export. Make the JPEG once, at its final dimensions and quality, instead of repeatedly resaving it during edits.
Every lossy JPEG export can discard more visual information. Repeated re-encoding can introduce block artifacts, ringing, and degraded text or logos. Keep a high-quality original, then make the final delivery file from that master.
Batch Export Settings That Keep Output Consistent
A useful export preset does two jobs: it meets the platform's needs and produces the same visual treatment across similar products. Before running a catalogue batch, settle the format, dimensions, color handling, and naming convention for each asset type.
For photographic delivery, set JPEG quality around 80–85% and use sRGB. Set dimensions to the platform target rather than exporting every image at the largest size you have. Amazon recommends at least 1,000 pixels on the longest side for zoom; Etsy recommends both dimensions at least 2,000 pixels; Shopify recommends 2,048 by 2,048 pixels. These requirements come from each platform's guidance, so preserve enough master detail to make channel-specific exports when needed.
For transparent assets and graphics, keep PNG through background removal, masking, and compositing. If your export tools expose channel depth and color-profile options, use settings that preserve the quality your production workflow needs. Don't convert a transparent asset to JPEG until you've decided on the solid background it will use.
Put operations in the right order
Complete background removal, color correction, masking, and reframing before the lossy JPEG export. This avoids saving and resaving the same image after each adjustment. Use filenames that distinguish the master from delivery files, so a later channel export doesn't accidentally start from a previously compressed JPEG.
Batch consistency also depends on the source image. If your apparel photos need more repeatable lighting or a consistent mockup setup, this resource on lighting and mockup advice for apparel can help you plan the images before export.
Batch check: Compare a few representative images at listing size before applying a preset across the entire collection. Look closely at product edges, text, and any high-contrast detail.
A repeatable process matters more than tuning each file by hand. This guide to batch editing images covers the broader workflow challenge of applying consistent edits across many assets.
Running the Workflow as a Chained Batch
Two hundred separate exports invite mistakes. One batch pipeline gives you a consistent order of operations and a single place to review the rules before processing the collection.
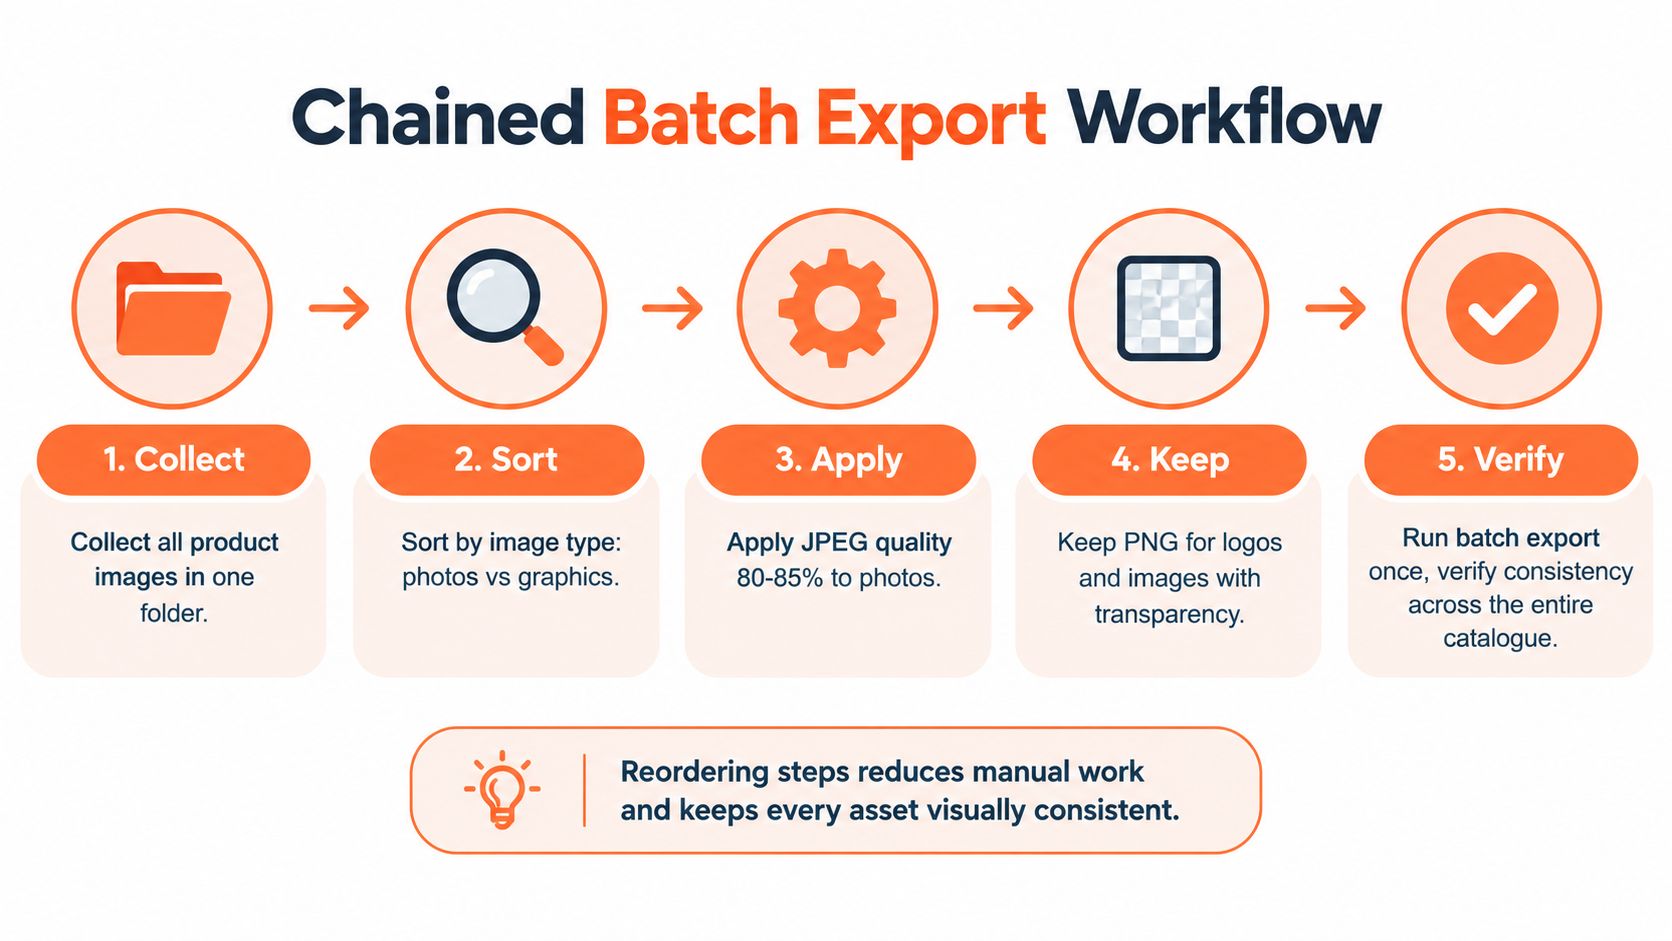
Start by importing the catalogue from the systems where your images already live. That might be Google Drive, Dropbox, Box, Shopify, WooCommerce, BigCommerce, Amazon S3, Cloudinary, Google Cloud, DigitalOcean Spaces, Cloudflare R2, or Backblaze B2. Sort the assets into photographs, transparent cutouts, and graphics, then apply the processing steps appropriate to each group.
Build the sequence around the final file
For an opaque product photo, a sensible chain is background removal if needed, color correction, platform-specific crop and reframing, then JPEG export. For a transparent graphic or cutout, preserve PNG through the steps that depend on alpha transparency. Don't send every file through every operation. The asset type should determine the route.
Processing order can affect cost as well as consistency. For example, removing backgrounds before upscaling can reduce the image before the more expensive step, and MerchLoom cites savings of up to 87% in its example. Treat that as an example of why sequence matters, not a result to assume for every product or batch.
MerchLoom runs chained AI image workflows across product collections, so you can describe the processing in plain English rather than handling each photo individually. The first images can be tried with no account, and the service is pay-per-image with credits that never expire. Review the output before using it in listings, especially where the product edge, color, or background needs to be exact.
A workflow video can also help you visualize how a chained batch is organized:
The point is not to automate judgment away. It's to make the repeatable parts consistent, then spend review time on the images most likely to need correction.
The Decision Framework and Common Seller Questions
Choose the delivery format by asset type and destination. A catalogue-wide “convert everything” setting creates unnecessary rework when photographs, transparent cutouts, and graphics share the same export queue.
- Opaque photographs: Export JPEG at about 80–85% quality, then inspect the result at the target display size.
- Transparent cutouts and graphic assets: Keep PNG where alpha transparency, text, or crisp edges matter.
- Marketplace delivery: Apply the channel's dimensions and background rules before approving the batch.
Should I convert PNG to JPEG?
Convert when the deliverable is an opaque photograph and file size needs to come down. Choose the background before export because JPEG cannot retain transparency. Keep the PNG or original master for later crop, edge, and background changes.
Export replacements from that master. Repeatedly editing and saving a delivery JPEG adds recompression without recovering detail.
Why does my transparent PNG look wrong on Etsy?
Check the flattened export before uploading the collection. Choose the background shoppers should see, export a JPEG, and inspect product edges for halos or unwanted dark areas. Validate dimensions against Etsy's listing photo requirements.
Then check the first-image thumbnail on Etsy. Approve that sample before applying the same settings across the batch; a clean master does not guarantee a clean listing preview.
How do I check Amazon's white background?
Validate the background against Amazon's required pure white, RGB 255, 255, 255. Use a color-sampling check and flag failures before upload. Inspect the product boundary separately so the background check does not conceal poor cutout edges.
MerchLoom can apply these processing and format choices across a collection through chained AI pipelines. Keep human approval between batch output and live listings.
For the next catalogue batch, separate asset types, save channel-specific export settings, and approve representative samples. MerchLoom offers initial tests without an account, followed by per-image payment with credits that never expire.
Stop editing product photos one at a time
Upload your catalog or connect your store. Describe the result once. MerchLoom does the rest.
Try MerchLoom