
How to Change the Background Color for Product Photos
Learn how to change the background color of product photos at catalogue scale, with tool steps, marketplace rules, and batch workflow tips.
You're halfway through preparing a catalogue upload. Some products sit on cream backgrounds, others on gray, and the latest batch has rough outlines around straps and packaging. Individually, the photos look usable. Together, they don't look like they belong in the same store.
Before editing another image, separate your photos by destination and save a background preset for each channel. Include the background color, canvas dimensions, crop, shadow policy, and export format. Learning how to change the background color is useful, but a preset you can reuse across your catalogue is what keeps the work manageable.
Why Background Color Is a Catalogue Problem
The background swap is rarely the difficult part. Keeping product edges, framing, and color consistent across different source photos takes more attention. A bag photographed against cream needs different edge cleanup from a bottle photographed against gray, even when both will end up on white.
Don't approve a batch from a single attractive preview. Review representative products together in a collection-style grid. You're checking whether the products have consistent space around them and whether the background treatment changes between categories.
Practical rule: Approve the treatment on your difficult products before applying it to your easy ones.
Define the output before touching the source
Create a short production specification that travels with the batch:
- Background token: Save the actual color value, not a description such as warm white.
- Canvas and placement: Specify the aspect ratio, product position, and padding.
- Edge treatment: Decide how to handle reflective surfaces, fine straps, and transparent packaging.
- Shadow policy: Keep, reduce, or remove shadows according to the destination.
- Export settings: Fix the file type and color profile before processing.
Use a separate specification for marketplace main images and brand-led storefront images. The guide to backgrounds for product photography can help you decide which treatment belongs in each group.
Also distinguish the image background from the storefront background. CSS background-color changes an element's presentation, while transparent lets underlying colors show through, as documented in the W3C background-color specification. Changing a product card's background won't replace the gray pixels already baked into an uploaded photo.
Keep an untouched source folder and separate destination folders. That lets you revise the output specification without losing the original product detail or accidentally uploading the wrong variant.
The Core Workflow for Swapping a Background
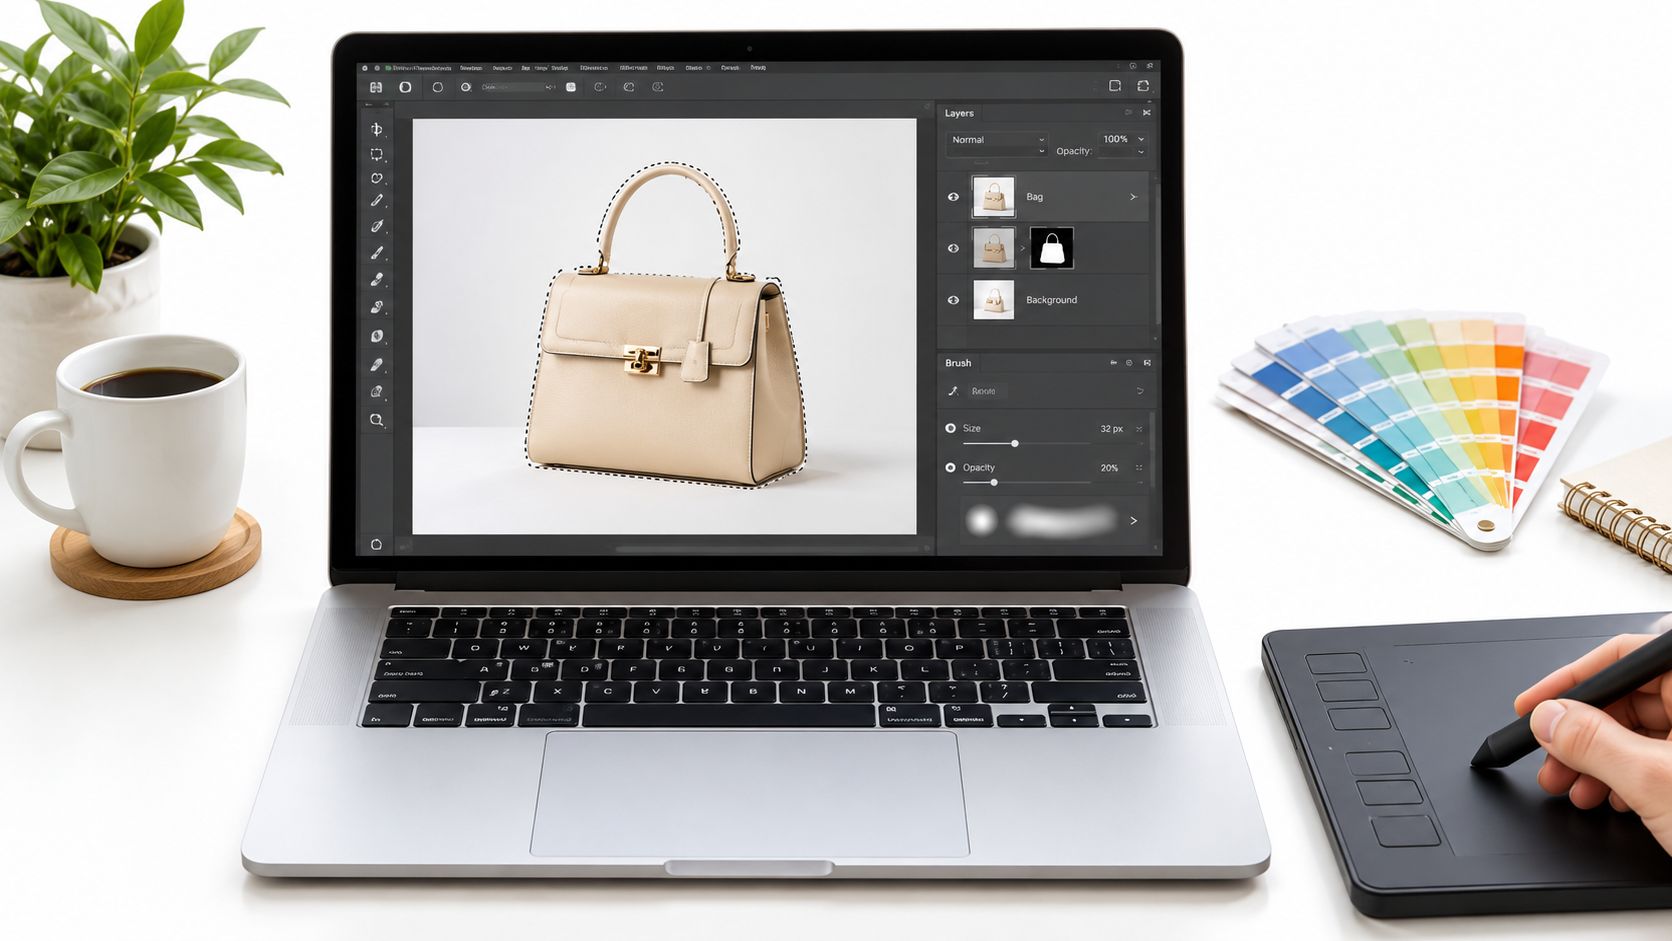
Use a nondestructive mask, not a brush painted directly over the original photograph. A mask separates the product from its surroundings while leaving you room to correct the selection later.
The working file should keep the product and replacement background separate.
Isolate the product without damaging it
In Photoshop, use Select Subject, Object Selection, or another selection tool to identify the product. Inspect the selection before proceeding. Handles, openings, and clear packaging need particular attention because the background may remain visible inside the product's outline.
If you need to work on the background selection, invert the selection. When attaching the mask to the product layer, make sure its orientation leaves the product visible and conceals the surroundings. A reversed mask is easy to diagnose: the product disappears instead of the background.
The Adobe background-color workflow uses editable masks and a separate color-fill layer. Apply the same approach throughout the catalogue:
- Create a layer mask: Keep the original product pixels intact.
- Refine gently: Paint black on the mask to conceal unwanted areas and white to restore product detail. Use a low-opacity brush around uncertain edges.
- Place the fill underneath: Add a Solid Color fill beneath the masked product, then enter your saved color value.
- Save the layered file: Keep the mask available for later destination variants.
Standardize settings, not every edge
Save the background as an sRGB color token that you can reapply without choosing it by eye. Record the selection-refinement settings alongside it, but don't assume identical feathering will suit a metal clasp and a fabric sleeve.
Inspect soft shadows separately from the product. A useful shadow on a branded catalogue image may be unsuitable for a strict marketplace main image. Don't let the selection tool make that decision for the whole batch.
If incoming photos repeatedly need heavy cleanup, address capture conditions too. JewelryBuyDirect's affordable product photography lighting setup is a practical planning resource when revisiting your shooting setup.
Test the saved treatment on glossy, textured, and semitransparent products before committing the collection. Reuse the workflow, but keep exceptions visible rather than forcing every material through the same mask settings.
Marketplace Background Rules at a Glance
Don't send the same export to every sales channel. Your Amazon main image, Etsy listing photo, and Shopify collection image can share the same isolated product, but they need separate output presets.
Dimension targets aren't always platform limits. Choose a production target that satisfies the destination without describing your preferred size as a mandatory requirement.
Marketplace main-image background and dimension rules
| Marketplace | Main image background | Dimension target |
|---|---|---|
| Amazon | Pure white, RGB 255,255,255 | Use 1,600 px or more on the longest side as your production target |
| Etsy | Use a consistent opaque background suited to the product | Aim for 2,000 px on the shortest side, satisfying the recommendation in both dimensions |
| Shopify | Use a consistent storefront treatment | Default to 2,048 × 2,048 px square; 4,472 × 4,472 px is an optional larger working target, not the platform maximum |
Amazon's official product-image requirements specify exact white, a longest-side range of 500 to 10,000 pixels, and zoom eligibility from 1,000 pixels; the larger production target above isn't its minimum. Amazon also identifies non-white backgrounds, borders, frames, and shadows extending to the image edge as violations.
Etsy's image requirements recommend at least 2,000 pixels wide and high, support JPG, GIF, and PNG, but not animated GIFs or transparent PNGs, and recommend sRGB when colors appear wrong. The first listing image should also be at least 635 pixels wide and high to avoid appearing lower in search.
Shopify's product-media guidance allows up to 5,000 × 5,000 pixels or 25 megapixels, with files below 20 MB, and says square 2,048 × 2,048-pixel product images usually display best. It also recommends consistent aspect ratios for main images.
Separate compliance from creative presentation
Use the Amazon product-image requirements checklist when building that destination preset. Keep primary listing images separate from secondary images, advertisements, and social creatives.
Brand colors and lifestyle backgrounds belong in a different export branch, subject to that channel's rules. For eBay, WooCommerce, Poshmark, and Depop, check the destination's current guidance rather than borrowing Amazon's specification.
Choosing the Right Tool for the Job
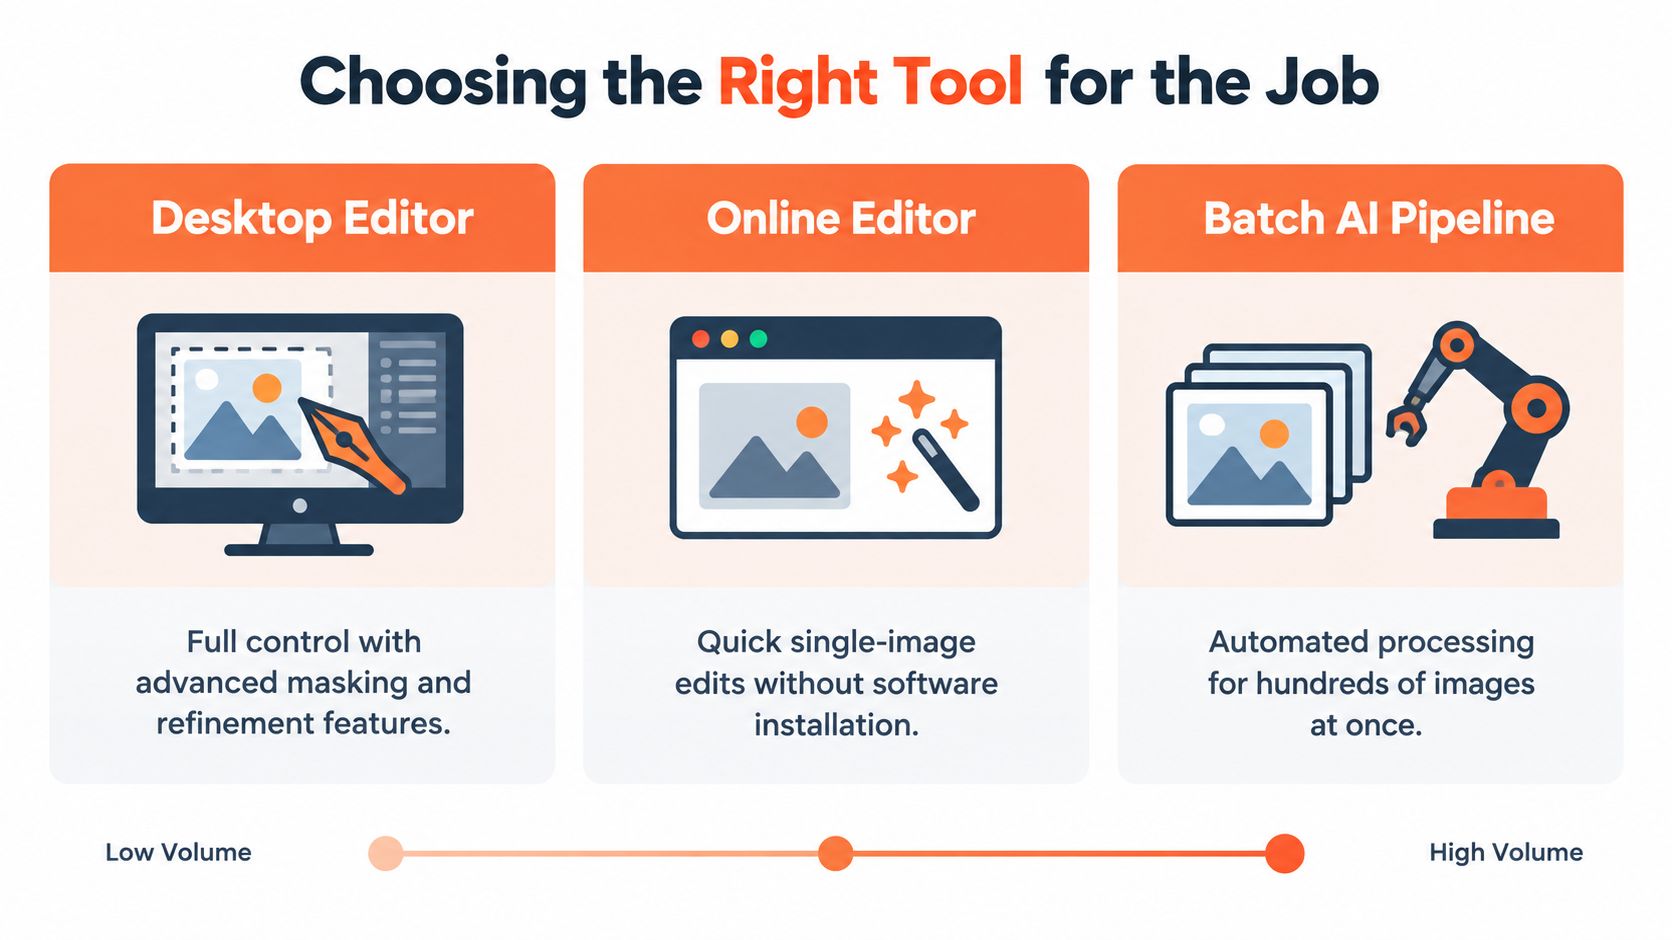
Choose the editing approach by the work your catalogue requires, not by how quickly a tool fixes an easy sample. Difficult selections need control. Repeated exports need automation. Most sellers need some of both.
The useful distinction is between editing an individual image and running a saved sequence.
Match the approach to the bottleneck
| Approach | Where it earns its place | Catalogue trade-off |
|---|---|---|
| Desktop editor such as Photoshop | Detailed masks, reflective edges, and exception repairs | Requires saved settings and deliberate automation to avoid repeated manual work |
| Single-image online editor | Browser-based corrections and occasional replacements | Repeated uploads, checks, and downloads can become the main workload |
| Batch AI pipeline | Applying the same processing sequence across a collection | Requires representative testing and review of difficult products |
Photoshop gives you direct control over the mask and layered file. Keep it available for products that need careful repair. It can participate in an automated workflow, but opening each file and making fresh decisions isn't a sensible default for a large collection.
A single-image online editor can be convenient when correcting an exception. The trade-off appears when you have to repeat the same background choice, crop, and export steps for every SKU. Browser access alone doesn't make a workflow suitable for batches.
Keep an exception lane
MerchLoom is one option for running the described work across a collection through chained AI pipelines rather than editing one image at a time. That changes how you execute the work, not whether the output needs inspection.
Keep difficult products in a review queue. Don't slow the entire catalogue because a clear bottle needs a better mask.
When evaluating an e-commerce photo-editing app, check whether you can reuse settings, separate destination variants, and rerun failed files without repeating successful work.
There's no universal SKU count at which manual editing stops making sense. The useful signal is repetition: if you're making the same decision for each file, save or automate that decision. Reserve hands-on editing for product-specific corrections.
Programmatic Background Replacement at Scale
A command-line workflow is useful when your products are already isolated and you need repeatable background fills and exports. It doesn't remove an opaque studio background by itself. Feed it masked images with transparency, not unprepared source photographs.
The terminal stage should follow subject isolation.
Doing this for a whole catalog?
MerchLoom runs background removal, upscaling and AI editing across every product photo you have — one prompt, whole batch.
Try MerchLoom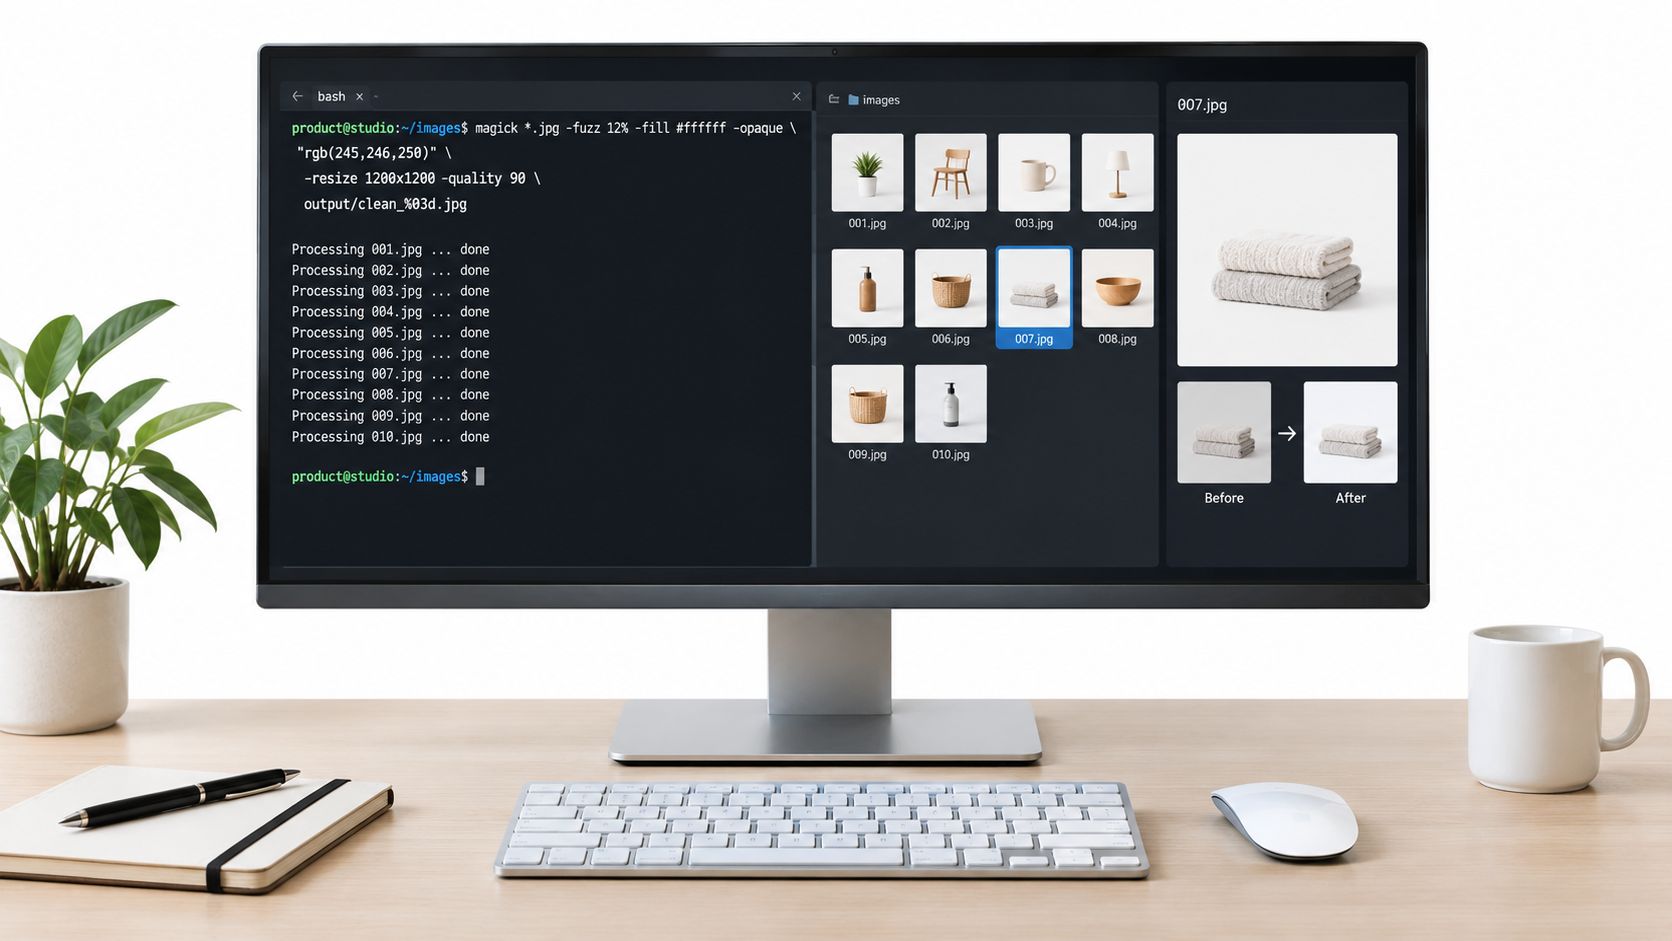
Fill transparent pixels and export an opaque file
For an isolated PNG, the command structure is:
magick input.png -background '#F2F2F2' -alpha background -alpha off output.jpg
The ImageMagick command-line documentation distinguishes setting the background color from controlling alpha. In this example, -background assigns the fill, -alpha background applies the background treatment to transparent pixels, and -alpha off disables the alpha channel for the opaque deliverable.
Treat #F2F2F2 as an example neutral background, not your Amazon preset. Insert the saved token for the destination you're exporting.
- Prepare inputs: Confirm that the product has been isolated and that the mask is usable.
- Apply the destination preset: Set canvas, placement, background, and output format together.
- Standardize color space: Include sRGB conversion in the export workflow rather than trusting mixed source files.
- Write to a new folder: Don't overwrite the isolated masters.
- Review outputs: Inspect at 100%, including edges against white and dark previews, as recommended in the ImageMagick workflow.
Make failures easy to rerun
Use filenames that retain the SKU and identify the destination. Keep a record of which inputs produced which outputs so a failed mask can be replaced without regenerating the entire catalogue.
Watch for color fringing from premultiplied transparency. A technically opaque export can still contain a pale or dark rim inherited from the source, so file validation doesn't replace visual inspection.
For a video companion to the command-line work:
If your images already live in a media pipeline, the AI image workflow for Cloudinary is relevant when planning source-to-output processing. Keep background replacement, export validation, and exception review as separate stages.
Accessibility and Contrast After a Color Swap
A background can suit your brand and still make a price badge unreadable. Check the finished foreground/background pairing, not just the color swatch you selected.
Under WCAG minimum-contrast guidance, normal text and images of text need 4.5:1, while large-scale text needs 3:1. The calculation is (L1 + 0.05) / (L2 + 0.05), using the lighter and darker relative luminance values, not raw RGB values.
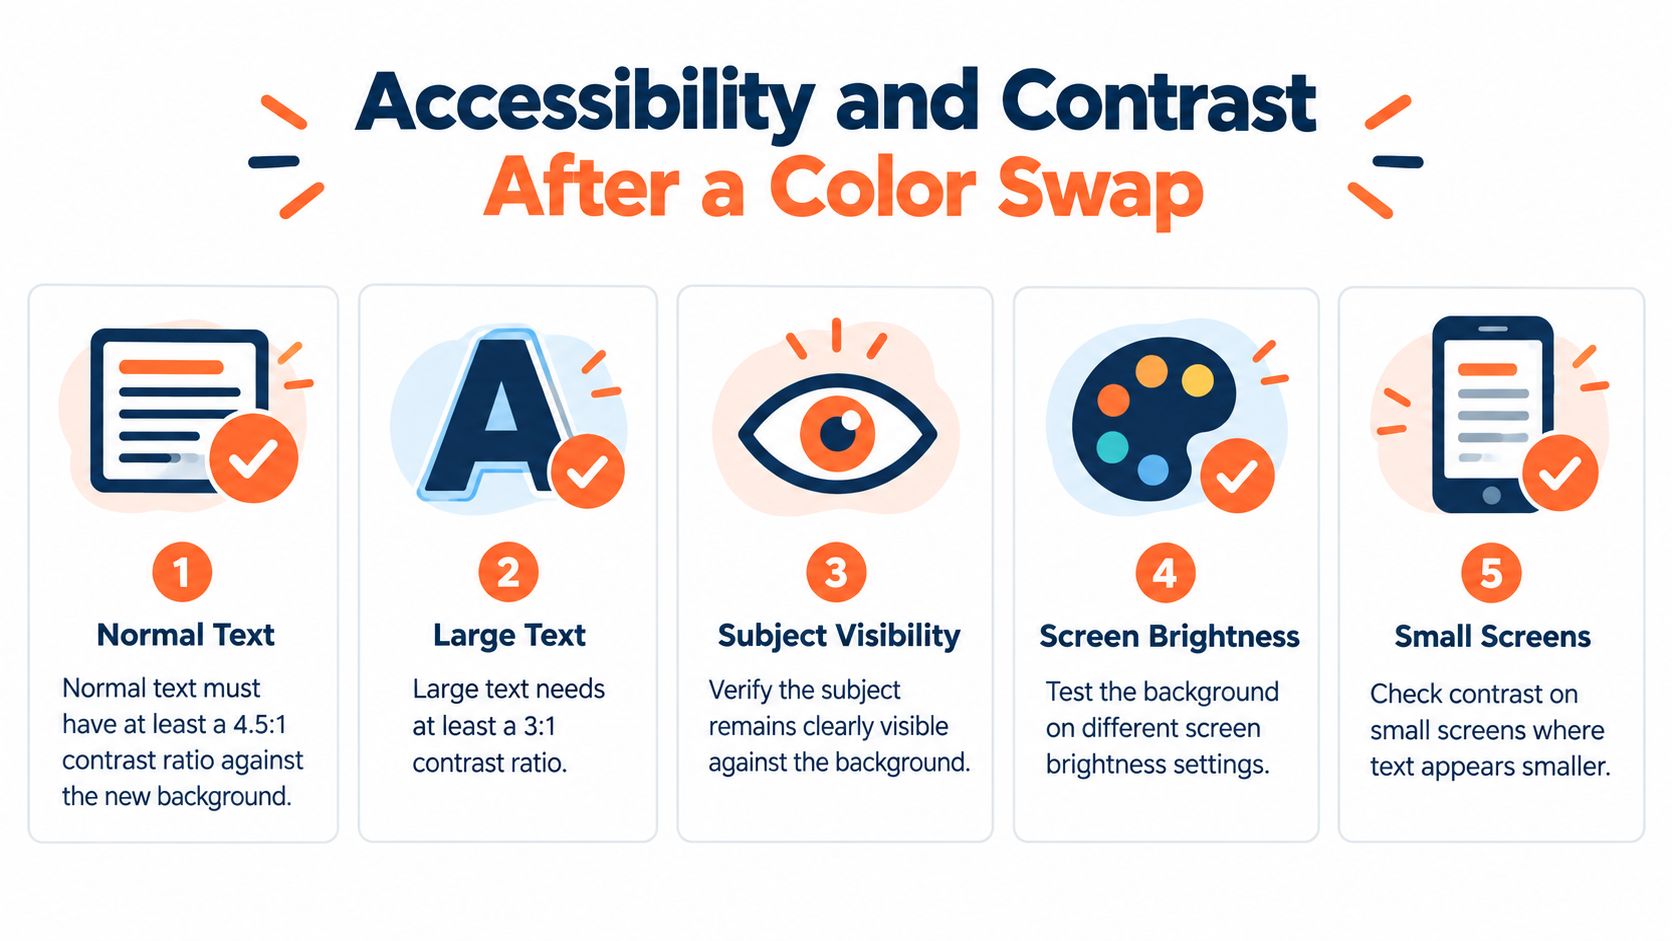
Test the actual exported pairings
MDN's color-contrast guidance also identifies 3:1 for relevant interface components and graphical objects, with different treatment for logos, decorative elements, and inactive controls. Medium-tone backgrounds can be troublesome because choosing black or white text by appearance alone isn't a reliable test.
- Sample the background: Test pixels behind the lettering, including shadows or variable areas.
- Check each overlay: Product names, prices, promotional badges, and buttons can use different foreground colors.
- Use the displayed size: Don't classify text as large merely because the source file has large dimensions.
- Repair the pairing: Change the text color, adjust the background, or place text on a solid backing panel.
- Inspect on mobile: Confirm that resized labels remain readable in the listing layout.
A passed contrast calculation applies to the tested pairing, not automatically to every badge in the catalogue.
Separate compliance from visual review
Also check that the product remains distinguishable from its background. A pale product on a pale canvas may need a different permitted treatment even when there's no text to test.
Screen-brightness checks and mobile previews are useful supplementary reviews. They don't replace the measured contrast check. Save approved overlay combinations with your presets so you aren't re-evaluating the same badge design for every SKU.
Troubleshooting the Most Common Batch Failures
Review failures by type rather than opening the catalogue in filename order. Grouping similar defects helps you decide whether to repair a source mask, revise a category preset, or change an export setting.
Start with representative files from each material category. Include the products you expect to be difficult, not just those with clean outlines.
Diagnose the defect before rerunning
Halos around glossy edges or straps
Compare the isolated product with the original. A rim of the old background usually needs mask cleanup, while a genuine highlight belongs to the product.
Refine the mask with a low-opacity brush. Test a small inward adjustment where appropriate, but don't apply blanket feathering that erases fine straps or soft fabric detail.
Backgrounds that look white but aren't
Sample the exported canvas away from the product and its shadow. Check the actual color against the saved marketplace token rather than trusting your monitor.
Reset the fill and inspect the final export again. If the mismatch appears across a whole group, repair the preset instead of correcting files individually.
Transparent exports sent to Etsy
Check whether the output still has transparency. A white preview in your editor doesn't prove the file contains an opaque background.
Flatten onto the approved canvas and export an opaque deliverable. Keep the transparent master separately so it remains available for other destinations.
Colored fringes after flattening
Inspect the same edge against light and dark backgrounds. If the rim changes visibility, investigate residual background contamination and premultiplied transparency.
Repair the source edge before recompositing. Disabling alpha won't remove a fringe already baked into visible pixels.
Shadows reaching the canvas edge
Check the destination variant rather than the shared master. A retained shadow can be acceptable for one presentation and unsuitable for another.
Remove or constrain the shadow in the strict marketplace branch. Don't discard it from every version because a main-image preset requires different treatment.
Fix framing and color inconsistencies separately
Products that appear different sizes usually need a placement correction, not a background correction. Compare their occupied area and padding in a grid, then revise the canvas rule for that category.
When backgrounds match but product colors differ, compare the exports with their originals and check the color profiles. Don't compensate by recoloring the background. Protect the product's appearance while standardizing the surrounding canvas.
Use a batch image-editing workflow that lets you rerun exceptions independently. After a repair, compare the corrected files with the approved batch before releasing them.
Keep a reusable approval checklist
- Source integrity: Preserve originals and editable masks.
- Destination treatment: Apply the approved background and shadow policy.
- Layout consistency: Check crop, aspect ratio, placement, and padding together.
- Color handling: Export with the intended sRGB profile.
- Overlay readability: Validate any text or interface graphics.
- File compliance: Check dimensions, format, opacity, and file size against the destination preset.
- Human review: Sample each product category and inspect flagged exceptions before approving the collection.
For your next batch, approve a representative set before processing everything. If a repeated defect appears, stop and repair the shared setting. If it affects an unusual product, move that SKU into the exception queue and keep the approved workflow unchanged.
Visit MerchLoom to run background removal, replacement, reframing, and export preparation across your collection through chained AI pipelines. You can try the first images without an account, and it's pay-per-image with credits that never expire. Start with representative products, review the edges and destination settings, then reuse the approved workflow for the rest of your catalogue.
Stop editing product photos one at a time
Upload your catalog or connect your store. Describe the result once. MerchLoom does the rest.
Try MerchLoom