
Color Correction Photo Guide for E-Commerce Catalogs
Master color correction photo workflows for e-commerce. Learn batch editing, white balance, and platform rules to keep large product catalogs consistent.
You have two hundred product photos in a folder, and they're all slightly different. One batch looks yellow, another looks blue, and a supplier's red sweater appears closer to orange than the sample on your desk. Fixing one image is easy. Keeping hundreds consistent across Amazon, Etsy, Shopify, eBay, WooCommerce, Poshmark, and Depop is the core task.
Start with a neutral reference, apply a documented correction to each batch, export by marketplace, and verify the files before upload. A color correction photo workflow should protect the product's physical appearance first. Artistic warmth and extra saturation come later, if they belong at all.
Establishing Baseline White Balance Across Batches
Auto white balance is convenient for a single photograph. It's unreliable as a catalog standard. The camera evaluates each frame independently, so a white shirt, wood table, grey wall, or bright window can change the result from one image to the next.
Color correction has always depended on separating and balancing color channels. Kodak's 1935 Kodachrome used three emulsion layers, with each layer recording red, green, or blue. Kodak later expanded the process into 35 mm slide and 8 mm home-movie formats in 1936, enabled paper prints from slides in 1941, and announced Kodacolor in 1942. The lesson for product catalogs is practical: repeatable color needs controlled capture, processing, and output conversion, not a fresh visual guess for every file. (Color photography history)
Build a reference before editing
Place a neutral grey reference card in the first frame of every lighting setup. It doesn't need to appear in the final product image. It gives you a known target for removing the cast created by the lamps, room, camera, or backdrop.
Use this sequence:
- Capture the reference: Photograph the card under the same light, distance, and camera settings used for the products.
- Create the baseline: In RAW processing software, use the picker on the neutral area. Record the resulting temperature and tint values.
- Apply the correction: Synchronize those settings across the images from that setup. Don't allow automatic white balance to recalculate each frame.
- Separate suppliers: If one supplier used a different phone, studio, or light source, create a separate baseline. A single preset shouldn't cross conditions it wasn't built for.
- Save the record: Store the correction values with the batch name, lighting setup, and source folder.
RAW files give you more flexibility for later white-balance correction than JPEG or HEIF, and Canon recommends matching white balance to the lighting or creating a custom setting. (Canon guidance on natural skin tones) JPEG adjustments are more limited because much of the processing has already been applied.
Practical rule: A preset should describe a capture setup, not an entire catalog.
For large folders, treat white balance as a batch-processing problem. A useful overview of scalable batch image processing helps frame the difference between applying one-off edits and running repeatable operations across a collection. MerchLoom's white balance workflow for product photography follows the same operational logic, but automation still needs a reference and a review sample.
When photos come from multiple suppliers, don't force them into one visual temperature just to make the grid look uniform. Keep approved product references, flag unusual casts, and correct each source group against its own neutral target. Consistency means the same physical color stays trustworthy, not that every image receives identical slider values.
Prioritizing Measurable Accuracy Over Subjective Edits
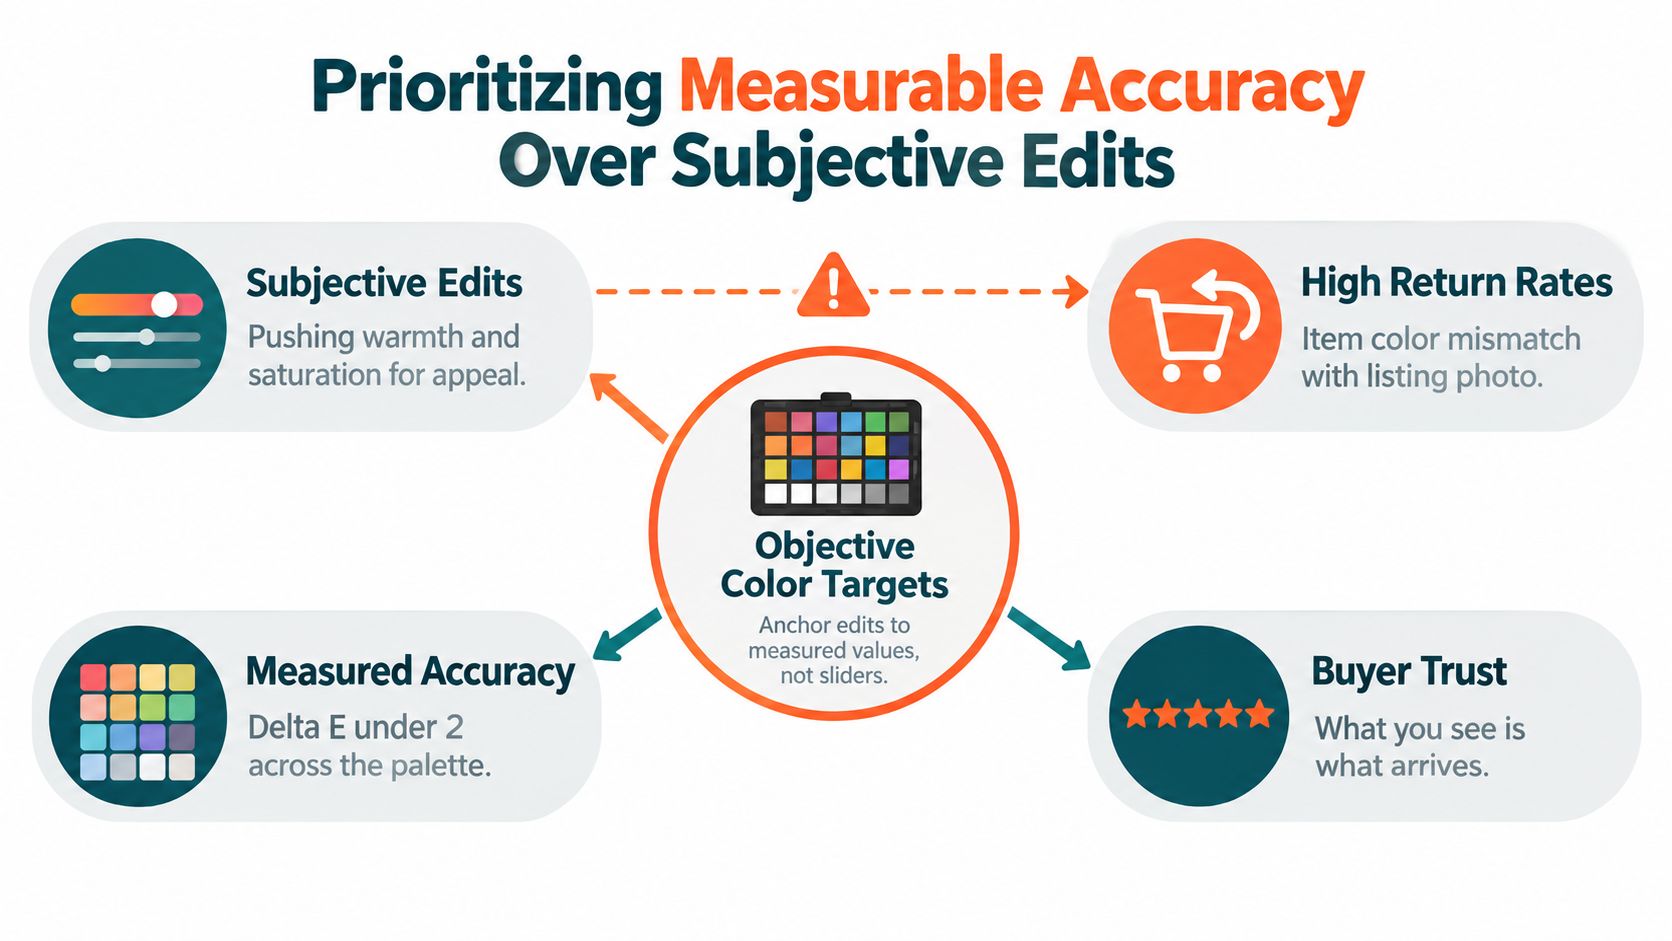
A product image can look attractive and still be wrong. Increasing warmth may flatter a lifestyle scene, while extra saturation can make a blue jacket appear richer than the item buyers receive. That gap matters most for apparel, cosmetics, paint, furniture, and home goods, where color is part of the buying decision.
Numeric values need a managed workflow
The same RGB numbers don't guarantee the same visible color on every camera, monitor, scanner, printer, or web workflow. The International Color Consortium developed an interoperable system built around device profiles, a profile connection space, and standardized processing elements. In practice, profiles describe how a device behaves instead of assuming that every device interprets RGB identically. (ICC color management white papers)
That distinction changes how a catalog team edits. A calibrated monitor gives you a more dependable review environment, while a setup-specific camera profile accounts for the lighting under which the profile was created. A profile made under one illumination shouldn't be treated as universally accurate under another.
Use a simple hierarchy:
- Neutral reference first: Correct the cast introduced by the lighting.
- Camera profile second: Match the capture setup rather than relying on a generic profile.
- Monitor review third: Judge edits on a calibrated, profiled display.
- Output conversion last: Export a web-ready copy in an appropriate space, commonly sRGB for marketplace images.
Color management doesn't fix an incorrect product color. It helps preserve the intended relationships when the file moves between devices. That's why a technically managed workflow still needs a physical reference and a product sample.
Stop editing for the grid alone
A catalog grid can look polished because every image has the same warmth, contrast, and saturation. That doesn't prove the colors are accurate. Forcing a pale beige item, a cool grey item, and a warm taupe item toward one preset can remove distinctions customers need to see.
Measure where you can. Compare a product swatch or approved reference beside the processed image, identify outliers, and use masks when one color needs protection. If you're deciding whether an image needs enhancement beyond correction, the workflow principles in AI image enhancement for product catalogs are more useful than just pushing saturation.
The operational target is not “every image looks identical.” It's “the same product looks consistent across its approved views, and different products remain different for the right reasons.”
Adapting Export Rules for Major Marketplaces
A corrected master file can still fail at upload. Marketplaces inspect dimensions, backgrounds, aspect ratios, and formats independently, so one export preset shouldn't serve every destination.
Amazon's main image needs a pure white background with RGB values of 255, 255, 255. It must show the actual product and exclude borders, watermarks, logos, inset images, and text that isn't part of the product. Amazon's image guidance lists 500 pixels as the minimum and 10,000 pixels as the maximum on the longest side, while its zoom guidance identifies 1,000 pixels or more on a dimension for zoom functionality. For the workflow here, export the Amazon main image with at least 1,600 pixels on the longest side, then validate the file against the current listing rules before upload. (Amazon product image requirements)
| Platform | Dimension Rule | Background / Format |
|---|---|---|
| Amazon | Use at least 1,600 pixels on the longest side for the prepared main-image workflow. | Pure white, RGB 255, 255, 255. Product only. |
| Etsy | 2,000 pixels on the shortest side. | JPEG, PNG, or GIF. Etsy recommends 72 PPI. |
| Shopify | Square canvas, up to 4,472 × 4,472 pixels. | Use a consistent web format and preserve the product's proportions. |
Etsy's shortest-side rule changes how portrait and landscape files must be resized. Scale each image until the shorter dimension reaches 2,000 pixels, rather than setting a fixed width that leaves portrait files too small. Do the crop and color correction before the final resize when possible, then export the listing copy consistently. (Etsy listing image recommendations)
Keep platform folders separate
Create a master folder and destination-specific exports:
- Amazon: Background whitening, product-only composition, longest-side check, and exact white-pixel validation.
- Etsy: Proportional resize based on the shortest side, then export in a supported shop format.
- Shopify: Square canvas, with the image kept within 4,472 × 4,472 pixels.
- Other channels: Follow each channel's current specifications instead of copying Amazon's white-background rule.
Background whitening and product-color correction are separate operations. Whiten the background without neutralizing the product itself, then check edge halos and shadows. Guidance on practical hero image tips can help with composition decisions, but it shouldn't replace the marketplace's own requirements.
A platform-specific export pipeline prevents a common mistake: preparing a visually correct file, then discovering that its dimensions or background fail the destination's technical check. MerchLoom's Amazon product image requirements workflow can be used as one part of a batch process, provided the final files are still reviewed.
Balancing Product Colors and Skin Tones
A lifestyle image can pass a creative review and still fail a catalog review. The model looks healthy, the scene feels warm, and the product color is wrong. That is the operational problem with mixed-subject editing at scale. Skin and merchandise rarely need the same correction, and a single preset usually pushes one of them too far.
As covered earlier in the white-balance baseline, custom settings beat auto correction for skin. The remaining job here is regional control. Start from the item you sell. Build the base correction around the approved product sample, color standard, or lighting reference, then protect that area before touching skin.
Doing this for a whole catalog?
MerchLoom runs background removal, upscaling and AI editing across every product photo you have — one prompt, whole batch. Try 2 batches free, no signup.
Try it freeEstablish a neutral product base
In production, the product gets priority because it has to match the listing, the return expectation, and the rest of the SKU family. If a red shirt shifts toward orange, or a lipstick shade looks warmer than the physical item, the image may feel nicer while becoming less accurate. That creates inconsistency across PDPs, ads, and marketplace thumbnails.
Use masks early. Isolate the garment, packaging, cosmetic, or label area before making local skin changes. The goal is simple: correct the person without changing what the customer is buying.
A practical review pass uses separate questions for each region:
- Product hue: Does the garment, package, or cosmetic match the physical sample?
- Skin hue: Does the skin avoid an obvious green, orange, or blue cast?
- Skin luminance: Is the face bright enough without losing texture?
- Interaction: Did a local skin adjustment spill into the product mask?
Review mixed images by region
This matters more as volume increases. Poses change, sleeves cover part of the torso, reflective packaging picks up color from the set, and hair or hands cross into the product edge. The same global warmth setting can be acceptable in one frame and wrong in the next. That is why catalog teams get better results from regional corrections than from image-wide presets.
Adjust skin hue and skin luminance independently after the neutral product base is locked. Keep product swatches, logos, packaging panels, and key fabric zones pinned to the approved reference. In model-heavy sets, the shooting approach also affects how much correction is needed later, so it helps to align edit rules with lifestyle product photography with models.
Some teams can handle this in-house with saved masks and clear approval rules. Others hand complex sets to a dedicated graphic design team. Either way, the approval logic should stay the same: define which areas require physical color accuracy, which areas need natural skin rendering, and which exceptions need human sign-off. Save reusable masks where possible, but recheck them whenever the garment, pose, or model position changes.
Automating Workflows with Chained AI Pipelines
Manual correction breaks down when the catalog contains hundreds or thousands of SKUs. The repeatable work usually includes ingesting files, removing or whitening backgrounds, applying color rules, resizing by destination, exporting copies, and sending the approved files to listings or storage.
A chained pipeline treats those actions as connected stages rather than isolated edits. The order matters. Background removal can happen before a platform-specific canvas is created. Color correction can use an approved reference. Resizing can happen after the visual decisions are complete, and export rules can vary by destination.
Design the chain around approvals
A practical sequence looks like this:
- Ingest: Pull source files from cloud storage, an e-commerce platform, CDN, or object storage.
- Prepare: Detect orientation, isolate the product, and create the required background.
- Correct: Apply white-balance normalization, exposure matching, and color-cast correction.
- Resize: Generate Amazon, Etsy, Shopify, and other destination copies from the corrected master.
- Review and sync: Send flagged outputs to human review, then export approved files.
MerchLoom can run chained AI pipelines across a collection instead of forcing you to edit one image at a time. You can try the first images with no account, and its model is pay per image with credits that never expire. That makes it possible to test a small batch before committing a larger collection. It isn't a full Photoshop replacement, and AI output still needs human review, especially for color-sensitive products, edges, reflections, and lifestyle masks.
The pipeline should preserve approved product references as inputs, not overwrite them with each new run. If a red dress has an accepted reference image, use that reference to identify outliers in later supplier batches. Store the original, corrected master, marketplace export, and review status separately.
A short demonstration can make the sequence easier to evaluate:
Automation handles repetition. It doesn't decide whether the approved product color is correct. Keep a review queue for uncertain images, and rerun only the failed stage when possible instead of processing the entire catalog again. The AI image workflow automation guide provides a useful framework for connecting those stages.
Verifying Output Before Upload
The final export isn't finished when the files appear in the destination folder. A monitor can make off-white look white, and a catalog grid can hide one blue or magenta outlier among hundreds of images. Verification needs file-level checks and a visual sample.
Run technical checks first
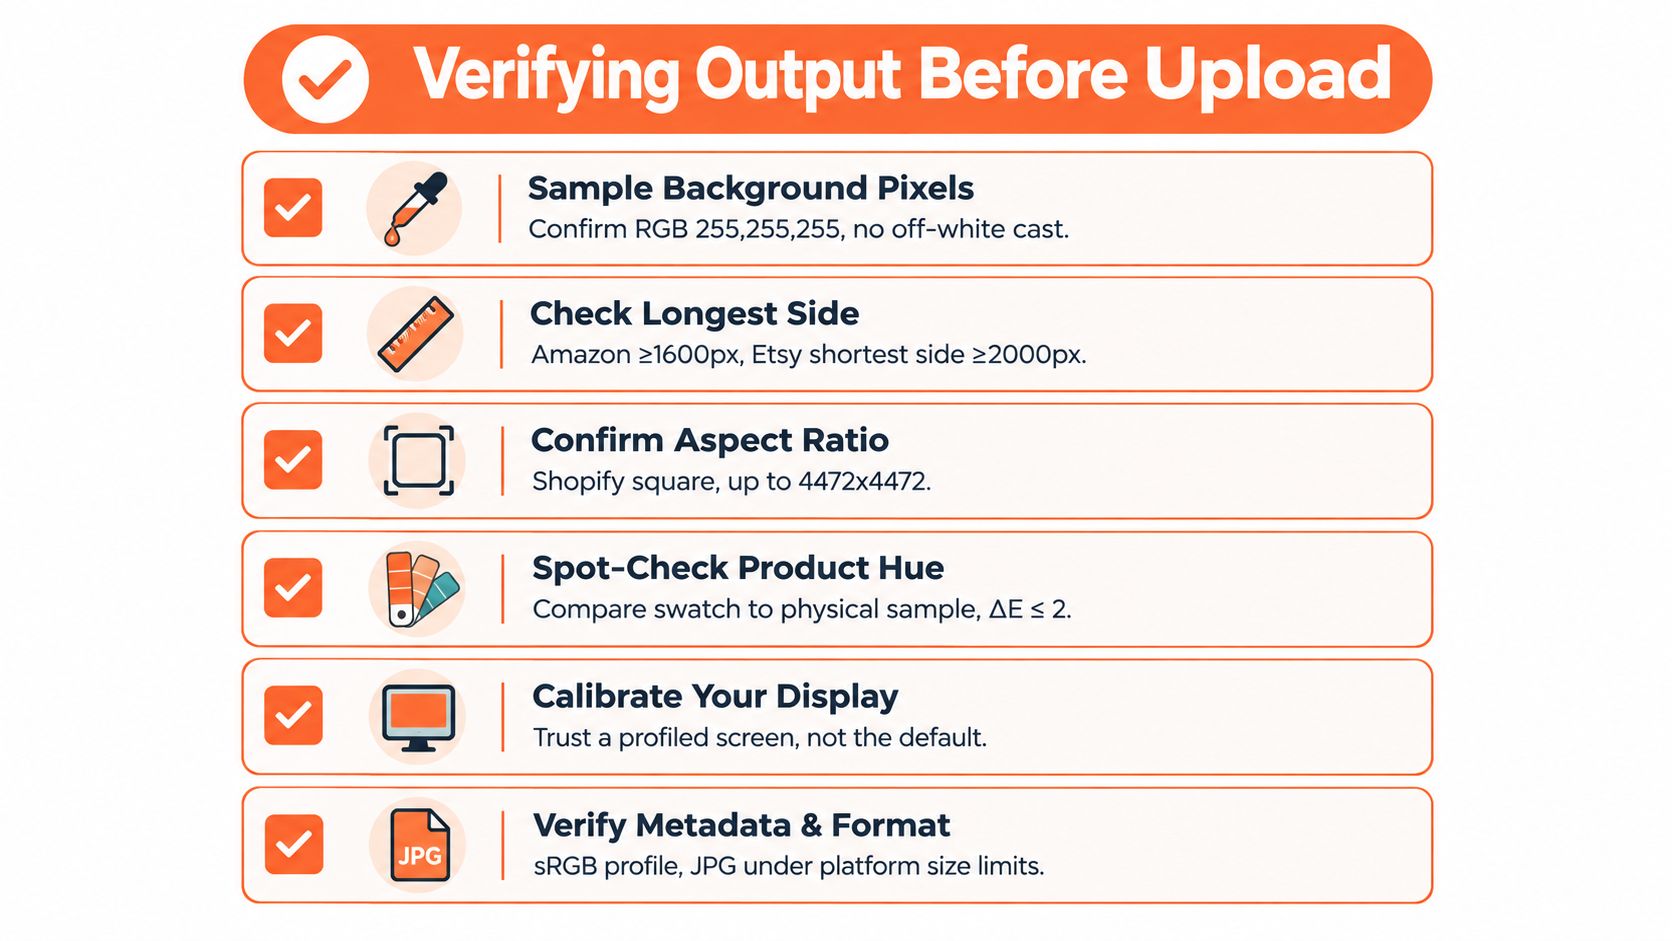
Automate the checks that don't require taste or judgment. For every destination folder, verify:
- Background pixels: Sample the Amazon background and confirm pure RGB 255, 255, 255, not a near-white value.
- Dimensions: Check Amazon's longest side and Etsy's shortest side independently.
- Aspect ratio: Confirm Shopify files use a square canvas and stay within 4,472 × 4,472 pixels.
- Format: Confirm the file type and embedded color profile match the destination workflow.
- Naming: Match every export to the correct SKU, variant, and view.
- Completeness: Confirm that every source image has an output or an explicit review exception.
Amazon's background rule applies to the main image, so don't assume a white-looking screen is enough. Etsy's shortest-side requirement also makes a dimension check essential, because a portrait file can pass a width rule while remaining too small on its shorter edge.
Sample the visual outliers
After technical validation, create a contact sheet or review grid grouped by product family, supplier, and lighting setup. Look for repeated problems:
- A whole supplier batch has a green cast.
- One fabric color changes between front and side views.
- A background halo remains around hair, transparent packaging, or reflective metal.
- A skin adjustment has shifted a garment or cosmetic shade.
- One image is noticeably darker than the rest of the SKU set.
The fastest review isn't random. It compares the files most likely to disagree.
Keep a physical sample, approved swatch, or previously accepted image beside the monitor when checking color-sensitive products. A profiled display is preferable to a default screen, but it doesn't remove the need to inspect the product reference.
Record failures by cause. “Color issue” is too broad for a repeatable process. Use categories such as lighting cast, wrong profile, background contamination, dimension failure, crop error, or SKU mismatch. Then fix the pipeline rule instead of repairing the same mistake manually across the next batch.
Run this checklist before every marketplace upload:
- Technical validation: Dimensions, format, profile, background, and filename.
- Product validation: Hue, exposure, edges, and proportions against the approved reference.
- Set validation: Front, side, detail, and lifestyle images agree where they should.
- Exception handling: Flag uncertain files for human review.
- Upload validation: Confirm the marketplace accepted the files and preserved the intended appearance.
A catalog workflow earns trust through controlled repetition. Create the correction rule, export the right variant, inspect the exceptions, and keep the approved reference available for the next batch.
MerchLoom lets you import product photos, describe the correction in plain English, and run chained AI pipelines for batch color correction, background preparation, resizing, and export. Try the first images with no account, then visit MerchLoom to process a larger collection with pay-per-image credits that never expire, while keeping human review in the approval loop.
Stop editing product photos one at a time
Upload your catalog or connect your store. Describe the result once. MerchLoom does the rest.
Try it free — no signup