
How to Change Background on Instagram Story for Catalog-Scale E-Commerce
Learn how to change background on Instagram Story to make your e-commerce products stand out. Discover scalable workflows for your entire product catalog.
For a casual Instagram user, figuring out how to change the background on an Instagram Story is a fun little trick. But if you’re running an e-commerce business, it’s not a trick—it’s a core part of your sales strategy. When you're managing a catalog of hundreds of products, this isn't about making one post look pretty; it's about building a consistent, efficient, and shoppable storefront that turns viewers into buyers.
Why Custom Backgrounds Are a Game-Changer for E-Commerce Sales

Let's be honest. As a seller, you're not posting on Instagram just for kicks. Every single Story is a piece of marketing. That default, auto-generated gradient that Instagram throws behind your product photo? It’s not just unappealing; it's a wasted opportunity. It screams "low effort" and does absolutely nothing to make your product—or your brand—memorable across your entire product line.
In a marketplace flooded with competitors, a strong, cohesive visual identity is what stops the scroll. When your Stories always feature your brand colours, fonts, and overall vibe, you create instant recognition. A potential customer should know a Story is yours without even glancing at your username.
From Passive Views to Active Conversions
The connection between sharp visual branding and sales isn't just a theory; it’s a proven reality. Custom backgrounds do more than just look professional. They perform specific jobs that directly boost your revenue and engagement.
- Builds Brand Recognition: A consistent background, whether it’s a solid brand colour or a custom template, transforms your Stories from a random photo dump into a curated digital boutique.
- Enhances Product Focus: A clean, uncluttered background forces the viewer's eye exactly where you want it: on your product. For marketplaces like Amazon, it's a requirement; for Instagram, it's a conversion tactic.
- Increases Professionalism and Trust: A polished, professional-looking Story feed sends a clear message: you’re a serious, reliable business. That perceived quality is what builds the trust needed to get someone to tap "shop now."
The numbers tell the same story. In thriving e-commerce hubs like California—home to over 1.5 million small businesses—Instagram Stories are a daily ritual for a massive audience. We've seen data showing that posts with custom-branded backgrounds can achieve 30% higher viewing rates. For fashion brands in Los Angeles, switching to batch background changers has been linked to a 22% sales increase from Story traffic alone. The line from visual strategy to revenue is direct.
Key Takeaway: Think of your Instagram Story background as prime real estate. Leaving it to the default settings is like opening a physical shop and leaving the walls completely bare. It’s a fundamental piece of your digital storefront.
The Grind of Editing One by One
Now for a reality check that every busy seller knows too well. Instagram does give you some basic tools to change a background, but they're designed for one-off posts. They force you to edit every single image manually, one at a time. This simply isn't a viable strategy when you're juggling a catalogue of hundreds, or even thousands, of products.
Just think through the steps for one image: upload the photo, open the draw tool, hunt for your brand colour, fill the screen, re-add the product as a sticker, and then position it perfectly. Now imagine doing that for the 50 new items you just photographed. It’s a workflow that's built to fail at scale. You end up with inconsistencies, hours of wasted time, and a bottleneck that stops you from getting your products in front of customers quickly.
This is why professional e-commerce workflows don't happen inside the Instagram app. The real work happens before you even think about posting. You need a system that can handle your entire product catalogue at once, applying a consistent, on-brand background to every single image. This is where tools built for batch processing, like MerchLoom, become absolutely essential. You can run an entire folder of photos through a chained AI pipeline, making sure every image gets the exact same perfect background, ready for any platform. A great starting point is learning how to get a consistently clean slate with a white photoshoot background.
Using Instagram's Native Tools for Background Changes
Let’s quickly cover what you can do inside the Instagram app, mainly so you understand its limitations for a catalog-based business. These built-in features aren't designed for managing an entire product catalog or ensuring consistency across hundreds of images. You'll quickly see why a more professional workflow is essential for any serious e-commerce brand. The methods are simple, but the time they eat up for each individual image is their biggest downfall.
The Solid Colour Background Method
The most direct way to change the background on an Instagram Story is by filling the screen with a solid colour. It’s a clean look for text-based announcements or making a single product pop against a simple, on-brand backdrop.
The catch? It’s a completely manual process. You have to start a Story, grab any old photo to act as a placeholder, and then open the Draw tool. From there, you pick a colour and long-press the screen to fill it. For a seller, the real problem is colour accuracy. Trying to eyeball your brand’s specific shade of blue with the colour dropper is a surefire way to get inconsistent branding across your posts.
Pro Tip for Sellers: Before opening the Draw tool, use the Sticker feature to add a tiny, temporary image of your brand logo. Then, you can use the colour picker tool on that logo to sample the exact HEX code. It's a manual workaround, but it beats guessing every time.
Layering Photos for a Custom Background
Another trick you can do right in the app is layering photos. This lets you set a full-screen image as your background or place a product photo on top of the solid colour you just created.
- Using a Photo as the Background: Just pick an image from your camera roll that fills the 1080x1920 Story dimensions. This could be a branded texture or a simple gradient you've pre-made.
- Adding a Product as a Sticker: Once you have your solid colour background, tap the Sticker icon and find the "photo" sticker. This lets you pull in another image from your camera roll—your product photo—and layer it on top.
The big hang-up here is that this method really only looks good if your product photo already has a transparent background (saved as a PNG file). If it doesn't, you’re left with a clunky, unprofessional-looking square sitting on your clean background. This is the first signal that the real work needs to happen before you open Instagram, at a batch level.
A Seller's Look at Instagram's Background Editing Tools
When you're running a business, every minute counts. It's helpful to break down exactly where these native Instagram tools fit into a seller's workflow and where they fall short. Here’s a quick comparison from a practical, e-commerce perspective.
| Method | Best For | Batch Processing Scalability | Pro Tip for Sellers |
|---|---|---|---|
| Solid Colour Fill | Quick one-off announcements, a single product spotlight. | Very Low. Manually creating each one is slow and prone to colour inconsistency across a product line. | Use the logo sticker trick to colour-pick your exact brand shade, but don't rely on this for catalog-wide consistency. |
| Layering Photos | Adding a product with a transparent background (PNG) onto a backdrop. | Low. This works for one-offs, but managing layers for dozens of products is inefficient. | Pre-design branded background templates (for Shopify, Etsy, etc.) and save them to your phone for quick, single posts. |
| Transparent Overlay | Making text legible over a busy photo or adding a colour mood to a single image. | Low. Applying it image by image offers little control and is not scalable for a product catalog. | Use it to create a subtle "filter" that aligns a user-generated photo with your brand's colour palette for a one-time feature. |
Ultimately, while these tools are handy for spontaneous content, they simply aren’t built for the demands of managing a product catalogue. Relying on them for your day-to-day product marketing is just not a sustainable strategy.
Creating a Semi-Transparent Colour Overlay
What if you want your background image to peek through, but tinted with your brand's colour? Instagram's Draw tool has a "highlighter" option that creates a semi-transparent overlay instead of a solid one.
This is a trick for making text more readable over a busy photo or for giving a single image a consistent colour theme. You follow the same long-press method as the solid fill, but you choose the highlighter pen first. The result is a translucent wash of colour over your image.
While it’s a neat effect, it’s still a manual, one-by-one process that offers limited creative control. Sometimes, a more refined touch like a blur can work even better. For a deeper look at that technique, check out our guide on how to blur the background on an iPhone.
The reality for any seller managing more than a handful of products is that these native tools are fundamentally inefficient. They aren't designed for the scale and consistency that e-commerce requires. The real solution lies in preparing your assets in bulk beforehand—a workflow we'll dive into next.
The Pro Workflow for Removing and Replacing Backgrounds
Alright, let's move beyond the one-off fixes inside the Instagram app. If you're serious about e-commerce, the real secret to changing your Story backgrounds efficiently isn't about mastering the Draw tool—it’s about prepping your product photos before they ever touch Instagram. This is where you shift from thinking like a single-post creator to thinking like a catalog manager.
The entire game changes once you start using dedicated tools to remove your product backgrounds first. Doing this gives you a clean, transparent PNG file of your product. This one asset is your golden ticket. It's a versatile, ready-to-use image that you can drop onto any background, for any platform, anytime you need it.
The Power of a Transparent PNG Library
Imagine having a folder filled with perfectly cut-out images of your entire product catalogue. Suddenly, all those frustrating manual tasks disappear. No more awkward white boxes around your items. No more painstakingly trying to trace your product with Instagram’s clumsy eraser tool.
With a library of transparent PNGs, your whole workflow gets an upgrade:
- Branded Templates: You can design a few go-to Story backgrounds that feature your brand colours and logo. Then, just drop your product PNGs on top. Done.
- Adapting to Trends: Is a new seasonal colour taking over social media? No problem. You just swap the background on your template, not re-edit every single product shot.
- Multi-Platform Magic: That same transparent PNG can be placed on a crisp white background for your Amazon listings, a lifestyle shot for your website, and a vibrant colour for an Instagram Story. You do the hard work just once.
This is the real difference between amateur and professional image management. Pros create flexible assets; amateurs edit finished images one by one.
The built-in Instagram tools, as you can see below, are designed for a single, manual process. It works for one-off posts, but it's not built for a business that needs to scale.
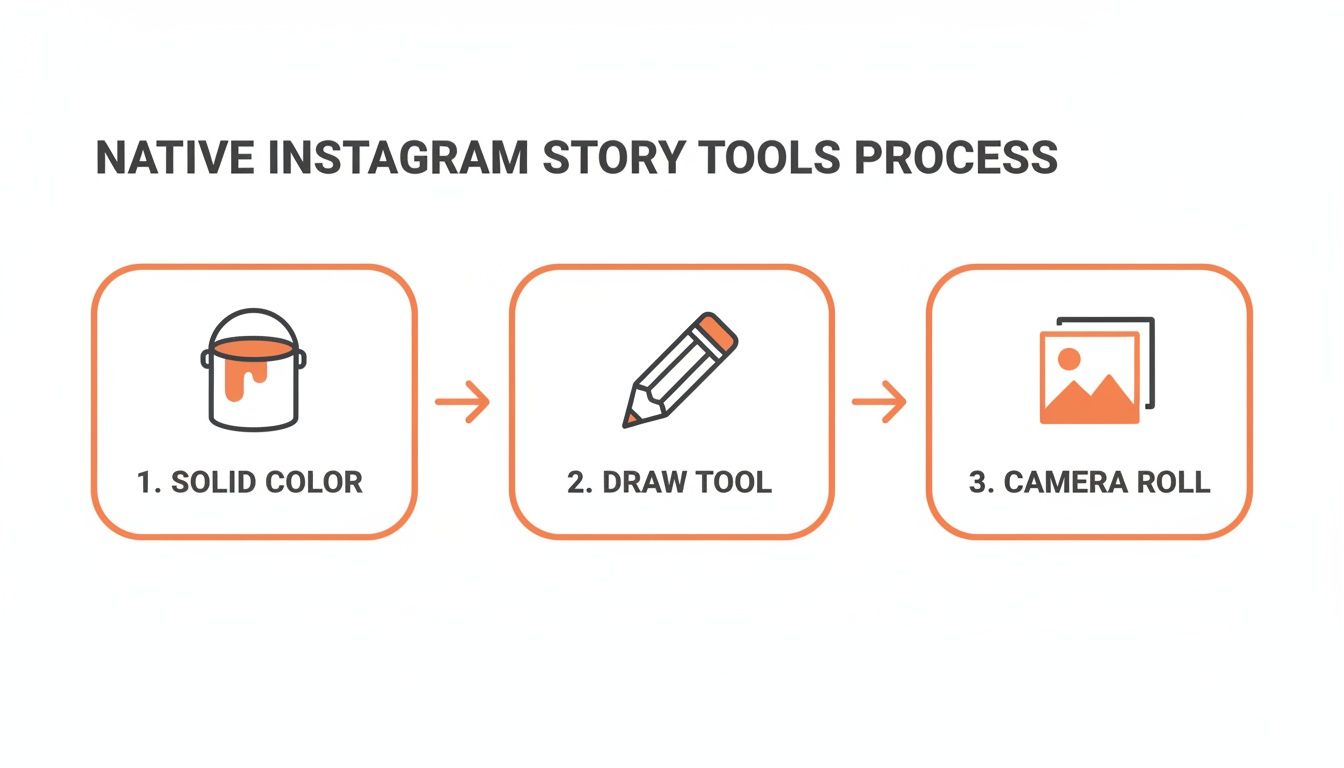
This flow highlights the linear, one-at-a-time nature of Instagram's features—a complete contrast to the batch-processing approach that defines a professional workflow.
Batch Processing Your Entire Catalogue
This is where the real efficiency kicks in. Sure, you can manually remove the background from a photo or two. But what about 200 new products for the upcoming season? That’s a production nightmare. You need a system built for volume.
A platform like MerchLoom lets you upload an entire product shoot at once and apply the same action to the whole collection. You can set up a simple instruction, like "Remove the background from all these images," and within minutes, you have that folder of clean, transparent PNGs ready to go. You're not just saving time; you're creating a level of consistency that's impossible to achieve by hand.
The Pro Mindset: Your job isn't to edit one photo perfectly. Your job is to build a system that produces hundreds of on-brand, high-quality images with minimal effort.
This approach transforms the task of figuring out how to change the background on an Instagram Story from a creative chore into the simple, final step in a much larger, more efficient content strategy. Your assets are prepared in advance, giving you the freedom to post quickly and consistently.
Doing this for a whole catalog?
MerchLoom runs background removal, upscaling and AI editing across every product photo you have — one prompt, whole batch. Try 2 batches free, no signup.
Try it freeOf course, AI tools are great for speed, but sometimes you need fine-tuned manual control. For those instances, a tool like GIMP is a powerful, free option. You can learn more about background removal with GIMP if you want to get hands-on.
By front-loading the work with a batch-processing system, you're not just prepping images for Stories. You’re building a versatile image library that will serve your business across every digital channel, saving countless hours and making sure your brand looks professional and cohesive everywhere your customers find you.
Scaling Up: How to Create an Image Workflow for Your Entire Product Catalogue

Alright, let's talk about the bigger picture. Knowing how to change the background on a single Instagram Story is useful, but the real goal is to stop thinking one image at a time. To truly grow your brand, you need a repeatable system that turns your raw product photos into a library of on-brand assets you can use across all your marketing channels.
If you're spending hours in the Instagram app manually adjusting each photo, you're losing valuable time. The pros don't do this. They think in batches and build pipelines. An efficient workflow handles the heavy lifting at scale, making sure every product looks consistent, professional, and ready to sell.
It’s a complete shift in mindset. Instead of seeing a new photoshoot as 50 separate editing tasks, you start seeing it as one single, streamlined process.
The Production Line Approach to Images
I’ve always found it helpful to think of image processing like a factory assembly line. Your raw photos are the materials that go in one end, and perfectly formatted, platform-ready images come out the other. Each step is automated and consistent.
Here’s how that looks in practice when you're creating images for your Instagram Stories:
- Bulk Upload: You start by dropping an entire folder of new product photos—dozens or even hundreds at a time—into a central tool.
- Set Up an AI Pipeline: Next, you define a sequence of automated jobs. The first one is almost always removing the background. You’re essentially telling the system, "Take this whole collection and give me clean, transparent PNGs of every product."
- Chain Your Actions: Then you add the next step. "Now, for all those images without backgrounds, apply our branded blue background (HEX code #0A4C8A)."
- Automate Resizing: The final instruction is for formatting. "Reframe everything to a 1080x1920 aspect ratio for Stories, making sure the product stays perfectly centred and scaled."
This isn't some far-off dream; this is exactly how smart e-commerce businesses operate in 2026. Using a tool like MerchLoom, you can build these chained AI pipelines just by describing what you need. The system does the rest, delivering a folder of perfectly branded Story assets without you lifting a finger for each one.
The key here is consistency. When a machine applies the same branded background and framing rules to 200 different products, you achieve a level of visual cohesion that's practically impossible to get by hand.
One Upload, Endless Possibilities
What's really great about this workflow is how incredibly efficient it is. That first step—the bulk upload and background removal—doesn't just help with your Instagram Stories. It creates a core set of assets: your transparent product PNGs. These become the foundation for everything else.
From that one initial process, you can spin off different pipelines for all your sales channels.
- For Amazon & eBay: Start a new pipeline with your transparent PNGs. The instruction is simple: "Add a pure white background (#FFFFFF) and resize all images to 2000px on the longest side."
- For Your Shopify Grid: Create another one. "Take those same PNGs, add a light grey background, and reframe them into a 1:1 square aspect ratio."
- For Instagram Stories: As we just covered, "Use our branded background and reframe to a 9:16 vertical aspect ratio."
Just like that, you’ve created perfectly formatted images for three different platforms from a single photoshoot and one upload. No more duplicating your work or compromising on image quality for different marketplaces. This is how you get your time back and build a visual marketing engine that can actually scale.
This method also bakes quality in from the start. It’s always better to process a high-resolution image correctly the first time than to try and fix a low-quality one later. If you're wrestling with image resolution, our guide on finding a quality HD photo converter can be a great help. A systematic approach ensures every image you create is top-notch and ready to drive sales.
Let's be real—even with a solid plan, you're bound to hit a few snags when changing your Instagram Story backgrounds. It just comes with the territory of selling online. Interestingly, the problem usually isn't with Instagram itself, but with the quality of the images you're feeding into the app.
Let’s walk through the most common headaches and, more importantly, how to fix them before they even start.
One of the biggest frustrations I see people run into is a blurry or pixelated product photo. You put all that effort into a high-resolution shot, meticulously remove the background, and the moment you pop it onto a new Story background, it looks soft and amateurish. It's maddening, and it can do real damage to how people perceive your brand's quality.
This almost always comes down to getting your workflow out of order. Many people shrink their images for web use before they remove the background. But when you take that smaller file and stretch it to fit a full-size 1080x1920 Story canvas, the pixels get pulled apart, and everything loses its sharpness. Think of it like trying to blow up a passport photo to the size of a movie poster—the detail just isn't there to begin with.
Keeping Your Images Sharp and Professional
The secret is to work with your highest-resolution file for as long as you possibly can. Getting the order of operations right is everything for maintaining that crisp, clean look, especially when you're processing hundreds of images.
Here’s a much better way to do it: First, perform the background removal on your original, full-sized, high-resolution file. Once you have that clean product cutout with a transparent background, you can then place it onto your new background canvas. The final step is to resize the entire thing down to the 1080x1920 dimensions for your Story.
Key Insight: Always upscale and resize after you've removed the background, not before. This keeps your product's original pixels intact for as long as possible, ensuring it stays sharp and clear in the final Story.
For some of those really stubborn images, you might need to dig a little deeper into the technology. It's worth taking a moment to learn about resolution in AI processing to truly understand how to squeeze the best possible results out of any automated tool you're using.
Fixing Fuzzy Edges and Inconsistent Colours
Okay, so your image is sharp. What's next? Let's talk about the dreaded "fuzzy edge." This is that soft, blurry halo you sometimes see around a product after the background is gone. It’s especially obvious on items with fine details, like jewellery chains, knitwear, or anything furry. It just screams "bad photoshop" and cheapens the look of your product.
This is a dead giveaway that your background removal tool isn't cut out for professional e-commerce work. A basic tool might handle a simple, hard-edged object just fine, but it will almost always stumble on complex textures. This is where a more sophisticated system becomes a necessity. When you use a platform like MerchLoom, which is specifically designed for product photos, its AI is trained to navigate these tricky edges, resulting in a much cleaner, more professional cutout. It even gives you a chance to quality-check the results mid-batch and make adjustments before committing to your entire photo set.
Colour inconsistency is the other silent brand-killer. If you’re just eyeballing your brand colours with Instagram’s colour picker tool, you’re setting yourself up for failure. The shade of blue you pick today will almost certainly be a few shades off from the one you pick next week.
The only way to guarantee consistency is to work outside of Instagram and use a system that lets you define your brand colours by their specific HEX codes. When you're setting up a batch workflow, you can create a rule like "set background to #0A4C8A," and you can be confident that every single image will have the exact same background, every time.
Nailing these details has a real, measurable impact on how your content performs. Creative agencies and e-commerce sellers have found that clean, professionally reframed product shots can experience up to 32% lower demotion rates in tests. With Instagram's algorithm constantly in flux, using tools that guarantee a high-quality output is a smart, defensive move. In fact, sellers using these refined methods have seen their reach grow by as much as 25%. It's worth reading up on how Instagram's algorithm really works to understand why quality is your best defence.
Frequently Asked Questions
If you're running an e-commerce brand, you're not just posting one-off Stories. You're thinking about how to efficiently manage an entire product catalogue. Here are some quick answers to the questions that really matter when you're working at scale.
Can I Change the Background for an Instagram Story Video?
Yes, but for a scalable business, the process is entirely different from the casual user's approach. A single, fun video might use Instagram’s built-in "Green Screen" effect. That's fine for a one-off, but it's a non-starter for a full product line.
The professional workflow for product videos happens before you open Instagram. You use video editing software to chroma key the background (remove it) and replace it with your branded visuals across all your video clips. You then upload the finished, polished videos. It's the only practical way to maintain brand consistency when you have more than a handful of products.
What Is the Best Image Resolution for Instagram Stories?
Always aim for 1080x1920 pixels. That’s the classic 9:16 aspect ratio for a vertical screen. One of the most common mistakes I see is sellers simply cropping a square or landscape product photo. This tanks the image quality and makes your products look blurry and unprofessional.
A scalable process sidesteps this problem entirely. Instead of just cropping, you should be using a tool that intelligently reframes the image. This involves resizing the canvas to 1080x1920 while keeping your product perfectly centred and sharp. Tools like MerchLoom do this by working with your original high-resolution file, guaranteeing every Story image is crisp and correctly formatted, even across hundreds of different products.
How Do I Keep My Brand Colours Consistent Across All Stories?
Trying to use Instagram's colour dropper tool to manually match your brand colours is a recipe for disaster. Eyeballing it will always result in slight variations, and over time, those little inconsistencies can make your brand feel less polished and professional.
The only truly reliable method is to work with your brand’s specific HEX codes. When you're setting up a batch processing system, you define your exact brand colours once. That rule then gets applied as the background for your entire product catalogue, ensuring every single Story you post is perfectly on-brand without you having to lift a finger.
Stop wasting hours editing images one by one. MerchLoom lets you upload your entire product catalogue and apply perfectly branded, platform-ready backgrounds with a single instruction. Try it for free on merchloom.ai.
Stop editing product photos one at a time
Upload your catalog or connect your store. Describe the result once. MerchLoom does the rest.
Try it free — no signup