
Image DPI Converter for Sellers: A 2026 Batch Guide
Confused by DPI? Use our image dpi converter guide for e-commerce. Learn to batch convert hundreds of photos for Amazon, Etsy, & Shopify without losing quality.
Most advice about an image dpi converter is built for one-off edits. Sellers don't have a one-off problem. They have a catalogue problem.
If you're managing apparel mockups, thrift listings, POD designs, or a new product drop, changing a DPI number on a single file isn't the win. The win is getting hundreds of images approved across Amazon.ca, Shopify, and Etsy without blurriness, odd crops, or another round of rejected uploads.
Why Most Image DPI Converters Fail E-commerce Sellers
The biggest mistake sellers make is trusting a free converter because it says “300 DPI” after export. That number often changes only the file's metadata. It doesn't add detail. It doesn't create missing pixels. It doesn't rescue a weak source image.
That matters because many sellers discover the problem only after listing rejection. Tools like Clideo, Pi7, and Convert Town primarily change metadata rather than resampling, which can mislead users into thinking print quality improved. DPI is print metadata, not pixel count. Without added pixels, a higher DPI setting can shrink print size or still look blurry on marketplaces such as Etsy Canada. The same source notes that 80% of POD sellers report rejection due to “low resolution” in a 2025 Shopify CA report, discussed on Clideo's DPI converter page.
What the converter promised versus what the file delivered
A typical seller workflow goes like this:
- You download supplier art that looks fine on screen.
- You run it through an image dpi converter and set it to 300.
- You upload to a marketplace expecting the issue to be solved.
- The platform still flags the file because the actual dimensions aren't sufficient for the intended print or listing use.
The file now says 300 DPI. The image still doesn't contain enough visual information.
DPI metadata can change in seconds. Useful image detail can't.
Why this hits batch sellers harder
If you list five products a month, this is annoying. If you list hundreds, it's expensive. You lose time rechecking files, re-exporting assets, and trying different tools that all produce the same disappointment in different interfaces.
This is why I treat “DPI conversion” as part of a broader prep workflow, not a standalone task. Background cleanup, cropping, square formatting, upscaling, and final export all affect whether the file passes. If your source images are soft to begin with, a metadata-only change won't save them. A proper HD photo converter workflow for marketplace images starts with image quality and dimensions, then sets the output for each platform.
The trap in plain language
Most free converters fail e-commerce sellers because they solve the label, not the asset. For web-only use, that may be enough. For print-oriented listings, marketplace checks, or catalogue consistency, it isn't.
If your image is too small, you need more pixels. If your image already has enough pixels, then changing the DPI tag can be fine. Sellers get into trouble when they confuse those two situations.
Understanding DPI vs Pixel Dimensions for Your Listings
Sellers waste a lot of time on DPI because the setting looks technical enough to feel important. In day-to-day listing work, pixel dimensions usually decide whether an image is usable, zoomable, and worth keeping in the batch.
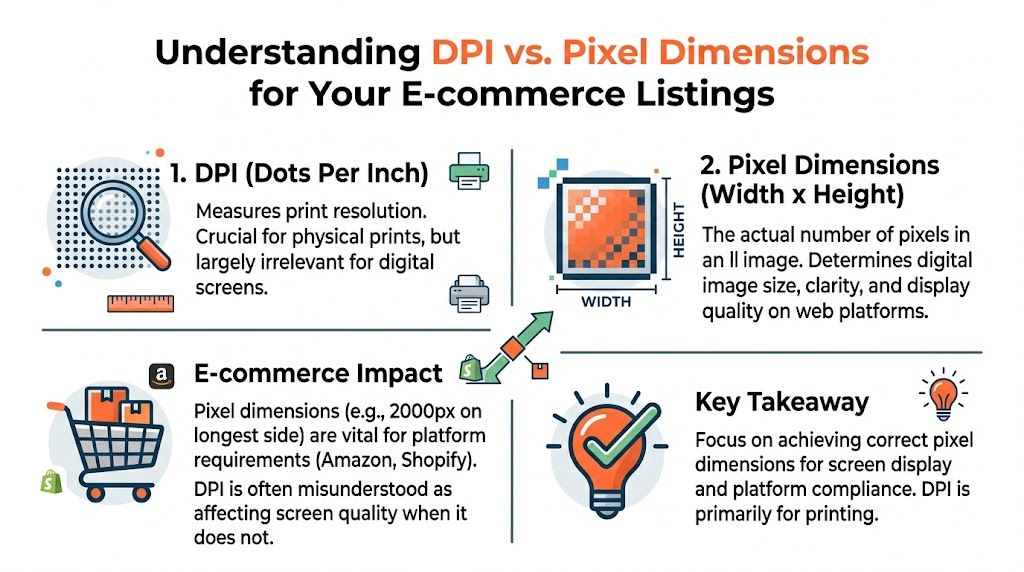
DPI controls print density. Pixels control image detail.
An image can be tagged at 72 DPI or 300 DPI and still contain the same underlying file data. Changing that tag does not add texture to fabric, sharpen product edges, or fix a soft phone photo. It only changes how print software interprets size.
The formula sellers actually need
Use this equation early, before you batch export anything:
Pixels = DPI × inches
That relationship is standard in print sizing references, including Stanford University’s overview of image resolution and print dimensions: https://library.stanford.edu/all-digital-library/services/digitization/image-resolution-guidelines.
Here is the practical version. If a marketplace, insert card, or print-on-demand template needs a 6.67 × 6.67 inch image at 300 DPI, the file needs to be about 2000 × 2000 pixels. If the source is only 1000 × 1000, changing the DPI field will not rescue it. You either accept a smaller print size or create more usable pixels through a separate step such as upscaling.
That distinction matters in e-commerce because DPI conversion is rarely the first image task. Sellers usually remove backgrounds, clean edges, standardize crops, square up the canvas, and only then export for the channel. If the file is undersized at the start of that pipeline, the final listing image stays undersized no matter what number gets written into metadata.
What to check before you convert anything
For product listings, check these in this order:
Pixel dimensions Width and height determine how much image information you have to work with.
Aspect ratio
A file can have enough pixels and still fail the crop for a square gallery, a tall mobile thumbnail, or a print template.Output use
Website display, marketplace zoom, catalogs, and physical print all apply different rules to the same source image.
If Amazon is part of your workflow, review these Amazon product image size requirements for marketplace compliance before running a batch. It is faster to build one correct export preset than to fix rejected images one by one.
E-commerce image requirements cheat sheet
| Platform / Use Case | Minimum DPI | Recommended Pixels (Longest Side) |
|---|---|---|
| Amazon.ca product images | 300 DPI for print-oriented use. Web listing approval depends more on pixel dimensions | Check listing format and intended print size first |
| Etsy.ca print-oriented listings | 300 DPI | Calculate pixels from final physical size |
| Shopify web theme images | DPI metadata is usually secondary | Use large, consistent source files suited to your theme |
That table is less tidy than the one-number advice many tools push, but it matches real listing work. Marketplace acceptance usually comes from the full file setup: enough pixels, correct crop, clean subject edges, and export settings that fit the channel.
A simple example shows why sellers get tripped up. A 1000 × 1000 px image tagged as 72 DPI and the same 1000 × 1000 px image tagged as 300 DPI will look the same on screen in normal web use. In print, the 300 DPI version is assigned a smaller physical size because the same pixels are packed into fewer inches.
Once that clicks, DPI stops looking like a quality button and starts looking like one setting inside a larger image production workflow.
Safely Changing Image DPI Without Losing Quality
Changing DPI safely is boring work, and that is exactly why so many sellers get it wrong. The expensive mistake is treating DPI like an image quality upgrade when it is often just a label attached to the same pixels.
For listing operations, there are two safe cases.
The first is simple. The file already has enough pixels for the final use, so you only change DPI metadata and leave the pixel dimensions alone. The second is the costly one. The file is too small, so you need a better source or an upscale step before setting export values. Mixing up those two cases is how sellers end up with soft edges, noisy textures, and rejected print files.
Scenario one when metadata change is enough
If the source file is already large enough, changing DPI without resampling is safe because nothing visual changes. You are updating print instructions, not inventing detail.
In practice, the workflow is straightforward:
- Start with the largest clean source file you have.
- Set the target DPI, such as 300, with resampling turned off.
- Confirm the pixel dimensions still support the intended physical size.
- Export once and review the final file before pushing it into a batch upload.
This is the route I use for seller catalogs that already came from a decent camera setup or a strong studio export. It is fast, predictable, and much safer than running every image through a converter that rescales the file without notice.
Scenario two when your image is actually too small
A small file does not become high quality because its DPI field says 300. Sellers run into this constantly with supplier images, old JPEGs, and marketplace downloads.
If the image lacks enough pixels for the final output, fix that problem first. Use the best original you can get, then upscale if needed, then apply the output DPI at export. The order matters because every edit after a weak upscale tends to make flaws more obvious. Background edges break sooner. Compression blocks show up faster. Product textures start looking plastic.
Start from the strongest source available. Original camera files beat screenshots. Lightly compressed exports beat files that have already been downloaded, cropped, and re-saved three times.
A practical decision check
Use this before you run a batch job:
- Pixels already meet the final size requirement. Change DPI metadata only.
- Pixels are too small for the final use. Upscale first, then set DPI on export.
- The file has been saved repeatedly as JPEG. Go back to the earliest version you still have before doing anything else.
This check saves time because it stops you from sending every file through the same conversion path. In e-commerce, that matters. A catalog usually needs more than a DPI change. It may also need background removal, cleanup, square crops, or channel-specific exports. If the source file is weak at the start, every later step gets harder.
What to avoid
The failures are usually predictable:
Starting with supplier thumbnails or compressed downloads
Those files rarely hold up once you crop, upscale, and export for multiple channels.Accidentally leaving resampling on
Editors can change pixel dimensions without making that obvious.Exporting the same JPEG over and over
Each save adds more compression damage, especially around product edges and text.Changing DPI before the rest of the pipeline is settled
If you still need background removal or enlargement, do those first and lock final output settings last.
A lot of confusion clears up once you understand how resolution affects AI image processing workflows. DPI is only one setting in the pipeline. For batch sellers, the quality decision happens earlier, with source selection, cleanup order, and whether you are changing metadata or rebuilding pixels.
A Pro Workflow for Batch Converting Hundreds of Images
Doing this for a whole catalog?
MerchLoom runs background removal, upscaling and AI editing across every product photo you have — one prompt, whole batch.
Try MerchLoomA single image fix doesn't help much when a new collection lands and you need assets for multiple channels by the end of the day. One platform wants a clean white background. Another wants square crops. Another needs print-safe files with 300 DPI. The work piles up when each requirement is handled as a separate manual edit.
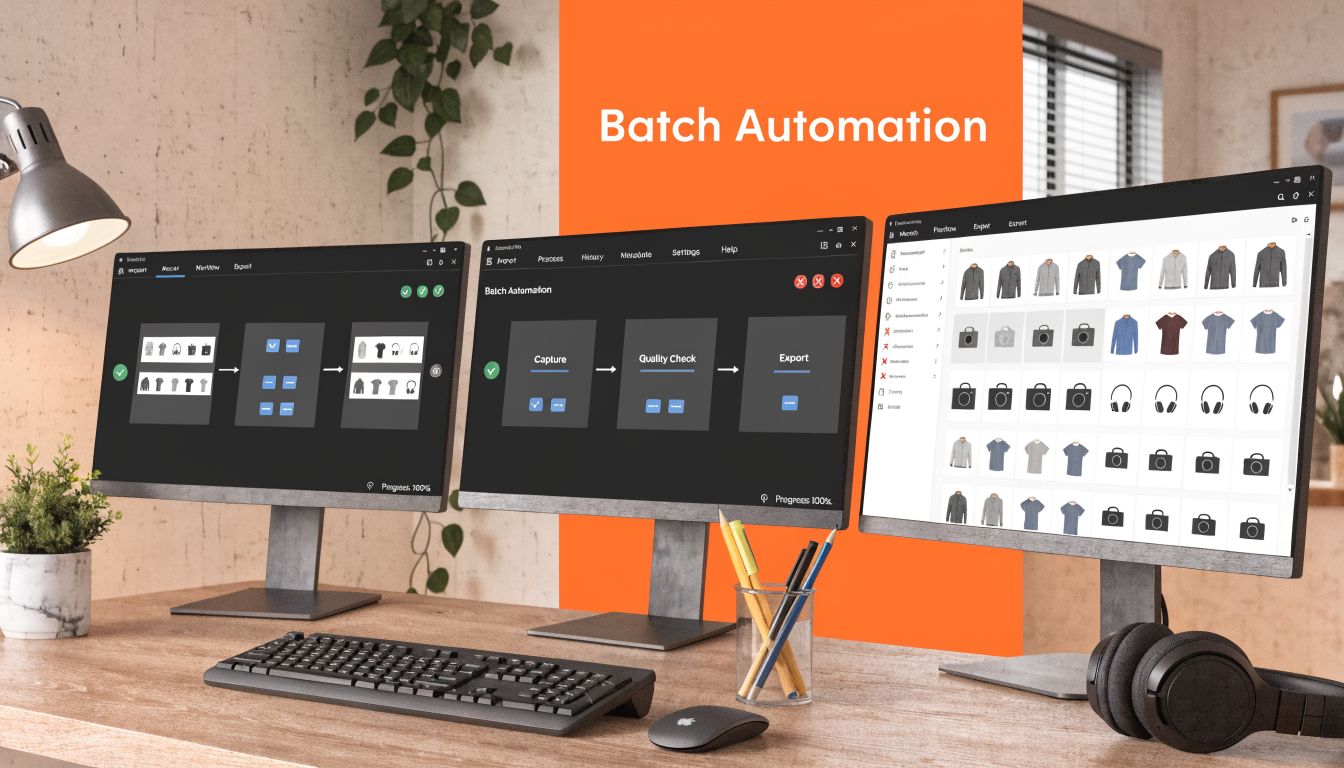
The smarter approach is to treat conversion as a pipeline, not a button click.
The order of operations matters
For sellers processing full collections, sequence is everything. Recent Etsy.ca enforcement around 300 DPI has added pressure for batch sellers, while many online tools still limit batch volume. The same discussion notes that sequencing tasks such as background removal on smaller files before upscaling can save up to 87% in processing costs, based on the batch workflow reference connected to Pi7's DPI converter discussion.
That single detail changes how you should build your workflow.
Instead of upscaling everything first, run the lighter cleanup steps while files are still smaller. Then enlarge only the assets that need it.
A seller-friendly batch pipeline
Here's the workflow I trust for catalogue-scale jobs:
Ingest the whole set
Upload the collection in one go. Keep originals grouped by product or variation so you don't mix front, back, detail, and swatch shots.Remove or standardise backgrounds
Do this early. It's cheaper and easier to quality-check before you make files larger.Reframe for destination channels
Prepare square crops for Shopify, compliant main-image framing for Amazon, and separate outputs for print listings if needed.Upscale only where required
Not every image needs enlargement. Lifestyle shots and detail crops may already be large enough.Set final DPI and export settings
This is the last packaging step, not the first repair step.
What this looks like in a real catalogue
A vintage reseller with hundreds of listings usually doesn't have studio-perfect files. They have mixed lighting, mixed aspect ratios, and inconsistent originals from different devices and time periods. If they try to solve all of that with an image dpi converter alone, the catalogue stays inconsistent.
If they run a proper chain instead, the outcomes improve fast:
- Main images become uniform
- Secondary images keep their detail
- Platform-specific exports stay organised
- Rejected files drop because the root problem gets fixed first
For a walkthrough on making marketplace images cleaner before export, this guide on how to make product photos look professional is worth keeping in your process notes.
Later in the workflow, it's useful to see this kind of batch handling in motion:
The hidden win is consistency
Sellers often focus on whether one file passes. The bigger payoff is that the whole collection looks like it came from the same shoot and the same system.
Batch image work gets easier when you stop asking, “How do I fix this file?” and start asking, “What sequence should every file follow?”
That's the difference between scrambling at upload time and running a repeatable operation every time a new drop arrives.
Troubleshooting Blurry Images and Artifacts Post-Conversion
Some conversion failures don't show up until the very end. The file uploads. The listing goes live. Then you zoom in and the edges look mushy, colours feel off, or the page gets heavier than it should.
Why the image looks blurry after conversion
This usually comes from one of three causes. First, the original file was too small. Second, the image was resampled poorly. Third, the file was exported too many times as JPEG.
The fix depends on the damage. If the blur comes from a tiny original, go back to a stronger source and upscale from there. If the blur appeared after editing, check whether your software enlarged the file during DPI adjustment. If the softness came after multiple saves, use the earliest clean version and export once.
Poor resampling doesn't just enlarge the image. It spreads weakness across the whole file.
Why the file size exploded
A heavy file often means the image was enlarged aggressively, saved with inefficient settings, or exported in a format that doesn't suit the use case.
For marketplace listings, keep a practical split in mind:
- Use high-quality working files while editing.
- Export web-ready copies for storefront performance.
- Keep separate print-ready outputs when a channel needs them.
Don't use one master export for every destination. A print-oriented asset and a Shopify listing image shouldn't always be the same file.
Why colours changed on upload
This is usually a colour profile or conversion issue. A file can look fine in editing software and then shift after upload if the platform expects a web-friendly profile and your export doesn't match.
For online listings, sRGB is the safest default in most workflows. For print-related preparation, check the marketplace or print partner's preferred output before batch export. The important part is consistency. Mixed profile handling across a large catalogue creates a store that feels visually unorganised even when the products are good.
A quick repair checklist
When a converted batch looks wrong, I check these in order:
Source quality first
Was the original strong enough for the intended output?Edit history second
Did the file go through repeated conversions or screenshot-based edits?Export settings third
Was the right format, compression level, and colour profile used for the destination?
If edge softness is the main complaint, this practical guide on how to sharpen an image in Photoshop without overdoing it can help recover borderline files. It won't replace missing detail, but it can clean up a weak export.
Moving Beyond DPI Converting to Full Image Automation
The phrase image dpi converter sounds useful, but it frames the job too narrowly for serious sellers. You're not trying to edit a number. You're trying to ship clean, compliant, consistent image sets across multiple channels.
That's why the better mindset is operational. Check pixel dimensions first. Upscale only when the source needs it. Leave DPI changes for the final output stage when the file already has enough real detail. Build one repeatable process and apply it to the whole catalogue.
Sellers who do this stop wasting time on fake fixes. They spend less time re-uploading, less time chasing rejections, and less time manually rebuilding files that should have been prepared correctly from the start.
A converter can be part of the stack. It shouldn't be the whole strategy.
Frequently Asked Questions About Image DPI
Does DPI matter for a web-only store
Not much on its own. For web display, pixel dimensions and file weight matter more than the DPI tag. A product image can look excellent online with ordinary metadata if the actual pixel dimensions are strong and the export is optimised properly.
How can I check an image's DPI quickly
On Windows, right-click the file and view its properties. On Mac, open it in Preview and inspect the file details. That gives you the metadata value, which is useful for checking print instructions, but remember that it doesn't tell you whether the image has enough actual pixels for your listing.
What's the difference between DPI and PPI
In everyday seller workflows, people often use them interchangeably. The practical distinction is this: PPI refers to pixels in the digital image, while DPI refers to print output density. If you're preparing marketplace assets, focus first on the image's real pixel dimensions.
Can I convert a 72 DPI image to 300 DPI
Yes, but that doesn't automatically improve quality. If the image already has enough pixels for the intended use, changing the metadata may be enough. If it doesn't, you'll need to enlarge the image properly before setting the final DPI.
Why did my print size get smaller after I changed the DPI
Because the same number of pixels is being packed into more dots per inch. The image didn't gain detail. The intended physical print size just became smaller.
Should I use one output for Amazon, Shopify, and Etsy
Usually not. The safer approach is to keep one strong master file and export channel-specific versions for each destination. That keeps your crops, backgrounds, and print settings consistent without forcing one file to do every job badly.
If you're tired of fixing product photos one by one, MerchLoom is built for practical seller workflows. You can upload whole collections, chain tasks like background removal, reframing, colour correction, and upscaling, and process marketplace-ready images in batches instead of babysitting every file manually.
Stop editing product photos one at a time
Upload your catalog or connect your store. Describe the result once. MerchLoom does the rest.
Try MerchLoom